Is your garden struggling because of stubborn clay soil? You’re not alone.
Many gardeners face the challenge of dealing with compacted clay, which can suffocate your plants and stunt their growth. But there’s good news! You don’t need expensive tools or fancy equipment to breathe life back into your garden. With just a simple garden fork and a bit of elbow grease, you can transform your clay soil into a nurturing haven for your plants.
Imagine your plants thriving in a healthier, more breathable environment. Picture the vibrant colors and robust growth that come with well-aerated soil. Intrigued? You should be. This method is not only effective but also cost-efficient, making it a perfect solution for any gardener. So, are you ready to unlock the secrets to a flourishing garden? Keep reading to discover how you can aerate your clay soil with a fork and give your plants the healthy foundation they deserve.
Benefits Of Aerating Clay Soil
Aerating clay soil helps plants grow stronger and healthier. It makes the soil easier for roots to spread.
Using a fork to aerate clay soil breaks up the hard surface. This improves how water and air move in the soil.
Improved Root Growth
Aeration loosens compacted clay soil. Roots can grow deeper and wider in soft soil. This helps plants get better support and stability.
- Roots get more space to expand
- Plants become stronger and more stable
- Better root growth helps plants survive droughts
Enhanced Water Drainage
Clay soil often holds too much water. Aeration creates small holes that let water drain faster. This stops water from pooling and causing root rot.
| Before Aeration | After Aeration |
| Water pools on surface | Water moves down quickly |
| Soil stays wet too long | Soil dries evenly |
| Roots can drown in water | Roots get enough air and water |
Better Nutrient Absorption
Aerated soil helps nutrients reach plant roots. Tiny spaces let air and water carry nutrients better. This makes plants healthier and more productive.
Here are nutrients that benefit most from aeration:
- Nitrogen for leaf growth
- Phosphorus for root development
- Potassium for flower and fruit production
Credit: dengarden.com
Tools Needed For Aeration
Aerating clay soil helps improve water and air flow to plant roots. Using the right tools makes this task easier and more effective.
This guide covers the main tools you need to aerate clay soil with a fork. We also list extra tools that can help the process.
Choosing The Right Garden Fork
A garden fork is the primary tool for aerating clay soil. Select one that fits your garden size and your strength.
- Look for a fork with long, strong tines to penetrate dense clay.
- Choose a fork with a comfortable handle to reduce hand strain.
- Heavy-duty steel forks last longer and work better in tough soil.
- A fork with a broad head lifts soil gently without damaging roots.
Additional Helpful Tools
| Tool | Use |
| Hand Trowel | For digging small holes and loosening soil around plants |
| Garden Rake | To smooth and level soil after aeration |
| Watering Can | To moisten soil before aeration, making it easier |
| Gloves | Protect hands while working with rough soil and tools |
Preparing The Soil
Aerating clay soil with a fork helps roots get air and water. Preparing the soil first makes this easier and more effective.
Start by clearing the area and checking soil moisture. These steps protect your tools and improve soil health.
Clearing The Area
Remove any debris from the soil surface before aerating. This lets the fork penetrate the soil without damage.
- Pick up sticks and stones
- Pull out weeds and grass patches
- Clear fallen leaves and mulch
- Check for any hidden wires or pipes
Moisture Check
Soil moisture affects how well you can aerate clay soil. Too dry or too wet soil makes the task harder.
| Soil Condition | How It Feels | Effect on Aeration |
|---|---|---|
| Dry | Hard and crumbly | Fork won’t penetrate easily |
| Ideal | Moist but not soggy | Fork slides in smoothly |
| Wet | Sticky and heavy | Soil compacts when poked |
Step-by-step Aeration Process
Aerating clay soil helps plants grow better by letting air and water reach roots. Using a fork is an easy way to do this without special tools.
Follow these steps to aerate your clay soil with a fork carefully and effectively.
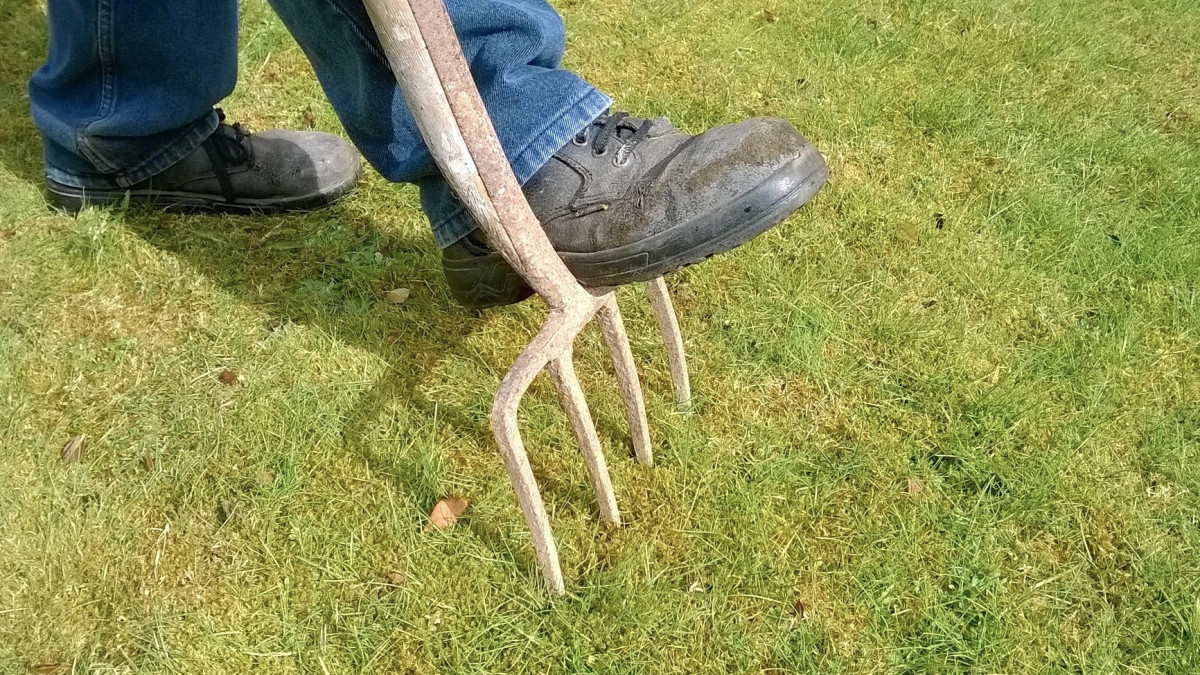
Inserting The Fork
Push the garden fork straight down into the soil. Make sure the tines go deep enough to break compacted layers. Avoid twisting the fork as you insert it.
Loosening The Soil
After inserting the fork, gently rock it back and forth to loosen the soil. Lift the fork slightly to create air spaces. This helps water drain and roots grow better.
Spacing Your Holes
Make holes evenly across the soil. Keep enough space so the soil loosens well without extra effort. Use this guide for spacing your fork holes:
- Place holes about 6 inches apart in small gardens.
- For large areas, space holes 8 to 12 inches apart.
- Focus on compacted spots for best results.
Aftercare For Aerated Soil
Aerating clay soil improves air and water flow. Proper aftercare helps plants grow strong. It keeps soil healthy and loose.
After aeration, you must water and feed the soil well. These steps help the soil settle and support roots.
Watering Tips
Water the aerated soil gently but deeply. This helps water reach down to the roots. Avoid flooding or letting water pool.
- Water soon after aeration to settle the soil.
- Use a watering can or hose with a fine spray.
- Water deeply at least twice a week if dry.
- Check soil moisture regularly to avoid overwatering.
- Water early in the morning or late in the afternoon.
Adding Organic Matter
Adding organic matter after aeration helps improve soil texture. It also feeds beneficial microbes and plants.
| Type of Organic Matter | Benefits |
|---|---|
| Compost | Enriches soil with nutrients and improves drainage |
| Leaf Mold | Increases moisture retention and soil softness |
| Manure | Provides nitrogen and boosts soil fertility |
| Grass Clippings | Breaks down quickly to add nutrients |
Common Mistakes To Avoid
Aerating clay soil with a fork helps improve water flow and root growth. Doing it right matters to get good results.
Some common errors can harm your soil instead of helping it. Avoid these to keep your garden healthy.
Aerating Too Often
Digging into clay soil too often can break its structure. This makes the soil weaker and less able to hold nutrients.
Give your soil time to recover between aerations. Usually, once or twice a year is enough.
Ignoring Soil Moisture
Trying to aerate dry or very wet clay soil causes more harm than good. Dry soil is hard and breaks apart.
Wet soil compacts easily and can be damaged by a fork. The best time is when soil feels damp but firm.
- Check soil moisture with your hand before aerating
- Wait after heavy rain or long dry spells
- Aim for slightly damp soil that holds shape
Using The Wrong Tools
Using tools not made for clay soil can cause damage or make work harder. A regular garden fork works best.
| Tool | Suitability for Clay Soil |
|---|---|
| Garden Fork | Good for aeration and loosening |
| Pitchfork | Not ideal, tines too thin |
| Spade | Can compact soil if used improperly |
| Rototiller | May overwork and damage soil |
Maintaining Healthy Clay Soil
Clay soil can be hard and compact. It needs air and water to keep plants healthy. Aerating clay soil helps roots grow strong.
Using a fork to aerate clay soil is simple. It breaks up the soil and lets air reach the roots.
Regular Aeration Schedule
Aerate clay soil at least twice a year. Do this in early spring and late fall. This timing helps plants get enough air and water.
Check your soil often. If it feels hard or water pools on top, it needs aeration more often. Use a garden fork to poke holes about 6 inches deep.
Soil Amendments
Add organic matter to improve clay soil texture. Compost and mulch help break up heavy soil. They also add nutrients for plants.
Mix amendments into soil after aerating. This helps the soil stay loose and drains better. Avoid adding too much sand because it can make soil hard.
- Use compost or well-rotted manure
- Add mulch to keep moisture
- Mix amendments well into the soil
- Test soil pH and adjust if needed

Credit: www.ageas.co.uk

Credit: www.reddit.com
Frequently Asked Questions
What Is The Best Time To Aerate Clay Soil With A Fork?
The best time to aerate clay soil is during early spring or fall. Soil is moist but not waterlogged, making fork aeration easier and more effective.
How Deep Should I Insert The Fork For Aerating Clay Soil?
Insert the fork about 6 to 8 inches deep. This depth loosens compacted clay soil, improving water drainage and root growth.
Can I Use A Garden Fork Instead Of A Mechanical Aerator?
Yes, a garden fork is effective for small areas. It manually breaks up clay soil without compacting it further.
How Often Should Clay Soil Be Aerated Using A Fork?
Aerate clay soil once or twice a year. Frequent aeration prevents soil compaction and promotes healthy plant roots.
Conclusion
Aerating clay soil with a fork helps water and air reach plant roots. This simple step improves soil health and plant growth. Regular aeration reduces soil compaction and makes gardening easier. You only need a garden fork and some effort.
Try this method in early spring or fall for best results. Your plants will thank you with stronger roots and better growth. Keep your soil loose and healthy to enjoy a thriving garden. Simple care brings great rewards.