Your drill press is only as good as its belts. If the belts slip, wear out, or break, your work grinds to a halt.
But keeping those belts in top shape isn’t as hard as you might think. With a few simple steps, you can extend their life and keep your drill press running smoothly. Ready to learn how to maintain your drill press belts and save time, money, and frustration?
Let’s dive in.

Credit: www.alvariauto.ee
Choosing The Right Belt
Maintaining your drill press starts with choosing the right belt. The correct belt keeps your tool running smoothly and safely.
Picking the right belt means knowing the types, materials, and size you need. This helps avoid breakdowns and improves performance.
Types Of Drill Press Belts
Drill press belts come in different types based on design and use. Each type fits specific drill press models and tasks.
- V-Belts: Shaped like a “V” for good grip and power transfer.
- Flat Belts: Smooth and wide, used on older or lighter machines.
- Timing Belts: Have teeth to prevent slipping on precise machines.
Material Considerations
Drill press belts are made from different materials. Choose a material that lasts and works well with your machine.
- Leather: Strong and flexible but needs regular care.
- Rubber: Durable and good for heavy use.
- Synthetic: Made from materials like neoprene for heat resistance.
Select materials that resist wear and heat. This helps the belt last longer and keeps your drill press safe.
Sizing And Fit
The belt size must match your drill press exactly. A belt that is too tight or loose causes problems.
Check the length, width, and thickness before buying a belt. Use the old belt or the manual to find the right size.
- Length: Fits around the pulleys without slack or stretch.
- Width: Matches the pulley groove for proper grip.
- Thickness: Strong enough to handle the drill press power.
Regular Inspection Routine
Keeping your drill press belts in good shape is important. Regular checks help find problems early. This keeps your machine running smoothly and safely.
Set a schedule to inspect the belts often. Look closely at all parts of the belt. This routine can save time and money by avoiding big repairs.
Checking For Wear And Tear
Wear and tear show how much the belt has been used. Look for signs like thinning or shiny spots. These mean the belt is wearing out.
Check the belt edges too. Worn edges can cause slipping or damage to the machine. Replace the belt if wear is serious.
Identifying Cracks And Frays
Cracks and frays weaken the belt. Look closely along the belt’s surface and sides. Small cracks can grow and cause failure.
Frayed belts have loose fibers or threads. These can catch on parts and break the belt. Replace belts with cracks or frays right away.
Monitoring Tension Levels
Proper tension keeps the belt from slipping. Too loose or too tight causes problems. Check tension often to keep it just right.
- Use a tension gauge or press the belt with your finger.
- It should feel firm but not hard.
- Adjust the tension according to your drill press manual.
Proper Belt Installation
Installing drill press belts correctly keeps your machine running smoothly. It prevents damage to the belts and extends their life. Proper installation also helps maintain safety during use.
This guide covers how to align the belt, adjust tension, and avoid common mistakes. Follow these steps to ensure your drill press works well every time.
Aligning The Belt Correctly
Start by placing the belt on the pulleys without twisting it. The belt should sit flat and run straight between the motor and drill press pulleys. Check that both pulleys are on the same plane.
Misalignment causes uneven wear and slipping. Use a straight edge or ruler to check the belt path. Adjust the motor or pulleys until the belt is perfectly aligned.
Adjusting Tension Properly
The belt tension must be firm but not too tight. Too loose causes slipping; too tight strains the motor and bearings. Use the drill press manual for recommended tension levels.
- Loosen the motor mounting bolts slightly.
- Move the motor away from the drill press to tighten the belt.
- Press the belt midway between pulleys. It should deflect about ½ inch.
- Tighten the motor bolts securely after adjusting.
Avoiding Common Installation Mistakes
| Mistake | Effect | How to Prevent |
|---|---|---|
| Twisted Belt | Causes quick wear and breakage | Place belt flat without twists |
| Wrong Belt Size | Slips or overstretches | Use correct belt size for your model |
| Overtightening | Damages motor and bearings | Adjust tension to manual’s recommendation |
| Ignoring Alignment | Uneven wear and noise | Align pulleys and belt carefully |
Cleaning And Lubrication Tips
Drill press belts need regular care to work well. Cleaning and lubrication help keep them strong.
Proper maintenance stops belts from slipping or breaking during use.
Removing Dust And Debris
Dust and debris can build up on belts and pulleys. This buildup reduces belt grip and causes damage.
Remove dust often to keep the belt running smoothly and safely.
- Turn off and unplug the drill press before cleaning.
- Use a soft brush to sweep off loose dust from belts.
- Wipe pulleys with a dry cloth to remove dirt.
- Use compressed air to blow out hard-to-reach debris.
Safe Cleaning Methods
Cleaning belts with harsh chemicals can cause cracks or wear. Use gentle cleaning methods instead.
Always avoid soaking the belts or using water directly on them.
- Use a damp cloth with mild soap if belts are very dirty.
- Dry belts completely before use to avoid slipping.
- Never spray cleaner directly on belts or pulleys.
- Avoid abrasive tools that can damage the belt surface.
Lubricants To Use And Avoid
Lubrication helps belts move smoothly on pulleys. Use the right lubricants to avoid damage.
Some lubricants can harm belts by making them slippery or soft.
- Use dry lubricants like graphite powder for belts.
- Avoid oil-based or grease lubricants that cause slipping.
- Do not apply lubricant directly on the belt surface.
- Lubricate pulleys and moving parts carefully to prevent belt contact.
Storage Best Practices
Proper storage of drill press belts keeps them in good condition. It helps avoid damage and extends their life.
Following simple storage rules protects the belts from common problems. This guide covers key storage tips.
Ideal Storage Conditions
Store drill press belts in a clean, dry place away from dust and dirt. The area should have stable temperature and low humidity.
- Keep belts flat or hanging loosely
- Avoid stacking heavy objects on belts
- Use sealed containers or bags for protection
- Keep belts away from sunlight and UV rays
Preventing Belt Deformation
Deformation happens when belts bend or twist too much. This causes cracks and weak spots that reduce belt strength.
| Storage Method | Effect on Belt |
|---|---|
| Coiling tightly | Causes permanent bends and cracks |
| Hanging on hooks | Supports shape, avoids bends |
| Flat laying | Prevents twisting and stretching |
Always hang or lay belts flat to keep their shape. Avoid folding or twisting belts during storage.
Avoiding Exposure To Heat And Moisture
Heat makes belts dry and brittle. Moisture causes swelling and loss of strength. Both damage belts quickly.
- Store belts at room temperature away from heaters
- Keep belts away from damp areas and water leaks
- Use silica gel packs to reduce moisture inside containers
- Check belts regularly for signs of heat or water damage

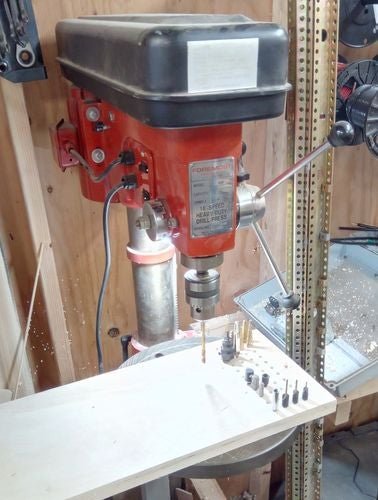
Credit: sawmillcreek.org
Signs You Need A Replacement
Drill press belts wear out over time and affect your machine’s performance. It is important to know when to replace them.
Watching for certain signs helps you keep your drill press working well and safe.
Performance Issues
If your drill press runs slower or slips often, the belt might be worn out. This reduces power transfer from the motor to the drill.
Listen for unusual noises or feel vibrations during use. These can mean the belt is losing grip or is loose.
- Slower drill speed than usual
- Frequent slipping or jerking
- Unusual sounds during operation
- Excessive vibration or wobbling
Visible Damage Indicators
Check the belt for cracks, fraying, or glazing on the surface. These signs show the belt is worn or damaged.
Look for missing chunks or uneven wear. These damage types reduce the belt’s strength and safety.
- Cracks along the belt
- Frayed or torn edges
- Shiny, glazed surface
- Missing pieces or chunks
- Uneven wear patterns
When To Upgrade For Better Efficiency
Sometimes replacing the belt with a better quality one improves drill press efficiency. New belts can last longer and reduce slipping.
Consider upgrading if you use the drill press often or for heavy work. A stronger belt can handle more stress.
- High usage or heavy-duty work
- Frequent belt replacements needed
- Desire for smoother, quieter operation
- Need for longer-lasting belts
Credit: www.woodworkingtalk.com
Frequently Asked Questions
How Often Should I Check Drill Press Belts?
Regularly inspect your drill press belts every 3 to 6 months. Frequent checks help identify wear and tear early. This proactive maintenance can prevent unexpected belt failures and ensure optimal performance. Adjust or replace belts as needed for safe and efficient operation.
What Signs Indicate Worn-out Drill Press Belts?
Look for cracks, fraying, or glazing on the belt surface. Unusual noises during operation can also signal wear. Reduced performance or slippage may indicate belt issues. Regular inspection helps identify these signs early, ensuring timely replacement and maintaining drill press efficiency.
How Do I Adjust Drill Press Belt Tension?
First, power off the machine and unplug it. Loosen motor mount bolts to adjust tension. Adjust until there’s about a half-inch deflection midway between pulleys. Ensure the belt is neither too tight nor too loose. Once adjusted, tighten the motor mount bolts securely.
Can I Use Any Belt For A Drill Press?
No, always use belts specified by the manufacturer. Using the correct belt ensures compatibility and optimal performance. Different belts have varying materials and dimensions. Refer to your drill press manual for recommended belt specifications to avoid damage and maintain efficiency.
Conclusion
Maintaining drill press belts helps your machine work well and last longer. Check belts often for cracks or wear. Keep them clean and tight to avoid slipping. Changing belts at the right time saves you from bigger problems. Small care steps prevent costly repairs later.
A well-kept drill press makes your work safer and easier. Follow these tips to keep your belts in good shape. Simple habits make a big difference in belt life. Stay consistent, and your drill press will serve you well.