When you’re working on a woodworking project, the way you clamp your pieces can make all the difference between a smooth finish and a frustrating mess. You want your wood to stay perfectly still, but sometimes it slips or leaves marks.
What if you could learn the best clamping techniques that save you time, reduce errors, and give your work a professional edge? You’ll discover simple, effective methods that help you hold your wood firmly without damage. Keep reading to unlock tips that can transform your woodworking experience and make every project easier and more precise.
Types Of Woodworking Clamps
Clamps hold wood pieces tightly while you work on them. They keep joints secure during gluing or cutting.
There are many types of clamps. Each type fits different woodworking tasks and materials.
Bar Clamps
Bar clamps have a long metal bar with adjustable jaws. They hold large or wide pieces of wood firmly.
These clamps are easy to adjust and provide strong pressure. They work well for furniture making and panel gluing.
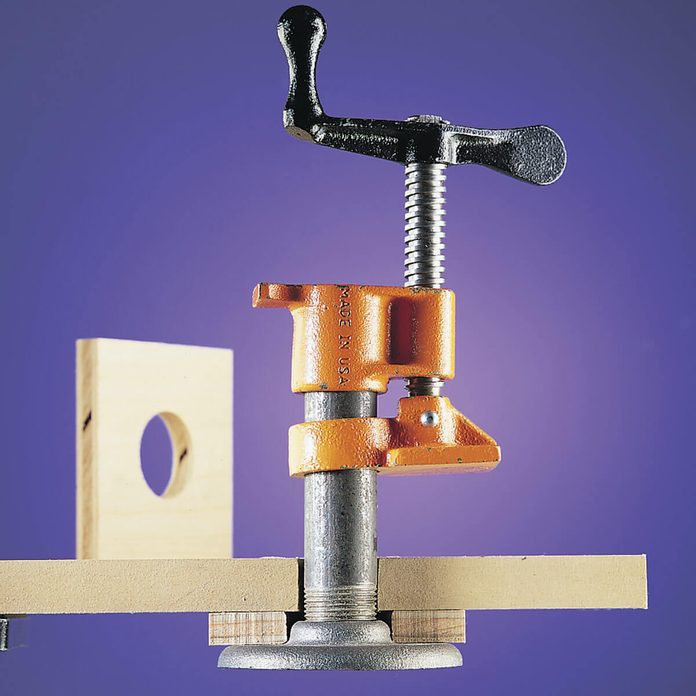
Pipe Clamps
Pipe clamps use a metal pipe as the bar. You can change the pipe length to fit big projects.
They are strong and affordable. You often see pipe clamps in workshops for heavy-duty clamping jobs.
C-clamps
C-clamps have a C-shaped frame with a screw for tightening. They work well for small to medium tasks.
These clamps are good for holding pieces during drilling or screwing. They are compact and easy to use.
Spring Clamps
Spring clamps look like large clothespins. They use a spring to apply pressure quickly.
These clamps are handy for light tasks or holding small parts. They are fast to open and close.
Corner Clamps
Corner clamps hold two pieces of wood at a right angle. They help create perfect corners for frames or boxes.
These clamps keep wood steady while you fasten or glue. They save time and improve accuracy.
Choosing The Right Clamp
Choosing the right clamp is important for woodworking projects. The right clamp holds wood pieces firmly without damaging them.
Different clamps work better for different tasks. Knowing what to look for helps you pick the best one.
Material Compatibility
Wood types vary in hardness and texture. Some clamps can leave marks or dents on soft wood.
Choose clamps with padded jaws for soft wood. Metal clamps work well for hard wood pieces.
- Soft wood: use clamps with rubber or plastic pads
- Hard wood: metal or steel clamps are strong and secure
- Delicate surfaces: use wide jaw clamps to spread pressure
Size And Capacity
Clamps come in different sizes and jaw openings. Choose a size that fits your project needs.
Make sure the clamp can open wide enough to hold your wood pieces. Longer clamps are good for large boards.
- Small clamps for thin or small pieces
- Medium clamps for general woodworking
- Large clamps for wide or thick wood panels
Pressure Requirements
Different tasks need different clamp pressures. Too much pressure can damage wood or glue joints.
Choose clamps that allow you to control pressure easily. Some clamps have screw mechanisms for slow tightening.
- Light pressure for delicate wood or thin pieces
- Medium pressure for most gluing and assembly
- High pressure for strong joints and heavy-duty work
Clamping Techniques For Precision
Using the right clamping methods ensures your woodworking projects fit together perfectly. Precision clamping helps keep parts steady and aligned during glue-up and assembly.
Good clamping prevents shifting and gaps. It also protects the wood surface and maintains even pressure across joints.
Aligning Workpieces
Proper alignment keeps your pieces flush and square. Use clamps that hold edges tightly without slipping. Check edges before tightening fully.
- Dry fit your pieces before applying glue or clamps
- Use cauls or scrap wood to keep edges even
- Apply clamps gradually to avoid moving parts
- Double-check alignment before the glue sets
Even Pressure Distribution
Clamps must spread pressure evenly to avoid gaps or dents. Uneven pressure can cause weak joints or warped wood.
| Clamping Tool | Best Use | Pressure Type |
|---|---|---|
| Bar Clamp | Large panels, long edges | Wide, even pressure |
| C-Clamp | Small parts, spot pressure | Strong, focused pressure |
| Pipe Clamp | Wide boards, heavy work | Adjustable, even pressure |
| Spring Clamp | Light holding, quick work | Light, even pressure |
Avoiding Surface Damage
Clamps can leave marks or dents if used carelessly. Protect your wood by adding padding between clamp jaws and the surface.
Here are common ways to protect your wood surface:
- Use scrap wood blocks as clamp pads
- Wrap clamp jaws with soft materials like felt or rubber
- Apply painter’s tape on delicate areas before clamping
- Check clamp pressure often and adjust as needed

Credit: www.familyhandyman.com
Strategies For Maximum Clamping Strength
Clamping is a key step in woodworking. Strong clamps hold pieces tightly for a solid bond. Using the right methods improves strength and prevents damage.
This guide covers useful techniques for clamping wood with maximum force and care. Learn how to use cauls, multiple clamps, and proper placement.
Using Cauls And Pads
Cauls are wooden strips used to spread pressure evenly. Pads protect delicate surfaces from clamp marks. Both help get strong, clean clamping.
- Place cauls across joints to distribute clamp pressure.
- Use soft pads under clamp jaws to avoid dents.
- Match caul size to the workpiece for even clamping.
- Check cauls for flatness to prevent uneven pressure.
Multiple Clamp Setup
Using several clamps increases hold and reduces gaps. Position clamps so pressure is balanced along the wood.
| Clamp Type | Best Use | Placement Tips |
|---|---|---|
| Bar Clamp | Wide panels | Space evenly, tighten gradually |
| C-Clamp | Small joints | Apply firm, steady pressure |
| Pipe Clamp | Long pieces | Use multiple clamps along length |
| Spring Clamp | Temporary hold | Use as helpers only |
Proper Clamp Placement
Place clamps close to the joint for best force. Avoid placing clamps too far, which weakens grip and may cause slippage.
- Clamp near the center of the joint for even pressure.
- Alternate clamp positions on opposite sides to avoid twisting.
- Check alignment before tightening clamps fully.
- Tighten clamps slowly to prevent shifting.
Common Clamping Mistakes To Avoid
Clamping is key in woodworking to hold pieces steady. Using clamps wrong can cause damage or weak joints.
Knowing common clamping mistakes helps protect your wood and improve your work quality.
Overtightening Risks
Applying too much pressure with clamps can crush or dent the wood. This weakens the piece and leaves marks.
Overtightening can also cause glue to squeeze out, making joints less strong and messy.
- Use moderate force when tightening clamps
- Stop tightening when the wood starts to bend
- Check for marks and dents after clamping
Uneven Clamping Pressure
Uneven pressure causes gaps or weak spots in glued joints. Parts may not align correctly.
Even clamping pressure spreads glue well and holds wood tightly without damage.
- Place clamps evenly along the joint
- Use cauls or pads to distribute pressure
- Check alignment before glue dries
Ignoring Wood Movement
Wood expands and contracts with humidity changes. Clamping too tightly can block this natural movement.
Ignoring wood movement can cause cracks or split joints over time.
- Allow slight gaps for wood to move
- Use flexible joinery with clamps
- Store wood properly before clamping
Credit: www.familyhandyman.com
Advanced Clamping Tips For Complex Projects
Clamping wood pieces correctly is important for strong joints. Complex projects need extra care in clamping.
This guide shares advanced tips to help you clamp better on difficult woodworking tasks.
Clamping Angled Joints
Angled joints can be tricky to clamp tightly. You need clamps that hold the pieces at the right angle.
Using cauls or blocks helps spread the clamp pressure evenly on angled surfaces.
- Place a scrap wood block to protect the angled surface
- Use band clamps or straps for odd angles
- Check the joint angle before tightening clamps
- Apply even pressure to avoid gaps
Temporary Vs Permanent Clamping
Temporary clamps hold wood while glue dries. Permanent clamps become part of the project.
Choose temporary clamps for quick setups. Use permanent clamps for parts that need long-term support.
- Temporary clamps: easy to remove, repositionable
- Permanent clamps: built-in strength, fixed position
- Check if the clamp will affect the wood finish
- Use proper clamp type based on project needs
Custom Clamp Solutions
Sometimes standard clamps do not fit your project shape. Custom clamp solutions fix this problem.
You can make custom clamps using scrap wood or metal parts for unusual shapes.
- Create wooden cauls shaped to your joint
- Use padded blocks to avoid damage
- Combine clamps with ropes or straps for complex holds
- Adjust clamp pressure carefully on custom parts
Maintenance And Care Of Clamps
Clamps are essential tools in woodworking. Keeping them in good shape ensures safety and efficiency. Regular care helps clamps last longer and work better.
This guide covers cleaning, storage, and inspection tips for woodworking clamps. Follow these practices to protect your investment.
Cleaning And Lubrication
Remove dirt and sawdust after each use. Use a dry cloth or soft brush to clean clamp surfaces. Avoid water to prevent rust.
- Wipe metal parts with a cloth
- Use light machine oil on moving parts
- Do not over-lubricate to avoid attracting dust
- Check screw threads for debris and clean gently
Storage Best Practices
Store clamps in a dry place away from moisture. Hang them or place them on racks to avoid damage and keep them ready.
| Storage Method | Benefits |
|---|---|
| Wall-mounted rack | Keeps clamps organized and off the floor |
| Tool chest drawer | Protects clamps from dust and moisture |
| Hanging hooks | Prevents bending and damage to clamp bars |
Inspecting For Wear
Check clamps regularly for damage. Look for bent bars, stripped threads, and worn pads. Replace parts if needed to keep clamps safe.
- Examine screw threads for smooth operation
- Check pads for cracks or heavy wear
- Test clamp pressure to ensure firm hold
- Replace any broken or bent parts promptly

Credit: www.familyhandyman.com
Frequently Asked Questions
What Are The Most Common Woodworking Clamp Types?
Common woodworking clamps include bar clamps, C-clamps, pipe clamps, and spring clamps. Each serves different purposes for securing wood pieces during gluing or assembly.
How Do I Choose The Right Clamp For My Project?
Choose clamps based on project size, pressure needed, and wood type. Larger projects require strong, adjustable clamps like bar or pipe clamps for stability.
Can Clamping Damage Wood Surfaces?
Yes, clamps can damage wood if overtightened. Use protective pads between clamp jaws and wood to prevent dents or marks.
What Is The Best Way To Apply Clamps Evenly?
Apply clamps gradually and alternate tightening to distribute pressure evenly. This helps avoid warping or uneven glue joints in woodworking projects.
Conclusion
Choosing the right clamping technique makes woodworking easier and more precise. Each method serves different needs. Consider the type of project and material size. Proper clamping ensures stability and accuracy. This prevents mistakes and enhances safety. Practice each technique to find what works best for you.
Experimentation leads to better results. Remember to maintain your tools for long-lasting use. Clean and inspect clamps regularly. This keeps them in top shape. With these tips, improve your woodworking projects. Achieve more consistent and professional results. Enjoy the process and watch your skills grow.