Are you struggling to get your projects perfectly level? Whether you’re building a shelf, framing a wall, or installing cabinets, mastering carpenter level techniques can make all the difference.
When your work is truly level, everything looks professional, fits better, and lasts longer. You’ll discover simple yet powerful tips that will help you use your level like a pro. Keep reading to unlock the secrets that will improve your skills and save you time and frustration on every job.
Your next project deserves nothing less than precision—and you’re about to learn how to achieve it.
Credit: www.toolstop.co.uk
Choosing The Right Carpenter Level
Carpenter levels help you check if surfaces are straight or even. Picking the right level makes your work easier and more accurate.
Different jobs need different types of levels. Knowing their features helps you choose the best one for your project.
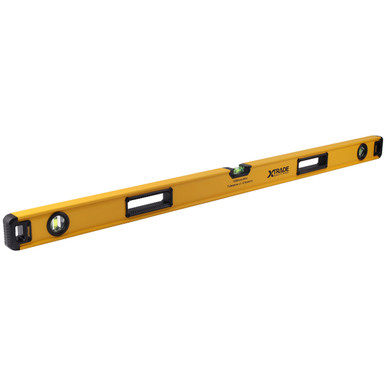
Types Of Levels
There are many types of carpenter levels. Each type suits certain tasks and environments.
- Spirit Levels:Use bubbles in liquid to show level or plumb.
- Laser Levels:Project a laser line for precise leveling over long distances.
- Box Levels:Have a sturdy frame for heavy-duty jobs.
- Torpedo Levels:Small and easy to carry for tight spaces.
Material And Build Quality
Good materials make a level last longer and stay accurate. Look for solid construction and quality parts.
Common materials include aluminum, wood, and plastic. Aluminum is light and strong. Wood feels classic but may warp. Plastic is cheap but less durable.
- Aluminum levels resist rust and damage.
- Wood levels can absorb moisture and change shape.
- Plastic levels are lightweight but may crack.
- Check for strong, clear vials that do not leak.
Accuracy Ratings
Accuracy shows how close the level measures true horizontal or vertical. Higher accuracy means better results.
Levels often have accuracy ratings like 0.5 mm/m or 0.0005 inches per inch. Smaller numbers mean more precise readings.
| Accuracy Rating | Meaning |
|---|---|
| 0.5 mm/m | Bubble moves 0.5 millimeters over 1 meter length |
| 1.0 mm/m | Less precise, good for basic tasks |
| 0.3 mm/m or better | High precision, used in fine woodworking |

Credit: www.youtube.com
Basic Leveling Techniques
Carpenter levels help check if surfaces are flat or straight. Learning to use them well keeps your work precise. Basic techniques make your job easier and more accurate.
This guide covers reading bubble vials, positioning the level, and checking surfaces. These tips suit beginners and improve your skills quickly.
Reading Bubble Vials
Bubble vials show if a surface is level or plumb. The bubble moves inside a liquid tube between two lines. When the bubble is centered, the surface is even.
- Look for the bubble inside the vial.
- Check if the bubble stays between the two lines.
- If the bubble moves outside, the surface is not level.
- Use different vials for horizontal, vertical, or angled checks.
Positioning The Level
Place the level properly to get accurate readings. The level must rest flat against the surface you want to check. Hold it steady and avoid tilting.
| Surface Type | Level Position |
| Horizontal (floor, shelf) | Flat on top |
| Vertical (wall, post) | Flat against side |
| Angled (roof, ramp) | Along the slope |
Checking Horizontal And Vertical Surfaces
Check surfaces by aligning the level and reading the bubble. For horizontal surfaces, place the level flat on top. For vertical surfaces, hold it flat against the side.
- Make sure the level does not rock or tilt.
- Read the bubble vial to see if it is centered.
- Adjust the surface if the bubble is off-center.
- Repeat the check until the bubble stays centered.
Advanced Leveling Methods
Carpenters use special techniques to ensure surfaces are perfectly level. Advanced methods help improve accuracy and save time.
These techniques include using laser levels, calibrating your tools, and measuring slopes and angles precisely.
Using Laser Levels
Laser levels project a straight, visible line over a distance. This helps you mark level points quickly and clearly.
They work well for large projects like walls, floors, and ceilings. You can place the laser level on a tripod for stability.
- Set up the laser level on a stable surface
- Turn it on and let it self-level
- Mark points where the laser line hits
- Check the laser line with a traditional level
Calibrating Your Level
Calibration ensures your level tool gives accurate readings. Over time, tools may drift out of alignment.
To calibrate, check the level on a flat surface and adjust it if needed. This step avoids mistakes in your work.
- Place the level on a flat surface
- Note the bubble or digital reading
- Flip the level 180 degrees
- Compare readings and adjust as needed
Slope And Angle Measurements
Measuring slopes and angles is important for drainage and roof work. It ensures water flows correctly.
Use an angle finder or digital level to get exact measurements. Mark the angles clearly for your cuts.
- Place the tool on the surface to measure
- Read the angle or slope in degrees or percent
- Mark the measurement on your material
- Double-check before cutting or installing
Credit: yorkacademy.ca
Common Mistakes To Avoid
Using a carpenter level needs attention to detail. Small errors can cause big problems in your work. Avoiding common mistakes helps ensure accuracy.
This guide points out three mistakes carpenters often make. Learn what to watch for and how to fix these errors.
Misreading The Bubble
Many carpenters misread the bubble inside the level vial. The bubble shows if a surface is even or not. Misreading it leads to wrong measurements.
- Do not guess the bubble’s center position.
- Look straight down at the bubble for accuracy.
- Check the bubble in good light to see it clearly.
- Remember the bubble moves slightly when the level shifts.
Ignoring Surface Imperfections
Surface bumps and dents can affect level readings. Ignoring these flaws causes errors in your project. You must check the surface before placing the level.
| Surface Type | Effect on Level |
| Rough Wood | May tilt the level unevenly |
| Warped Surface | False bubble reading |
| Dirty Surface | Blocks proper contact |
Improper Level Placement
Placing the level incorrectly is a common mistake. The level must lie flat and stable. Otherwise, the reading will be off.
Tips for proper placement:
- Place the level on a clean, flat area.
- Hold the level steady while checking the bubble.
- Do not lean or tilt the level with your hand.
- Use the correct edge of the level for the job.
Maintaining Your Carpenter Level
Keeping your carpenter level in good shape helps you get accurate readings. Simple care steps can extend its life and performance.
Follow these tips for cleaning, calibration, and handling to ensure your tool stays reliable.
Cleaning And Storage
After each use, wipe the level with a dry cloth. Avoid water or harsh chemicals that can damage the tool.
- Use a soft brush to remove dirt from edges and vials
- Store the level in a dry place away from direct sunlight
- Keep it in a protective case to prevent scratches and dents
Regular Calibration Checks
Calibration ensures your level gives correct measurements. Check it often to catch errors early.
| Calibration Method | How to Perform | Frequency |
|---|---|---|
| Flip Test | Place the level on a flat surface, note the bubble. Flip it 180° and compare. | Monthly |
| Surface Check | Use a known flat surface to verify bubble alignment. | Quarterly |
| Professional Calibration | Send to a service center for precise adjustment. | Yearly or if inaccurate |
Handling Tips
Handle your carpenter level with care to avoid damage. Rough use can cause misalignment.
- Do not drop or throw the level
- Avoid placing heavy objects on top of it
- Carry it in a sturdy case during transport
- Keep it away from extreme temperatures
Applying Level Techniques In Projects
Using level techniques is important to keep projects straight and even. It helps avoid mistakes and ensures quality work.
In carpentry, levels help check horizontal and vertical lines. This guide covers how to apply these skills in three common tasks.
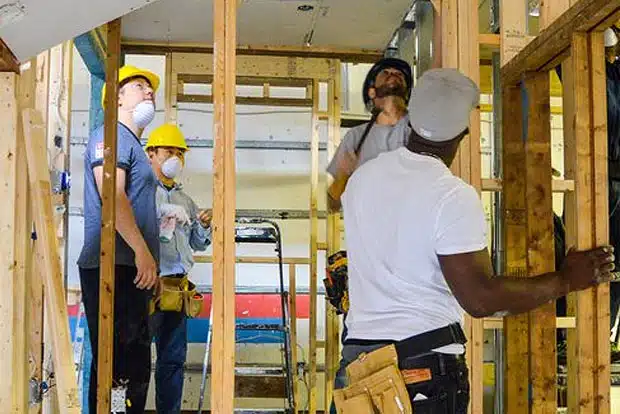
Framing Walls
When framing walls, use a level to make sure studs are vertical. Check the top and bottom plates for flatness and alignment.
- Place the level against each stud to check plumb
- Adjust studs until the bubble is centered
- Confirm plates are level along the length of the wall
- Re-check after nailing to keep the frame straight
Installing Cabinets
Level cabinets before fixing them to the wall. Uneven cabinets cause doors to swing open or close by themselves.
| Tool | Purpose | How to Use |
| Spirit Level | Check horizontal alignment | Place on top of cabinet, adjust until bubble is centered |
| Laser Level | Project a level line on wall | Align cabinet edges to laser beam for perfect height |
| Shims | Fill gaps for leveling | Insert under cabinets to correct uneven surfaces |
Laying Flooring
Use levels to prepare the subfloor and lay flooring flat. Uneven floors cause damage and look poor.
Follow these tips for using a level in flooring:
- Check subfloor with a long level or straightedge
- Fill low spots with leveling compound
- Start laying flooring from the highest point
- Use spacers to keep tiles or planks even
- Regularly check level as you work
Frequently Asked Questions
What Is The Best Carpenter Level Technique For Accuracy?
The best technique is to use a bubble level consistently. Place it on a flat surface and adjust until the bubble centers. Recheck multiple times for precision. This ensures your measurements and installations are perfectly aligned every time.
How To Maintain A Carpenter Level Properly?
Keep your level clean and dry after use. Store it in a protective case to avoid damage. Regularly check the bubble vial for cracks or leaks. Proper maintenance ensures long-lasting accuracy and reliability in your work.
Why Is Using A Carpenter Level Important In Woodworking?
A carpenter level ensures your projects are straight and balanced. It prevents errors and uneven surfaces, enhancing structural integrity. Using it improves the quality and professionalism of your woodworking projects significantly.
Can Digital Levels Improve Carpenter Level Techniques?
Yes, digital levels offer precise readings and ease of use. They display exact angles, reducing human error. Incorporating digital levels can speed up tasks and improve accuracy in complex projects.
Conclusion
Mastering carpenter level techniques enhances craftsmanship. Precision ensures quality in every project. Consistent practice sharpens skills and boosts confidence. Simple tools, when used correctly, yield impressive results. Keep your tools clean for accurate readings. Regular maintenance prevents errors and prolongs tool life.
Sharing knowledge with peers promotes growth. Understanding techniques improves efficiency and saves time. Patience and attention to detail are key. Always strive for improvement and learn from mistakes. These skills make any woodworking project successful. Your journey in carpentry can be fulfilling and rewarding.
Keep learning, keep building.