Are you ready to take your furniture-making skills to the next level? Carving furniture edges accurately can transform a simple piece into a stunning work of art.
But getting those clean, precise lines isn’t always easy. Imagine the satisfaction of running your hand along perfectly carved edges that showcase your craftsmanship. You’ll discover clear, step-by-step tips that make carving edges easier and more exact than you thought possible.
Keep reading, and soon you’ll be creating furniture that stands out for its fine details and professional finish.

Credit: www.woodcraft.com
Choosing The Right Tools
Carving furniture edges needs the right tools. Good tools make the work easier and more precise.
Choosing tools that fit your project helps you carve clean and smooth edges every time.
Essential Carving Tools
Use sharp chisels and gouges for shaping furniture edges. Different shapes help with various cuts.
A mallet helps control the force for delicate carving. Small knives work well for detailed work.
- Chisels in different widths
- Gouges with curved edges
- Wood carving knives
- Wood mallet for gentle tapping
Sharpening And Maintenance
Sharp tools carve better and safer. Regularly sharpen blades with whetstones or sharpening systems.
Keep tools clean and dry. This stops rust and keeps edges sharp longer.
- Use fine grit whetstones for sharpening
- Hone edges after sharpening for smoothness
- Oil blades lightly to prevent rust
- Store tools in a dry place
Safety Equipment
Wear safety glasses to protect your eyes from chips and dust. Gloves protect your hands from cuts.
Use a carving glove or thumb guard on your holding hand. Work in a well-lit area to see clearly.
- Safety glasses for eye protection
- Cut-resistant gloves or carving gloves
- Thumb guards for extra hand safety
- Good lighting for clear visibility
Preparing The Wood
Carving furniture edges needs careful preparation of the wood. Proper steps help make clean and precise cuts. This guide explains how to get the wood ready for carving.
Good preparation saves time and avoids mistakes. It also keeps the wood strong and smooth during carving.
Selecting Suitable Wood Types
Choose wood that is easy to carve and fits your project. Hardwoods and softwoods have different uses. Pick one that holds details well and does not chip easily.
- Basswood: soft and smooth for beginners
- Cherry: medium hardness, fine grain
- Maple: hard, holds sharp edges
- Walnut: dark color, strong and dense
- Pine: soft, but may have knots
Marking Edge Patterns
Mark the patterns clearly before carving. Use pencils or marking knives for accuracy. This helps follow the design and avoid errors.
| Tool | Use | Notes |
| Pencil | Draw lines | Erasable, good for rough marks |
| Marking Knife | Score lines | Creates fine grooves for guides |
| Template | Trace shapes | Use for repeated patterns |
| Ruler | Measure edges | Ensures even spacing |
Securing The Workpiece
Keep the wood steady during carving to avoid slips. Clamp the piece firmly on your workbench. Check that it does not move before starting.
- Use bench clamps or vices
- Place pads to protect the wood surface
- Adjust clamps to hold the piece tightly
- Test stability by gently shaking the wood
Basic Carving Techniques
Carving furniture edges adds style and detail to wood pieces. Using simple techniques helps you carve clean edges.
Focus on control and precision to get smooth, even shapes on your furniture edges.
Holding And Controlling Tools
Hold your carving tools firmly but not too tight. This lets you move the tool smoothly.
Use your dominant hand to guide the tool. Support the wood with your other hand to keep it steady.
- Grip the handle near the blade for better control
- Keep your hands dry to avoid slipping
- Use slow, steady movements for accuracy
- Rest your hands on the work surface for stability
Common Edge Profiles
Edge profiles shape the look of furniture. Choose simple designs for easy carving.
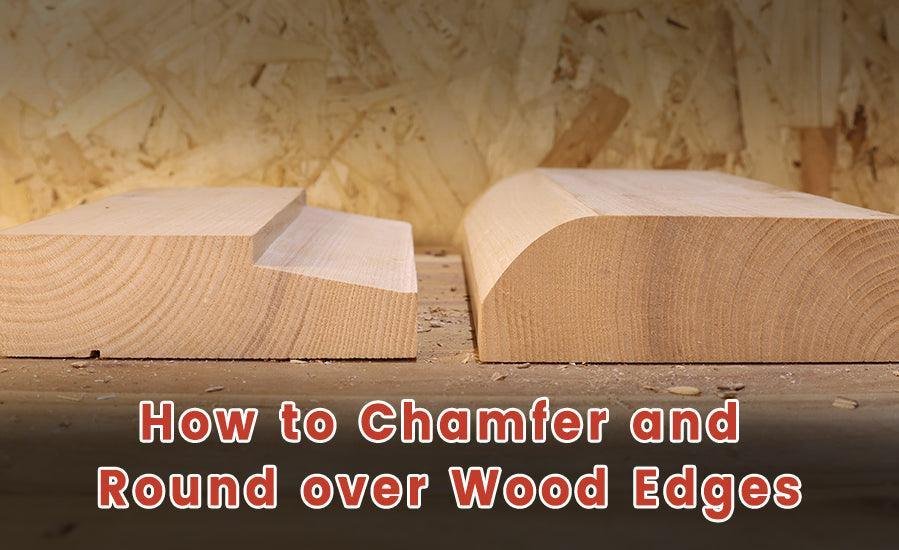
Popular profiles include round, bevel, and ogee edges. Each adds a unique style to your work.
- Round Edge:Smooth, curved shape that softens corners
- Bevel Edge:Angled cut that creates a sharp line
- Ogee Edge:S-shaped curve for a classic look
Avoiding Common Mistakes
Take care to avoid mistakes that can ruin your carving work. Patience is key.
Work slowly and check your progress often. Fix small errors before they get worse.
- Don’t push too hard; this can chip the wood
- Avoid carving against the grain to prevent splinters
- Keep tools sharp for clean cuts
- Practice on scrap wood before working on your project

Credit: www.familyhandyman.com
Advanced Carving Methods
Carving furniture edges with accuracy requires skill and good tools. Advanced methods help achieve clean, detailed results. These techniques improve your work’s quality and style.
Using templates, layering your cuts, and adding decorative details are key steps. Each method adds precision and creativity to your carving projects.
Using Templates And Guides
Templates keep your carving shapes consistent and precise. You can make templates from thin wood or plastic sheets. Guides help control your tools and avoid mistakes.
- Create or buy a template for the edge shape you want.
- Attach the template firmly to the furniture edge.
- Use a pencil or scribing tool to trace the shape.
- Carve along the traced lines slowly and carefully.
- Remove the template and refine the carving by hand.
Layered Carving Approaches
Layered carving means working in steps. You remove wood in small amounts, checking your progress often. This method reduces errors and keeps edges sharp.
| Layer | Action | Purpose |
|---|---|---|
| First | Outline the edge shape | Set the basic form |
| Second | Remove excess wood around shape | Define depth and profile |
| Third | Refine details and smooth surfaces | Improve appearance and accuracy |
Incorporating Decorative Details
Adding decorative details raises the style of your carving. Use small gouges and knives for fine work. Plan your details to fit the furniture’s style and size.
- Sketch designs lightly on the wood before carving.
- Use different tools for textures like beads or leaves.
- Work slowly to avoid breaking thin details.
- Sand gently to keep sharp lines clear.
- Apply finishes carefully to protect your work.
Finishing Touches
Carving furniture edges is a skill that needs careful finishing. Proper finishing makes the edges look smooth and protects the wood.
This section covers sanding, applying finishes, and keeping your carved furniture in good shape for years.
Sanding And Smoothing Edges
Sanding removes rough spots and sharp edges on your carving. Use fine-grit sandpaper for the best results. Move the sandpaper gently along the grain.
- Start with 120-grit sandpaper to shape the edges.
- Use 220-grit sandpaper to smooth the surface.
- Finish with 320-grit for a silky feel.
- Clean dust with a soft brush or cloth after sanding.
Applying Finishes And Sealants
Finishes protect carved edges from damage and moisture. Choose the right finish based on the wood type and furniture use.
| Finish Type | Benefits | Best For |
| Oil | Enhances wood grain, easy to apply | Indoor furniture |
| Varnish | Strong protection, glossy finish | High-use surfaces |
| Wax | Soft shine, easy to repair | Decorative pieces |
| Polyurethane | Durable, water-resistant | Outdoor furniture |
Apply finishes with a clean brush or cloth. Let each coat dry before adding the next. Lightly sand between coats for smoothness.
Maintaining Carved Furniture
Regular care keeps your carved edges sharp and beautiful. Dust furniture often and avoid harsh cleaners.
- Use a soft cloth for dusting.
- Avoid placing furniture in direct sunlight.
- Reapply finishes every year or as needed.
- Check edges for chips or cracks and fix them quickly.

Credit: www.familyhandyman.com
Troubleshooting And Tips
Carving furniture edges takes patience and skill. Small mistakes can affect the final look.
Use these tips to fix errors, improve your accuracy, and save time while carving.
Correcting Carving Errors
If a carved edge looks uneven, don’t panic. You can fix most mistakes by careful sanding.
Use fine sandpaper or a small file to smooth rough spots and reshape edges gently.
- Check your work in good light to spot errors early.
- Use a sharp carving tool to avoid tearing wood fibers.
- If a cut is too deep, try filling the gap with wood filler and re-carve after drying.
Improving Precision
Carve slowly and control your tools with steady hands. Precision improves with practice.
Use guides or templates to keep edges consistent and straight. Mark edges lightly before carving.
- Keep your tools sharp for clean cuts.
- Hold the wood firmly but comfortably.
- Work in a well-lit area to see details clearly.
- Take breaks to avoid hand fatigue.
Time-saving Techniques
Plan your carving before you start. Good planning saves time and reduces errors.
Use power tools for rough shaping, then finish details by hand for better control.
- Organize your tools so they are easy to reach.
- Keep your workspace clean to avoid distractions.
- Practice simple designs to build speed before complex patterns.
- Use clamps to hold wood steady and free your hands.
Frequently Asked Questions
How Do I Prepare Wood For Carving Furniture Edges?
Start by sanding the wood surface smoothly. Remove all dust and debris. Use a sharp pencil to mark the carving design. Proper preparation ensures clean and accurate carving results.
What Tools Are Best For Carving Furniture Edges?
Use sharp chisels, gouges, and carving knives. Power rotary tools with carving bits also work well. Select tools based on the edge design complexity and wood type for precise carving.
How Can I Maintain Accuracy While Carving Edges?
Use guides or templates to keep consistent shapes. Work slowly with controlled strokes. Regularly check your progress against the design to avoid mistakes.
What Safety Tips Should I Follow When Carving Edges?
Always wear protective gloves and goggles. Keep tools sharp to reduce slips. Work in a well-lit, clean area to prevent accidents.
Conclusion
Carving furniture edges accurately requires patience and practice. Start by choosing the right tools. A sharp knife or chisel works best. Always measure twice. Cut once. This helps avoid mistakes. Keep your hands steady. Ensure the wood is secured. This prevents slips.
Sand the edges smoothly. This creates a clean finish. Mistakes happen. Learn from them and improve. Enjoy the process. Each piece becomes unique with your touch. With time, your skills will grow. Confidence will follow. Happy carving!
