If you want to create strong, beautiful wood joints that last, learning how to cut dovetail joints is a game-changer. You might think it’s tricky, but with the right steps, you can master this skill and take your woodworking to the next level.
Imagine making furniture or boxes that not only hold together firmly but also look stunning up close. In this guide, you’ll discover simple techniques and tips to cut perfect dovetail joints every time. Ready to impress yourself and others with your craftsmanship?
Keep reading, and let’s get started!

Credit: m.youtube.com
Dovetail Joint Basics
Dovetail joints are strong and look good. They are often used to join wood at right angles.
The joint has interlocking pins and tails that fit tightly. This makes the joint very strong without nails or screws.
Types Of Dovetail Joints
There are several types of dovetail joints. Each type fits different woodworking needs.
- Through Dovetail: Visible pins and tails on both sides.
- Half-Blind Dovetail: Pins hidden on one side.
- Secret Mitered Dovetail: Joint is hidden completely.
- Sliding Dovetail: Used for joining boards along their edges.
Tools Needed
You need some basic tools to cut dovetail joints. Sharp tools help make clean cuts.
- Dovetail saw or fine backsaw for cutting.
- Chisels to clean and shape the joint.
- Marking gauge to mark wood accurately.
- Pencil and square for layout lines.
- Mallet to drive chisels.
Choosing The Right Wood
Choose wood that is easy to work with and strong. Hardwood is best for dovetail joints.
- Hardwoods like oak, maple, and cherry are strong.
- Softwoods like pine are easier to cut but less durable.
- Dry wood reduces movement and gaps in joints.
- Flat and straight boards help with precise cuts.
Preparing For Cutting
Cutting dovetail joints needs careful preparation. This helps you get clean and tight joints.
Before you start, make sure you plan your steps and set up right. This saves time and avoids mistakes.
Measuring And Marking
Accurate measuring and marking are key to good dovetail joints. Use a sharp pencil or marking knife.
- Measure twice to avoid errors.
- Mark the tails and pins clearly on the wood.
- Use a square to keep lines straight and precise.
- Label each piece to keep parts organized.
Setting Up Your Workspace
Arrange your tools and materials neatly. A tidy workspace helps you work faster and safer.
| Workspace Item | Purpose |
|---|---|
| Workbench | Supports wood pieces firmly |
| Clamps | Hold wood steady during cutting |
| Good Lighting | Makes markings and cuts visible |
| Tool Tray | Keeps saws and chisels within reach |
Safety Precautions
Safety is important when cutting dovetail joints. Protect yourself and others nearby.
- Wear safety goggles to protect your eyes.
- Use ear protection if power tools are loud.
- Keep fingers away from saw blades and chisels.
- Work in a well-ventilated area to avoid dust buildup.
- Check tools before use to ensure they are sharp and safe.
Cutting Techniques
Cutting dovetail joints is a key skill in woodworking. It creates strong and attractive connections.
There are different ways to cut dovetails. Each way has tools and tips to help you.
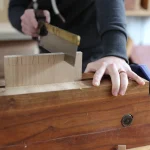
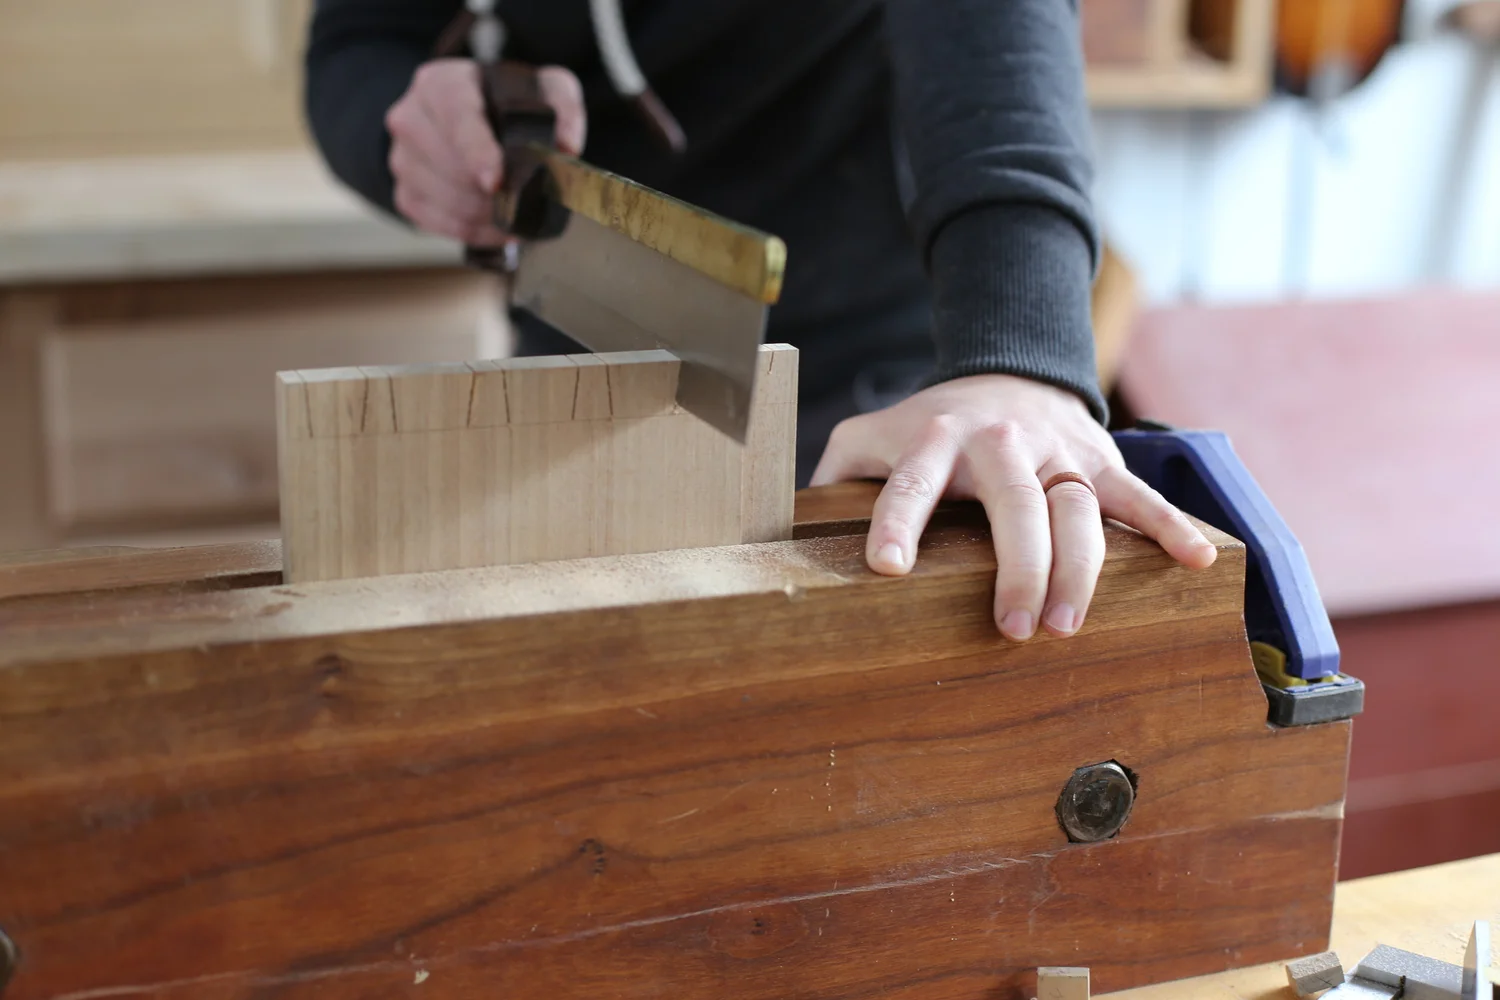
Hand Saw Method
The hand saw method uses a backsaw for precise cuts. Mark your pins and tails carefully.
Cut along the marked lines slowly. Keep the saw straight and steady for clean joints.
- Use a fine-toothed backsaw for control
- Cut the waste wood first before the pins or tails
- Chisel out the waste carefully after sawing
- Check your angles with a bevel gauge
Using A Router
A router can speed up cutting dovetails. Use a dovetail bit and a guide for accuracy.
Set the depth of the cut before starting. Move the router slowly for smooth edges.
- Clamp the wood firmly to avoid movement
- Use a straight edge or jig to guide the router
- Test depth on scrap wood first
- Clean out waste with a chisel after routing
Dovetail Jig Tips
Dovetail jigs help cut joints quickly and accurately. Choose the right jig for your project.
Follow the jig instructions carefully. Set clamps and guides tightly to avoid errors.
- Use sharp router bits for clean cuts
- Check all measurements before cutting
- Practice on scrap wood to get familiar with the jig
- Keep the jig and router steady during work

Credit: www.newtonmakes.com
Fitting And Assembly
Fitting and assembling dovetail joints needs care and patience. You check the fit before gluing to avoid mistakes.
Good fitting makes strong joints that last long. This guide covers test fitting, fixing tight joints, and gluing.
Test Fitting
Put the pins and tails together without glue. Check if they fit snugly but can slide with slight pressure. This step shows if you need to adjust the joint.
Adjusting For Tight Fits
If the joint is too tight, use these methods to adjust it carefully:
- Lightly sand the pins or tails where they bind.
- Use a sharp chisel to pare down high spots.
- Check the fit often to avoid making it too loose.
- Remove small amounts at a time for better control.
Gluing And Clamping
Apply glue evenly on all joint surfaces. Avoid too much glue that can squeeze out and make a mess.
| Step | Action | Tip |
| 1 | Apply glue | Use a brush for even coverage |
| 2 | Assemble joint | Fit pieces together gently |
| 3 | Clamp | Use clamps to hold firmly |
| 4 | Clean excess glue | Wipe off before it dries |
| 5 | Let dry | Follow glue drying time on package |
Troubleshooting Common Issues
Cutting dovetail joints can be tricky. Small mistakes cause problems that affect the fit and look.
This guide covers common problems and how to fix them. Learn to spot and solve issues with your dovetails.
Misaligned Tails And Pins
Misalignment happens when tails and pins don’t line up correctly. This can make the joint weak or ugly.
Check your marking and cutting carefully. Use sharp tools and steady hands. If misaligned, try these tips:
- Re-mark the pieces using a marking gauge for accuracy.
- Cut slowly and follow the lines exactly.
- Use a dovetail marker or template to keep angles consistent.
- Test fit often to catch errors early.
- If one side is off, gently trim the other side to match.
Loose Joints
Loose joints mean the tails and pins are too small or the cuts are not tight. This weakens the joint.
| Cause | Fix |
| Tails cut too small | Use a sharper tool and cut closer to the line |
| Pins too large | Trim pins carefully with a chisel |
| Wood shrinkage | Try a slightly larger cut or glue gaps |
| Inconsistent cutting depth | Set a clear depth mark before cutting |
Always dry fit the joint before gluing. Adjust small gaps with light sanding or trimming.
Splintering And Tear-out
Splintering happens when wood chips or tears during cutting. This hurts the joint’s appearance.
Prevent splintering with these tips:
- Use sharp saw blades and chisels.
- Score the cutting lines with a knife before sawing.
- Clamp the wood firmly to reduce movement.
- Cut slowly and support the wood near the cut.
- Cut with the grain direction to avoid tear-out.
Finishing Touches
After cutting dovetail joints, finishing touches make the joint look better and last longer. Proper care helps keep the joint strong and attractive.
Pay attention to sanding, applying finish, and maintenance to protect your work and ensure it stands the test of time.
Sanding And Smoothing
Sanding removes rough edges and helps the joint fit smoothly. Use fine-grit sandpaper to avoid damaging the wood.
Sand gently along the wood grain. Avoid sanding too much to keep the joint tight and strong.
- Start with 120-grit sandpaper for shaping
- Use 220-grit sandpaper for smooth finishing
- Sand corners carefully to keep sharp lines
Applying Finish
Applying finish protects the wood and highlights its natural beauty. Choose a finish that suits your project and wood type.
Apply thin coats with a brush or cloth. Let each coat dry fully before adding the next one.
- Use oil finishes for a natural look
- Try varnish for a hard, protective surface
- Wax can add shine and mild protection
Maintaining The Joint
Keep dovetail joints strong by checking them regularly. Clean dirt and dust to prevent damage over time.
Reapply finish when the wood looks dry. Avoid exposing joints to extreme moisture or heat.
- Inspect joints yearly for cracks or looseness
- Clean with a soft cloth and mild cleaner
- Touch up finish to keep wood sealed

Credit: www.highlandwoodshopcorvallis.com
Frequently Asked Questions
What Tools Are Essential For Cutting Dovetail Joints?
Essential tools include a dovetail saw, marking gauge, chisels, and a mallet. Precision tools ensure accurate cuts and tight fits. A marking knife helps in clear lines. A dovetail jig can assist beginners for consistent results.
How Do You Mark Dovetail Joints Accurately?
Use a marking gauge to scribe consistent lines on wood edges. Mark the tails first, then transfer the layout to the pins. A sharp marking knife creates precise, visible lines for clean cuts. Accuracy in marking is key to perfect joints.
What Is The Best Wood Type For Dovetail Joints?
Hardwoods like maple, cherry, and oak are best for dovetails. They provide strength and durability. Softwoods can work but may wear out faster. Choose wood that suits your project’s strength and aesthetic needs.
How Do You Ensure Tight-fitting Dovetail Joints?
Cut slowly and follow marked lines precisely. Use sharp chisels to clean waste wood. Test fit frequently during the process. Slight adjustments improve fit without gaps. Tight joints enhance strength and appearance.
Conclusion
Creating dovetail joints takes practice and patience. They are strong and look nice. Remember, measure twice and cut once. This avoids mistakes and saves time. Use sharp tools for clean cuts. Test fit each piece before gluing. Adjust if needed.
Keep your workspace organized. It helps maintain focus. With practice, your skills will improve. You’ll build confidence. Soon, you’ll craft beautiful dovetail joints with ease. Enjoy the process and learn from each project. Happy woodworking!