Do you own a belt sander? If so, you already know it’s a powerhouse tool for smoothing surfaces and shaping wood.
But, are you getting the most out of it? Proper maintenance can extend its life and improve its performance. Imagine effortlessly gliding your belt sander across a project, knowing it’s in peak condition. This guide is tailored for you. We’ll reveal easy-to-follow steps to keep your belt sander running smoothly.
With just a little care, you’ll enhance its efficiency, save money, and ensure safety. Ready to unlock the secrets of seamless sanding? Let’s dive in.
Choosing The Right Belt Sander
A belt sander is a powerful tool for smoothing rough surfaces. Picking the right one makes your work easier and safer.
This guide helps you understand different types of belt sanders and what to think about before buying.
Types Of Belt Sanders
Belt sanders come in many styles. Each style fits different tasks and work environments.
- Handheld Belt Sanders:Portable and easy to use. Good for small jobs and tight spaces.
- Stationary Belt Sanders:Fixed to a workbench. Best for larger projects that need steady sanding.
- Wide Belt Sanders:Used in woodworking shops. They handle big panels and wide surfaces.
- Detail Belt Sanders:Small and precise. Ideal for corners and hard-to-reach areas.
Factors To Consider Before Buying
Choose a belt sander based on your needs, budget, and the work you plan to do.
| Factor | Description | Why It Matters |
| Power | Measured in amps or watts | Higher power means faster sanding and better handling of tough materials |
| Belt Size | Length and width of the sanding belt | Large belts cover more area; smaller belts work well in tight spaces |
| Speed | Variable or fixed sanding speed | Variable speed lets you control sanding for different materials |
| Weight | How heavy the sander is | Lighter sanders cause less fatigue during long use |
| Dust Collection | Built-in dust bag or port for vacuum | Keeps your workspace clean and improves air quality |
| Ergonomics | Handle design and grip comfort | Better grip reduces hand strain and increases control |
Essential Maintenance Tools
Keeping your belt sander in good shape needs the right tools. These tools help you clean, oil, and replace parts to keep your sander working well.
Using proper maintenance tools saves time and makes your belt sander last longer. Let’s look at the main tools you need.
Cleaning Supplies
Cleaning your belt sander removes dust and debris that can block its parts. Use soft brushes and cloths to clean gently.
Compressed air helps blow out dust from hard-to-reach areas. Avoid water or harsh chemicals that may damage the sander.
- Soft-bristle brush
- Lint-free cloth
- Compressed air canister
- Vacuum cleaner (optional)
Lubricants And Oils
Lubricants reduce friction and wear on moving parts. Use light machine oil or grease made for power tools.
Apply lubricants to bearings, rollers, and other metal parts. This helps your belt sander run smoothly and quietly.
- Light machine oil
- Grease for power tools
- Oil applicator or small brush
Replacement Parts
Worn or broken parts affect your sander’s performance. Keep spare belts, rollers, and brushes on hand for quick fixes.
Check parts often and replace them as needed. Using the right parts keeps your sander working safely and well.
- Replacement sanding belts
- Rollers and drums
- Carbon brushes
- Screws and fasteners
Cleaning Your Belt Sander
Keeping your belt sander clean helps it work better and last longer. Dirt and dust can block its parts and cause damage.
Regular cleaning stops problems and keeps your tool safe to use. Follow simple steps to clean your belt sander properly.
Removing Dust And Debris
Dust and debris build up around the sander during use. This can make it hard to control and lower its power.
Turn off and unplug the sander before cleaning. Use a brush or compressed air to clear away dust from all parts.
- Use a soft brush to sweep dust from vents and surfaces
- Blow compressed air into tight spots and motor areas
- Wipe the outside with a dry cloth to remove loose dirt
Cleaning The Belt And Rollers
The belt and rollers collect dirt and residue from sanding materials. This can wear out the belt and cause it to slip.
Remove the belt before cleaning. Use a rubber cleaning stick or a damp cloth to clean the rollers and belt surface.
- Check the belt for tears or damage before cleaning
- Use a rubber belt cleaner to remove built-up residue
- Wipe the rollers with a soft cloth to keep them smooth
- Reinstall the belt carefully after cleaning is done
Lubricating Moving Parts
Lubricating the moving parts of your belt sander keeps it running smoothly. It helps reduce wear and tear on the machine.
Proper lubrication also prevents parts from overheating and extends the tool’s life. Regular care saves money on repairs.
Identifying Parts That Need Lubrication
Focus on parts that move or rub against each other. These include bearings, rollers, and shafts inside the sander.
Check the user manual for specific parts. Look for signs of friction, noise, or stiffness when the sander runs.
- Bearings that support the sanding belt
- Rollers that guide the belt
- Drive shafts and pulleys
- Any exposed gears or joints
Choosing The Right Lubricant
Use lubricants designed for power tools. They protect parts without causing damage or attracting dirt.
A light machine oil or grease works well for most belt sander parts. Avoid heavy oils that can clog moving parts.
- Light machine oil for bearings and shafts
- Grease for rollers and gears
- Avoid WD-40 as a long-term lubricant
- Use lubricants that resist dust and heat
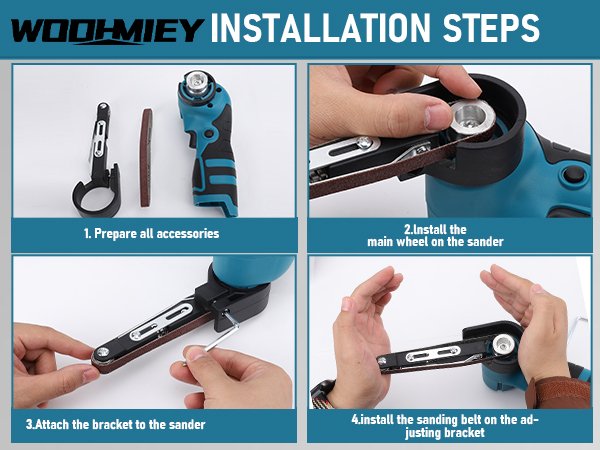
Replacing And Adjusting The Belt
Keeping your belt sander in good shape needs regular belt changes. The belt wears out with use and needs replacement. Adjusting the belt ensures smooth sanding and longer tool life.
This guide shows you how to remove the old belt, install a new one, and adjust tension and tracking.
Removing The Old Belt
First, unplug the sander to keep it safe. Find the lever or knob that holds the belt in place. Release the tension by moving the lever or loosening the knob.
Slide the worn belt off the rollers carefully. Check the rollers for dirt or damage before installing the new belt.
Installing A New Belt
Choose the right size belt for your sander. Place the new belt around the rollers. Make sure the arrows on the belt match the direction of rotation.
Push the belt into the correct position. Secure the tension lever or knob to hold the belt tightly.
Tension And Tracking Adjustments
Tension keeps the belt tight to prevent slipping. Check if the belt feels firm when you press it. Adjust the tension lever if needed.
Tracking keeps the belt centered on the rollers. Turn on the sander at low speed. Watch the belt to see if it moves to one side.
- If the belt drifts right, turn the tracking knob left.
- If the belt drifts left, turn the tracking knob right.
- Stop adjusting when the belt stays centered during use.

Credit: www.homebuilding.co.uk
Checking Electrical Components
Maintaining your belt sander ensures it works safely and lasts longer. Checking the electrical parts is important to avoid problems.
Regularly inspect the power cord, switches, and motor to keep your tool in good shape. This helps prevent electrical hazards.
Inspecting The Power Cord
Look over the power cord for any cuts, cracks, or worn spots. A damaged cord can cause shocks or stop the sander from working.
Make sure the plug is not loose or bent. Replace the cord if you see any damage to keep safe use.
- Check for visible cuts or tears
- Feel for soft spots or cracks
- Ensure the plug fits tightly in the outlet
- Do not use if the cord is damaged
Testing Switches And Motors
Test the switch to see if it turns the sander on and off smoothly. A faulty switch can stop the tool or cause it to run unexpectedly.
Listen to the motor while it runs. Strange sounds or slow starts may mean the motor needs repair or cleaning.
- Flip the switch to check for proper function
- Watch for any flickering or inconsistent power
- Listen for grinding, buzzing, or unusual noises
- Check if the motor heats up quickly
Storage And Handling Tips
Keeping your belt sander in good shape takes care and attention. Proper storage and handling help extend its life and keep it working well.
This guide covers key tips to store and handle your belt sander safely and effectively.
Proper Storage Practices
Store your belt sander in a dry, clean place. Avoid areas with high humidity or dust. This prevents rust and damage to the motor and belt.
- Keep it away from moisture and water sources
- Use a protective case or cover to block dust
- Store on a stable shelf or hook to avoid falls
- Remove the sanding belt before long storage periods
Safe Handling During Use
Handle your belt sander carefully to avoid injury and tool damage. Follow safety rules every time you use it.
| Handling Tip | Reason |
| Always wear safety goggles | Protect eyes from dust and debris |
| Hold the sander firmly with both hands | Maintain control and prevent slips |
| Do not force the sander into the material | Prevents motor overload and uneven sanding |
| Unplug before changing belts or cleaning | Avoid accidental starts and injuries |
Troubleshooting Common Issues
Keeping your belt sander in good shape helps you get smooth finishes. Some problems happen often. Fixing them fast keeps your work on track.
Below are common issues with belt sanders. Learn how to spot and fix uneven sanding, overheating, and belt slippage.
Uneven Sanding
Uneven sanding leaves rough or patchy spots on your work. It may come from worn belts, wrong pressure, or a dirty belt surface.
- Check if the sanding belt is worn out or torn. Replace if needed.
- Apply even pressure while sanding. Avoid pushing too hard on one side.
- Clean the belt and rollers to remove dust and debris.
- Make sure the belt tracks straight on the rollers.
Overheating Problems
Overheating can damage the sander and your work. It usually happens if you sand too long in one spot or block air vents.
| Cause | How to Fix |
| Sanding too long in one place | Move the sander steadily and avoid stopping |
| Clogged air vents | Clean the vents regularly to allow airflow |
| Worn motor brushes | Replace brushes if motor performance drops |
| Low-quality sanding belts | Use belts recommended by the manufacturer |
Belt Slippage
Belt slippage stops the sander from working well. It causes uneven sanding and can wear the belt fast. Tightening the belt or cleaning parts helps fix this.
- Turn off the sander and unplug it.
- Check belt tension and tighten if loose.
- Clean the drive and idler rollers to remove dust.
- Inspect the belt for damage and replace if needed.
- Ensure the belt tracks properly on the rollers.
Extending The Life Of Your Belt Sander
A belt sander is a useful tool for woodworking and other tasks. Taking care of it helps it work better for longer.
This guide covers easy ways to keep your belt sander in good shape. Following these tips saves money and time.
Regular Maintenance Schedule
Checking and cleaning your belt sander regularly keeps it running smoothly. Set a schedule to do this after each use or weekly.
Look for worn parts, clean dust, and check the belt condition. Replace parts before they cause bigger problems.
- Clean dust from vents and rollers
- Check belt for tears or wear
- Tighten all screws and bolts
- Lubricate moving parts as needed
- Inspect the power cord for damage
Best Practices For Usage
Using your belt sander properly reduces wear and tear. Avoid mistakes that shorten its life.
Apply even pressure and keep the sander moving. Do not force it to work too hard on tough spots.
- Use the right belt grit for your project
- Keep the sander flat on the surface
- Avoid sanding in one spot too long
- Turn off and unplug before changing belts
- Store in a dry, clean place after use

Credit: manuals.plus

Credit: benchmarkabrasives.com
Frequently Asked Questions
How Often Should I Clean My Belt Sander?
Clean your belt sander after every use. Remove dust and debris to prevent clogging. Regular cleaning extends its lifespan and maintains performance.
What Type Of Belts Are Best For Sanding?
Choose belts based on material and grit. Coarse grits suit rough sanding; fine grits are for finishing. Use quality belts for better results.
How Do I Replace A Belt On My Sander?
Turn off and unplug the sander. Release the tension lever, remove the old belt, and slide on the new one. Re-tension and check alignment.
How Can I Prevent Belt Sander Overheating?
Avoid pressing too hard during sanding. Use proper grit and take breaks to cool the sander. Overheating damages the motor and belt.
Conclusion
Maintaining your belt sander helps it last longer and work better. Clean the belt and check parts often. Replace worn belts to keep sanding smooth. Store the tool in a dry, safe place. Small steps prevent big problems later. Take care of your sander to save time and money.
Simple habits make a big difference. Keep your tool ready for any project.