
Imagine walking into your garage and knowing exactly where each tool is. No more frantic searching for a missing wrench or screwdriver.
A well-organized tool wall can be a game-changer, saving you time and frustration. You might think setting up a garage tool wall is a daunting task, but it’s easier than you think. With the right guide, you can transform chaos into order and create a workspace that sparks creativity and productivity.
In this guide, you’ll discover simple steps to set up your own tool wall, making your garage a place of efficiency and inspiration. Let’s turn your cluttered garage into a haven of organization and get you back to doing what you love most—working on your projects. Ready to dive in? Let’s get started!

Credit: www.lemonthistle.com
Planning Your Tool Wall
Setting up a garage tool wall starts with good planning. This helps keep your tools organized and easy to find.
Focus on choosing the right spot, measuring the area, and picking which tools to show on the wall.
Choosing The Right Location
Select a wall that is easy to access and has good lighting. Avoid areas cluttered with other items.
Check for a sturdy surface that can hold the weight of your tools and storage racks.
Measuring And Mapping The Space
Measure the height and width of the wall space. Note any obstacles like windows or switches.
| Measurement | Description |
| Width | Measure from left to right edge of the wall |
| Height | Measure from floor to ceiling or desired tool height |
| Obstacles | Mark locations of windows, outlets, and light switches |
Selecting Tools To Display
Choose tools you use often for the wall. Keep larger or rare-use tools stored elsewhere.
- Hammers and screwdrivers
- Wrenches and pliers
- Measuring tapes and levels
- Power tool accessories
- Safety gear like gloves and goggles
Materials And Tools Needed
Setting up a garage tool wall helps keep tools organized and easy to find. Choosing the right materials and tools is key to a sturdy and useful wall.
This guide covers the main items needed: wall panels and pegboards, hooks and holders, and mounting hardware.
Wall Panels And Pegboards
Wall panels and pegboards form the base of your tool wall. Pegboards are popular for their flexibility and ease of use. Panels come in various materials like metal, wood, or plastic.
- Pegboard made of hardboard or metal
- Wooden slatwall panels for heavier tools
- Metal panels for durability and strength
- Backing boards to protect your wall surface
- Measuring tape to size the panels correctly
Hooks And Holders
Hooks and holders keep your tools in place and easy to access. Choose types based on your tool shapes and sizes.
| Type | Use | Material |
| Single hooks | Hanging small tools like hammers | Steel or plastic |
| Double hooks | Holding larger tools like wrenches | Steel |
| Tool holders | Special shapes for screwdrivers or pliers | Plastic or metal |
| Baskets | Holding loose items or small parts | Wire mesh |
Mounting Hardware
Mounting hardware secures your panels and pegboards to the wall. Use strong and reliable fasteners for safety.
- Wall anchors for drywall or masonry
- Wood screws for studs or wooden walls
- Washers to spread the load of screws
- Drill and drill bits for pilot holes
- Level to keep panels straight
Designing For Efficiency
Setting up a garage tool wall can save time and keep your workspace tidy. Planning the layout helps you find tools quickly. It also makes your work easier.
Focus on organizing tools by how you use them. Use space wisely to fit everything you need. Adding work surfaces can improve your workflow.
Grouping Tools By Function
Arrange tools based on their use to speed up your work. Keep similar tools close together for easy access. This reduces the time spent searching.
- Hand tools like hammers, screwdrivers, and pliers
- Power tools such as drills and saws
- Fasteners like nails, screws, and bolts
- Measuring tools including tape measures and levels
- Painting supplies and brushes
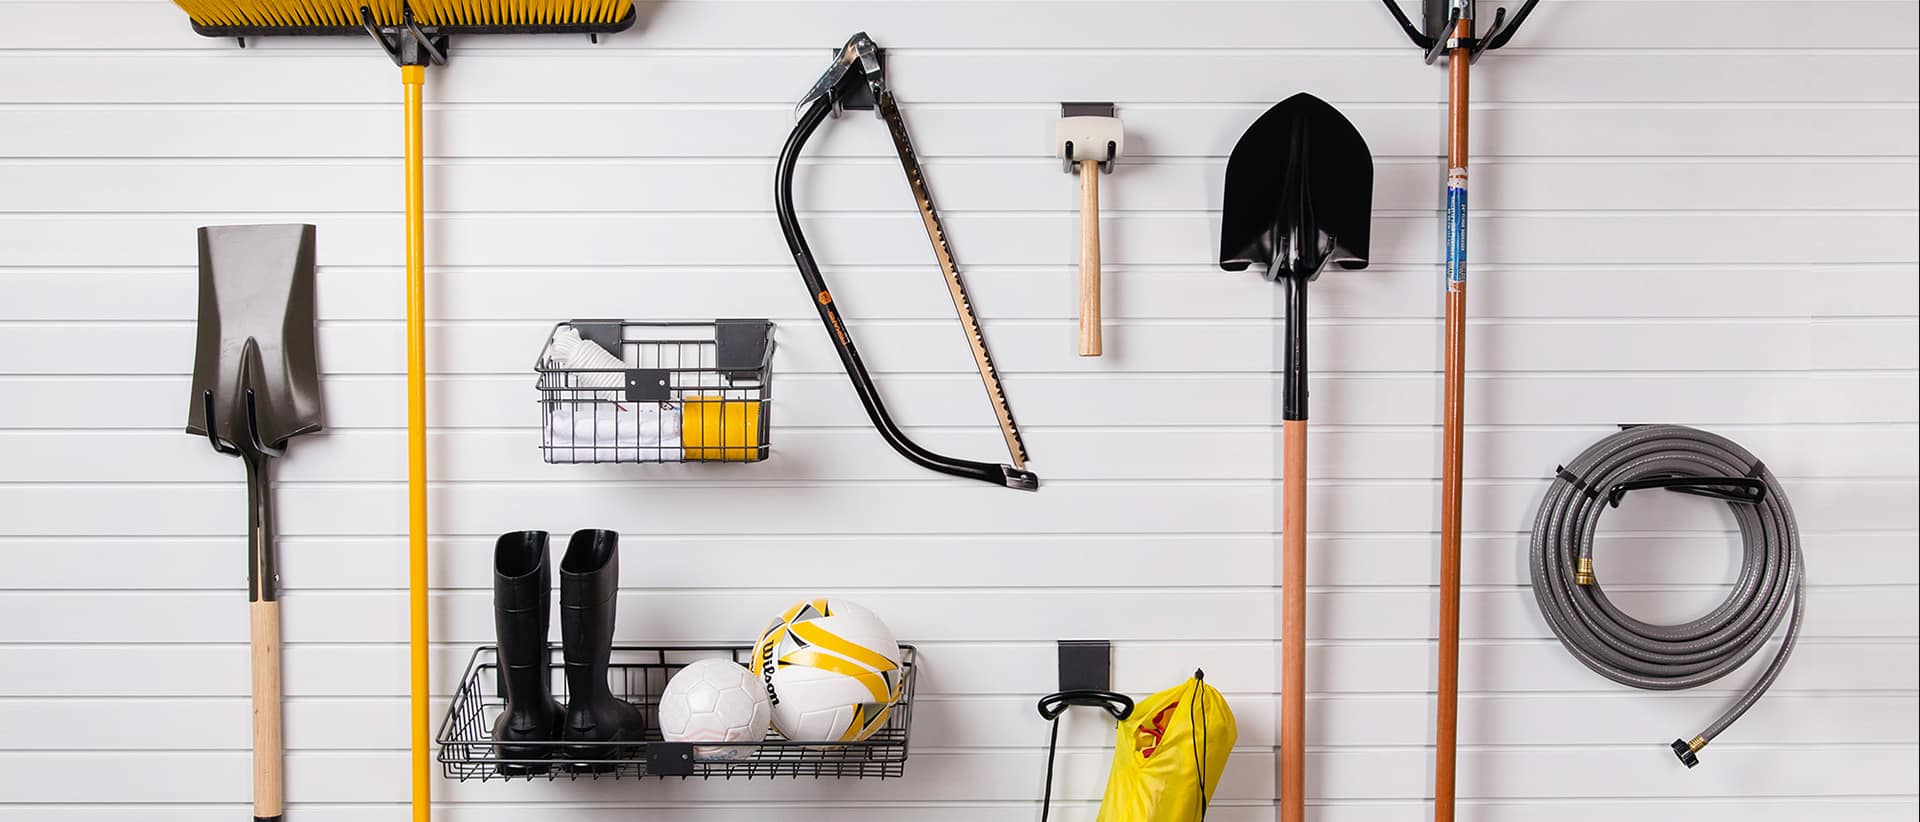
Maximizing Vertical Space
Use the height of your garage walls to store more tools. Hooks, pegboards, and shelves keep tools off the floor. This clears space and makes cleaning easier.
| Storage Method | Best For | Benefit |
| Hooks | Large tools like shovels and brooms | Quick access and easy to rearrange |
| Pegboards | Hand tools and small power tools | Visible and organized display |
| Shelves | Toolboxes and containers | Stores bulky items safely |
Incorporating Work Surfaces
Adding work surfaces near your tool wall helps with repairs and projects. A sturdy bench gives you space to place tools and materials. It keeps your workflow smooth.
- Choose a surface height that fits your comfort
- Use durable materials like hardwood or metal
- Add storage drawers under the surface
- Keep the area well-lit for safety
Credit: www.hellogarage.com
Installation Steps
Setting up a garage tool wall helps keep your tools organized and easy to find. This guide covers the basic steps for installing your tool wall.
Follow these steps carefully to create a strong and functional tool storage area in your garage.
Preparing The Wall Surface
Start by clearing the wall where you want to install the tool wall. Remove any nails, hooks, or debris that might be on the surface.
Make sure the wall is clean and dry. If the wall has holes or cracks, fill them with spackle and sand smooth. A flat surface helps panels and pegboards stick well and sit flush.
Mounting Panels And Pegboards
Choose strong panels or pegboards that will hold the weight of your tools. Use a stud finder to locate studs behind the wall for secure mounting.
- Mark the stud locations on the wall with a pencil.
- Hold the panel or pegboard against the wall and align it with the marks.
- Drill pilot holes through the panel into the studs.
- Use screws to attach the panel firmly to the wall.
- Check that the panel is level before tightening all screws.
Arranging Hooks And Holders
Plan where to place hooks and holders based on the size and type of your tools. Group similar tools together for easy access.
| Tool Type | Suggested Hook/Holding Method | Placement Tips |
|---|---|---|
| Hand Tools | Small pegboard hooks | Place at eye level for quick reach |
| Power Tools | Heavy-duty hooks or shelves | Lower positions for better support |
| Garden Tools | Long hooks or brackets | Keep grouped by size and use |
| Fasteners and Small Items | Bins or small containers | Attach bins to panel near workbench |
Attach hooks securely to the pegboard holes. Test the weight support before hanging heavy tools.
Maintenance And Upkeep
Keeping your garage tool wall neat helps you find tools fast. Proper care stops damage and saves money.
Regular checks and cleaning keep the wall strong. You can update the layout to fit your needs better.
Regular Cleaning Tips
Dust and dirt can build up on your tool wall. Clean it often to keep tools in good shape and easy to use.
Use a soft cloth or brush to remove dust. Avoid harsh chemicals that could damage the wall or tools.
- Wipe surfaces weekly with a dry or slightly damp cloth
- Use compressed air to blow out dust from small crevices
- Clean tools before putting them back on the wall
- Check for rust or dirt buildup and clean promptly
Updating Tool Layout
Change your tool layout if your needs change. This keeps the wall organized and tools easy to reach.
Place often-used tools at eye level. Group similar tools together for quick access.
- Move heavy tools to lower hooks for safety
- Label tool spots to keep order
- Remove tools you no longer use to free space
- Add new holders or shelves if needed
Safety Considerations
Keep your tool wall safe by checking hooks and mounts often. Loose hooks can cause tools to fall.
Store sharp or heavy tools carefully. Use covers or guards if needed to avoid accidents.
- Inspect hooks and brackets monthly for damage
- Tighten any loose screws or fasteners
- Place sharp tools out of reach of children
- Use safety locks for dangerous tools
Creative Storage Solutions
Setting up a garage tool wall helps keep your workspace neat. It also saves time when you need your tools.
Using creative storage ideas can make your garage more organized and efficient. This guide covers three ways to store your tools smartly.
Using Magnetic Strips
Magnetic strips hold metal tools on the wall. They keep tools visible and easy to grab. You can place strips at different heights for various tools.
Install magnetic strips near your workbench. This way, you can quickly grab screwdrivers, pliers, or wrenches without searching through drawers.
Adding Shelves And Bins
Shelves and bins store larger or odd-shaped tools. They also hold supplies like nails and screws. Choose shelves that fit your wall space and tool sizes.
- Use sturdy shelves for heavy tools
- Stack bins to save floor space
- Choose clear bins to see contents easily
- Place frequently used items on lower shelves
- Label bins for quick sorting
Labeling For Quick Access
Labeling helps find tools fast. Use a label maker or write on tape. Place labels on shelves, bins, and tool holders.
| Storage Type | Label Example |
| Magnetic Strip | Screwdrivers |
| Shelf | Power Tools |
| Bin | Nails & Screws |
| Drawer | Measuring Tools |

Credit: www.ramblingrenovators.ca
Frequently Asked Questions
What Tools Are Essential For A Garage Tool Wall?
Essential tools include hammers, screwdrivers, wrenches, pliers, and measuring tapes. These tools cover most DIY and repair tasks. Organize them by frequency of use for easy access and efficiency.
How Do I Choose The Right Wall For My Tool Setup?
Select a wall with enough space, good lighting, and easy access. Avoid damp or cluttered areas. Ensure it can support weight and allows for tool organization customization.
What Materials Work Best For Garage Tool Walls?
Pegboards, slat walls, and metal panels are popular. Pegboards are versatile and affordable. Slat walls offer sturdy hooks and shelves. Metal panels provide durability and a clean look.
How Can I Organize Tools Effectively On The Wall?
Group tools by type and size. Use labeled hooks, bins, and shelves. Keep frequently used tools at eye level. Maintain clear spacing to avoid clutter and enhance visibility.
Conclusion
Creating a garage tool wall helps keep your workspace neat and tidy. It saves time by making tools easy to find. You can customize it to fit your needs and space. Regularly check and update your wall to keep it efficient.
This simple step makes your projects smoother and more fun. Start organizing today and enjoy a clutter-free garage.
