Are you ready to tackle your plumbing project but unsure how to create strong, leak-proof copper joints? Learning to solder copper plumbing joints is a skill that can save you time, money, and stress.
This guide will walk you through every step, making the process simple and clear—even if you’ve never soldered before. By the end, you’ll have the confidence to handle your plumbing repairs or installations like a pro. Keep reading to unlock the secrets to reliable, durable copper joints that stand the test of time.
Tools And Materials Needed
Soldering copper plumbing joints needs the right tools and materials. Using proper items makes your work safer and stronger.
This guide covers the tools and materials you need before starting your soldering project.
Essential Soldering Tools
You need some basic tools to solder copper pipes correctly. These tools help you heat, clean, and join the pipes well.
- Soldering torch or propane torch for heating
- Pipe cutter to cut copper pipes cleanly
- Wire brush or sandpaper to clean pipe ends
- Heat-resistant gloves to protect your hands
- Fireproof cloth or heat shield for safety
- Flux brush to apply flux evenly
Choosing The Right Solder And Flux
Solder and flux are important for joining copper pipes. Pick ones made for plumbing use to ensure a tight seal.
Lead-free solder is safe for drinking water pipes. Flux cleans the pipe and helps the solder flow better.
- Use lead-free solder marked for plumbing
- Choose flux that is water-soluble and non-corrosive
- Apply flux evenly to cleaned pipe surfaces
Safety Equipment
Safety is very important when soldering copper pipes. Protect yourself from heat, fumes, and fire risks.
Wear safety gear and work in a well-ventilated area to avoid accidents and health problems.
- Heat-resistant gloves to protect hands
- Safety goggles to guard eyes from sparks
- Long sleeves and pants to protect skin
- Fire extinguisher nearby for emergencies
- Good ventilation or respirator to avoid fumes
Credit: www.oatey.com
Preparing Copper Pipes
Preparing copper pipes correctly is important for strong plumbing joints. This step helps the solder stick well and prevents leaks.
Clean and smooth pipes make the soldering process easier and safer. Use the right tools for best results.
Cutting Copper Pipes
Cut pipes straight to make tight joints. Use a pipe cutter for a clean cut. Avoid using saws that can leave rough edges.
Turn the pipe cutter around the pipe slowly. Tighten the cutter bit after each turn. Stop when the pipe is fully cut.
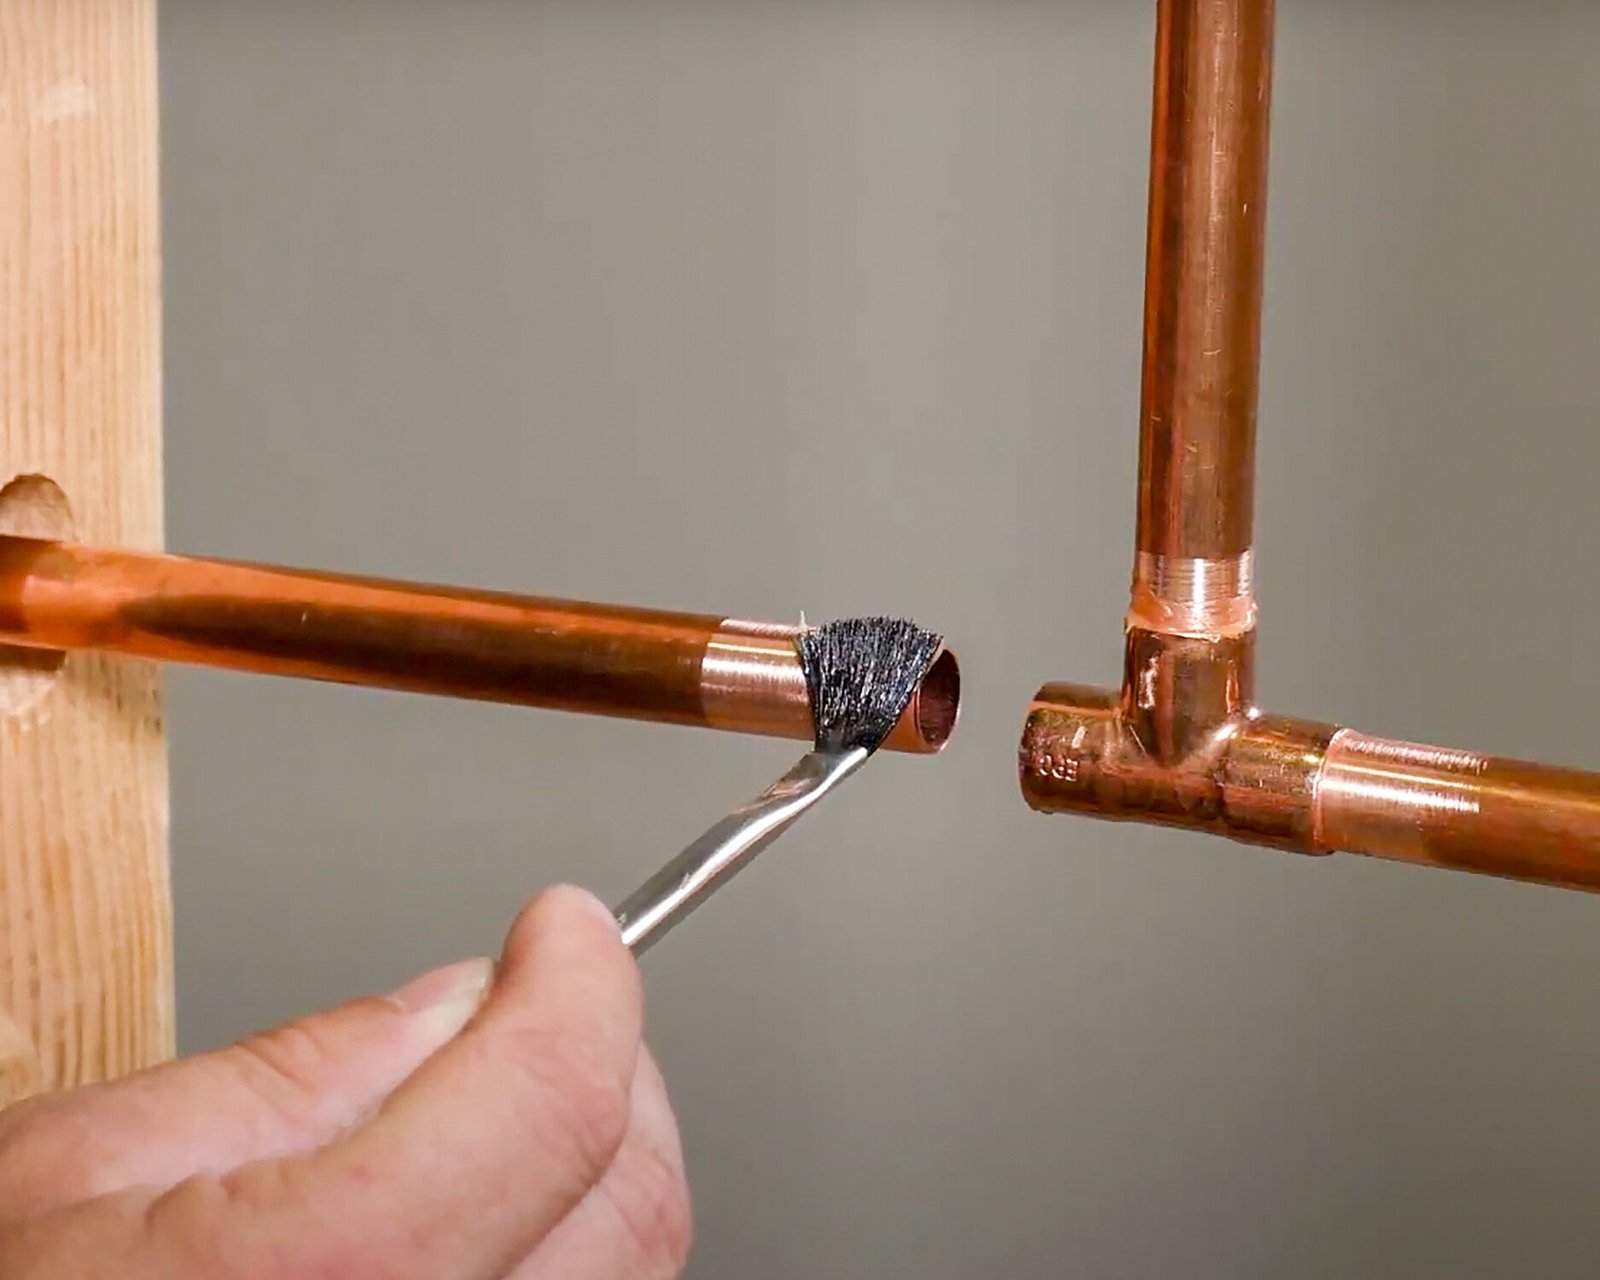
Cleaning And Deburring
Remove any dirt, oil, or oxidation from the pipe surface. Use a wire brush or sandpaper for cleaning. Pipes must shine before soldering.
After cutting, smooth the pipe’s inside edges. Use a deburring tool to remove sharp bits. This helps water flow and prevents damage to fittings.
- Use emery cloth or sandpaper on outside pipe surface
- Clean inside edge with a round file or deburring tool
- Wipe pipe with a clean cloth after sanding
Fitting Pipes Together
Fit pipes tightly into fittings before soldering. Pipes should slide in easily but not be loose. Check the fit for proper alignment.
Mark the pipe and fitting to keep alignment during soldering. This helps avoid movement that can cause weak joints or leaks.
Applying Flux Correctly
Applying flux is an important step in soldering copper plumbing joints. It helps the solder flow and creates a strong connection.
Using flux the right way saves time and prevents leaks in your plumbing system.
Purpose Of Flux
Flux cleans the metal surfaces before soldering. It removes dirt, oil, and oxidation that stop solder from sticking.
Flux also helps solder flow smoothly by keeping the joint free of air and moisture.
- Prevents oxidation during heating
- Improves solder flow and bonding
- Cleans metal surfaces for better joints
- Protects joint from air and moisture
Proper Application Techniques
Apply flux evenly on the cleaned copper surfaces. Use a brush or applicator made for flux.
Do not use too much flux. Excess flux can cause weak joints and messy soldering.
- Clean pipes and fittings before applying flux
- Brush a thin, even layer on both surfaces
- Cover only the area where solder will flow
- Remove excess flux with a cloth after soldering
Heating The Joint
Heating the copper plumbing joint is a key step in soldering. It helps the solder melt and flow into the connection.
Proper heat ensures a strong and leak-free joint. Too much or too little heat can cause problems.
Selecting The Heat Source
Choose a heat source that fits the job size and location. Common heat sources include propane torches and MAPP gas torches.
Propane torches work well for small to medium pipes. MAPP gas torches burn hotter and are good for larger pipes.
- Propane torch: affordable and easy to find
- MAPP gas torch: hotter flame, faster heating
- Butane torch: good for small or delicate work
- Oxy-acetylene torch: usually for very large pipes
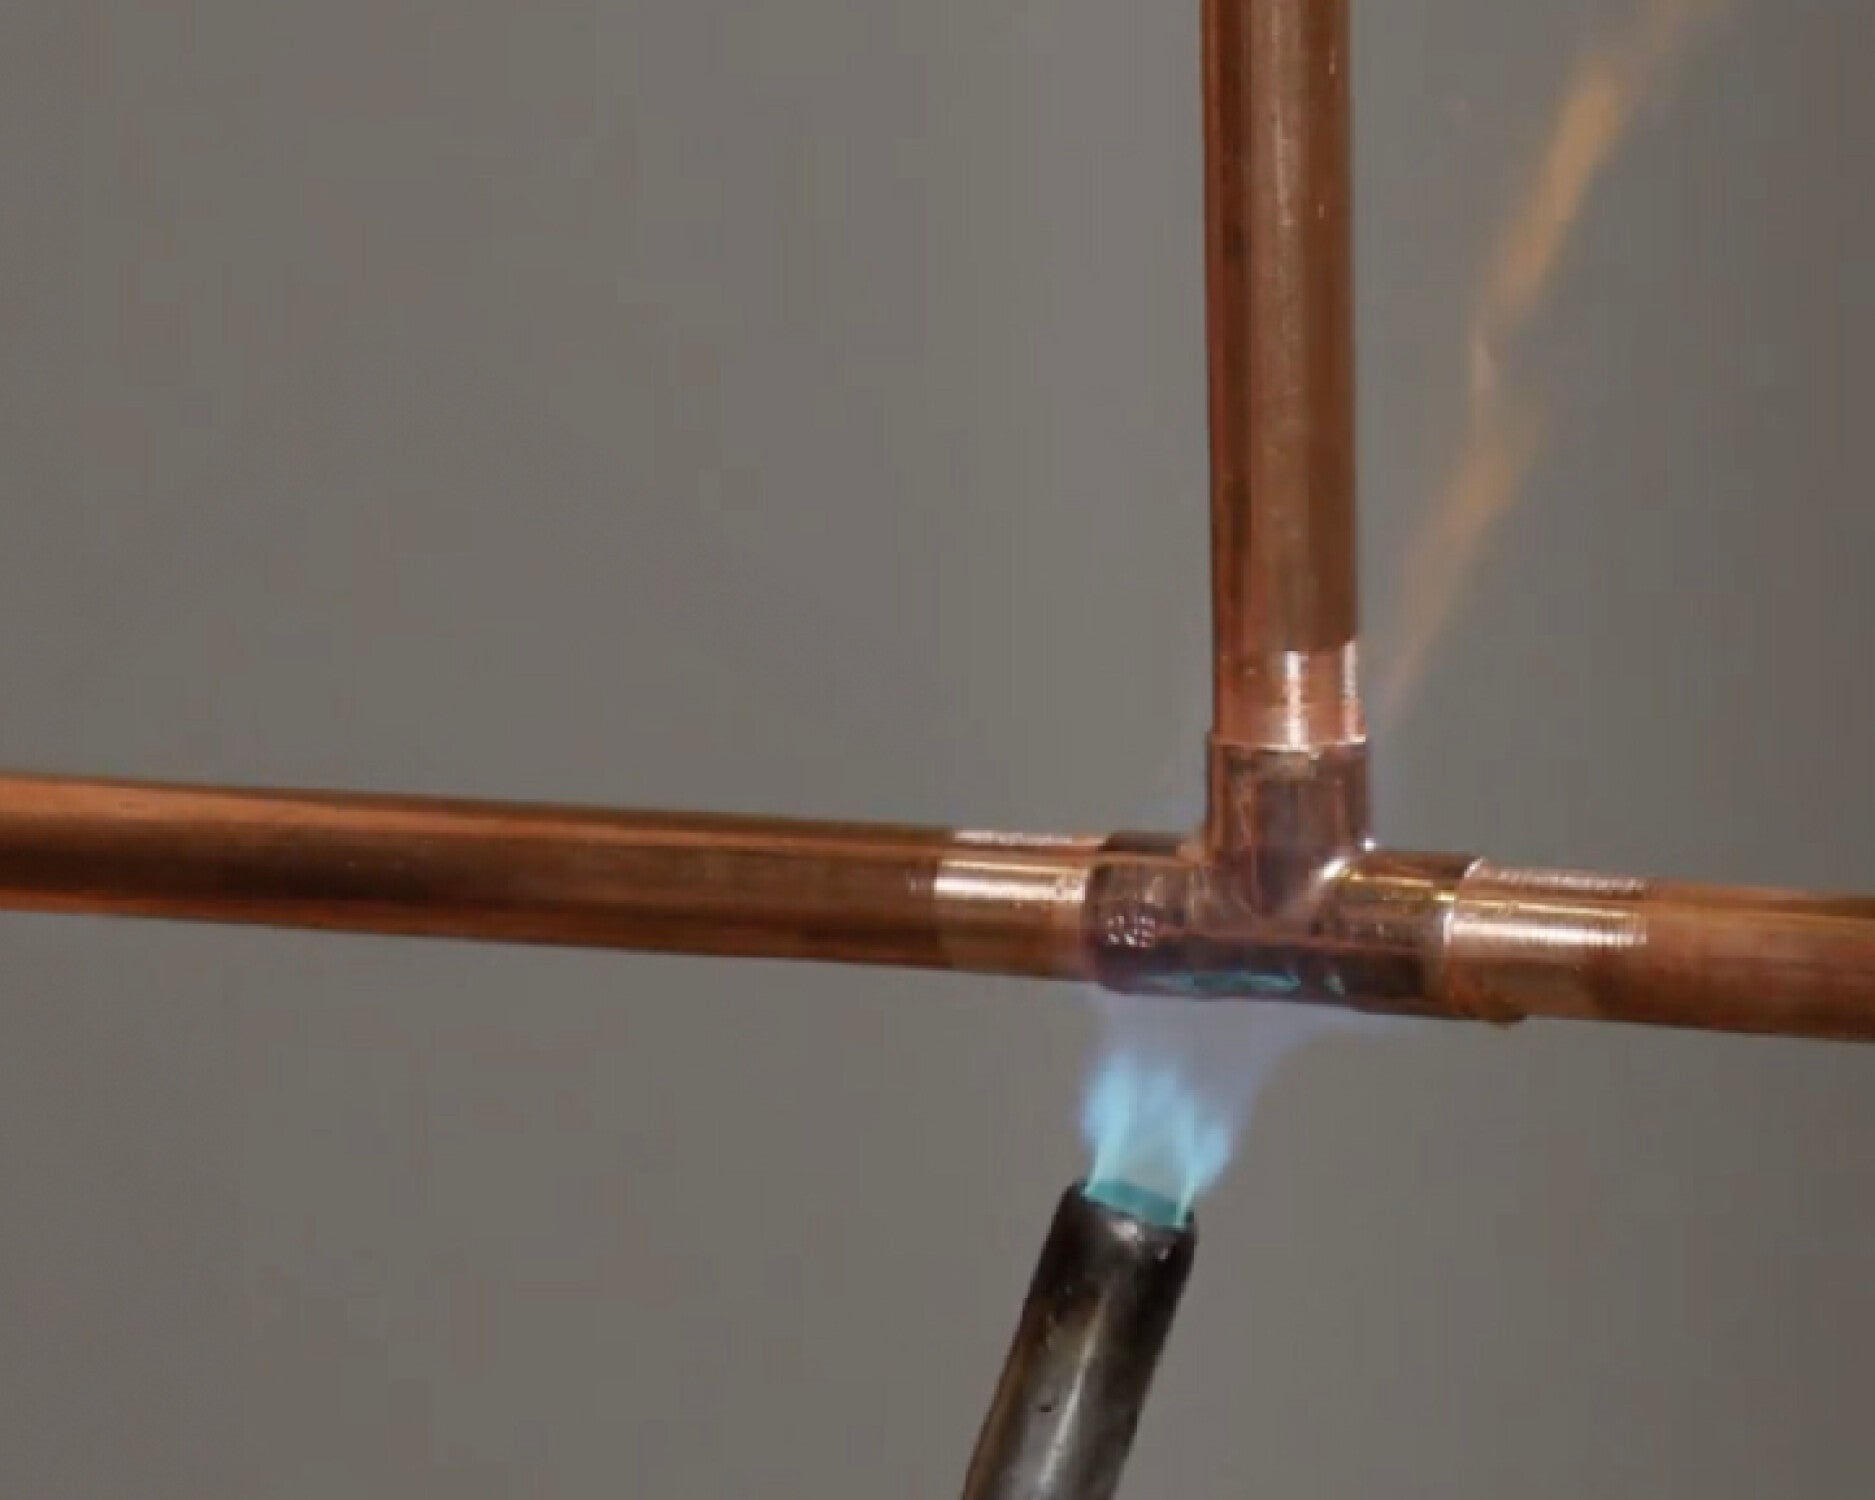
Heating Tips For Even Heat Distribution
Heat the joint evenly by moving the flame around the pipe and fitting. Avoid heating one spot too long.
Keep the flame focused on the fitting, not the solder. The fitting should get hot enough to melt solder on contact.
- Start heating from the side opposite the solder entry point
- Move the flame in a circular motion around the joint
- Watch for a slight change in color on the copper as it heats
- Touch solder to the joint to check if it melts easily
Applying Solder
Applying solder to copper plumbing joints is a key skill for strong, leak-free connections. The solder melts and fills the joint, sealing the pipes together.
Proper technique ensures the solder flows evenly and bonds well. This guide explains how to feed solder into the joint and what a good joint looks like.
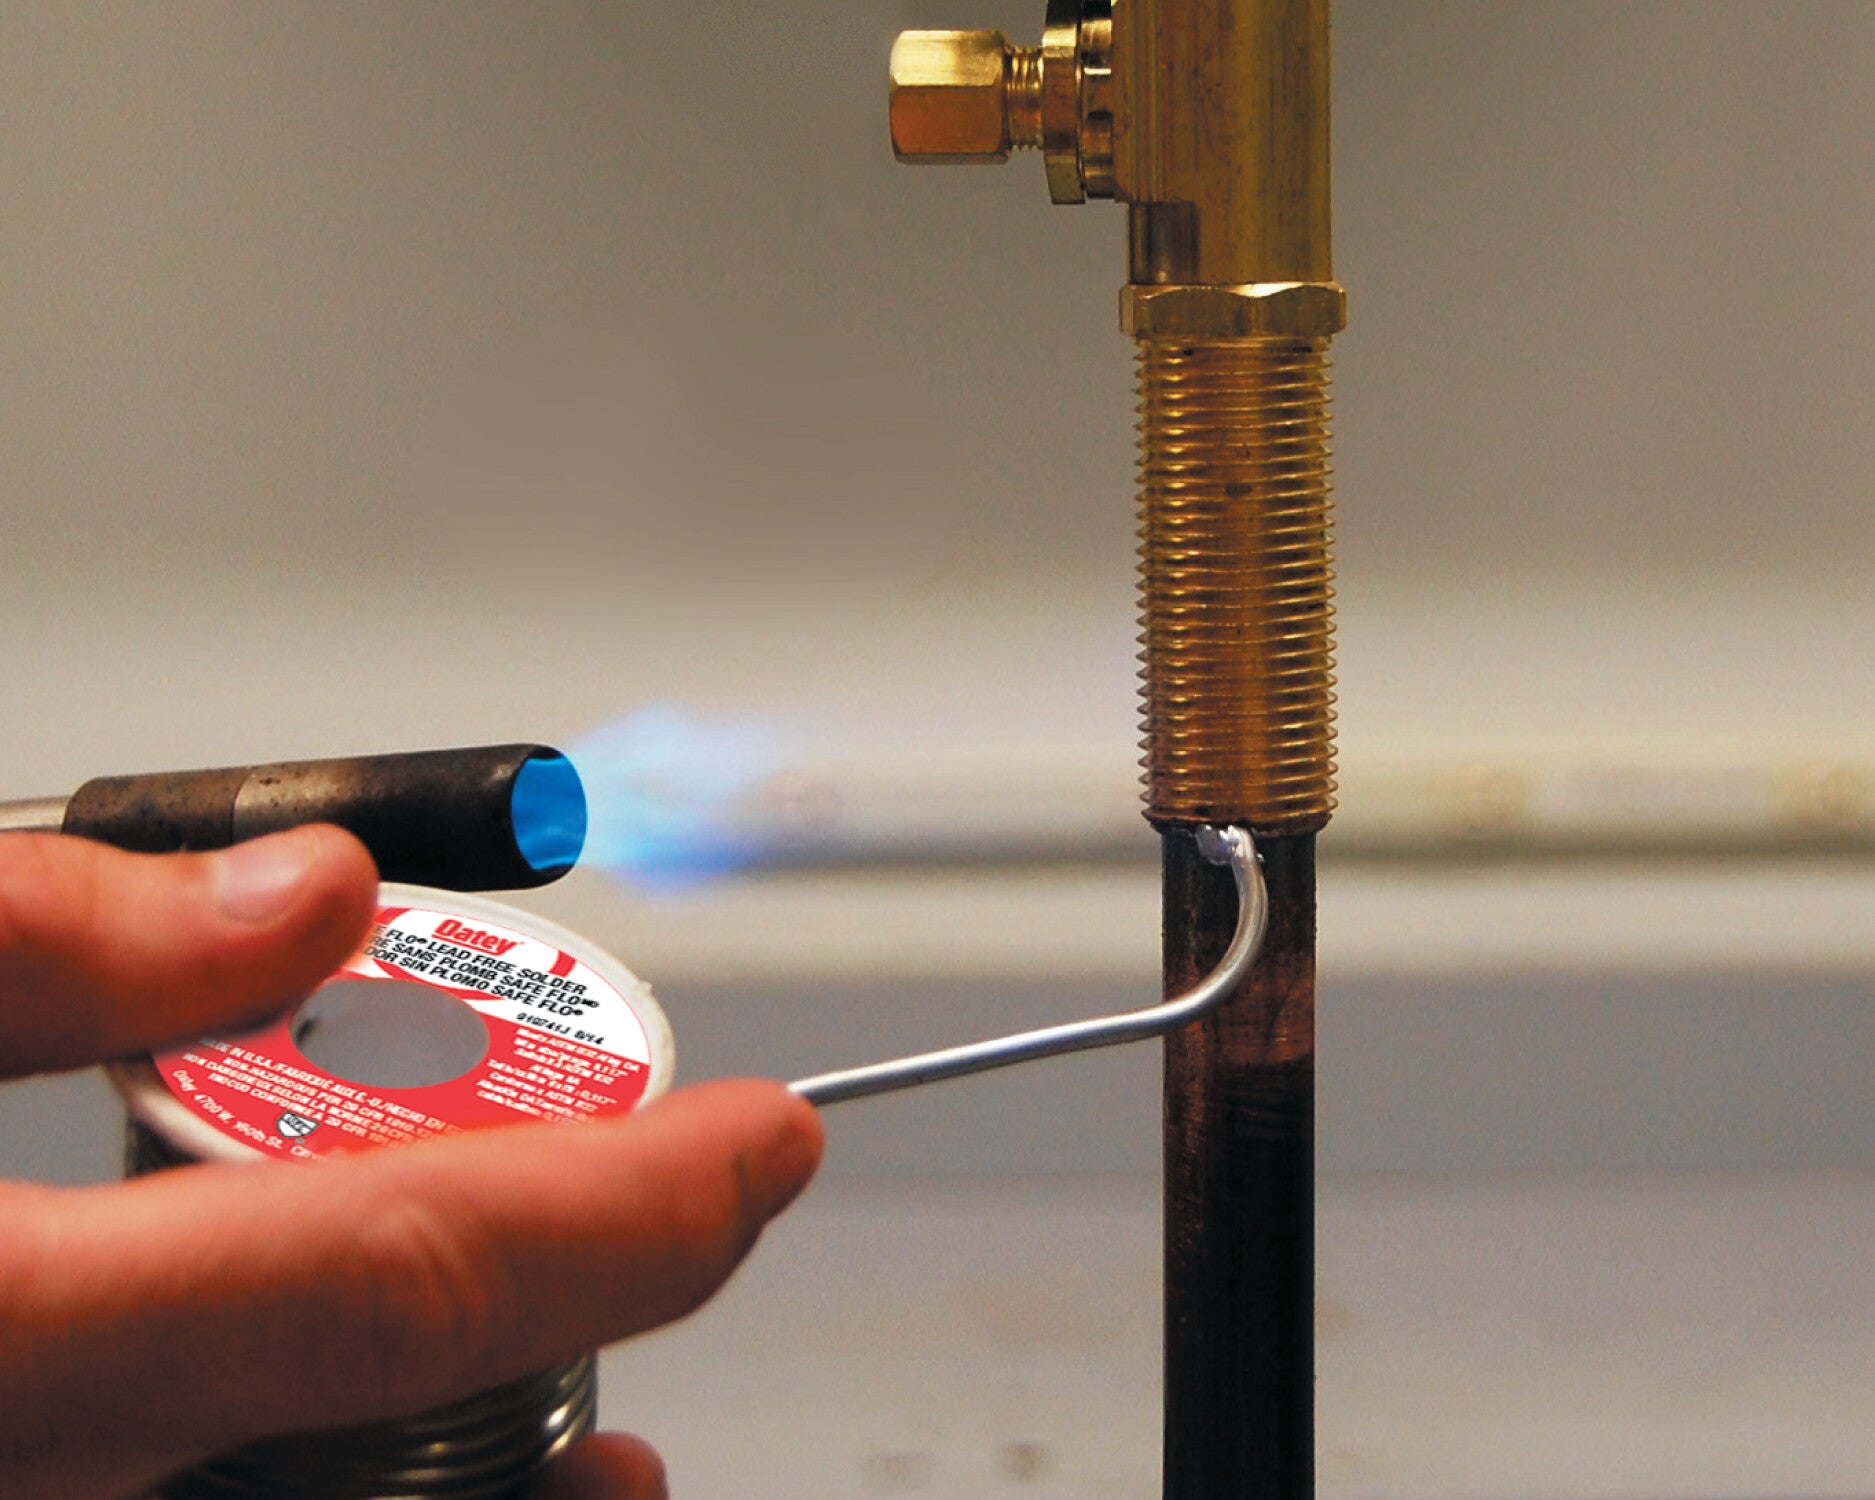
How To Feed Solder Into The Joint
Heat the joint evenly with a torch until the copper is hot enough to melt solder. Touch the solder wire to the joint, not the flame.
The solder will melt and flow into the joint by capillary action. Keep feeding solder until it fills the gap all around the pipe.
- Heat the joint evenly before adding solder
- Touch solder to the joint, not the flame
- Feed solder steadily for even flow
- Stop when solder appears around the joint
Signs Of A Good Solder Joint
A good solder joint looks smooth and shiny without gaps or lumps. The solder should cover the entire joint evenly.
It should be strong and leak-proof after cooling. A dull or cracked joint often means a poor seal.
- Shiny, smooth surface
- Solder covers entire joint
- No cracks or gaps visible
- Joint feels strong and solid

Credit: www.familyhandyman.com
Cooling And Cleaning The Joint
After soldering copper plumbing joints, you must let the joint cool down. Cooling helps the solder set firmly. Cleaning the joint removes any leftover flux. This keeps the pipe safe and strong.
Proper cooling and cleaning improve the joint’s durability. They prevent leaks and corrosion over time.
Allowing Proper Cooling Time
Let the soldered joint cool naturally. Do not touch or move the pipes while cooling. Moving the joint can cause weak connections.
Cooling usually takes a few minutes depending on pipe size and room temperature. Avoid using water or other cooling methods. Rapid cooling may cause cracks in the joint.
- Wait at least 5 minutes before handling the joint.
- Keep the pipes steady during cooling.
- Do not apply water to cool the joint.
Removing Excess Flux
After the joint cools, clean off any leftover flux. Flux can cause corrosion if left on the pipe. Use a damp cloth or brush for cleaning.
Make sure to remove all flux residue from the joint and nearby pipe areas. This helps keep the plumbing safe and leak-free.
- Use warm water and a cloth or brush.
- Wipe off all visible flux from the pipe.
- Dry the area completely after cleaning.
Common Mistakes To Avoid
Soldering copper plumbing joints needs careful work. Mistakes can cause leaks or damage.
Knowing common errors helps you do the job right the first time. Avoid these to get strong joints.
Overheating The Pipe
Heating copper too much can weaken the pipe or burn the solder. It makes the joint fail later.
- Use a moderate flame size to control heat
- Move the torch evenly around the pipe
- Watch the solder carefully as it melts
- Stop heating as soon as solder flows into the joint
Insufficient Cleaning
Dirty pipes stop solder from sticking well. Clean both pipe and fitting before soldering.
| Cleaning Tools | Purpose |
| Emery cloth or sandpaper | Remove tarnish and dirt |
| Wire brush | Clean inside fittings |
| Flux | Remove oxides and help solder flow |
Using The Wrong Solder
Not all solder fits plumbing needs. Use only lead-free solder made for copper pipes.
Wrong solder types can cause health risks or weak joints. Check labels to confirm:
- Use lead-free solder marked “for potable water”
- Avoid electrical solder or acid-core solder
- Store solder in a dry place to keep quality
Troubleshooting Leaks
Leaks in copper plumbing joints can cause water damage and waste. Finding the source and fixing it quickly is important.
This guide helps you spot leaks and shows how to fix and re-solder joints correctly to stop leaks.
Identifying Leak Sources
Look closely at the copper joints to find any wet spots or corrosion. Leaks often appear as green or white stains around joints.
- Dry the area and watch for water drips.
- Check for loose fittings or cracks in the pipe.
- Use a flashlight to see hidden leaks.
- Listen for hissing sounds when water is on.
- Check pressure in the pipes to spot weak joints.
Fixing And Re-soldering Techniques
Fix leaks by cleaning the joint, applying flux, and heating the pipe evenly. Use solder to seal the joint well.
| Task | Details |
| Clean Joint | Remove old solder and dirt with sandpaper or a wire brush. |
| Apply Flux | Coat the joint with flux to help solder flow and stick. |
| Heat Joint | Use a torch to heat the pipe evenly until flux sizzles. |
| Add Solder | Touch solder to the joint and let it melt into the gap. |
| Cool and Test | Let the joint cool naturally. Turn on water and check for leaks. |
Maintenance Tips For Copper Plumbing
Copper plumbing needs regular care to last long. Proper maintenance stops leaks and damage. These tips help keep your pipes strong.
Check your copper pipes often. Spotting problems early saves you time and money. Use simple steps to protect your plumbing.
Regular Inspection
Inspect pipes for cracks, leaks, or green spots. Look under sinks and near water heaters. Early fixes prevent big repairs later.
- Check joints and fittings for signs of moisture
- Listen for dripping sounds or water running
- Feel pipes for unusual cold or wet spots
- Look for corrosion or discoloration on pipes
- Test water pressure to detect hidden leaks
Preventing Corrosion
Corrosion can weaken copper pipes. Protect your plumbing by reducing water acidity and avoiding contact with metals that cause rust.
| Corrosion Cause | Prevention Method |
| High water acidity | Use water neutralizers or filters |
| Contact with steel or iron | Use dielectric fittings to separate metals |
| Standing water | Keep water moving with regular use |
| Soil chemicals | Apply protective pipe coatings underground |
Credit: www.oatey.com
Frequently Asked Questions
What Tools Are Essential For Soldering Copper Plumbing Joints?
Essential tools include a propane torch, solder, flux, emery cloth, and a wire brush. These help clean, heat, and join copper pipes securely and effectively.
How Do You Prepare Copper Pipes Before Soldering?
Clean the pipe ends with emery cloth or a wire brush. Apply flux evenly to ensure strong adhesion and prevent oxidation during soldering.
What Temperature Is Ideal For Soldering Copper Joints?
Heat the joint evenly until the flux sizzles and solder melts on contact. This typically occurs around 400-600°F (204-316°C).
How Long Should You Heat Copper Joints For Soldering?
Heat the joint just enough to melt the solder, usually 10-20 seconds. Avoid overheating to prevent pipe damage or weak joints.
Conclusion
Soldering copper plumbing joints is a valuable skill. It’s simple with practice. Gather the right tools and materials first. Clean surfaces ensure strong connections. Heat the joint carefully for best results. Use lead-free solder for safety. Work in a well-ventilated area.
Patience and care prevent mistakes. Inspect your work for leaks. Make adjustments if needed. With these steps, tackle plumbing tasks confidently. Enhance your home repair skills efficiently. Keep practicing to improve your technique. Happy soldering!
