Are you struggling to get perfect threads on your pipes every time? Threading pipes accurately can be tricky, but it’s essential for strong, leak-free connections.
Whether you’re a beginner or want to sharpen your skills, this guide will give you clear, step-by-step tips to help you thread pipes like a pro. Keep reading, and you’ll learn how to avoid common mistakes, save time, and make your plumbing projects smoother and more reliable.
Your next pipe threading job will be easier than ever.
Tools Needed For Pipe Threading
Threading pipes requires the right tools to get clean and accurate threads. Using proper equipment saves time and improves the quality of your work.
This guide covers the main tools you need for pipe threading. It explains how to choose threading machines, essential hand tools, and safety gear.
Choosing The Right Threading Machine
Select a threading machine that fits the size and type of pipes you work with. Electric threading machines are fast and good for regular jobs. Manual machines work well for small projects or where power is limited.
- Check the pipe size range the machine supports
- Look for machines with easy die changes
- Choose machines with adjustable speeds
- Consider portability if you work on different sites
- Ensure the machine has a sturdy build
Essential Hand Tools
Hand tools help prepare pipes and finish threads. Use the right tools to avoid damage and get neat threads every time.
| Tool | Use | Notes |
| Pipe Cutter | Cut pipes cleanly | Choose sharp blades for smooth cuts |
| Reamer | Remove burrs inside the pipe | Prepares the pipe for threading |
| Threading Dies | Cut threads on pipe ends | Match die size to pipe diameter |
| Pipe Wrench | Hold and turn pipes | Use adjustable wrench for different sizes |
Safety Gear Essentials
Wear safety gear to protect yourself during threading. Pipes and machines can cause injuries without proper protection.
- Safety glasses to protect your eyes from metal shavings
- Work gloves to protect hands from cuts and sharp edges
- Hearing protection if using loud threading machines
- Sturdy footwear to protect feet from heavy pipes
- Long sleeves to shield skin from sparks and debris
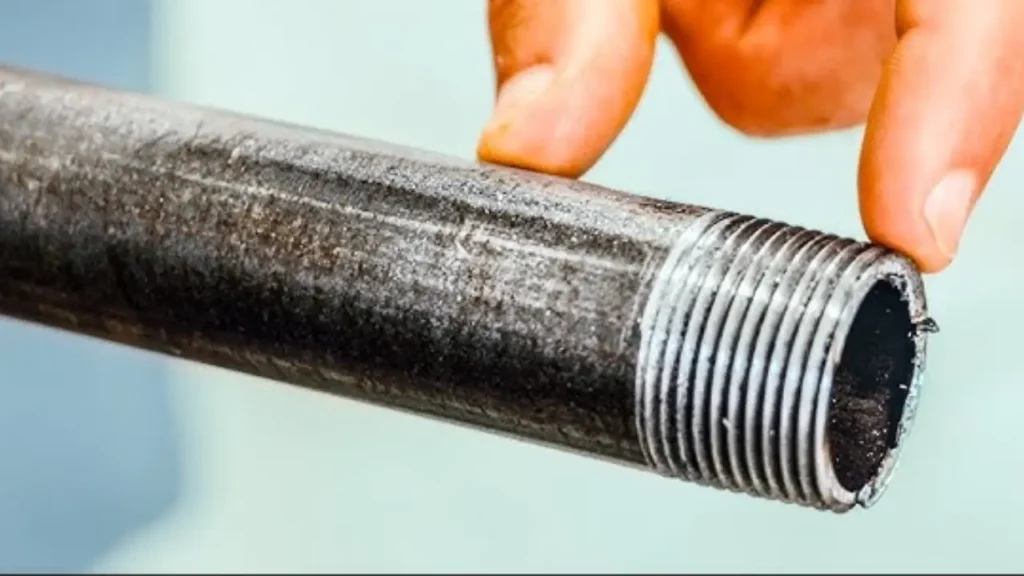
Credit: dfhydraulics.com
Preparing Pipes For Threading
Preparing pipes before threading is important to get clean, accurate threads. Good preparation helps avoid leaks and weak joints.
This guide covers measuring and marking, cleaning and deburring, and securing pipes properly for threading.
Measuring And Marking Pipes
Measure the pipe length carefully using a tape measure. Mark the pipe where the thread will start with a fine-tip marker or pencil. Accurate marks guide the threading tool for straight cuts.
- Use a tape measure to find the exact length needed.
- Mark the start point of the thread clearly.
- Double-check measurements before cutting or threading.
Cleaning And Deburring
Cleaning the pipe removes dirt and oils that can affect threading. Deburring smooths sharp edges inside and outside the pipe to prevent damage to the threading tool and ensure a good fit.
| Task | Tools Needed | Purpose |
|---|---|---|
| Cleaning | Rag, solvent | Remove dirt, oil, and rust |
| Deburring Outside Edge | File, deburring tool | Smooth sharp edges |
| Deburring Inside Edge | Reamer, deburring tool | Prevent thread damage |
Securing Pipes Properly
Hold the pipe firmly in a vise to keep it still during threading. Use soft jaws or protective covers to avoid damaging the pipe surface. Proper securing ensures even thread cutting and safety.
- Place pipe in a pipe vise or clamp.
- Use soft jaws or padding to protect the pipe.
- Check the pipe is tight and will not move.
Threading Techniques
Threading pipes is a skill that needs care and attention. Using the right techniques helps create strong, clean threads.
This guide covers key threading steps to help you get accurate results every time.
Aligning The Threading Die
Start by placing the threading die square to the pipe end. Proper alignment prevents crooked threads.
Hold the die firmly and check it from different angles before you begin cutting.
- Use a die holder to keep the die steady.
- Check the die is centered on the pipe edge.
- Adjust if the die tilts or shifts.
Applying Cutting Oil
Cutting oil reduces friction and heat during threading. It helps the die cut smoothly and lasts longer.
Apply oil evenly on the pipe end and the threading die before you start cutting.
- Use oil designed for metal cutting.
- Reapply oil often during threading.
- Keep the work area clean from dirt and debris.
Maintaining Consistent Pressure
Apply steady pressure while turning the die. Uneven pressure can cause poor thread shape.
Turn the die slowly and keep the force even to cut clean threads without damage.
- Do not force the die too hard.
- Pause occasionally to clear metal shavings.
- Keep the threading speed steady.
Ensuring Thread Accuracy
Threading pipes needs careful attention to get the right fit. Accurate threads prevent leaks and ensure strong connections.
Use proper tools and techniques to check thread pitch and depth. This helps avoid mistakes and saves time.
Checking Thread Pitch And Depth
Thread pitch means the distance between thread peaks. Thread depth is how deep the threads cut into the pipe. Both must match the pipe’s specifications.
Use a pitch gauge to measure thread pitch. A depth gauge checks how deep the threads are. If threads are too shallow or too deep, connections can fail.
Using Thread Gauges
Thread gauges help check if threads are cut correctly. They come in different types for internal and external threads.
- Match the gauge size to the pipe thread size.
- Insert the gauge carefully without forcing it.
- Look for smooth fit without gaps or tight spots.
- Replace worn gauges to keep measurements accurate.
Common Threading Errors To Avoid
| Error | Cause | Effect |
|---|---|---|
| Wrong thread pitch | Using incorrect gauge or tool | Loose or tight fit, leaks |
| Too shallow threads | Insufficient cutting depth | Weak connection, risk of stripping |
| Thread damage | Improper handling or tools | Poor sealing, pipe failure |
| Cross-threading | Misaligned threading start | Thread deformation, hard to connect |
Post-threading Steps
After threading pipes, it is important to follow certain steps. These steps help ensure a secure and leak-free connection.
Careful work after threading saves time and prevents problems later. This guide covers cleaning, sealing, and testing threads.
Cleaning Threads
Clean the threads to remove metal shavings and dirt. Use a wire brush or cloth for this task.
Cleaning helps the threads fit better and prevents damage. Make sure the threads are dry before moving on.
Applying Thread Sealant
Apply thread sealant to prevent leaks. Use a suitable pipe thread compound or Teflon tape.
Wrap tape clockwise around the threads three to four times. Spread sealant evenly if using paste.
- Do not apply too much sealant
- Avoid sealant on the pipe end
- Sealant must cover all threads
Testing Thread Fit
Check the fit of the threaded pipe by hand-tightening first. It should turn smoothly without cross-threading.
Use a wrench to tighten the pipe to the recommended torque. Test for leaks by running water or air through the pipe.
- Look for leaks around the threads
- Tighten more if needed, but avoid overtightening
- Fix leaks before final use

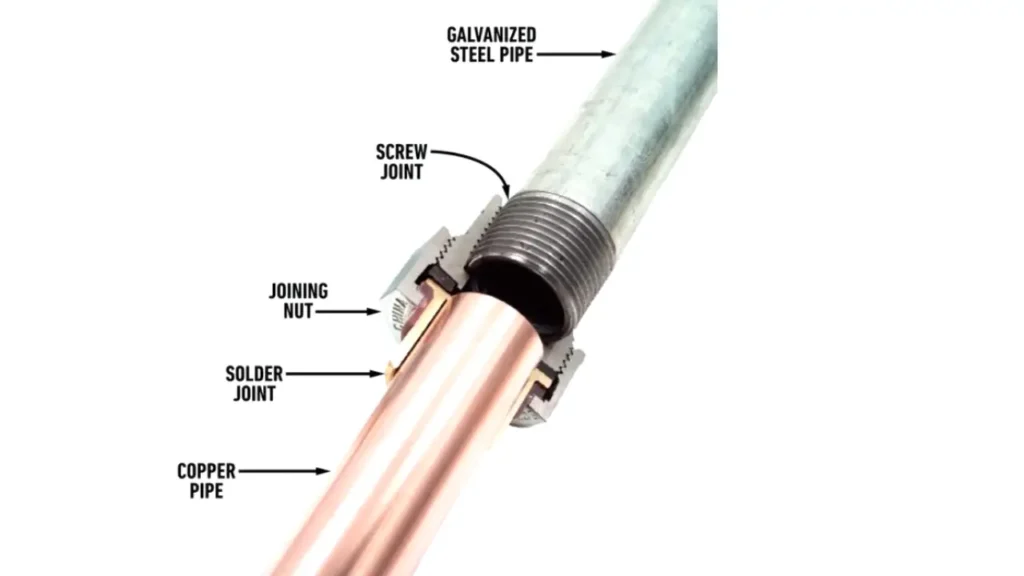
Credit: procamlock.com
Troubleshooting Threading Issues
Threading pipes correctly is important for a strong connection. Sometimes problems happen during threading. These issues can cause leaks or weak joints.
This guide helps you fix common threading problems. Use these tips to make your pipe threads fit well and last long.
Fixing Cross-threading
Cross-threading happens when threads do not line up properly. This can damage the pipe and the fitting. It causes leaks and weak joints.
To fix cross-threading, start threading slowly by hand. Make sure the threads match before using tools. If you feel resistance, stop and realign.
- Clean threads before starting
- Use hand tools to begin threading
- Check thread direction and pitch
- Stop if threads feel tight or catch
- Reposition pipe and try again
Dealing With Damaged Threads
Damaged threads make it hard to join pipes tightly. Threads can be bent, worn, or cut wrong. This causes leaks and poor fit.
Use a thread file or die to repair threads. Remove any dirt or rust first. If damage is too bad, replace the pipe or fitting.
- Inspect threads for dents or wear
- Clean threads with wire brush
- Use a thread file to reshape threads
- Apply cutting oil before using a die
- Replace parts if repair is not possible
Adjusting Threading Equipment
Threading tools must be set correctly for good threads. Wrong settings cause poor thread shape or damage. Check your tools before starting.
Adjust the tool’s die head to fit the pipe size. Use the right speed and pressure. Regularly clean and maintain your equipment for best results.
- Match die size to pipe diameter
- Set correct cutting depth on die
- Operate threading machine at proper speed
- Keep threading tools clean and oiled
- Inspect tools for wear before use
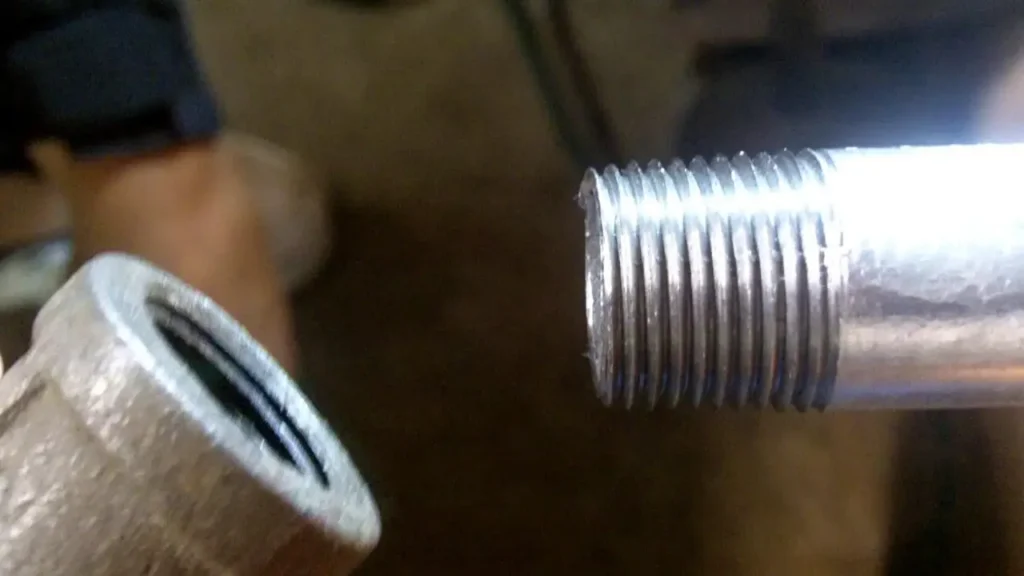
Credit: dfhydraulics.com
Frequently Asked Questions
What Tools Are Needed For Threading Pipes Accurately?
To thread pipes accurately, use a pipe cutter, reamer, threading die, and a pipe wrench. These tools ensure clean cuts, smooth threads, and proper fitting for secure connections.
How Do You Prepare Pipes Before Threading?
Before threading, cut the pipe squarely and remove burrs. Clean the pipe surface and apply cutting oil to reduce friction and prevent damage during threading.
What Is The Correct Technique For Threading Pipes?
Secure the pipe firmly, align the die properly, and turn it steadily clockwise. Apply consistent pressure and use cutting oil to achieve clean, precise threads without damaging the pipe.
How Can You Avoid Common Threading Mistakes?
Avoid uneven pressure, misalignment, and skipping lubrication. Always use sharp dies, maintain steady speed, and inspect threads regularly to ensure accuracy and prevent leaks.
Conclusion
Threading pipes accurately ensures a solid plumbing setup. It reduces leaks and enhances efficiency. Proper alignment is crucial for this task. Use the right tools for clean and precise threads. Practice makes perfect; don’t rush the process. Always double-check your work for any mistakes.
Invest in quality pipe materials. It ensures longevity and reliability. This guide helps build your threading skills. Keep learning and improving your technique. Your efforts will pay off with reliable results. Happy threading!