
Ever looked at an old piece of furniture and thought about giving it a fresh new look? A belt sander might just be your best friend for this task.
Imagine transforming a worn-out table or a scratched-up chair into a stunning centerpiece for your home. With the right guidance, you’ll discover how easy and satisfying furniture projects can be. This guide will show you the ins and outs of using a belt sander, a tool that not only saves time but also gives your projects a professional finish.
Dive in to learn how this powerful tool can elevate your DIY skills, and turn your creative visions into reality. Don’t let those old pieces go to waste—grab your sander and let’s get started!
Choosing The Right Belt Sander
A belt sander is a useful tool for furniture projects. It helps smooth wood fast and evenly. Picking the right belt sander makes your work easier and better.
There are different belt sanders. Each type suits different tasks. Knowing the key features helps you choose the best one for your needs.
Types Of Belt Sanders
There are three main types of belt sanders. Handheld, stationary, and edge sanders. Handheld models are easy to move around. Stationary sanders stay in one place for big jobs. Edge sanders work well on furniture corners.
- Handheld belt sanders:Portable and good for general sanding.
- Stationary belt sanders:Fixed machines for heavy sanding tasks.
- Edge belt sanders:Designed for sanding edges and tight spaces.
Key Features To Consider
Look at the size of the belt first. Common sizes are 3×18 inches or 4×24 inches. A bigger belt covers more area but may be harder to control. Check the dust collection system to keep your workspace clean.
Also, think about the weight and grip. A lighter sander is easier to use for a long time. A good grip helps you hold the tool firmly and safely.
- Belt size affects sanding area and control.
- Dust collection keeps the area clean.
- Weight influences comfort during use.
- Good grip improves handling and safety.
Power And Speed Options
Power affects how fast the sander removes material. Higher power works better on hard woods. Speed settings let you control how fast the belt moves. Variable speed helps with different wood types and finishes.
Choose a sander with enough power for your projects. Look for models with adjustable speed for more control and better results.
- Higher power removes wood quickly.
- Variable speed adjusts belt speed for different tasks.
- Lower speed avoids damaging soft woods.

Credit: www.familyhandyman.com
Essential Safety Tips
Using a belt sander can make furniture projects easier and faster. Safety is very important to avoid accidents and injuries.
This guide covers essential safety tips to protect yourself and your work while sanding.
Protective Gear To Wear
Wearing the right protective gear keeps you safe from dust and flying debris. Always prepare before you start sanding.
- Wear safety goggles to protect your eyes
- Use a dust mask or respirator to avoid breathing dust
- Wear ear protection to reduce noise damage
- Put on gloves to protect your hands from friction and splinters
- Wear long sleeves and pants to protect your skin
Safe Handling Practices
Handling the belt sander properly helps prevent accidents. Follow these simple rules to stay safe.
- Always unplug the sander before changing belts or cleaning
- Hold the sander firmly with both hands during use
- Keep your work area clean and well-lit
- Do not wear loose clothing or jewelry that can get caught
- Keep the power cord away from the sanding area
Avoiding Common Hazards
Know the common dangers when using a belt sander. Avoiding these keeps your project safe and smooth.
| Hazard | How to Avoid |
|---|---|
| Kickback | Hold sander firmly and never force it into the wood |
| Dust Inhalation | Use a dust mask and work in a ventilated area |
| Belt Breakage | Check the belt before use and replace worn belts |
| Electric Shock | Keep tools dry and check cords for damage |
Preparing Your Workspace
Using a belt sander safely and effectively needs a good workspace. This guide helps you prepare your area before starting your furniture project.
A well-prepared space keeps you safe and helps you work faster. Focus on stability, dust control, and good lighting.
Setting Up A Stable Work Area
Make sure your work surface does not move while sanding. A steady base gives you control and protects your furniture.
- Choose a strong workbench or table.
- Use clamps to hold your furniture in place.
- Clear the area of any tools or materials that may fall.
- Place non-slip mats under your workbench if it slides.
- Keep cords and wires away from the sanding path.
Dust Collection Solutions
Sanding creates a lot of dust. This dust can harm your lungs and make your workspace messy.
| Dust Control Method | Description | Benefits |
| Vacuum Attachment | Connects to the belt sander to suck dust. | Keeps dust out of the air and off surfaces. |
| Dust Mask | Wear a mask to protect your lungs. | Prevents inhaling fine dust particles. |
| Plastic Drop Cloths | Cover floors and nearby furniture. | Makes cleaning easier after sanding. |
| Air Purifier | Filters dust from the room air. | Improves overall air quality. |
Lighting And Ventilation
Good lighting helps you see the surface clearly. Proper ventilation keeps fresh air moving and removes dust.
Tips for Lighting and Ventilation:
- Use bright, white light close to your work area.
- Open windows or use fans to bring in fresh air.
- Avoid dusty air recirculating by using exhaust fans.
- Check that cords and tools do not block airflow.
Selecting The Right Sandpaper
Choosing the right sandpaper is key for a smooth finish on furniture projects. It helps remove old finishes and shapes the wood properly.
Different sandpapers have various grit sizes and materials. Knowing when to change sandpaper improves your work quality.
Grit Sizes Explained
Sandpaper grit size shows how coarse or fine the abrasive is. Lower numbers mean rougher paper. Higher numbers mean finer paper.
- Coarse grit (40-60): Removes old paint and rough wood.
- Medium grit (80-120): Smooths wood after coarse sanding.
- Fine grit (150-220): Prepares wood for finishing.
- Very fine grit (320+): Polishes and smooths finish.
Material Compatibility
Pick sandpaper that matches the furniture material. Wood, metal, and plastic need different abrasives for best results.
| Material | Recommended Sandpaper Type | Common Grit Range |
| Softwood | Aluminum Oxide | 80 – 180 |
| Hardwood | Garnet or Aluminum Oxide | 100 – 220 |
| Metal | Silicon Carbide | 120 – 400 |
| Plastic | Silicon Carbide | 150 – 320 |
When To Change Sandpaper
Change sandpaper if it no longer sands well or clogs with dust. Using worn paper can damage your furniture.
- If sanding feels less effective, swap the paper.
- Replace paper when it tears or wrinkles.
- Change if dust clogs and reduces sanding power.
- Switch grit size as your project moves to finer finishes.
Step-by-step Sanding Process
Using a belt sander can speed up your furniture projects. It helps smooth rough surfaces quickly and evenly.
Following the right steps ensures a clean finish and protects your wood pieces.
Initial Surface Preparation
Start by cleaning the wood surface from dust and dirt. Remove any nails or screws that may damage the sander.
Check for any rough spots or glue residue. These can affect your sanding results.
- Clear the workspace for safety and comfort
- Use a brush or cloth to wipe the surface
- Remove hardware that could catch the belt
- Fill holes or cracks with wood filler if needed
Using The Sander Correctly
Hold the sander firmly with both hands. Keep it flat on the wood and move it with steady pressure.
Always sand in the direction of the wood grain. This avoids scratches and uneven surfaces.
- Switch on the sander before touching the wood
- Move the sander slowly and evenly
- Do not press too hard to avoid gouges
- Overlap your passes to cover the entire area
- Change sanding belts when worn out
Finishing Techniques
After sanding, remove dust with a vacuum or tack cloth. This cleans the surface for finishing.
Check for any rough spots and lightly sand again with finer grit if needed.
- Use fine grit sandpaper for a smooth finish
- Apply wood conditioner before staining
- Seal the wood with varnish or paint
- Let each finish coat dry fully before the next
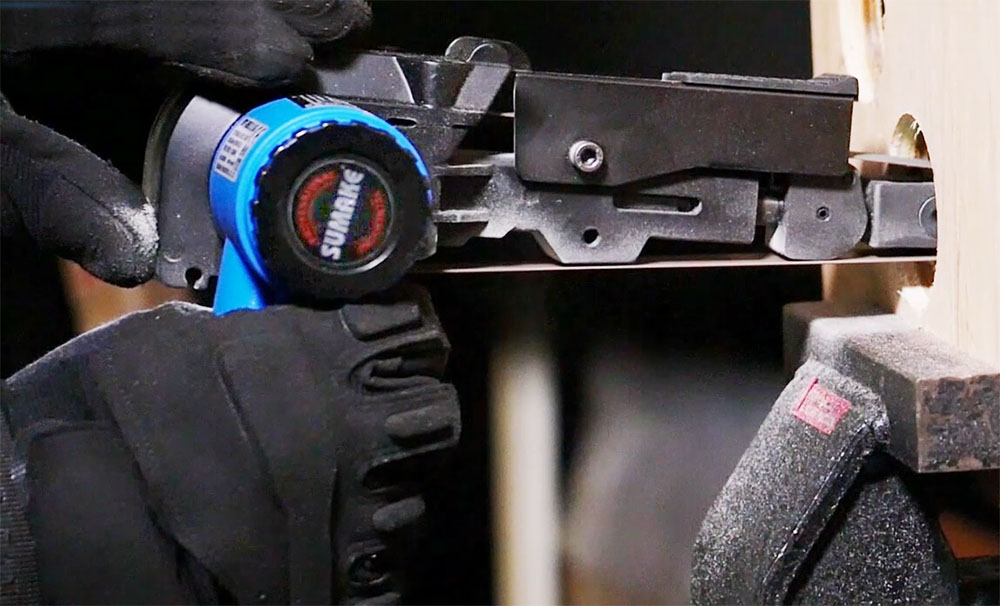
Credit: www.sumake.com
Common Mistakes To Avoid
Using a belt sander on furniture projects can save time and effort. Yet, some mistakes can damage your wood or ruin the finish.
Knowing which errors to avoid helps you get smooth, even results. Here are some common issues to watch out for.
Over-sanding Issues
Over-sanding removes too much wood and changes the shape of your piece. It can make edges round or surfaces uneven.
- Check your progress often to avoid sanding too much.
- Use finer grit sandpaper as you finish to protect the wood.
- Do not stay too long in one spot to prevent deep marks.
Uneven Pressure Problems
Applying uneven pressure makes some parts smooth and others rough. This causes an irregular surface that needs extra work.
| Pressure Level | Effect on Wood |
| Too High | Gouges and deep scratches |
| Too Low | Slow sanding, uneven finish |
| Uneven | Wavy or bumpy surface |
Ignoring Grain Direction
Sanding against the wood grain leaves scratch marks. These marks show up after staining or finishing.
- Always sand in the direction of the grain.
- Look closely at the wood pattern before starting.
- Change sandpaper grit gradually to avoid damage.
Maintaining Your Belt Sander
Keeping your belt sander in good shape helps it work well for a long time. Regular care prevents problems and saves money.
Simple maintenance tasks keep the tool safe and ready for your furniture projects. Learn how to clean, store, and fix your belt sander.
Cleaning And Storage Tips
Clean your belt sander after each use. Remove dust and debris from the belt and motor vents. Use a brush or compressed air to clear hard-to-reach spots.
Store the sander in a dry place. Keep it away from moisture and dirt. Cover it with a cloth or case to protect it from dust.
- Unplug the sander before cleaning
- Use a soft brush for dust removal
- Check the belt for stuck debris
- Keep the sander in a dry, cool area
- Cover the tool to avoid dust buildup
Replacing Belts
Change the sanding belt when it wears out or tears. Using a damaged belt lowers sanding quality and can harm the tool.
To replace the belt, first unplug the sander. Release the belt tension lever and slide off the old belt. Put the new belt on, making sure it aligns properly. Tighten the tension lever to secure it.
- Unplug the tool before starting
- Release tension to remove old belt
- Check belt direction marks
- Fit the new belt on rollers evenly
- Tighten tension to hold belt firmly
- Test the sander to ensure smooth running
Troubleshooting Performance
If the belt sander vibrates or slows down, check for belt wear or wrong belt size. Loose belts cause poor sanding results.
Overheating or burning smells may mean the motor is overloaded. Let the tool cool down and avoid pushing too hard during sanding.
- Inspect the belt for damage or slipping
- Use the correct belt size for your sander
- Keep sanding pressure steady and light
- Clean dust from vents to prevent overheating
- Allow the motor to rest if it gets hot
Project Ideas For Practice
Using a belt sander can make your furniture projects easier and faster. It helps smooth surfaces and shape wood quickly.
Try these project ideas to practice your belt sanding skills and build confidence.
Simple Furniture Repairs
Fixing small damage on furniture is a great way to start. A belt sander can remove scratches and rough spots fast.
Practice sanding areas like table edges, chair legs, or drawer fronts to make repairs look smooth and clean.
- Remove water rings from wooden tables
- Smooth out dents on chair arms
- Even out rough drawer faces
Creating Custom Pieces
Use a belt sander to shape wood for new furniture projects. It helps create straight edges and smooth curves.
Try making small shelves, stools, or picture frames. These projects let you practice control and precision with the sander.
- Sand wood panels for wall shelves
- Shape legs for a custom stool
- Smooth edges on picture frames
Refinishing Old Furniture
Refinishing old furniture often starts with sanding off the old finish. A belt sander speeds up this job.
Practice removing old paint or varnish on chairs, tables, or dressers. Be careful not to sand too deep.
- Strip old paint from wooden chairs
- Sand varnish off table surfaces
- Prepare dresser drawers for new finish

Credit: icocea.org
Frequently Asked Questions
What Safety Gear Is Needed When Using A Belt Sander?
Always wear safety goggles, a dust mask, and hearing protection. Gloves can protect your hands from splinters and vibration. Ensure your workspace is well-ventilated to avoid inhaling dust. Proper safety gear prevents injuries and enhances your sanding experience.
How Do I Choose The Right Belt Sander Grit?
Start with coarse grit (40-60) to remove old finishes or rough surfaces. Use medium grit (80-120) for smoothing wood. Finish with fine grit (150-220) for a polished surface. Selecting the right grit ensures efficient sanding and a smooth finish.
Can A Belt Sander Damage Delicate Furniture Surfaces?
Yes, a belt sander can easily damage delicate wood if not used carefully. Always test on scrap wood first. Use lower speed and finer grit for delicate surfaces. Proper technique avoids gouges and uneven sanding on furniture.
How To Maintain A Belt Sander For Furniture Projects?
Regularly clean the sanding belt and remove dust buildup. Inspect belts for wear and replace if necessary. Lubricate moving parts as per the manufacturer’s instructions. Proper maintenance extends the tool’s life and ensures consistent performance.
Conclusion
Using a belt sander makes furniture projects easier and faster. Always wear safety gear to protect your hands and eyes. Start with coarse sandpaper, then switch to finer grit for smoothness. Keep the sander moving to avoid uneven spots. Practice on scrap wood before working on your project.
With patience and care, your furniture will look great. Enjoy the sanding process and the results you create.