
Are you tired of those rough and uneven surfaces ruining your woodworking projects? A belt sander might just be your new best friend.
Imagine the satisfaction of effortlessly transforming a jagged piece of wood into a smooth, polished masterpiece. With the right guidance, you can master this powerful tool and achieve professional-quality finishes that will leave everyone in awe. In this guide, we’ll reveal the secrets to using a belt sander effectively, ensuring that your projects stand out for all the right reasons.
Ready to unlock the potential of your woodworking skills and impress with every piece you create? Keep reading, and discover how you can achieve those perfect, smooth finishes every time.
Choosing The Right Belt Sander
A belt sander is a powerful tool for smoothing wood and other materials. Picking the right one makes your work easier and better.
This guide helps you choose a belt sander that fits your project and skill level.
Types Of Belt Sanders
There are different belt sanders for different jobs. Each type has its own use and size.
- Handheld Belt Sanders:Easy to move and good for small to medium jobs.
- Stationary Belt Sanders:Bigger and fixed on a bench for heavy sanding.
- Detail Belt Sanders:Small and good for tight spots and corners.
Selecting The Appropriate Grit
Sanding belts come in different grit sizes. The grit affects how smooth or rough the finish will be.
Use coarse grit for quick material removal. Use fine grit for a smooth finish.
- Coarse Grit (40-60): Removes paint and rough wood.
- Medium Grit (80-120): Smooths surfaces after rough sanding.
- Fine Grit (150-220): Prepares wood for finishing and painting.
Power And Speed Considerations
Power and speed affect how fast the belt sander works and the finish quality.
Higher power is good for tough jobs. Adjustable speed lets you control sanding depth and finish.
- Power: Measured in amps or watts; higher power handles bigger jobs.
- Speed: Variable speed helps with different materials and finishes.
- Consistent speed avoids burning or uneven sanding.
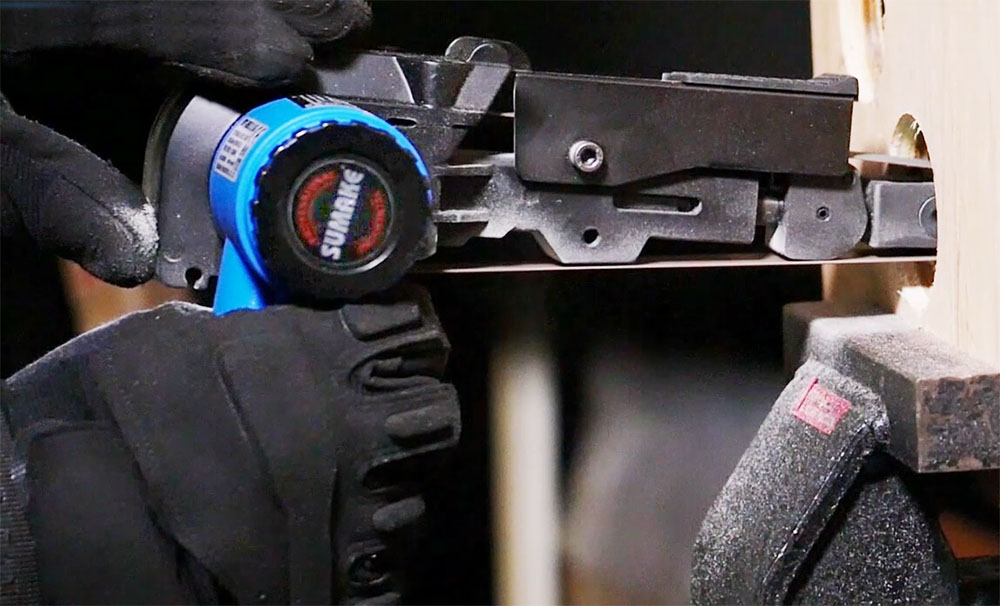
Credit: www.sumake.com
Preparing Your Workspace
Before using a belt sander, arrange your workspace carefully. A clean and organized area helps you work safely and efficiently.
Make sure you have enough space to move the sander smoothly over your workpiece. Proper lighting is also important.
Safety Measures
Wear safety gear such as goggles and a dust mask. Keep your hands clear of the sanding belt at all times.
- Wear eye protection to prevent debris injuries
- Use hearing protection to guard against noise
- Wear a dust mask to avoid inhaling fine particles
- Keep loose clothing and hair away from the sander
- Unplug the sander when changing belts or cleaning
Setting Up The Workpiece
Secure your workpiece firmly before sanding. Use clamps or a vise to keep it from moving.
| Type of Workpiece | Recommended Holding Method |
| Wooden board | Use clamps on a stable workbench |
| Small parts | Use a vise or a jig |
| Large panels | Support with sawhorses and clamps |
Dust Collection Tips
Dust from sanding can harm your lungs and make your workspace messy. Use dust collection to keep it clean.
- Connect the belt sander to a vacuum system if possible
- Empty dust bags or containers regularly
- Work in a well-ventilated area
- Wear a dust mask even with dust collection
Basic Belt Sander Techniques
A belt sander is a powerful tool used to smooth rough surfaces quickly. It uses a continuous loop of sandpaper to remove material fast.
Using the right techniques helps you get a smooth finish without damaging your workpiece. Safety and control are important.
Proper Handling And Grip
Hold the belt sander firmly with both hands. One hand should grip the front handle, the other on the rear handle.
This grip gives you control and reduces vibration. Keep your fingers away from the sanding belt to avoid injury.
Maintaining Even Pressure
Apply steady, light pressure on the sander. Pressing too hard can cause uneven sanding or damage the surface.
Let the sander’s weight do most of the work. Move the sander slowly and evenly across the material.
- Use gentle pressure to avoid gouges
- Keep the sander flat on the surface
- Do not hold the sander in one spot too long
Sanding With The Grain
Always sand in the direction of the wood grain. Sanding against the grain can cause scratches and rough patches.
Follow the natural lines in the wood to keep the surface smooth. This helps the finish look clean and professional.
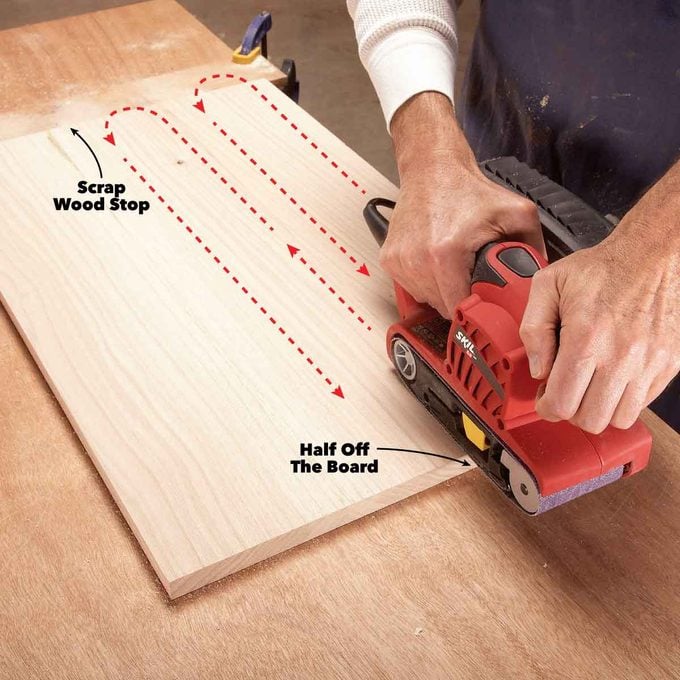
Credit: www.familyhandyman.com
Achieving Smooth Finishes
Using a belt sander can make your wood projects look smooth and clean. It helps remove rough spots quickly.
To get the best finish, you need to use the right sanding techniques and tools. This guide will help you.
Progressive Grit Sanding
Start sanding with a coarse grit to remove big rough areas. Then use finer grits to smooth the surface.
Changing to finer grits step by step reduces scratches and leaves a clean finish.
- Begin with 40 or 60 grit for rough sanding
- Move to 80 or 100 grit to smooth the surface
- Finish with 150 or 220 grit for a fine, smooth finish
Avoiding Common Mistakes
Do not press too hard with the belt sander. This can cause uneven sanding or damage the wood.
Keep the sander moving to avoid sanding marks. Stay consistent with your speed and pressure.
- Do not stay in one spot for too long
- Use even pressure across the surface
- Check your sanding progress often
- Replace worn-out sanding belts
Final Touches And Polishing
After sanding, wipe the surface to remove dust. This helps you see any rough spots left behind.
Use fine grit sandpaper or polishing pads to give the wood a smooth shine. This step improves the look and feel.
- Clean dust with a tack cloth or damp rag
- Lightly sand with 320 grit or finer
- Use polishing compounds if needed
- Apply finish or sealant after polishing
Maintaining And Troubleshooting
Keeping your belt sander in good shape helps you get smooth finishes every time. Regular checks and proper care can stop problems before they start.
This guide covers how to replace sanding belts, avoid belt slippage, and best cleaning and storage tips.
Replacing Sanding Belts
Change the sanding belt if it is torn or worn out. A fresh belt gives better results and protects your workpiece.
- Unplug the sander before starting.
- Release the tension lever to remove the old belt.
- Align the new belt with the rollers.
- Secure the tension lever to hold the belt in place.
- Check the belt tracking and adjust if needed.
Preventing Belt Slippage
Belt slippage reduces sanding quality and can damage the sander. Follow these tips to keep the belt tight and running smoothly.
| Cause | Solution |
| Loose belt tension | Tighten the tension lever or replace worn parts |
| Dirty rollers | Clean rollers to remove dust and debris |
| Wrong belt size | Use correct belt size for your model |
| Worn drive drum | Replace the drive drum if it is damaged |
Cleaning And Storage Tips
Clean your belt sander after each use. Proper storage keeps it ready for the next job.
- Remove dust with a brush or compressed air.
- Wipe the body with a dry cloth.
- Store the sander in a dry place.
- Avoid places with high humidity.
- Keep the sanding belts separately to prevent damage.
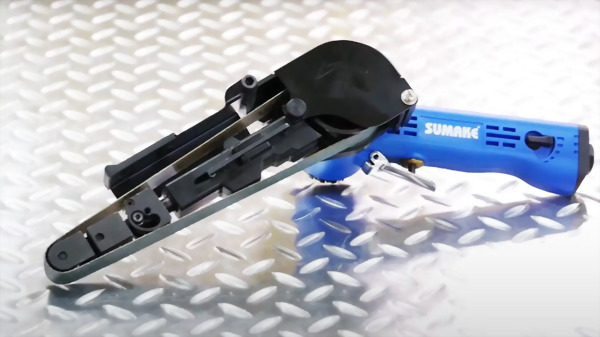
Credit: www.sumake.com
Frequently Asked Questions
What Is The Best Grit Sandpaper For Belt Sanders?
For smooth finishes, start with 80-grit sandpaper to remove roughness. Then, use 120- or 150-grit for finer smoothing. Always match the grit to your project’s needs to avoid damaging the surface.
How Do I Prevent Gouges Using A Belt Sander?
Keep the sander moving steadily and avoid pressing down too hard. Let the sander’s weight do the work. Hold the tool flat and glide it evenly across the surface.
Can A Belt Sander Be Used On Wood And Metal?
Yes, belt sanders work on both wood and metal. Use appropriate grit and speed settings for each material. Always wear safety gear to protect from dust and debris.
How Do I Maintain A Belt Sander For Long Life?
Clean the dust collection system regularly and replace worn belts promptly. Check for loose parts and lubricate moving components as needed. Proper maintenance ensures optimal performance and longevity.
Conclusion
Using a belt sander can make your wood projects smooth and neat. Start with the right grit sandpaper and keep the sander moving steadily. Always wear safety gear to protect yourself. Take your time and check your work often. Practice will help you get better and avoid mistakes.
With patience, your finishes will look clean and professional. Keep these tips in mind for your next sanding job. Smooth surfaces are within your reach.