Are you struggling to get perfect angled cuts every time? A bevel gauge might be the simple tool you’re missing.
Whether you’re a beginner or have some experience, mastering this tool can save you time and frustration. In this guide, you’ll discover how to use a bevel gauge easily and accurately, so your cuts come out clean and precise. Keep reading to unlock the secret to flawless angled cuts and take your woodworking or DIY projects to the next level.

Credit: woodworkersinstitute.com
Bevel Gauge Basics
A bevel gauge is a simple tool used to measure and transfer angles. It helps woodworkers, metalworkers, and DIYers make accurate angled cuts.
Understanding how to use a bevel gauge can improve the quality of your work. It saves time and reduces mistakes on angled cuts.
What Is A Bevel Gauge
A bevel gauge, also called a sliding bevel, is a tool that measures angles. It has two main parts that move to match any angle you need.
You use it by setting the angle on the gauge and then transferring it to your workpiece. This helps you cut wood or metal precisely.
Key Parts And Features
The bevel gauge has a handle and a blade. The blade can rotate and lock at any angle against the handle.
- Handle:The fixed part you hold.
- Blade:The adjustable arm that moves to set angles.
- Locking Mechanism:A screw or knob that holds the blade in place.
- Material:Usually made of wood, metal, or plastic for durability.
These parts work together to help you measure and copy angles easily. The locking feature keeps the blade steady while you mark or cut.

Credit: woodworkersinstitute.com
Choosing The Right Bevel Gauge
A bevel gauge helps you measure and transfer angles for angled cuts. Choosing the right one makes your work easier and more precise.
Look at the types and materials before picking a bevel gauge. These affect durability and ease of use.
Types Of Bevel Gauges
There are several types of bevel gauges. Each has features for different tasks and preferences.
- Sliding Bevel:Has an adjustable blade that slides to set angles.
- Fixed Bevel:Has a blade fixed at one angle, used for repeated cuts.
- Combination Bevel:Can work as a sliding and fixed bevel, offering flexibility.
- Digital Bevel:Uses electronic sensors to show angles on a screen.
Materials And Build Quality
The material of a bevel gauge affects its strength and accuracy. Choose one that lasts and stays true.
| Material | Advantages | Disadvantages |
|---|---|---|
| Wood | Lightweight, classic look | Can warp or wear over time |
| Plastic | Affordable, resistant to moisture | Less durable, can break easily |
| Metal | Strong, long-lasting, precise | Heavier, may rust if not treated |
| Combination | Mix of materials for balance | May cost more, parts can fail |
Setting Up Your Bevel Gauge
A bevel gauge helps you measure and mark angles for cuts. Setting it up correctly makes your work precise and easier.
This guide covers how to adjust the blade angle and tips for using the locking mechanism.
Adjusting The Blade Angle
To adjust the blade angle, loosen the locking knob first. Move the blade to the needed angle by matching it to your workpiece or protractor.
- Loosen the locking knob gently.
- Move the blade to the desired angle.
- Check the angle against your reference tool.
- Tighten the locking knob to hold the blade.
Locking Mechanism Tips
The locking mechanism keeps the blade steady during marking. Use the right amount of force when tightening to avoid slipping or damage.
| Tip | Reason |
| Tighten knob firmly but not too hard | Prevents blade movement without breaking parts |
| Check lock before each use | Ensures angle stays accurate |
| Keep mechanism clean | Improves smooth locking and longevity |
Measuring Angles Accurately
Using a bevel gauge helps you measure and mark angles precisely. It is a tool that adjusts to any angle you need.
Accurate angle measurement is important for making clean and perfect cuts in woodworking or metalworking projects.
Transferring Angles From Workpiece
Place the bevel gauge blade against the angled edge of your workpiece. Tighten the locking knob to hold the angle.
Next, transfer this set angle onto your cutting material by laying the bevel gauge flat and marking along the blade.
- Align the blade with the angle on the workpiece
- Lock the blade in place securely
- Move the bevel gauge to your new material
- Draw a line along the blade edge for cutting
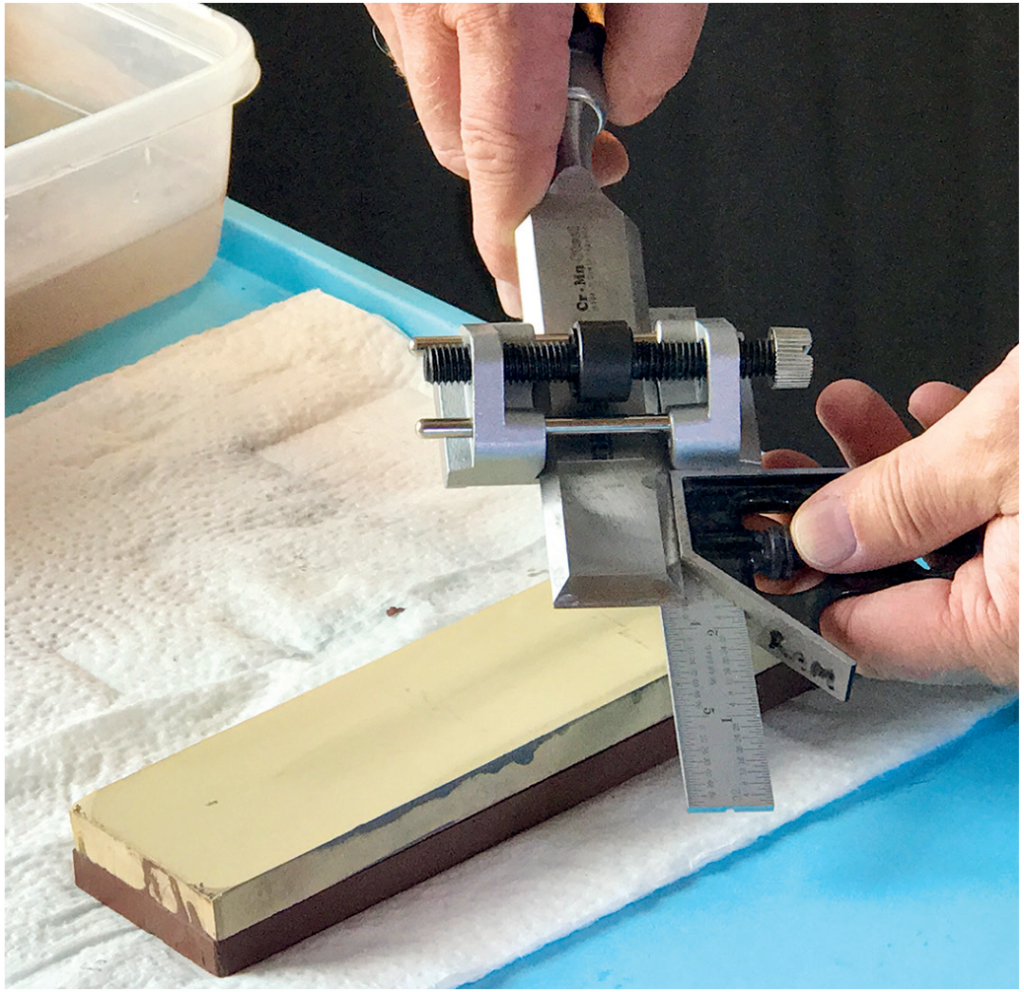
Using A Protractor With A Bevel Gauge
Set the bevel gauge blade to a rough angle. Then, place a protractor on the blade to check the exact angle.
Adjust the bevel gauge blade until the protractor shows the desired angle. Tighten the gauge to keep it fixed.
- Loosen the bevel gauge blade
- Hold the protractor on the blade
- Move the blade to the needed angle
- Lock the blade once the angle matches
Making Precise Angled Cuts
Using a bevel gauge helps you make angled cuts that fit perfectly. It lets you measure and transfer angles accurately to your workpiece.
Precision is important for clean joints and good fit. Learning how to use a bevel gauge ensures your cuts are correct every time.
Marking Cut Lines
Set the bevel gauge blade to match the angle you need. Lock it firmly so it does not move while marking.
Place the gauge on the wood and use a sharp pencil to draw the cut line along the blade edge. This line guides your saw for a precise cut.
- Adjust the bevel gauge to the exact angle
- Secure the blade to avoid shifting
- Draw a clear line along the blade edge
- Check the line before cutting
Cutting Techniques For Accuracy
Use a sharp saw that matches your wood type. Follow the marked line closely to keep the angle accurate.
Start the cut slowly to guide the saw. Keep your hand steady and use smooth strokes until the cut is complete.
- Choose the right saw for the material
- Begin cutting slowly to stay on line
- Keep your hand steady for control
- Use smooth, even strokes
- Check the cut angle as you go

Credit: woodworkersinstitute.com
Common Mistakes To Avoid
Using a bevel gauge correctly is key for accurate angled cuts. Many make simple errors that affect the cut quality.
Understanding common mistakes helps you avoid them and get better results with your tool.
Misreading Angles
One common error is reading the bevel gauge angle incorrectly. This mistake leads to cuts that do not fit properly.
- Not aligning the gauge blade with the workpiece edge.
- Confusing the inside and outside angles on the gauge.
- Ignoring the scale marks or reading them from the wrong side.
- Failing to lock the gauge before transferring the angle.
Improper Tool Handling
Holding or adjusting the bevel gauge the wrong way causes inaccurate angle transfer and poor cuts.
| Handling Mistake | Effect on Cut |
| Loose blade lock | Angle shifts during marking |
| Using the gauge on uneven surfaces | Inconsistent angle measurement |
| Gripping too tightly | Difficulty adjusting angle smoothly |
| Ignoring tool maintenance | Blade moves or sticks |
Maintaining Your Bevel Gauge
Keeping your bevel gauge in good shape helps you get accurate angled cuts. Regular care stops damage and wear.
This guide covers how to clean, store, and check your bevel gauge for best results.
Cleaning And Storage
After using your bevel gauge, clean it to remove dust and dirt. Use a soft cloth to wipe all parts gently.
Store the bevel gauge in a dry place. Keep it away from moisture to avoid rust or damage.
- Wipe blade and body with a dry cloth
- Use light oil on metal parts to prevent rust
- Store in a case or toolbox
- Keep away from direct sunlight and damp areas
Calibration Checks
Check the accuracy of your bevel gauge often. This keeps your angled cuts precise.
Test calibration by setting the gauge to a known angle. Compare it with a protractor or angle finder.
- Set bevel gauge to 45° or 90° angle
- Compare reading with a reliable protractor
- Tighten any loose screws or knobs
- Adjust blade if readings differ
Advanced Tips For Experts
Using a bevel gauge for angled cuts can be precise and efficient. Experts can improve their technique with advanced tips.
This guide focuses on custom angle settings and combining tools for complex cuts to help you work smarter.
Custom Angle Settings
Adjusting your bevel gauge to custom angles ensures accuracy for unique projects. Calibrate your gauge carefully to avoid errors.
- Use a digital protractor to set exact angles on the bevel gauge.
- Lock the bevel gauge firmly after adjusting to prevent shifting.
- Mark angles on your workpiece before cutting to double-check alignment.
- Practice measuring multiple angles to improve speed and confidence.
Combining Tools For Complex Cuts
Sometimes a bevel gauge alone is not enough. Combining it with other tools helps achieve complex angled cuts.
| Tool Combination | Purpose | Tip |
| Bevel Gauge + Miter Saw | Set compound angles | Lock gauge and transfer angle to saw fence |
| Bevel Gauge + Combination Square | Check angles on edges and faces | Use square to verify bevel angle |
| Bevel Gauge + Digital Angle Finder | Confirm precise angles | Compare readings to ensure accuracy |
Frequently Asked Questions
What Is A Bevel Gauge Used For?
A bevel gauge measures and transfers angles for precise angled cuts. It helps woodworkers replicate and mark angles accurately on materials.
How Do You Adjust A Bevel Gauge?
Loosen the locking knob, move the blade to desired angle, then tighten the knob. This locks the angle securely for marking or cutting.
Can A Bevel Gauge Measure Both Interior And Exterior Angles?
Yes, a bevel gauge can measure and transfer both interior and exterior angles. It’s versatile for various woodworking and metalworking tasks.
Why Use A Bevel Gauge Over A Protractor?
A bevel gauge offers easy angle transfer from templates to workpieces. It’s more practical and quicker for repetitive angled cuts than a protractor.
Conclusion
Mastering the bevel gauge can ease your angled cuts. With practice, accuracy improves. Remember to check your angles twice. This ensures perfect cuts every time. Start with simple projects. Gain confidence as you progress. The bevel gauge is a handy tool.
It helps in various woodworking tasks. Soon, you’ll notice your skills sharpening. Your projects will look more professional. Enjoy the process. Happy woodworking!