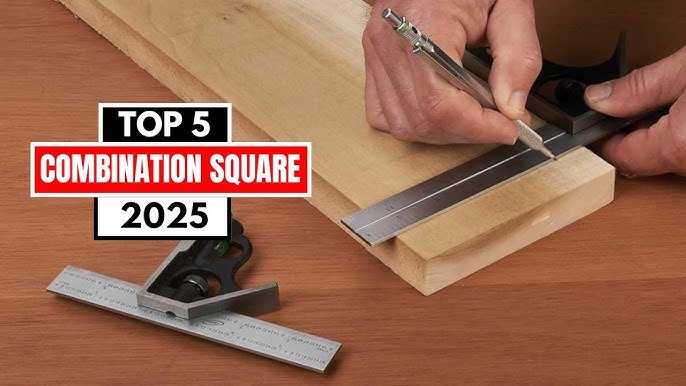
If you want your woodworking projects to look sharp and professional, mastering the use of a combination square is a must. This simple tool can make a big difference when it comes to marking precise lines and angles on your wood.
Whether you’re a beginner or looking to improve your skills, this guide will show you exactly how to use a combination square to get accurate, clean marks every time. Stick with me, and you’ll discover tips that save you time, reduce mistakes, and boost your confidence with every cut.
Let’s get started!
Choosing The Right Combination Square
A combination square is a useful tool for marking and measuring wood. Choosing the right one helps you work more accurately and easily. This guide explains the main features to look for.
Knowing the types, materials, and sizes will help you pick the best combination square for your woodworking tasks.
Types Of Combination Squares
There are different types of combination squares. Each type has features for specific tasks. Choose one that fits your needs and projects.
- Standard Combination Square: Measures and marks 90 and 45 degrees.
- Center Square: Helps find the center of round objects.
- Protractor Square: Measures and marks angles other than 45 and 90 degrees.
- Depth Gauge: Measures depth and steps on wood pieces.
Materials And Build Quality
Material quality affects durability and accuracy. Look for strong, rust-resistant materials. This ensures your tool lasts long and stays reliable.
- Steel: Strong and durable, good for long use.
- Stainless Steel: Rust-resistant and low maintenance.
- Aluminum: Lightweight but less durable than steel.
- Plastic: Cheap but less accurate and less durable.
Check that the blade fits tightly and the locking mechanism works well. Loose parts reduce accuracy.
Size And Measurement Units
Combination squares come in different sizes. Common blade lengths are 6, 12, and 24 inches. Choose a size that matches your typical project.
Also, check the measurement units on the blade. Some blades show inches, others millimeters, or both. Pick the units you use most.
- 6-inch blade: Good for small projects and tight spaces.
- 12-inch blade: Most common size for general use.
- 24-inch blade: Best for larger projects needing longer measurements.
- Dual units (inches and mm): Useful if you work with both systems.
Credit: commonwoodworking.com
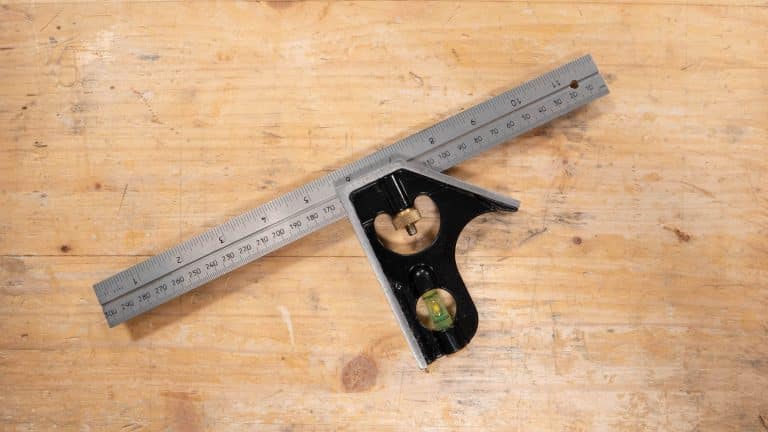
Parts Of A Combination Square
A combination square is a useful tool for woodworking. It helps you mark and measure wood accurately.
This tool has several parts that work together. Knowing each part helps you use it properly.
Blade And Ruler
The blade is the long, flat part of the square. It acts as a ruler for measuring wood.
The blade usually has both metric and imperial units. This makes it easy to measure in inches or centimeters.
- The blade is often made of steel for strength.
- It slides through the head for adjustable measurements.
- Markings on the blade help you measure precisely.
Stock And Head
The stock is the thick part attached to the blade. It holds the blade at a right angle.
The head is the movable part that slides along the blade. You can lock it in place for different uses.
- The stock provides a flat surface for marking lines.
- The head has a locking mechanism to keep measurements fixed.
- The head helps check angles like 45 and 90 degrees.
Scriber And Level Vial
The scriber is a small pointed tool stored in the head. It helps make fine marks on wood.
The level vial is a small glass tube filled with liquid. It helps check if a surface is level or plumb.
- The scriber can be removed and used to scratch lines.
- The level vial is built into the head for easy viewing.
- Using the vial helps you keep wood straight and even.
Setting Up The Combination Square
Using a combination square correctly starts with proper setup. Setting it up ensures accurate markings on your wood.
This guide covers adjusting the blade, locking the head, and calibrating for accuracy.
Adjusting The Blade
The blade is the long metal part used for measuring and marking. You can slide it to the length you need.
Hold the head and move the blade until it matches your measurement.
- Loosen the locking screw on the head
- Slide the blade to the desired length
- Check the measurement on the blade scale
- Tighten the screw slightly to hold position
Locking The Head
The head is the square part that holds the blade. Lock it firmly to keep the blade in place.
Secure locking prevents the blade from moving during marking or measuring.
- Turn the locking screw clockwise to tighten
- Check that the blade does not slide
- Do not overtighten to avoid damage
Calibrating For Accuracy
Calibration ensures the square reads correctly. It helps you mark perfect 90-degree or 45-degree angles.
Use a known straight edge or a carpenter’s square to check the calibration.
- Place the square against a known straight edge
- Check if the blade lines up with the edge
- If not aligned, loosen the locking screw
- Adjust the blade or head until it matches
- Tighten the screw and recheck the alignment
Marking Wood With Precision
Using a combination square helps you mark wood with accuracy. It is a tool that measures and guides your lines.
With clear marks, you can cut and join wood pieces correctly. Learning to use this tool well saves time and effort.
Marking Straight Lines
Place the ruler of the combination square against the wood edge. Hold the head firmly to keep it steady.
Use a pencil to draw a line along the ruler’s edge. This line will be straight and even.
- Check that the ruler is tight against the wood edge
- Hold the head to prevent slipping
- Draw the line slowly for accuracy
- Double-check the line before cutting
Drawing 90-degree Angles
Use the combination square’s head to form a right angle with the ruler. Align the head with the wood edge.
Mark the wood along the ruler edge. This creates a perfect 90-degree angle for joints or cuts.
| Position | Action |
| Head against wood edge | Align firmly |
| Ruler pointing across wood | Draw line along ruler |
| Check angle | Use protractor if needed |
Measuring And Marking 45-degree Angles
Set the combination square to the 45-degree position by adjusting the head. Lock it in place.
Place the head against the wood edge. Draw a line along the ruler to mark the 45-degree angle.
- Adjust the head to the 45-degree mark
- Lock the head tightly
- Align the head with the wood edge
- Draw the angled line carefully
Advanced Techniques
A combination square is more than a tool for simple measuring. It helps with precise checks and layouts on wood. Using some advanced techniques improves your woodworking accuracy.
These skills let you check flatness, depth, and create detailed layouts. You can also combine the square with other tools for better results.
Checking Flatness And Depth
Use the combination square to check if a surface is flat or uneven. Place the square’s blade on the wood and see if the base sits flush. Gaps show high or low spots.
To measure depth, slide the ruler part into holes or grooves. Lock the ruler and remove the square. Use a tape or ruler to read the depth from the blade’s end.
- Place the square on the surface to spot gaps.
- Use the ruler to measure holes or grooves.
- Lock the ruler to keep the measurement steady.
Using The Square For Layouts
You can mark straight lines and angles with the combination square. Align the ruler on the wood edge and draw a line along the blade. This helps create perfect right angles.
The square also helps mark parallel lines. Set the ruler to a fixed distance and slide it along the wood edge. Mark lines at equal spacing for cuts or joints.
- Use the square to draw 90-degree lines.
- Set the ruler for parallel line marking.
- Slide the square along edges for even spacing.
Combining With Other Tools
The combination square works well with other woodworking tools. Pair it with a marking knife for clear lines. The knife cuts fibers, making smooth saw cuts easier.
Use the square with a try square or bevel gauge to check angles beyond 90 degrees. This helps with angled cuts and complex joinery.
- Mark lines with a marking knife using the square.
- Check angles with a bevel gauge and combination square.
- Use try square for quick angle checks alongside it.

Credit: www.wikihow.com
Maintenance And Care
Taking care of your combination square helps keep it accurate and long-lasting. Regular maintenance stops damage and rust.
Simple cleaning and storage habits protect your tool. Fixing small problems early saves time and money.
Cleaning Tips
Clean your combination square after every use to remove dirt and dust. Use a soft cloth to wipe the blade and head.
For stubborn grime, dampen the cloth slightly with water. Avoid soaking the tool or using harsh chemicals.
- Wipe off wood dust and debris
- Use a dry cloth to prevent rust
- Apply light oil on metal parts if needed
Storage Recommendations
Store your combination square in a dry place to avoid rust. Keep it in a toolbox or a protective case when not in use.
Do not leave the tool in direct sunlight or damp areas. Make sure it is secure to prevent damage from falls.
- Keep the tool in a dry, cool spot
- Use a case or pouch for extra protection
- Store flat to avoid bending the blade
Troubleshooting Common Issues
If your combination square slips, check the locking screw. Tighten it to hold the blade firmly in place.
Rust can cause rough movement. Clean rust spots gently with fine steel wool and apply oil to protect the metal.
- Blade not locking? Tighten the screw
- Rusty parts? Clean and oil them
- Measurement marks faded? Use a marker to redraw

Credit: www.reddit.com
Frequently Asked Questions
What Is A Combination Square Used For In Woodworking?
A combination square is used to mark precise measurements and angles on wood. It helps ensure accurate cuts and layouts. It can measure 90 and 45-degree angles, check depth, and mark straight lines. This tool improves woodworking precision and efficiency.
How Do You Properly Use A Combination Square?
To use a combination square, slide the ruler to the desired measurement. Lock it in place with the screw. Align the square’s head against the wood edge. Mark your line along the ruler edge. This ensures accurate and consistent markings.
Can A Combination Square Measure Angles Other Than 45 And 90 Degrees?
No, a standard combination square primarily measures 45 and 90-degree angles. For other angles, you need a protractor or bevel gauge. The combination square is designed for common woodworking angles to simplify layout and marking tasks.
How Do I Maintain My Combination Square For Accuracy?
Keep your combination square clean and dry. Avoid dropping or bending the ruler. Periodically check calibration against a known square. Store it in a protective case to prevent damage. Proper care preserves its accuracy and extends tool life.
Conclusion
Using a combination square simplifies wood marking tasks. It offers accuracy. Beginners find it user-friendly. Precision increases with practice. This tool saves time on projects. Easy to learn. Quick to master. Enhanced woodworking quality. Great for marking straight lines. Also useful for measuring angles.
A practical addition to any toolkit. Invest in one for better results. Your projects will benefit greatly. Enjoy woodworking more. Remember, practice makes perfect. Keep experimenting with different techniques. Your skills will grow over time. Happy woodworking!