Measuring small parts accurately can be tricky, especially when every tiny detail matters. If you’ve ever struggled to get precise measurements or felt unsure about your tools, this guide is made for you.
Using a digital caliper might seem complicated at first, but once you learn the simple steps, it becomes your best friend for exact measurements. Imagine saving time, avoiding costly mistakes, and working with confidence every time you measure. Keep reading, and you’ll discover how to master your digital caliper quickly and easily.
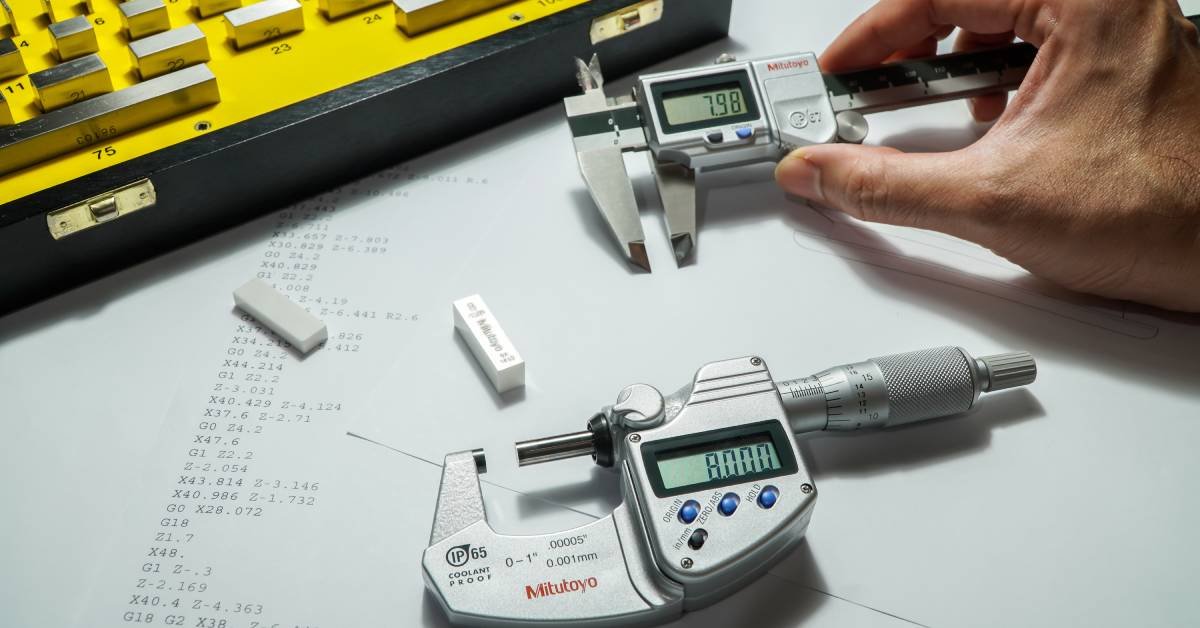
Credit: www.accu.co.uk
Choosing The Right Digital Caliper
Using a digital caliper helps measure small parts with ease and accuracy. Picking the right caliper is important for good results.
This guide explains different types of digital calipers, key features to check, and how to consider your budget.
Types Of Digital Calipers
There are three main types of digital calipers. Each type suits different measuring needs.
- Standard Digital Calipers:Used for measuring length, depth, and inside or outside diameters.
- Dial Digital Calipers:Have a dial display and are easy to read for quick checks.
- Vernier Digital Calipers:Combine traditional vernier scale with a digital display for precise reading.
Key Features To Look For
| Feature | Why It Matters |
| Measurement Range | Choose based on the size of parts you measure |
| Resolution | Smaller increments mean more precise measurements |
| Display Type | Clear digital display helps avoid reading errors |
| Material | Stainless steel is durable and resists corrosion |
| Zero Setting | Allows easy resetting for relative measurements |
Budget Considerations
Digital calipers come in a range of prices. Think about what features you need before buying.
- Basic models are affordable and good for simple tasks.
- Mid-range calipers offer better build and more features.
- High-end tools provide high accuracy and extra functions.
- Check if batteries are included or need separate purchase.
- Consider brand reliability and warranty for long-term use.

Credit: manuals.plus
Caliper Components And Functions
A digital caliper is a tool used to measure small parts accurately. It has different parts that help take precise measurements.
Knowing each part and its function helps you use the caliper correctly. This guide explains the main components.
Main Scale And Vernier
The main scale shows the basic measurement in millimeters or inches. It is fixed and does not move.
The vernier is a small sliding scale that helps read measurements between the marks on the main scale. It improves accuracy.
- Main scale is the base ruler on the caliper.
- Vernier scale slides for fine measurement.
- Combined, they give precise readings.
Digital Display And Buttons
The digital display shows the measurement in numbers. It is easy to read and reduces errors.
Buttons control the caliper functions. Common buttons include power on/off, zero reset, and unit change.
- Power button turns the caliper on or off.
- Zero button resets the reading to zero.
- Unit button switches between metric and imperial units.
Measuring Jaws And Depth Rod
The measuring jaws are the parts that touch the object being measured. The large jaws measure outside dimensions.
The smaller jaws measure inside dimensions. The depth rod measures the depth of holes or slots.
- Large jaws measure outer edges.
- Small jaws measure inner edges.
- Depth rod measures hole depths.
Preparing Your Caliper
A digital caliper helps measure small parts accurately. Preparing the tool is key for exact readings. You need to clean, calibrate, zero, and check the battery before use.
This guide explains how to ready your caliper. Follow each step to keep your device working well and measuring correctly.
Cleaning And Calibration
Keep the caliper clean to avoid errors. Dirt or dust on the jaws affects the measurement. Calibration ensures your tool measures right against a known standard.
- Wipe the jaws with a soft, lint-free cloth.
- Use a small brush to remove dust from moving parts.
- Check calibration with a gauge block or reference object.
- Adjust calibration if your caliper has a calibration feature.
Zeroing The Caliper
Zeroing sets the caliper to read zero when fully closed. It removes any gap or offset, giving accurate measurements. Always zero before measuring.
| Action | What to Do |
|---|---|
| Close jaws | Gently press the jaws until they touch fully |
| Press zero button | Set display to zero to start fresh |
| Verify | Open and close jaws again to check zero reading |
Battery Maintenance
Battery power affects the caliper’s display and function. Keep the battery fresh and replace it as needed to avoid wrong readings or device failure.
- Check battery level before use.
- Use the recommended battery type for your caliper model.
- Replace batteries when the display dims or flickers.
- Remove batteries if storing the caliper for a long time.
Measuring Small Parts Accurately
Using a digital caliper helps you measure small parts with precision. It shows exact numbers on a screen, making it easy to read.
Knowing how to measure different parts correctly improves your work quality. This guide explains how to measure outside, inside, and depth dimensions.
Measuring Outside Dimensions
To measure outside dimensions, open the caliper jaws wide enough to fit around the part. Close the jaws gently until they touch the edges.
Make sure the part sits straight between the jaws for an accurate reading. Read the measurement on the digital display.
- Hold the part steady and avoid tilting
- Do not press too hard with the jaws
- Check the zero reading before measuring
Measuring Inside Dimensions
Use the smaller jaws at the top of the caliper to measure inside dimensions. Insert them into the hole or gap you want to measure.
Open the jaws until they touch the inside edges gently. Read the size on the digital screen. Keep the caliper straight for accuracy.
- Clean the inside surfaces before measuring
- Move the jaws slowly to avoid damage
- Take multiple readings for consistency
Measuring Depth And Steps
The depth rod of the caliper measures the depth of holes and steps. Place the base of the caliper flat on the surface.
Extend the depth rod until it touches the bottom of the hole or step. Read the measurement on the screen carefully.
- Keep the caliper steady and vertical
- Do not tilt the depth rod during measurement
- Use a flat surface to rest the caliper base
Tips For Precision Handling
Using a digital caliper helps measure small parts accurately. Holding it right is key to good results.
Learn simple ways to handle the caliper carefully. This keeps your readings exact and reliable.
Proper Grip And Positioning
Hold the caliper firmly but gently. Use your thumb and fingers to slide the jaws smoothly.
Keep the part and caliper steady. Position the part between the jaws so it fits snugly without force.
- Use your dominant hand to hold the caliper.
- Keep your wrist straight to avoid shaking.
- Place the part flat against the measuring jaws.
- Align the caliper scale so you can read it easily.
Avoiding Common Errors
Check the zero reading before measuring. This ensures the caliper starts at the right point.
Do not apply too much pressure. Pressing hard can change the part size or damage the caliper.
- Always clean the caliper jaws before use.
- Do not measure dirty or oily parts without cleaning.
- Read the display carefully and avoid parallax errors.
- Use consistent pressure for each measurement.
Working With Delicate Components
Handle fragile parts with care. Use the caliper gently to avoid bending or breaking them.
Use the caliper’s fine adjustment wheel if available. This helps you close the jaws softly on small parts.
- Support the part with your free hand to keep it steady.
- Avoid sudden movements while measuring.
- Use a soft cloth or padding if needed to protect the part.
- Take multiple measurements to confirm accuracy.

Credit: blocktobox.com
Recording And Using Measurements
Using a digital caliper helps you get exact measurements of small parts. Recording these measurements correctly is key to using them well.
This guide shows how to read the display, switch units, and transfer data properly.
Reading The Digital Display
The digital screen shows the size of the part you measure. Numbers change as you move the caliper jaws.
- Look at the main number for the measurement.
- Check for any error signs or low battery warnings.
- Make sure the display shows zero before measuring.
- Press the hold button to freeze the number if needed.
Converting Units
Digital calipers can switch between millimeters and inches. Use the unit button to change the display format.
| Unit | Symbol | Description |
| Millimeters | mm | Common in most countries, metric system |
| Inches | in | Used mainly in the United States |
Transferring Data Effectively
Write down or save your measurements to avoid mistakes. Use clear labels for each part.
- Record the measurement shown on the display.
- Note the unit used (mm or inches).
- Double-check the number before writing it down.
- Use a notebook or digital app for tracking.
- Label each measurement with the part name or code.
Maintaining Your Digital Caliper
Keeping your digital caliper clean and well-stored helps it last longer. Proper care also keeps measurements accurate.
Regular maintenance prevents damage and avoids common problems with your tool.
Regular Cleaning Techniques
Clean your digital caliper after every use to remove dirt and dust. Use a soft, dry cloth to wipe the surfaces gently.
- Do not use water or harsh chemicals on the caliper.
- Remove any debris from the measuring jaws carefully.
- Use a small brush to clean hard-to-reach areas.
- Check the battery compartment for dust and clean if needed.
Storage Best Practices
Store your digital caliper in a dry and safe place to avoid damage. Keep it in its case or a soft pouch when not in use.
| Storage Tip | Reason |
| Use original case | Protects from dust and shocks |
| Keep away from moisture | Prevents rust and corrosion |
| Store in a stable temperature | Avoids damage to electronics |
| Remove battery if unused long | Prevents battery leaks |
Troubleshooting Common Issues
If your digital caliper does not turn on, check the battery first. Replace it if the display is weak or blank.
For inaccurate readings:
- Clean the measuring surfaces.
- Reset the zero point by closing the jaws fully.
- Check for physical damage or wear.
- Ensure the caliper is not tilted during measurement.
Frequently Asked Questions
How Do I Measure Small Parts With A Digital Caliper?
To measure small parts, gently close the caliper jaws around the object. Read the measurement on the digital display for precision.
What Units Can A Digital Caliper Measure In?
Digital calipers typically measure in millimeters and inches. You can switch units easily using the caliper’s unit button.
How Accurate Are Digital Calipers For Small Parts?
Digital calipers usually provide accuracy up to 0. 01 mm or 0. 0005 inches, ideal for precise small part measurements.
How Do I Calibrate A Digital Caliper Before Use?
Close the jaws completely and press the zero button to reset the caliper to zero for accurate readings.
Conclusion
Mastering a digital caliper is essential for accurate measurements. Practice makes perfect. Use it regularly to measure small parts accurately. Always keep it clean and calibrated. This ensures precise readings every time. Choose the right caliper for your needs. Consider size, features, and budget.
Understanding your tool is key to success. Don’t rush the process. Take time to measure carefully. Double-check your results for accuracy. With patience, you’ll improve your skills. Soon, you’ll measure like a pro. Enjoy the benefits of precise measurements in your projects.
Happy measuring!