If you want to build strong, beautiful cabinets that last, mastering the dovetail joint is key. But hand-cutting dovetails can be tricky and time-consuming.
That’s where a dovetail jig comes in—it makes the process faster, easier, and more precise. In this guide, you’ll discover step-by-step how to use a dovetail jig for cabinets, even if you’re new to woodworking. By the end, you’ll have the confidence and skills to create perfect joints that impress every time.
Ready to transform your cabinet-making projects? Let’s dive in!
Choosing The Right Dovetail Jig
Selecting the proper dovetail jig is key for building strong cabinets. It affects your work quality and ease of use.
This guide helps you understand different types, materials, and features to pick the best jig for your cabinet projects.
Types Of Dovetail Jigs
Dovetail jigs come in various styles that fit different skill levels and project needs. Choose one that matches your work.
- Manual Jigs:Require hand adjustment and setup but are affordable and reliable.
- Template Jigs:Use fixed templates for specific joint sizes and shapes, easy for beginners.
- Adjustable Jigs:Offer flexibility to create multiple dovetail sizes and types with one tool.
- Pin and Tail Jigs:Designed to cut either pins or tails, some jigs do both for full sets of joints.
Materials And Build Quality
The material and build quality of a dovetail jig affect its durability and accuracy. Look for strong parts that last.
| Material | Pros | Cons |
| Aluminum | Lightweight, rust-resistant, sturdy | Higher cost |
| Steel | Very strong and durable | Heavier, can rust if not treated |
| Plastic | Affordable, lightweight | Less durable, may wear fast |
| Wood | Traditional look, easy to modify | Can warp or crack over time |
Features To Consider
Look for features that improve your cutting accuracy and ease of use. These help you work faster and cleaner.
- Adjustable guides for different board thicknesses
- Clear markings for easy setup and alignment
- Compatibility with your router model
- Quick clamp systems to hold wood firmly
- Ability to cut both pins and tails with one jig
- Included templates or the option to buy more
Credit: www.vevor.ca
Essential Tools And Materials
Using a dovetail jig to build cabinets needs some key tools and materials. These items help you make strong and precise joints.
Getting the right tools ready before you start will save time and improve your work quality.
Router And Bits
A router is the main power tool used with a dovetail jig. It cuts the shapes needed for the dovetail joints.
Use router bits that fit your jig and wood thickness. Straight and dovetail bits are common choices.
- Choose a router with good speed control
- Use dovetail bits sized for your joint design
- Straight bits help clean out waste wood
- Sharp bits make cleaner cuts and last longer
Wood Selection
Select wood that is smooth and easy to work with. Hardwoods like maple or cherry are popular for cabinets.
Wood should be dry and free from knots or cracks. This makes the joints stronger and neater.
- Use hardwoods for durability and appearance
- Softwoods work but may dent more easily
- Check wood moisture to avoid warping
- Choose straight-grained boards for best results
Measuring And Marking Tools
Accurate measuring and marking ensure your joints fit well. Use tools that help you mark exact lines and depths.
Keep a ruler, square, and pencil nearby. These simple tools guide your cuts and setup of the jig.
- Steel ruler or tape measure for length checking
- Combination square for marking right angles
- Pencil or marking knife for clear lines
- Calipers can measure thickness precisely
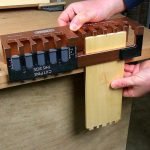
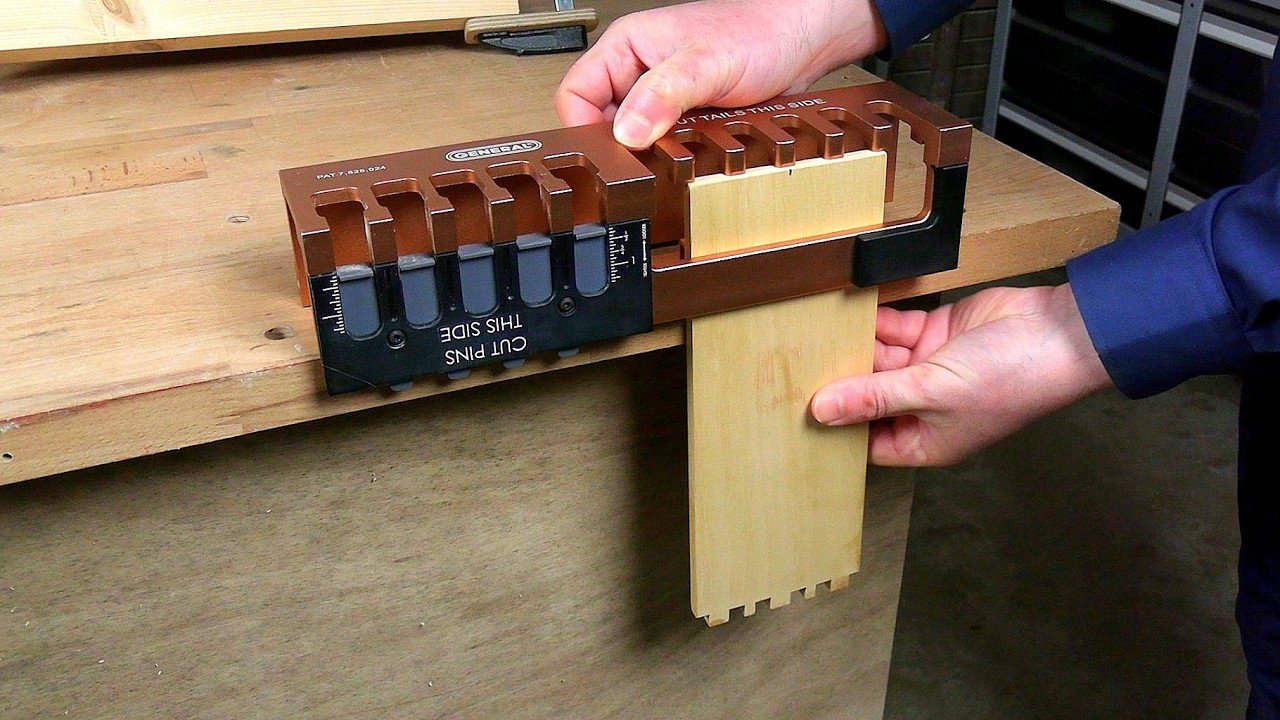
Setting Up Your Dovetail Jig
Setting up your dovetail jig correctly is important for making strong cabinet joints. This guide helps you prepare your jig for precise cuts.
Follow these steps carefully to adjust templates, clamp your workpieces, and set the router for the best results.
Adjusting Templates And Guides
First, select the right template for your joint style. Attach it firmly to the jig base. Make sure the guides align with the workpieces.
Check the template for any damage or wear before use. Adjust the guide rails to match the thickness of your wood. This ensures tight joints and clean cuts.
Clamping Techniques
Secure your workpieces firmly to avoid movement during routing. Use clamps that fit your jig and workpiece size.
- Place the boards flat against the jig base.
- Use even pressure from clamps to hold the pieces.
- Check that clamps do not block the router path.
- Tighten clamps slowly to prevent wood damage.
Router Depth And Speed Settings
Set the router bit depth to match the template thickness. Too deep cuts can damage the wood or the jig.
| Setting | Recommended Range | Notes |
|---|---|---|
| Router Depth | 8-12 mm (5/16 – 1/2 inch) | Match to wood thickness and template guide |
| Router Speed | 20,000 – 25,000 RPM | Adjust based on bit size and wood type |
| Feed Rate | Slow and steady | Prevents burn marks and chip out |
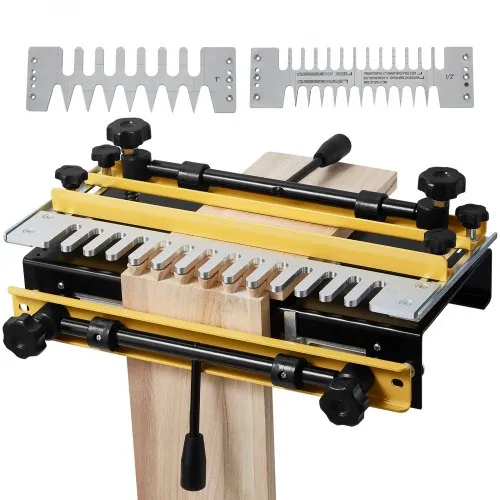
Step-by-step Joinery Process
Using a dovetail jig helps create strong, precise joints for cabinets. This guide covers the main steps to follow.
Each step ensures the pieces fit perfectly for a lasting connection.
Preparing The Workpieces
Start by selecting wood pieces that are flat and smooth. Cut them to the right size and mark the joint areas clearly.
Clamp the workpieces securely to keep them steady during routing.
Routing The Pins
Install the pin template onto the dovetail jig. Set the router depth to match the wood thickness.
- Place the first workpiece on the jig with the pin template.
- Turn on the router and carefully guide it along the template edges.
- Remove the workpiece and clean out the pin sockets with a chisel if needed.
Routing The Tails
Switch to the tail template on the jig. Adjust the router depth as before.
Use the router to cut the tails on the second workpiece. Check for smooth, even cuts.
| Tool | Purpose |
| Dovetail Jig | Holds the wood and guides the router |
| Router | Makes the pins and tails cuts |
| Chisel | Clears waste and refines joints |
Fitting And Testing The Joint
Try fitting the pins and tails pieces together without glue. They should fit snugly but not too tight.
- Check for gaps between the joint parts.
- Sand or trim any areas that are too tight.
- Ensure the joint aligns squarely.
Tips For Achieving Precision
Using a dovetail jig for cabinets needs careful attention. Precision ensures strong joints and a smooth look.
Small errors can cause gaps or weak connections. Follow these tips to get precise and tight fits every time.
Avoiding Common Mistakes
Many beginners make simple errors that affect accuracy. Avoid these to improve your results.
- Double-check measurements before cutting.
- Make sure the jig is firmly clamped to the wood.
- Use sharp router bits to avoid tear-out.
- Test cuts on scrap wood to adjust settings.
- Keep the wood pieces clean and free of dust.
Maintaining Consistent Pressure
Consistent pressure helps the jig and router stay steady. This reduces errors in cuts and fit.
| Pressure Point | Tip |
|---|---|
| Clamping the Jig | Use a firm, even clamp to hold the jig in place. |
| Holding the Wood | Press wood firmly against the jig surface without bending. |
| Router Handling | Keep steady hands and move the router evenly along the guide. |
Fine-tuning The Fit
Small adjustments make a big difference in joint tightness. Check the fit and adjust as needed.
- Cut test joints on scrap wood to check tightness.
- Slightly adjust the router bit depth if joints are loose or tight.
- Smooth edges with fine sandpaper for better fit.
- Repeat test cuts until joints fit snugly without forcing.
Credit: www.vevor.ca
Finishing And Assembly
Using a dovetail jig creates strong cabinet joints. Proper finishing and assembly help ensure a clean, sturdy cabinet.
Take your time sanding, gluing, and clamping. These steps improve the cabinet’s look and strength.
Sanding And Smoothing Edges
Sanding removes rough spots and splinters from the dovetail joints. Smooth edges help the pieces fit tightly.
Use fine-grit sandpaper for the best finish. Sand gently along the wood grain to avoid scratches.
- Start with 120-grit sandpaper
- Finish with 220-grit for smoothness
- Check joints for gaps or uneven edges
- Use a sanding block for flat surfaces
Glue Application Techniques
Apply glue evenly on the dovetail joints. Cover all the surfaces that will touch for a strong bond.
A small brush or glue bottle tip helps spread glue in tight spots. Avoid using too much glue to prevent mess.
- Apply a thin, even coat on all joint surfaces
- Use a brush to reach inside dovetail pins
- Wipe off excess glue immediately
- Check for full coverage before assembly
Clamping For Drying
Clamping holds the cabinet parts tight while glue dries. This keeps joints aligned and strong.
Use clamps that fit your cabinet size. Tighten enough to hold parts firmly but not so much that wood bends.
- Place clamps evenly along the joint
- Use corner clamps for right angles
- Check alignment before tightening fully
- Leave clamps for at least 30 minutes
- Let glue cure fully before removing clamps
Troubleshooting Common Issues
Using a dovetail jig for cabinets can be tricky at first. Some problems may occur during cutting.
This guide helps you fix common issues with your dovetail joints and tools.
Misaligned Joints
Misaligned joints happen when the pins and tails don’t line up. This makes the cabinet look uneven.
- Check that the wood pieces are clamped tightly and square in the jig.
- Make sure the jig is set up correctly for the size of the wood.
- Double-check the position of the router and guide bush.
- Test on scrap wood before cutting your final pieces.
Poor Fit Or Gaps
Gaps or loose joints happen if the cuts are too big or small. This weakens the cabinet structure.
| Cause | Fix |
| Router speed too high | Lower router speed for cleaner cuts |
| Worn router bit | Replace or sharpen the bit |
| Incorrect jig settings | Adjust settings to match wood thickness |
| Wood movement | Use dry, stable wood |
Router Bit Problems
Router bits can cause many problems if dull or damaged. They affect cut quality and safety.
- Check the bit before each use for chips or dull edges.
- Clean resin and dust off the bit regularly.
- Use the correct bit size for your jig.
- Replace the bit if cuts become rough or uneven.
- Follow safety instructions when changing bits.

Credit: www.youtube.com
Advanced Joinery Techniques
Using a dovetail jig for cabinets allows precise and strong joints. Advanced techniques improve both strength and appearance. Understanding these methods helps create quality cabinetry.
This guide covers half-blind dovetails, sliding dovetails, and how to customize joint patterns. Each method offers unique benefits for cabinet making.
Half-blind Dovetails
Half-blind dovetails hide the joint on the front face of the cabinet. This makes the joint invisible from the outside but still very strong. It is common in drawer fronts and face frames.
- Set the jig to cut half-blind pins and tails.
- Use a fine-tooth saw to clean the waste.
- Check the fit often to avoid gaps.
- Glue the joint and clamp firmly.
Sliding Dovetails
Sliding dovetails join two pieces at right angles with a long, interlocking shape. They add strength and alignment to shelves or cabinet backs. The joint slides into place and holds tightly.
| Step | Action | Tip |
|---|---|---|
| 1 | Cut the dovetail groove on the first board. | Use a fence for straight cuts. |
| 2 | Cut the matching dovetail tongue on the second board. | Test fit before final sanding. |
| 3 | Slide the joint together gently. | Apply glue if permanent. |
Customizing Joint Patterns
Custom joint patterns let you create unique designs or fit special cabinet shapes. You can change pin sizes, spacing, and angles. This adds style and function to your work.
Tips for customizing joint patterns:
- Adjust the guide settings on your dovetail jig.
- Draw your pattern on scrap wood first.
- Use different bit sizes for varied pin widths.
- Test each change carefully before final cuts.
Frequently Asked Questions
What Is A Dovetail Jig Used For In Cabinets?
A dovetail jig helps create strong, precise dovetail joints for cabinet corners. It ensures perfect alignment and durability. This tool simplifies woodworking, making joint cutting faster and more accurate. It is essential for professional-quality cabinet construction and enhances the overall cabinet strength.
How Do You Set Up A Dovetail Jig Correctly?
To set up a dovetail jig, clamp your wood securely and adjust the template guides. Align the router bit according to the jig’s instructions. Proper setup ensures accurate, clean cuts. Always double-check measurements before routing to prevent mistakes during joint creation.
Can Beginners Use A Dovetail Jig Easily?
Yes, beginners can use a dovetail jig with practice and patience. Most jigs come with clear instructions and templates for guidance. Start with scrap wood to build confidence. This tool simplifies complex joints, making it accessible for new woodworkers.
What Router Bit Is Best For Dovetail Jigs?
A dovetail router bit with a 14 to 20-degree angle is ideal for dovetail jigs. Choose a bit size that matches your wood thickness. Sharp, high-quality bits ensure clean cuts and reduce tear-out. Proper bit selection improves joint fit and appearance.
Conclusion
Creating cabinets with a dovetail jig is rewarding. This tool makes strong joints. Follow the steps carefully for best results. Practice improves your skills and confidence. Remember to measure twice, cut once. Precision is key in woodworking. A good dovetail jig saves time and effort.
Your cabinets will be sturdy and look professional. With patience, you can achieve great results. Enjoy the process and take pride in your work. Happy woodworking!