Are you ready to transform your garden into a vibrant paradise? Whether you’re a seasoned gardener or just starting out, mastering the art of transplanting bulbs can elevate your green space to new heights.
Imagine the satisfaction of seeing your flowers bloom in perfect harmony, all thanks to your skillful touch. But here’s the secret weapon you need: the garden trowel. In this guide, we’ll reveal how this simple tool can make transplanting bulbs a breeze.
You’ll discover how to use it effectively, ensuring your bulbs have the best start possible. Plus, we’ll share tips and tricks to avoid common pitfalls that can hinder growth. Are you eager to unlock the potential of your garden? Let’s dig in and turn your gardening dreams into reality!
Credit: www.gardengatemagazine.com
Choosing The Right Trowel
Using the right garden trowel makes planting bulbs easier. It helps dig the right size hole without hurting the bulb.
Not all trowels are the same. Different types suit different soil and plants. Let’s look at how to pick the best one for transplanting bulbs.
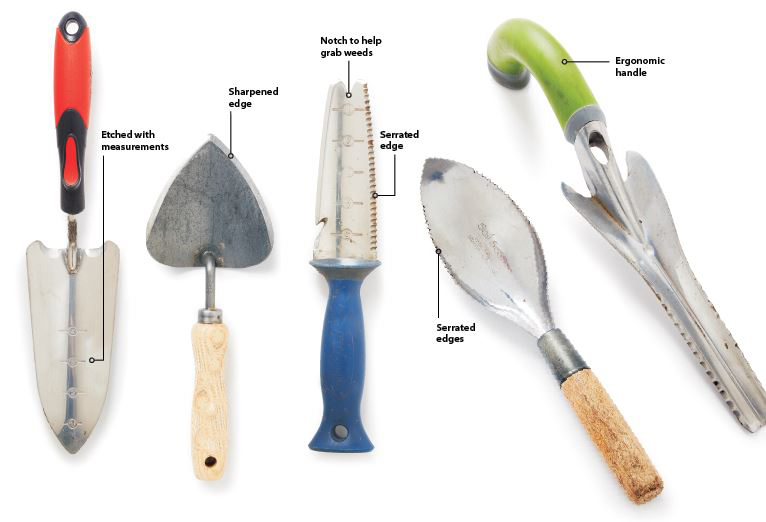
Types Of Garden Trowels
There are several types of garden trowels. Each has a unique shape and size. Choose one that matches the task and soil type.
- Pointed Trowel:Good for hard or clay soil. Its sharp tip cuts through soil easily.
- Transplanting Trowel:Has a narrow blade. It is ideal for moving small plants and bulbs.
- Digging Trowel:Wider and stronger. Best for loose or sandy soil.
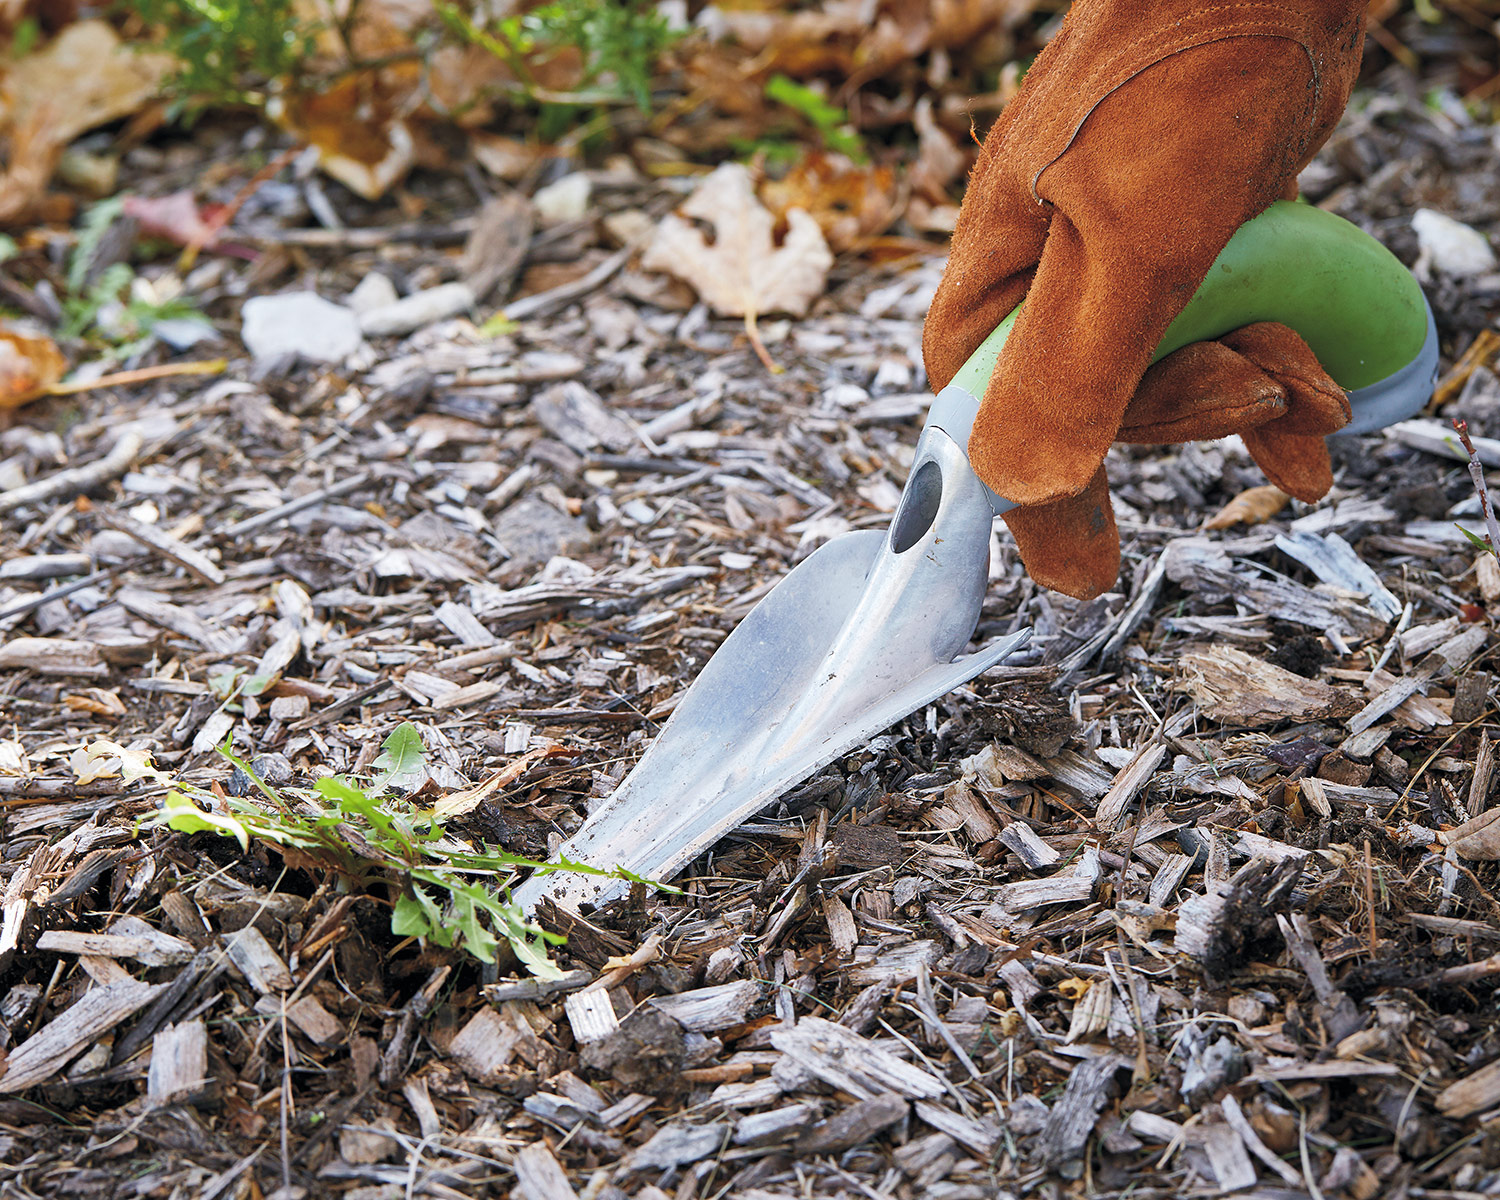
- Weeding Trowel:Thin blade for tight spaces. Helps remove weeds without disturbing bulbs.
Material And Durability
Trowels come in different materials. The choice affects how long the tool lasts and how well it works.
| Material | Durability | Maintenance |
| Stainless Steel | High | Rust-resistant, easy to clean |
| Carbon Steel | Very High | Needs oiling to prevent rust |
| Plastic | Low | Can break, not for hard soil |
| Aluminum | Medium | Lightweight, may bend |
Handle Comfort And Grip
A comfortable handle helps you work longer without pain. Look for grips that fit your hand size and feel secure.
- Wood handles offer a natural feel but need care.
- Rubber grips prevent slipping when hands are wet.
- Ergonomic shapes reduce hand strain.
- Check for smooth edges to avoid blisters.
Preparing Bulbs For Transplanting
Transplanting bulbs requires care to help them grow well. Preparing bulbs correctly makes sure they stay healthy.
This guide explains how to select, clean, and time your bulbs for the best results.
Selecting Healthy Bulbs
Choose bulbs that look firm and feel heavy. Avoid bulbs with soft spots or mold.
Healthy bulbs will have no cuts or bruises. They should be free of pests and dry on the outside.
- Firm texture without mushy areas
- No signs of mold or rot
- Dry outer skin without damage
- Free from insect holes or pests
Soaking And Cleaning
Before planting, soak bulbs in water for a few hours. This helps rehydrate them and softens the roots.
After soaking, gently clean off dirt. Use a soft brush if needed. Do not damage the bulb skin.
- Soak bulbs in lukewarm water for 2-4 hours
- Use a soft brush to remove soil
- Handle bulbs carefully to avoid skin damage
- Dry bulbs in shade before planting
Timing For Transplanting
Transplant bulbs when the soil is cool but not frozen. Early spring or fall is best.
Plant bulbs before they start sprouting. This helps them adjust and grow strong roots.
- Transplant in early spring or fall
- Soil should be moist and cool
- Plant before new growth appears
- Avoid freezing or very hot soil
Soil Preparation
Good soil preparation helps bulbs grow strong roots. It ensures bulbs get enough nutrients and water.
Using a garden trowel makes soil work easier. It helps you prepare the right planting area for bulbs.
Testing Soil Quality
Test soil to know if it is good for bulbs. Bulbs grow best in loose, well-draining soil.
Look for soil that is neither too sandy nor too clayey. Check if the soil stays wet for long or drains well.
- Take a small soil sample from the planting area
- Feel the soil texture between your fingers
- Check soil color and smell for signs of health
- Observe how water moves through the soil
Amending Soil For Bulbs
Add materials to improve soil if it is poor. Bulbs like soil that drains well and holds some moisture.
Organic matter like compost helps soil stay loose and fertile. Avoid heavy clay or very sandy soil without changes.
- Mix compost or peat moss into the soil
- Add sand to improve drainage if soil is clayey
- Use garden lime to reduce soil acidity if needed
- Work amendments evenly into the soil with your trowel
Loosening Soil With A Trowel
Use a garden trowel to break up hard soil. Loosen soil to help bulb roots grow easily.
Dig small holes or trenches with the trowel. Remove stones and clumps to make soil smooth and soft.
- Push the trowel blade into the soil and lift gently
- Turn the soil over and break clumps into smaller pieces
- Clear away debris like rocks and old roots
- Make the planting hole just bigger than the bulb size
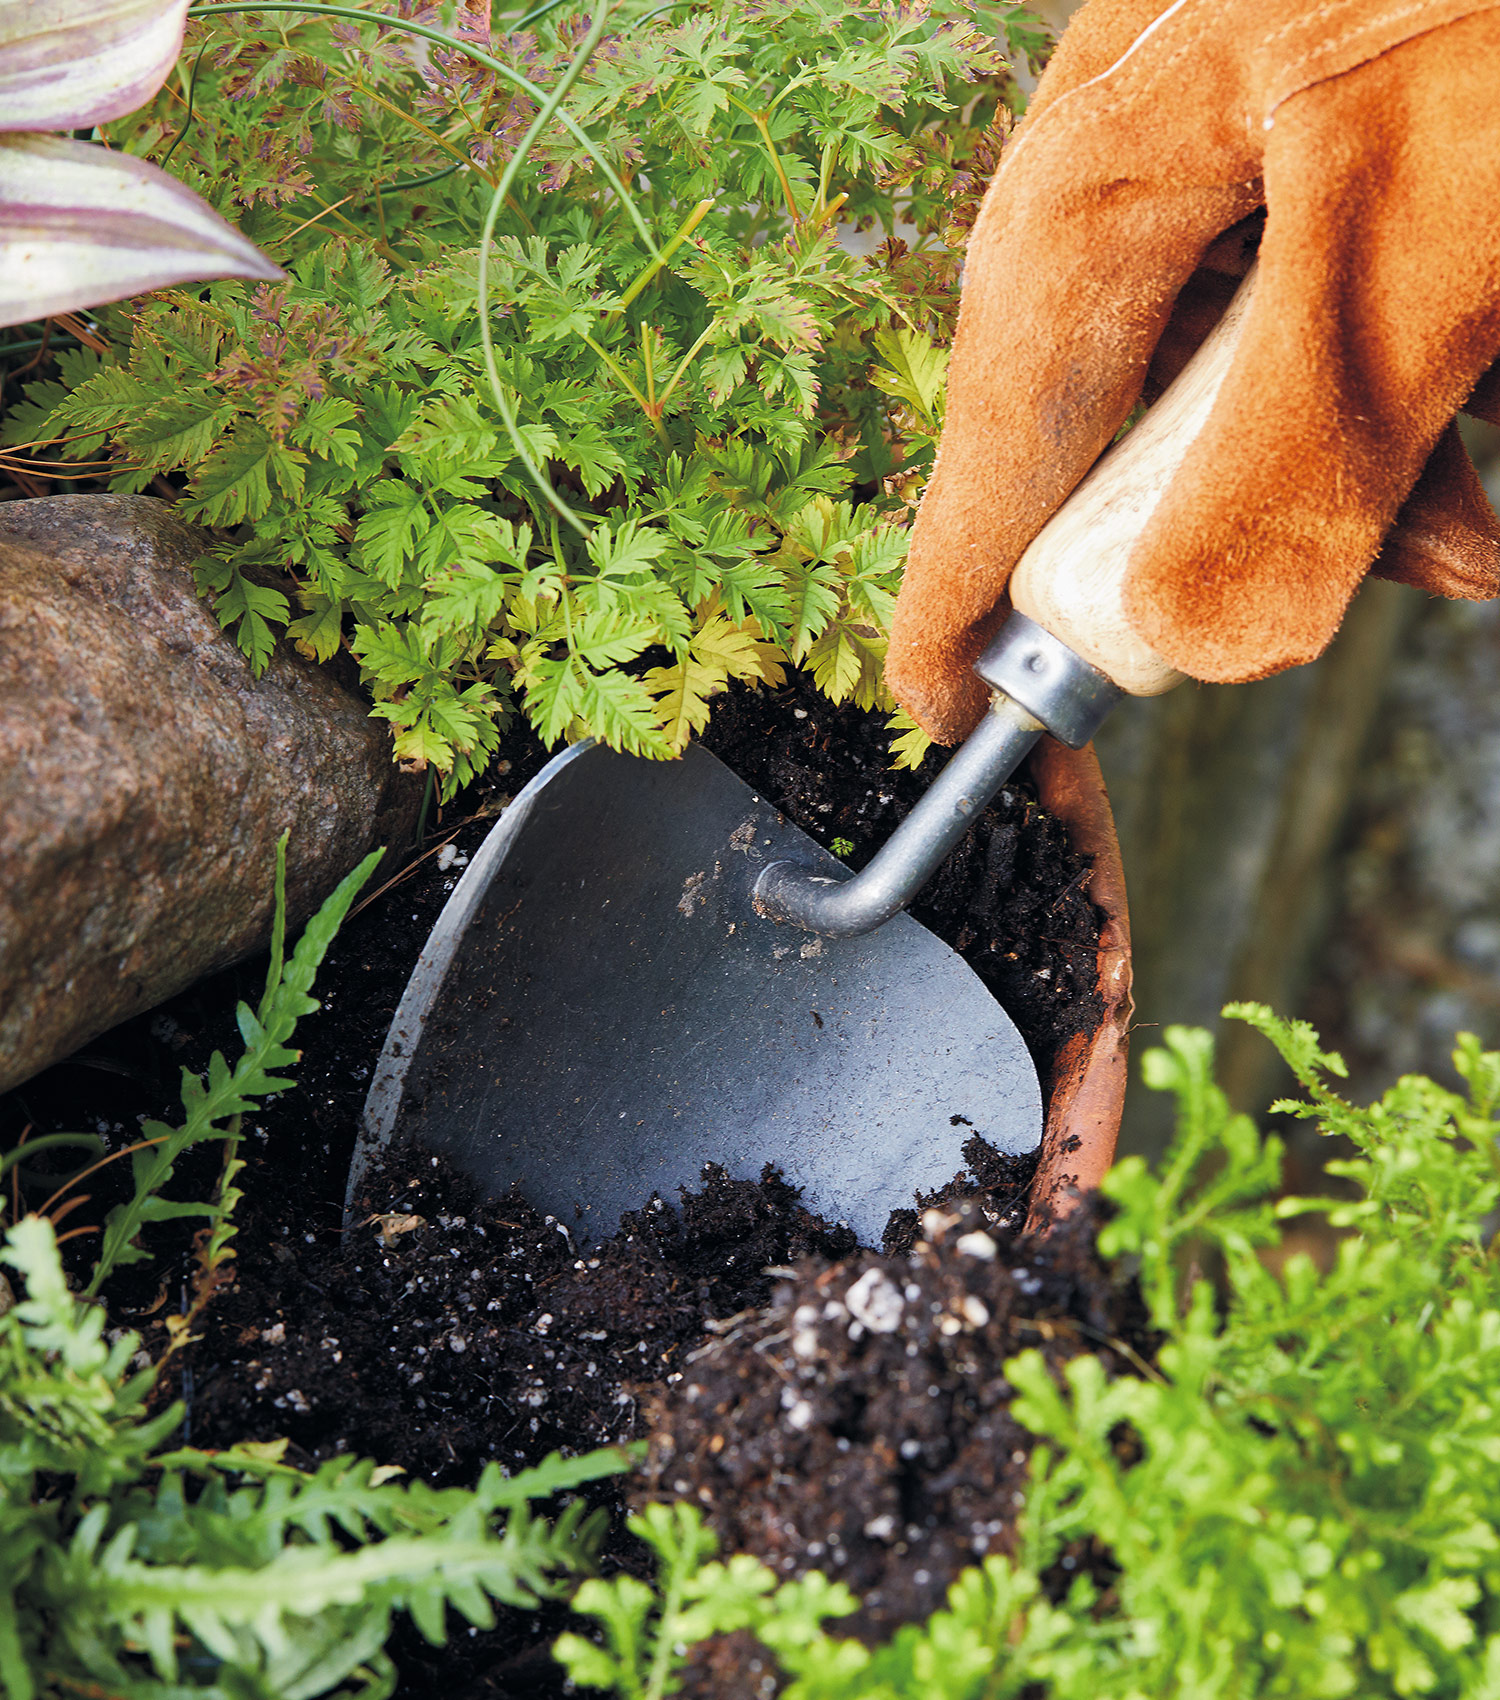
Techniques For Using A Garden Trowel
A garden trowel is a small hand tool used for digging and planting. It helps you move soil and plant bulbs with care.
Using a trowel properly makes transplanting bulbs easier. It protects the bulbs and the soil around them.
Digging The Perfect Hole
Start by loosening the soil with the trowel. Dig a hole wide enough for the bulb to fit without bending.
Remove soil gently to keep the hole clean. Avoid making the hole too big or too small.
- Dig about twice the bulb’s width
- Keep soil edges smooth and even
- Clear out stones or debris from the hole
Handling Bulbs Carefully
Hold bulbs by their sides, not by the roots or shoots. This avoids damage that can stop growth.
Use the trowel to lift bulbs from the soil gently. Avoid dropping or squeezing them too hard.
- Check bulbs for soft spots or damage
- Keep bulbs dry until planting
- Plant bulbs soon after lifting
Placing Bulbs At Correct Depth
Place the bulb bottom down in the hole. The pointed end should face up toward the surface.
Cover the bulb with soil so the depth matches the bulb’s size. Planting too shallow or deep can harm growth.
- Plant bulbs two to three times their height deep
- Firm the soil gently over the bulb
- Water the soil after planting
Aftercare Tips
Taking care of bulbs after transplanting is very important. Proper care helps bulbs grow strong and healthy.
Follow some simple steps to protect your bulbs and encourage good growth.
Watering Guidelines
Water the bulbs right after planting to help settle the soil. Keep the soil moist but not soggy.
Check soil moisture regularly and water when the top inch feels dry. Avoid overwatering to prevent rot.
- Water immediately after transplanting
- Keep soil evenly moist, not wet
- Water when top inch of soil is dry
- Reduce watering as bulbs start to grow
Mulching For Protection
Apply a layer of mulch over the soil to keep moisture and protect bulbs from cold. Mulch also stops weeds.
Use organic mulch like straw, shredded leaves, or bark. Keep mulch about two inches thick and away from bulb stems.
- Spread 2-inch layer of organic mulch
- Keep mulch a little away from bulb tops
- Mulch keeps soil moist and warm
- Mulch helps prevent weeds
Monitoring Growth
Watch your bulbs for signs of growth like shoots or leaves. Healthy bulbs will start growing in a few weeks.
If you see any yellowing or wilting, check soil moisture and pests. Remove damaged leaves to help plants stay healthy.
- Look for new shoots and leaves
- Check soil moisture and pests often
- Remove damaged or dead leaves
- Support plants if needed with stakes
Credit: www.gardengatemagazine.com
Common Mistakes To Avoid
Using a garden trowel to transplant bulbs needs care and attention. Small errors can harm the bulbs or stop them from growing well.
Knowing what to avoid helps you plant bulbs that bloom beautifully. Read on to learn common mistakes and how to prevent them.
Planting Too Deep Or Shallow
Placing bulbs too deep or too shallow in the soil can stop them from growing. The right depth gives bulbs the best chance to sprout and flower.
- Plant bulbs at a depth two to three times their height.
- Too deep planting delays sprouting and wastes energy.
- Too shallow planting can dry out the bulb or expose it to frost.
- Use your garden trowel to dig precise holes for correct depth.
Damaging Bulbs During Transplant
Bulbs are delicate and can break easily. Using a trowel carelessly can cut or bruise bulbs, making them weak or rotten.
- Handle bulbs gently by their sides, not the roots or tips.
- Use the trowel to loosen soil around bulbs, not to pry them out forcefully.
- Check the bulb for soft spots or damage before planting.
- Clean your trowel to avoid spreading disease between bulbs.
Ignoring Soil Conditions
Good soil helps bulbs grow strong roots. Ignoring soil type or condition leads to poor growth or bulb rot.
| Soil Condition | Problem | Solution |
| Heavy Clay | Poor drainage, water stays too long | Add sand or compost to improve drainage |
| Sandy Soil | Dries out quickly, low nutrients | Mix in organic matter to keep moisture |
| Compacted Soil | Roots cannot grow well | Loosen soil with trowel before planting |
Credit: www.gardengatemagazine.com
Frequently Asked Questions
What Is The Best Garden Trowel For Transplanting Bulbs?
The best garden trowel for bulbs has a narrow, pointed blade. It easily digs into soil without damaging bulbs. Look for a sturdy, rust-resistant material like stainless steel for durability. A comfortable handle ensures better grip and control during transplanting.
How Do You Use A Garden Trowel For Bulb Transplanting?
First, loosen the soil with the trowel by digging a hole twice the bulb size. Gently place the bulb pointed side up. Cover with soil and press lightly. Water the area to help bulbs settle and encourage root growth.
When Is The Ideal Time To Transplant Bulbs Using A Trowel?
Transplant bulbs during their dormant period, usually in early fall or spring. Avoid transplanting when bulbs are actively growing to prevent damage. This timing helps bulbs establish roots before flowering, ensuring healthy growth and vibrant blooms.
Can A Garden Trowel Prevent Bulb Damage During Transplanting?
Yes, a sharp, narrow trowel minimizes soil disturbance and bulb injury. It allows precise digging around bulbs, protecting their roots. Using the right trowel reduces transplant shock and increases the chances of successful bulb growth.
Conclusion
Using a garden trowel makes transplanting bulbs easier and cleaner. It helps dig the right size hole without harming the bulbs. Handle the tool carefully to avoid damage to roots. Keep your soil loose and well-drained for better growth. Regular practice improves your transplanting skills quickly.
Enjoy watching your bulbs grow strong and healthy. This simple tool supports your garden’s success every season. Give it a try and see the difference yourself. Gardening feels rewarding with the right tools in hand.
