Are you ready to elevate your woodworking skills? Imagine creating intricate designs and detailed cuts with precision, all with a simple hand saw.
This tool, often overlooked in favor of power tools, holds the secret to crafting beautiful, detailed pieces. In this guide, you’ll discover the steps to master the art of using a hand saw for detailed cuts. You’ll learn the techniques that make all the difference, turning your projects from ordinary to extraordinary.
Let this be your new tool of choice for achieving finesse in your woodworking projects. Ready to transform your approach and see impressive results? Keep reading to unlock the secrets of the hand saw and how it can revolutionize your work.
Credit: www.familyhandyman.com
Choosing The Right Hand Saw
Selecting the proper hand saw is key for detailed cuts. The right saw makes your work easier and more precise.
Consider the saw type, blade quality, and handle comfort before buying. Each affects your cutting experience.
Types Of Hand Saws For Detail Work
Different hand saws suit different detail tasks. Choose the saw that fits your project size and wood type.
- Backsaw: Has a reinforced spine for straight cuts.
- Keyhole saw: Ideal for small, tight curves and holes.
- Coping saw: Good for intricate shapes and curves.
- Dovetail saw: Perfect for fine joinery and precise cuts.
Blade Selection Tips
| Blade Feature | Benefit |
| Tooth Count (TPI) | Higher TPI gives smoother cuts, lower TPI cuts faster. |
| Blade Thickness | Thin blades allow tight curves and detail work. |
| Blade Length | Shorter blades offer better control on small cuts. |
| Material | High-carbon steel blades stay sharp longer. |
Handle Comfort And Grip
A comfortable handle reduces hand fatigue during long work. Look for handles that fit your hand size well.
- Wood handles offer a natural feel and good grip.
- Plastic handles are lightweight and often have textured grips.
- Ergonomic shapes help maintain control and reduce slips.
- Check if the handle is smooth with no sharp edges.
Preparing For Precise Cuts
Making detailed cuts with a hand saw needs careful preparation. Good preparation helps you cut clean and exact lines.
Small mistakes in setup can cause big problems in your final work. Follow simple steps to get ready for precise cutting.
Marking Your Cut Lines Accurately
Clear and accurate cut lines guide your saw. Use the right tools to mark your lines before you start cutting.
Measure twice and mark once. This reduces errors and saves material.
- Use a sharp pencil or fine-tip marker for clear lines
- Employ a ruler or square to draw straight lines
- Mark both sides of the wood if possible
- Double-check measurements before cutting
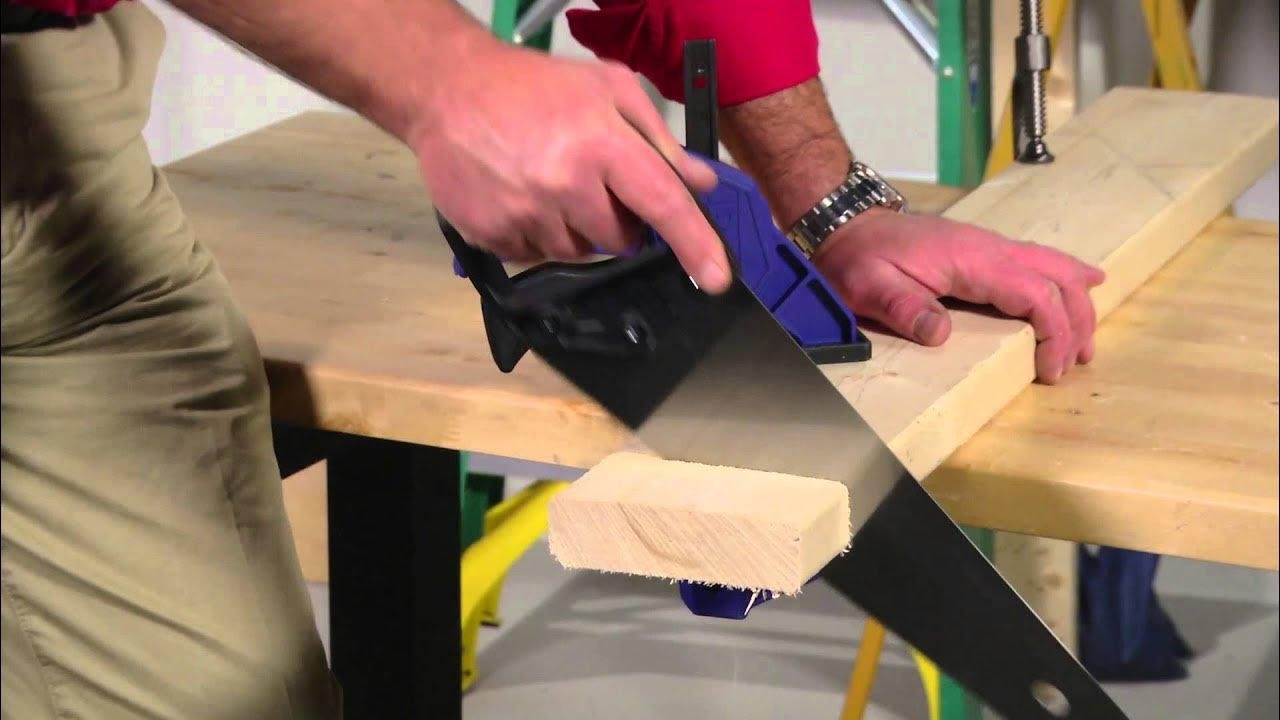
Securing The Workpiece
Hold the wood firmly to stop it from moving. Movement can cause inaccurate cuts or accidents.
Use clamps or a vise to keep the workpiece steady. Make sure it is tight but not damaged.
- Place clamps near the cut line but not in the way
- Check that the wood does not wobble
- Use a flat surface to support the workpiece fully
Setting Up Your Workspace
A clean and organized workspace helps you work faster and safer. Good lighting is important for seeing the lines clearly.
Keep your tools nearby and space clear to avoid distractions and accidents.
- Work on a stable, flat surface at a comfortable height
- Ensure bright, even lighting over your cutting area
- Keep saw blades clean and sharp for smooth cuts
- Remove clutter to avoid tripping or knocking tools over
Techniques For Detailed Sawing
Using a hand saw for detailed cuts needs focus and control. Small mistakes can ruin your work.
These techniques help you cut cleanly and accurately with a hand saw.
Proper Sawing Posture And Hand Position
Stand with your feet shoulder-width apart. Keep your body balanced and relaxed.
Hold the saw handle firmly but not too tight. Use your dominant hand to guide the saw.
- Keep your wrist straight to avoid strain
- Use your other hand to steady the wood
- Position the saw blade at the start of the cut
Starting The Cut Cleanly
Begin the cut slowly to create a guide line. Avoid pushing hard at the start.
Use light, short strokes to help the saw bite into the wood. This keeps the cut straight.
- Mark your cut line clearly before sawing
- Start with the saw at a low angle
- Let the saw do the work, avoid forcing it
Controlling Saw Speed And Pressure
Cut with a steady speed to keep control. Fast sawing can cause mistakes or splinters.
Apply gentle pressure on the push stroke. Release pressure on the pull stroke for smooth cutting.
- Keep your strokes even and consistent
- Slow down near corners or curves
- Pause to check your progress often
Maintaining A Steady Cutting Angle
Hold the saw at the same angle throughout the cut. Changing angles can cause uneven edges.
Use your body and arm to guide the saw, not just your wrist. This helps keep the angle steady.
- Keep the blade aligned with your cut line
- Check angles often during cutting
- Adjust your stance if you lose control

Credit: www.familyhandyman.com
Maintaining Your Hand Saw
Keeping your hand saw in good shape helps you make clean, detailed cuts. Regular care prevents damage and makes your work easier.
Learn simple ways to sharpen, clean, and store your saw for the best results every time.
Sharpening The Blade
Sharp blades cut smoothly and safely. Dull blades make work harder and less accurate. Use a file or sharpening tool to keep the teeth sharp.
File each tooth evenly, following the original angle. Check the blade often and sharpen when cutting feels tough.
- Secure the saw in a clamp before sharpening
- Use a triangular file for best results
- Keep the file at the correct angle
- Sharpen teeth evenly on both sides
Cleaning And Lubricating
Dirt and sap can stick to the blade and slow down cutting. Clean your saw after each use with a brush or cloth.
Apply a light oil to the blade to stop rust and keep it moving smoothly. Wipe off extra oil before storing.
- Remove sawdust and debris with a stiff brush
- Use mild soap and water for sticky sap
- Dry blade completely before oiling
- Apply a thin layer of machine oil or WD-40
Safe Storage Practices
Store your saw where it stays dry and safe from damage. Avoid places with high humidity to stop rust.
Use blade guards or wrap the blade to protect the teeth. Hang the saw or place it flat in a tool box.
- Keep saw in a dry, cool area
- Use blade covers or wrap in cloth
- Hang saw by the handle on a hook
- Store away from heavy tools that can bend the blade
Troubleshooting Common Issues
Using a hand saw for detailed cuts can be tricky. Small problems can ruin your work. Knowing how to fix these issues saves time and effort.
This guide covers three common problems: wandering cuts, blade binding, and tear-out. Each section explains how to handle these issues.
Fixing Wandering Cuts
A wandering cut happens when your saw moves off the line. This makes the cut uneven. It usually happens if you do not start the cut right or lose control.
- Mark your cut line clearly with a pencil or knife.
- Start the cut slowly to create a small groove.
- Keep the saw blade aligned with the mark.
- Hold the wood steady to avoid movement.
- Use smooth, controlled strokes to follow the line.
Dealing With Blade Binding
Blade binding happens when the saw blade gets stuck in the wood. It can stop the cut and damage the blade or wood. This often occurs if the cut is too tight or the wood closes on the blade.
| Cause | Solution |
| Tight kerf (cut width) | Use a saw with a wider set or thin blade |
| Wood pinching the blade | Clamp the wood firmly or use wedges to hold the cut open |
| Excess pressure on saw | Let the saw do the work; apply gentle pressure |
| Dull blade teeth | Sharpen or replace the saw blade |
Preventing Tear-out
Tear-out happens when the wood fibers tear away at the cut edge. It leaves rough or splintered wood. This is common with soft or fragile wood.
Try these tips to reduce tear-out:
- Score the cut line with a sharp knife before sawing.
- Use painter’s tape along the cut line to hold fibers in place.
- Cut with the good face of the wood facing down.
- Use a fine-toothed saw designed for clean cuts.
- Cut slowly and gently near the end of the cut.
Advanced Tips For Precision
Cutting detailed shapes with a hand saw needs patience and skill. Small mistakes can ruin the work.
Use these tips to make cleaner, more exact cuts. Practice is key to getting better results.
Using Guides And Fences
Guides and fences help keep your saw straight. They stop the saw from moving side to side.
You can clamp a wooden fence or metal guide to your workpiece. This makes long or angled cuts easier.
- Use a ruler or square to place the guide exactly.
- Clamp the guide firmly to prevent movement.
- Check the angle of the guide before sawing.
- Cut slowly along the guide for best control.
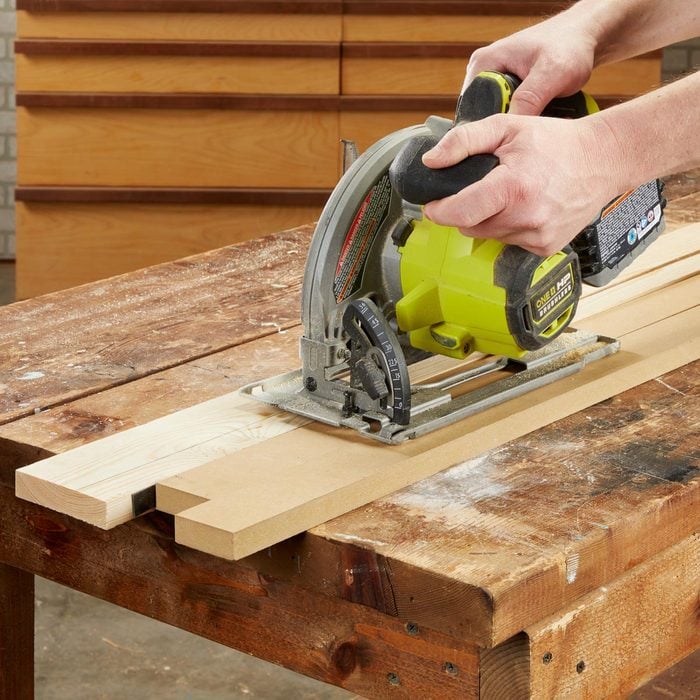
Combining Sawing With Other Tools
Sometimes a hand saw alone is not enough for detailed cuts. Use other tools to prepare or finish the work.
For example, a coping saw can cut curves, while a file smooths edges. A chisel can clean corners.
- Start cutting rough shapes with a hand saw.
- Use a coping saw for curves or tight spots.
- File edges to remove splinters and smooth cuts.
- Chisel sharp corners for fine details.
Practice Exercises To Improve Skill
Practice helps you control the saw better and see where to improve. Use simple exercises to build skill.
Try cutting straight lines, angles, and curves on scrap wood. Check the cuts and adjust your technique.
- Cut straight lines using a guide fence.
- Practice angled cuts at 45 and 90 degrees.
- Make curved cuts with a coping saw.
- Finish cuts by filing edges smooth.
- Time yourself to improve speed and accuracy.

Credit: kakuritools.com
Frequently Asked Questions
What Type Of Hand Saw Is Best For Detailed Cuts?
A fine-toothed saw, like a dovetail or back saw, works best. It offers precision and clean cuts on small, intricate wood pieces. Choose one with a comfortable handle for better control during detailed work.
How Do I Maintain Accuracy With A Hand Saw?
Use a steady, controlled motion and keep the saw aligned with your cut line. Mark your cut clearly and avoid rushing. Proper posture and a firm grip improve accuracy and reduce mistakes.
Can I Use A Hand Saw On Different Wood Types?
Yes, hand saws can cut various woods. However, select a saw with suitable teeth for softwood or hardwood. Adjust your cutting speed and pressure based on the wood’s density for best results.
How Should I Prepare Wood Before Detailed Sawing?
Secure the wood firmly using clamps or a vise to prevent movement. Mark your cut lines clearly with a pencil or marking knife. Smooth any rough surfaces for better saw guidance.
Conclusion
Using a hand saw for detailed cuts takes practice and patience. Choose the right saw for your project. Keep your cuts slow and steady to stay precise. Always hold the saw firmly and guide it carefully. Take breaks to avoid mistakes from tired hands.
With time, your skills will improve naturally. Enjoy the process of creating fine, clean cuts. This guide helps you start with confidence and control. Keep practicing, and your projects will look better each time.