Ready to take your woodworking skills to the next level? Using a mallet with chisels can be a game-changer for your craft.
Imagine creating smoother, cleaner cuts with ease, transforming your projects into masterpieces. Whether you’re a beginner or a seasoned woodworker, mastering this technique can bring precision and efficiency to your workbench. In this guide, you’ll discover the essential tips and tricks to harness the power of a mallet and chisel, ensuring your projects stand out.
Dive in, and unlock the secrets to woodworking success that will keep you coming back for more!
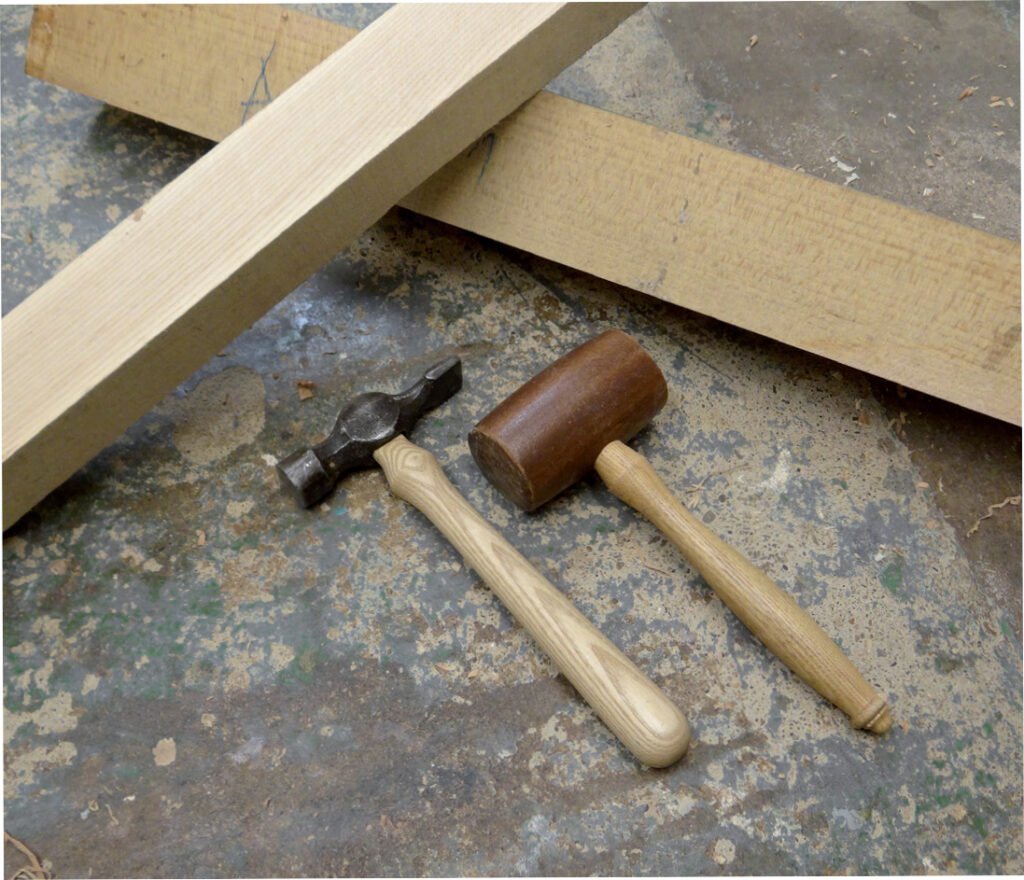
Credit: commonwoodworking.com
Choosing The Right Mallet
Using a mallet with chisels helps control your cuts better. Picking the right mallet improves your carving and safety.
Not all mallets work the same way. Knowing the types, materials, and how to match them with chisels makes your work easier.
Types Of Mallets
Mallets come in different shapes and sizes. Each type suits certain tasks and chisels. Choose one that feels good in your hand and fits your work style.
- Wooden mallets: Traditional and lightweight, good for soft woods.
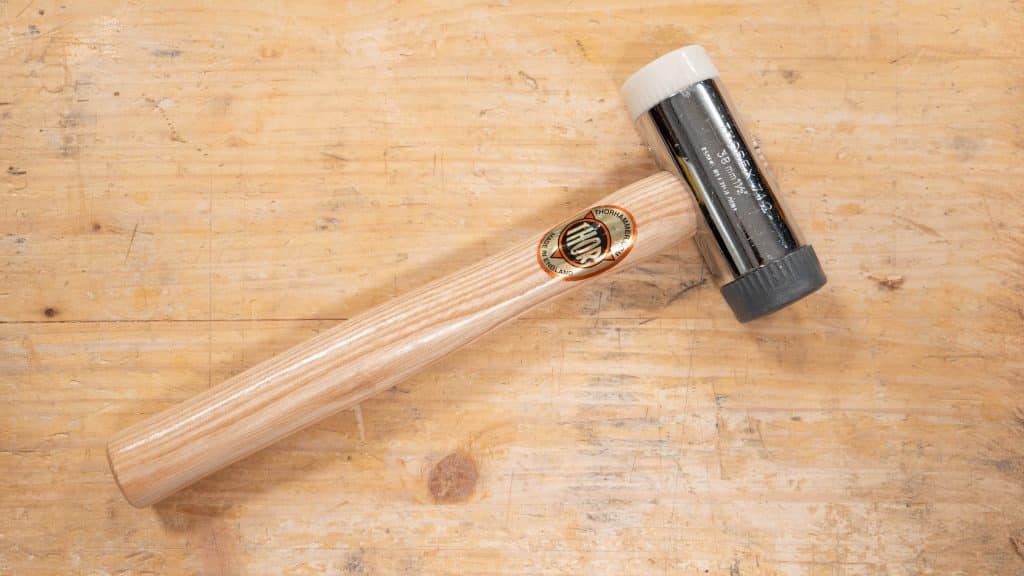
- Rubber mallets: Softer hits, reduce damage on delicate chisels.
- Rawhide mallets: Wrap a wooden head with leather for softer blows.
- Plastic mallets: Durable and light, good for light carving.
Materials And Weight
Mallets are made from wood, rubber, plastic, or leather-covered wood. The weight affects how much force you apply with each hit.
| Material | Weight | Best Use |
|---|---|---|
| Wood | Light to medium | General woodworking, soft woods |
| Rubber | Light | Delicate chiseling, soft materials |
| Plastic | Light to medium | Light carving, hobby work |
| Leather-covered wood | Medium | Soft hits, protecting chisel edges |
Matching Mallet To Chisel
Use a mallet that fits your chisel size and type. Heavy mallets suit large chisels. Light mallets work well with small or delicate chisels.
- Large chisels need firm, heavy hits for deep cuts.
- Small chisels require light taps to avoid damage.
- Soft mallets protect sharp edges on fine chisels.
- Choose mallets that feel balanced with your chisel for control.

Credit: woodworkersinstitute.com
Selecting Suitable Chisels
Choosing the right chisel is key to using a mallet well. The chisel must fit the task and work smoothly with the mallet.
Different chisels suit different crafts and cutting jobs. Picking the correct one saves effort and improves results.
Chisel Types For Different Crafts
Woodworking chisels have sharp edges for carving wood. They come in many styles for fine or rough work.
Stone chisels are tougher and used with heavy mallets. They break and shape stone or concrete.
- Wood chisels: carving, paring, and joinery
- Stone chisels: splitting, pitching, and lettering
- Metal chisels: cutting metal or shaping hard materials
Blade Sizes And Shapes
Blade size affects control and cut depth. Small blades work well for detail work. Larger blades remove more material fast.
Blade shape suits the cut type. Straight blades give clean cuts. Curved or angled blades reach tight spots.
- Wide blades: smooth, flat cuts
- Narrow blades: fine, precise cuts
- Curved blades: shaping and scooping
- Beveled edges: working in corners
Handle Designs
Handle shape affects comfort and control. Wooden handles absorb shock well. Plastic or metal handles last longer.
Longer handles give more power. Shorter handles offer better precision. Some handles have grips for safety and slip resistance.
- Wood handles: traditional feel and shock absorption
- Plastic handles: durable and weather resistant
- Metal handles: heavy-duty and long lasting
- Ergonomic grips: reduce hand fatigue
Proper Grip And Positioning
Using a mallet with chisels needs the right grip and positioning. This helps you work safely and accurately.
Good control comes from holding tools correctly and keeping your body steady. This guide covers key points for better results.
Holding The Mallet Correctly
Hold the mallet near the end of the handle for better control. Your grip should be firm but not too tight.
Use your whole hand to wrap around the handle. Your thumb should rest along the side, not on top.
- Grip the mallet handle near the bottom
- Keep your hand relaxed but steady
- Thumb rests on the side of the handle
- Strike with the flat face of the mallet
Positioning The Chisel
Place the chisel blade flat on the wood surface. The bevel side should face the waste area you want to remove.
Hold the chisel handle firmly with your other hand to guide it. Keep your fingers clear of the striking area.
- Set the chisel blade flat against the wood
- Bevel side faces the area to be cut
- Hold the handle steady with your free hand
- Keep fingers away from the mallet strike zone
Body Posture For Control
Stand with your feet shoulder-width apart for balance. Face your work directly to keep control.
Bend your knees slightly and keep your back straight. Use your arm and shoulder muscles to guide the mallet.
- Stand with feet shoulder-width apart
- Face your work straight on
- Bend knees slightly
- Keep back straight
- Use arm and shoulder for steady strikes

Credit: woodworkersinstitute.com
Techniques For Precise Striking
Using a mallet with chisels requires accuracy and control. Precise striking helps you shape wood or stone cleanly.
Learn how to apply force, control your angle, and avoid common mistakes. These tips improve your work quality.
Controlled Force Application
Use steady, measured hits instead of wild swings. Controlled force helps prevent damage to the chisel and material.
- Hold the mallet firmly but not too tight.
- Start with light taps to test the chisel’s position.
- Increase force gradually as needed.
- Keep your wrist flexible for better control.
Angle And Direction Of Hits
Strike the chisel at the correct angle for clean cuts. The direction affects how the material breaks away.
| Angle | Effect |
| 90 degrees | Strong, straight cuts |
| 45 degrees | Gentle, angled shaping |
| Less than 30 degrees | Light surface scraping |
Avoiding Common Mistakes
Watch out for these common errors to keep your work safe and neat:
- Hitting too hard and damaging the chisel edge.
- Striking off-center, causing the chisel to slip.
- Using the wrong mallet size for the chisel.
- Ignoring proper grip and posture.
Maintaining Tools For Longevity
Keeping your mallet and chisels in good shape helps them last longer. Proper care also makes your work safer and easier.
Simple maintenance steps can keep your tools sharp and ready to use. Regular cleaning and storage are important too.
Sharpening Chisels
Sharp chisels cut cleanly and require less force. Dull edges can damage wood and cause accidents.
Use a sharpening stone or honing guide to keep the edge straight and sharp. Always keep the bevel angle steady.
- Clean the blade before sharpening
- Start with coarse grit, finish with fine grit
- Use water or oil on the stone as needed
- Test sharpness by gently slicing paper
Caring For Mallets
Mallets take hits, so they need regular checks. Look for cracks or dents in the head and handle.
Clean your mallet after use to remove dirt and sap. Apply linseed oil to wooden handles to stop drying and cracking.
- Check for loose heads and tighten if needed
- Sand rough spots on the handle for smooth grip
- Store mallets away from extreme heat or moisture
Storage Tips
Store your chisels and mallets in a dry place to stop rust and wood damage. Keep them safe from drops and knocks.
Organize your tools with racks or holders. This prevents damage and helps you find tools quickly.
- Use blade guards or covers for chisels
- Hang mallets on hooks or place in toolboxes
- Keep tools away from damp basements or garages
- Regularly check stored tools for rust or wear
Safety Tips During Use
Using a mallet with chisels requires care to avoid injuries. Safety should be your top priority when working with sharp tools and heavy strikes.
Follow safety rules to protect yourself and others in your workspace. Proper preparation can prevent accidents and improve your work quality.
Protective Gear
Wear the right protective gear to keep safe during chiseling. This gear helps protect your eyes, hands, and body from flying chips and accidental hits.
- Safety goggles to protect your eyes from chips
- Heavy-duty gloves to shield your hands
- Long-sleeved shirts to protect your arms
- Closed-toe shoes to guard your feet
- Hearing protection if you work in noisy areas
Work Environment Setup
Prepare your work area before you start chiseling. A tidy and well-lit space helps you work safely and efficiently.
| Safety Measure | Description |
| Clear Workspace | Remove clutter and obstacles near your workbench. |
| Proper Lighting | Use bright lights to see your tools and work clearly. |
| Stable Surface | Work on a strong, flat surface to avoid slips and falls. |
| Tool Inspection | Check mallets and chisels for damage before use. |
| Secure Materials | Clamp or hold workpieces firmly to prevent movement. |
Handling Slips And Accidents
Even with care, slips and accidents can happen. Know how to respond quickly to reduce harm.
- Stop working immediately if an accident occurs.
- Check the injury and clean any wounds.
- Apply first aid or seek medical help if needed.
- Report serious injuries to a supervisor or emergency services.
- Review what caused the accident and fix the problem.
Advanced Crafting Techniques
Using a mallet with chisels can improve your woodworking skills. It gives you better control and power.
This guide covers advanced ways to use a mallet for fine detailing, joinery, and creative carving.
Fine Detailing
Use a light mallet tap to control small chisel cuts. This helps add delicate shapes and lines.
Work slowly to avoid splitting the wood. Keep the chisel sharp for clean edges.
Joinery Applications
Use the mallet to drive chisels for making joints like mortise and tenon. It helps remove wood pieces precisely.
Tap firmly but steadily. This prevents damage to the wood and tools.
- Mark joint outlines before chiseling
- Use the mallet to chip away wood inside the joint
- Check fit often to avoid overcutting
Creative Carving Methods
Combine mallet strikes with different chisel angles to create patterns and textures. This adds depth to your work.
Vary your mallet force for light or deep cuts. Experiment with shapes to make unique designs.
- Use angled chisels for curved cuts
- Tap lightly for fine surface texture
- Strike harder for bold, deep shapes
Frequently Asked Questions
What Type Of Mallet Is Best For Chisels?
A wooden or rubber mallet is ideal for chisels. These mallets deliver controlled force without damaging the chisel handle. Choose a mallet that balances weight and grip to ensure precision during woodworking tasks.
How Do I Hold A Mallet Correctly With Chisels?
Hold the mallet firmly but relaxed, gripping near the end of the handle. Use your wrist and forearm to swing for better control and accuracy. Avoid over-gripping to maintain fluid motion and reduce fatigue.
Can I Use A Metal Hammer Instead Of A Mallet?
Using a metal hammer can damage chisels and reduce control. Mallets provide softer, controlled impacts suited for chiseling wood. Always prefer a mallet to protect your tools and achieve cleaner cuts.
How Much Force Should I Apply With A Mallet?
Apply moderate, controlled force to avoid splitting wood or damaging chisels. Start with light taps and increase gradually. Precision and control matter more than brute strength in chiseling.
Conclusion
Using a mallet with chisels makes woodworking easier and safer. Choose the right mallet for your chisel size and task. Hold the chisel firmly and strike carefully to avoid damage. Practice helps improve your control and accuracy. Remember to keep your tools sharp for better results.
Enjoy the satisfaction of crafting with the right technique. This guide gives you a solid start for using mallets and chisels well. Keep practicing, and your skills will grow steadily over time.