Are you tired of guessing what’s wrong inside your pipes? A pipe inspection camera can be your best tool to see exactly what’s going on without digging up your walls or floors.
Imagine saving time, money, and frustration by spotting blockages, leaks, or damage quickly and clearly. In this guide, you’ll learn how to use a pipe inspection camera like a pro, whether you’re a homeowner or a professional. By the end, you’ll feel confident to inspect your pipes yourself and make smarter repair decisions.
Keep reading to unlock the secrets of this powerful device and take control of your plumbing problems.

Credit: www.amazon.com
Choosing The Right Camera
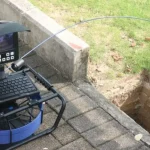
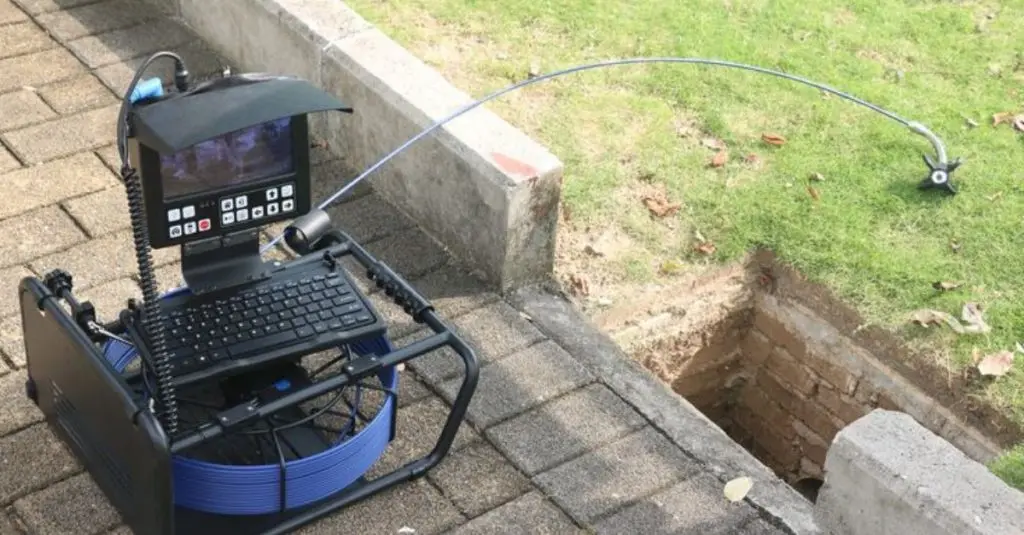
Using a pipe inspection camera helps find problems inside pipes. Picking the right camera makes the job easier and faster.
Different cameras offer various features. Learn about types, key features, and how to balance budget and quality.
Types Of Inspection Cameras
There are many types of pipe inspection cameras. Each type fits different pipe sizes and inspection needs.
- Handheld Cameras:Small and easy to use for quick checks in small pipes.
- Push Cameras:Have a flexible cable to push inside longer pipes.
- Drone Cameras:Used for large or hard-to-reach pipes and ducts.
- Wireless Cameras:Send images to a screen without cables for better mobility.
Key Features To Consider
Look for features that match your inspection needs. They improve camera use and image quality.
- Camera Size:Choose a size that fits the pipe diameter.
- Image Quality:Clear pictures help find small problems.
- Lighting:Built-in lights brighten dark pipes.
- Cable Length:Longer cables reach farther inside pipes.
- Waterproof Design:Protects the camera in wet environments.
- Screen Type:Look for a good display for easy viewing.
Budget Vs. Quality
Cameras come in many price ranges. Higher price usually means better quality and features.
Think about how often you will use the camera. Choose one that fits your budget but meets your needs.
- Low-cost cameras work for occasional use and small jobs.
- Mid-range cameras offer better image quality and durability.
- High-end cameras provide advanced features and long cable length.

Credit: www.youtube.com
Preparing For Inspection
Using a pipe inspection camera helps find problems inside pipes. Getting ready is important to make the inspection smooth.
Preparation includes checking the pipe, setting up the camera, and following safety rules.
Assessing The Pipe Condition
Look at the pipe’s outside before inspection. Check for cracks, leaks, or blockages.
Note the pipe type and size. This helps choose the right camera and tools.
- Inspect visible parts for damage
- Measure pipe diameter
- Identify pipe material
- Check for recent repairs
Setting Up The Equipment
Prepare the pipe inspection camera by charging the battery. Make sure all parts are clean and working.
Connect the camera to the monitor or recording device. Test the camera light and focus before use.
- Charge camera battery fully
- Clean camera lens and cable
- Connect camera to screen or recorder
- Test camera functions and lighting
Safety Precautions
Wear gloves and safety glasses to protect yourself. Pipes may have sharp edges or harmful substances.
Keep the work area dry and clear to avoid slips. Follow all safety guidelines for electrical equipment.
- Wear protective gloves and glasses
- Ensure good lighting in the work area
- Keep area dry and free of obstacles
- Handle electrical parts with care
Operating The Camera
Using a pipe inspection camera helps you see inside pipes clearly. It shows blockages, cracks, and other problems without digging.
To get good results, you need to know how to operate the camera well. This guide covers key steps to use it effectively.
Inserting The Camera Properly
Start by cleaning the pipe opening. This stops dirt from sticking to the camera lens. Hold the camera cable steady to avoid damage.
Insert the camera slowly and straight into the pipe. Avoid forcing it in. This reduces risk of breaking the cable or camera head.
- Wear gloves for a good grip
- Keep the cable untangled
- Insert gently to prevent damage
- Watch the screen for camera position
Navigating Through Pipes
Move the camera forward slowly. Stop if you feel resistance. Pull back a little before trying again. This protects the equipment.
Use gentle turns to guide the camera through bends. Avoid sharp angles that can get the camera stuck. Keep an eye on the screen to see where you are.
- Advance the camera slowly
- Stop if cable feels stuck
- Retract slightly before moving again
- Guide through bends carefully
- Watch the live video for direction
Adjusting Lighting And Focus
Most cameras have built-in lights to brighten dark pipes. Adjust the light level to avoid glare or dark spots. Good lighting shows pipe details clearly.
Focus the camera lens if possible. Clear images help spot small cracks and blockages. Check the display screen often and adjust settings as needed.
- Turn on built-in lights
- Adjust brightness for clear view
- Focus the lens for sharp images
- Check screen regularly during inspection
Interpreting The Footage
Using a pipe inspection camera helps you see inside pipes clearly. Interpreting the footage is key to finding problems fast.
Good interpretation helps you spot issues and decide the best fix. It saves time and money on repairs.
Identifying Common Issues
Look closely at the footage for signs of damage or wear. Common problems include rust, corrosion, and pipe joint leaks.
Changes in pipe color or texture can also show trouble spots that need attention.
- Rust or corrosion patches on pipe walls
- Loose or broken pipe joints
- Signs of water leakage or seepage
- Build-up of sediment or debris
Spotting Blockages And Cracks
Blockages often appear as dark spots or clumps blocking the pipe’s path. Cracks look like thin lines or splits in the pipe surface.
Check how big the blockage or crack is. This helps decide if cleaning or repair is needed.
- Blockages may be hair, grease, or roots
- Cracks can cause leaks or pipe breaks
- Look for pipe deformation near cracks
- Note if blockages reduce pipe diameter
Recording And Saving Videos
Record the footage to review later or show to a plumber. Clear videos help explain the problem well.
Save videos with labels like date and pipe location. This keeps your inspection organized.
- Use the camera’s record button to capture video
- Save files in easy-to-access folders
- Label videos with inspection date and pipe area
- Review videos to confirm issues before repair
Maintenance And Troubleshooting
Keeping your pipe inspection camera in good condition is key to getting clear images. Regular checks and cleaning help avoid problems. This guide covers simple maintenance and quick fixes.
Understanding how to care for the camera lens, fix common issues, and store the equipment can save time and money. Follow these tips to keep your device working well.
Cleaning The Camera Lens
Dirty lenses reduce image quality and can hide important details. Clean the lens gently to keep the view clear. Use soft cloths and avoid harsh chemicals.
- Turn off the camera before cleaning.
- Use a microfiber cloth to wipe the lens.
- If needed, slightly dampen the cloth with water or lens cleaner.
- Do not use abrasive materials or strong solvents.
- Dry the lens completely before using the camera again.
Handling Technical Problems
Technical issues can happen even with careful use. Knowing some basic fixes can help you get the camera back to work fast.
| Problem | Possible Cause | How to Fix |
| No image on screen | Loose cable connection | Check and reconnect cables firmly |
| Blurry image | Dirty lens or low battery | Clean lens and charge or replace battery |
| Camera won’t turn on | Dead battery or faulty power switch | Charge battery or inspect power switch |
| Image flickers | Interference or damaged cable | Move away from electronics or replace cable |
Storing The Equipment Safely
Proper storage extends the life of your pipe inspection camera. Keep it in a dry, safe place to avoid damage and rust.
- Store the camera in its case after use.
- Keep the cable coiled loosely to avoid kinks.
- Do not store in direct sunlight or damp areas.
- Remove batteries if you won’t use the camera for a long time.
- Check the equipment regularly for signs of wear or damage.
Advanced Tips And Techniques
Using a pipe inspection camera can save time and effort in plumbing tasks. Advanced tips help you get clearer images and better results.
These techniques improve your inspection quality and make work easier in hard places.
Using Software For Analysis
Many pipe inspection cameras come with software to help analyze videos and pictures. This software can measure pipe size and locate defects.
Use the software to mark problem spots and save reports. This helps track issues over time and share details with others.
- Check for cracks or blockages with image tools
- Use measurement features to find pipe diameter
- Save and export data for easy sharing
- Compare past inspections to see changes
Enhancing Image Quality
Good image quality shows pipe details clearly. Clean the camera lens before use to avoid blurry pictures.
Adjust the lighting and focus settings on the camera. Use higher resolution if your device supports it.
- Wipe the lens with a soft cloth
- Use built-in LED lights to brighten dark pipes
- Adjust focus for sharp images
- Choose high video resolution settings
Working In Difficult Environments
Some pipes are hard to reach or very dirty. Use flexible camera cables to navigate tight bends and long distances.
Protect your camera from water and dirt by using waterproof and durable models. Take breaks if the environment is tough to avoid mistakes.
- Choose flexible cables for bends and corners
- Use waterproof cameras for wet pipes
- Wear gloves and safety gear in dirty areas
- Pause inspections to clean the lens if needed

Credit: www.amazon.ca
Frequently Asked Questions
What Is A Pipe Inspection Camera Used For?
A pipe inspection camera helps identify blockages, leaks, and damage inside pipes. It provides a clear video view of hard-to-reach areas. This tool saves time and prevents costly pipe repairs by pinpointing exact issues quickly and accurately.
How Does A Pipe Inspection Camera Work?
The camera is attached to a flexible cable and inserted into the pipe. It transmits live video footage to a monitor. Bright LED lights illuminate the inside of the pipe, allowing for detailed inspection and assessment of any problems.
Can I Use A Pipe Inspection Camera Myself?
Yes, many models are user-friendly and designed for DIY use. They come with easy controls and clear displays. However, complex plumbing issues might still require professional help to ensure accurate diagnosis and repair.
What Types Of Pipes Can Be Inspected With This Camera?
Pipe inspection cameras work on various pipes, including PVC, metal, and cast iron. They are suitable for sewer lines, drain pipes, and HVAC ducts. The flexible cable adapts to different pipe sizes and bends.
Conclusion
Mastering a pipe inspection camera can simplify plumbing tasks. These devices help detect issues early, preventing costly repairs. Understanding their usage boosts efficiency and accuracy. Regular practice makes operation easier and quicker. Choosing the right camera is crucial for best results.
Always follow safety guidelines to avoid accidents. Keep learning and improving skills to handle inspections effectively. A well-maintained camera ensures long-lasting performance. Investing time in mastering this tool pays off in the long run. Happy inspecting!