Are you ready to take your plumbing skills to the next level? Learning how to use a pipe threader can save you time, money, and frustration on your projects.
Whether you’re fixing pipes at home or working on a bigger job, mastering this tool gives you control and precision. In this guide, you’ll discover simple, step-by-step instructions that anyone can follow. By the end, you’ll feel confident creating strong, leak-proof threads every time.
Keep reading, and turn your pipe threading challenges into easy wins.
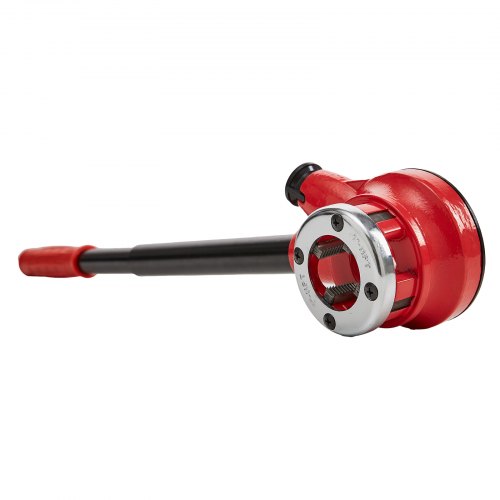
Choosing The Right Pipe Threader
Selecting the right pipe threader is key for good pipe connections. The right tool saves time and effort. It also ensures safe and strong threads on pipes.
This guide looks at two important points: manual vs. electric threaders and choosing the correct die size. These details help you pick the best pipe threader for your job.
Manual Vs. Electric Threaders
Manual threaders work by hand and are good for small jobs. They are light and easy to carry. Electric threaders use power and work fast. They fit bigger jobs and thick pipes.
- Manual threaders require more physical effort.
- Electric threaders save time with faster threading.
- Manual tools cost less and are simple to fix.
- Electric tools need power and can be heavier.
- Choose manual for small, quick tasks.
- Choose electric for large or frequent jobs.
Selecting The Correct Die Size
Dies cut the threads on pipes. Using the wrong die size can ruin the pipe or cause leaks. You must match the die size to the pipe diameter exactly.
| Pipe Diameter | Die Size | Common Use |
| 1/2 inch | 1/2 inch die | Small water pipes |
| 3/4 inch | 3/4 inch die | Standard plumbing |
| 1 inch | 1 inch die | Gas lines |
| 1 1/4 inch | 1 1/4 inch die | Industrial pipes |
| 2 inch | 2 inch die | Large plumbing systems |
Credit: www.vevor.com
Preparing The Pipe
Preparing the pipe is important before using a pipe threader. It helps create clean and strong threads.
This guide covers cleaning, measuring, and cutting the pipe to the right length.
Cleaning And Measuring
Start by cleaning the pipe surface. Remove dirt, rust, and oil using a wire brush or cloth.
Measuring the pipe correctly ensures the threads fit well. Use a tape measure to find the right length.
- Clean the pipe end inside and outside
- Check for damage or cracks
- Measure pipe length with a tape measure
- Mark the cutting point clearly
Cutting The Pipe To Length
Cut the pipe straight and to the correct length. Use a pipe cutter or saw for a clean cut.
After cutting, remove burrs with a file or deburring tool. This helps the threader work smoothly.
- Use a pipe cutter or saw for cutting
- Make a straight cut at the marked point
- Remove burrs inside and outside the pipe
- Double-check the pipe length before threading
Setting Up The Threader
Setting up a pipe threader correctly helps you create clean threads. This guide covers basic setup steps.
Proper setup saves time and prevents damage to pipes and tools. Follow these steps carefully.
Installing The Die Head
Start by selecting the right die head for your pipe size. The die head holds the cutting dies that form threads.
Attach the die head to the threader securely. Make sure it fits tightly and locks in place to avoid slipping.
- Check the die head for any damage or dirt.
- Align the die head with the threader spindle.
- Push the die head onto the spindle until it clicks.
- Use the locking mechanism to secure the die head.
- Turn the die head by hand to ensure smooth movement.
Adjusting For Thread Depth
Thread depth controls how deep the threads cut into the pipe. Adjust it carefully to avoid weak threads.
Use the adjustment screws or knobs on the die head to set the cutting depth. Test on a scrap pipe if possible.
- Loosen the locking screws before adjusting.
- Turn the adjustment knob to increase or decrease depth.
- Check the thread depth with a gauge or by visual inspection.
- Tighten the locking screws after setting the depth.
- Run a test thread to confirm the setting is correct.

Credit: www.reedmfgco.com
Threading The Pipe
Threading a pipe with a pipe threader creates strong, leak-proof joints. It needs care and the right steps for good results.
This guide focuses on three key parts of threading: applying lubricant, keeping alignment, and turning the tool consistently.
Applying Lubricant
Lubricant reduces friction and helps the threads form cleanly. Use a pipe thread lubricant or cutting oil for best results.
- Apply lubricant evenly on the pipe end before threading.
- Reapply lubricant if the threading process takes longer.
- Avoid using too much lubricant to prevent mess and slipping.
Maintaining Proper Alignment
Keep the pipe and threader aligned to avoid crooked or damaged threads. Proper alignment ensures a tight fit.
| Common Alignment Issues | Fix |
| Pipe tilted or angled | Hold pipe steady and adjust threader angle |
| Threader not square on pipe | Position threader straight before turning |
| Pipe slipping during threading | Secure pipe in a vise or clamp |
Consistent Turning Techniques
Turn the threader handle smoothly and evenly. Consistent motion helps create uniform threads without damage.
- Start turning the handle clockwise with steady pressure.
- Keep speed slow and constant to avoid cross-threading.
- After each full turn, slightly back off the handle to clear debris.
- Repeat until the desired thread length is reached.
Finishing The Threads
Finishing the threads is a crucial part of using a pipe threader. Proper finishing ensures a tight, leak-free connection.
This guide covers removing burrs and checking thread quality to help you finish threads correctly.
Removing Burrs
After threading, small metal burrs may remain on the pipe edges. These burrs can cause leaks or damage fittings.
- Use a deburring tool or file to smooth the edges.
- Work gently to avoid removing too much material.
- Check the pipe ends for any sharp points or rough spots.
- Clean the pipe surface to remove metal shavings.
Checking Thread Quality
Good thread quality means the threads fit well and create a strong seal. Inspect the threads before final assembly.
| Thread Aspect | What to Check | Fix if Needed |
| Thread Depth | Threads should be even and deep enough. | Re-thread if too shallow or uneven. |
| Thread Shape | Threads must be sharp, not rounded or crushed. | Use a cleaner tool or re-thread carefully. |
| Thread Alignment | Threads should align straight along the pipe. | Adjust threading tool or start over. |
| Cleanliness | No debris or oil on threads. | Wipe threads clean before use. |
Safety Measures
Using a pipe threader needs care to avoid injury. Safety measures help you work without harm.
Follow these safety tips to protect yourself and others around you.
Protective Gear
Always wear the right protective gear to keep safe while threading pipes.
- Wear safety goggles to protect your eyes from metal shavings.
- Use heavy-duty gloves to avoid cuts and burns.
- Wear a long-sleeve shirt to protect your arms from debris.
- Use ear protection if the tool makes loud noise.
- Wear sturdy boots to protect your feet from falling objects.
Handling Equipment Safely
Handle the pipe threader with care to prevent accidents and damage.
| Safety Tip | Description |
| Inspect Equipment | Check the threader and dies before use for damage or wear. |
| Secure the Pipe | Clamp the pipe firmly to avoid movement during threading. |
| Keep Work Area Clean | Remove tools and debris to avoid tripping or slipping. |
| Use Both Hands | Hold the threader with both hands to maintain control. |
| Turn Off Power | Switch off and unplug the tool before adjusting or changing parts. |
Common Issues And Fixes
Using a pipe threader can be tricky if you face common problems. Knowing how to fix these issues helps keep your work smooth.
This guide covers two frequent problems: cross-threading and damaged threads. Learn simple fixes to save time and avoid waste.
Cross-threading Solutions
Cross-threading happens when the threads do not line up properly. This can damage the pipe and fitting, causing leaks or failure.
To fix cross-threading, start by carefully aligning the pipe and die before threading. Turn the handle slowly and check often.
- Apply cutting oil to reduce friction and help threads form correctly.
- Use the threader at a steady, even speed to avoid forcing the threads.
- Stop immediately if you feel resistance, then back off and realign the pipe.
- Inspect threads after cutting. If cross-threading is minor, you can try re-threading carefully.
Dealing With Damaged Threads
Damaged threads cause leaks and weak connections. Damage can come from worn tools or using too much force.
Fixing damaged threads often means cleaning or re-cutting the threads to restore their shape and function.
- Use a thread file or chase tool to clean and reshape damaged threads.
- Apply cutting oil before re-cutting to ease the process.
- If damage is severe, cut off the damaged section and re-thread the pipe end.
- Check threading tools regularly for wear and replace them as needed.
Maintenance And Storage
Proper maintenance and storage keep your pipe threader in good shape. It helps the tool last longer and work better.
Following simple cleaning and storage steps can prevent damage and rust. This guide shows you how to care for your pipe threader.
Cleaning After Use
Clean your pipe threader right after using it. Dirt and metal shavings can cause rust and wear.
Use a brush to remove debris from the threads and cutting parts. Wipe the tool with a dry cloth.
- Remove metal shavings with a wire brush
- Wipe all surfaces with a clean, dry cloth
- Apply light oil to moving parts to stop rust
- Check the tool for damage or worn parts
Proper Storage Tips
Store your pipe threader in a dry, cool place. Avoid wet or humid areas to prevent rust.
Keep the tool in its case or hang it on a wall hook. This protects it from dust and damage.
- Use a tool case or box for storage
- Hang the tool to avoid scratches and dents
- Store away from direct sunlight and moisture
- Check stored tools regularly for rust or damage

Credit: www.reedmfgco.com
Frequently Asked Questions
What Is A Pipe Threader Used For?
A pipe threader cuts threads on pipes for secure fittings. It creates tight, leak-proof connections in plumbing and gas lines. This tool is essential for joining pipes accurately and efficiently in construction and repair jobs.
How Do You Operate A Pipe Threader Safely?
Wear gloves and eye protection before starting. Secure the pipe firmly in a vise. Apply lubricant to the die head for smooth threading. Turn the handle steadily without forcing the tool to avoid damage or injury.
Can A Pipe Threader Work On All Pipe Materials?
Pipe threaders work best on metal pipes like steel and iron. They are not suitable for plastic or PVC pipes. Choosing the correct die size for the pipe material ensures clean, precise threads.
How Do I Maintain My Pipe Threader Tool?
Clean the die head after each use to remove metal shavings. Lubricate moving parts regularly to prevent rust. Store the tool in a dry place. Proper maintenance extends the life and performance of your pipe threader.
Conclusion
Mastering a pipe threader enhances your plumbing projects. Practice makes perfect. Ensure safety by wearing gloves and goggles. Always measure pipes accurately. This reduces errors. Clean threads after cutting for a better fit. Use a thread sealant to prevent leaks.
Regular maintenance of your pipe threader prolongs its life. Store it in a dry place. Remember, patience is key. Take your time. With these tips, threading pipes becomes simpler. Enjoy the process. Happy threading!