Are you ready to tackle your demolition project with confidence? A pry bar is one of the most powerful and versatile tools you can have in your hands.
Whether you’re removing old nails, pulling apart wooden boards, or breaking down walls, knowing how to use a pry bar correctly will save you time, effort, and frustration. In this guide, you’ll discover simple techniques and expert tips that make every demolition job easier and safer.
Keep reading to unlock the full potential of your pry bar and turn your project into a smooth, satisfying experience.
Choosing The Right Pry Bar
Selecting the correct pry bar is important for safe and effective demolition work. The right tool helps you remove nails, lift boards, and break materials with ease.
Consider the type, material, size, and weight of the pry bar before buying. These factors affect how well the tool performs and how comfortable it feels.
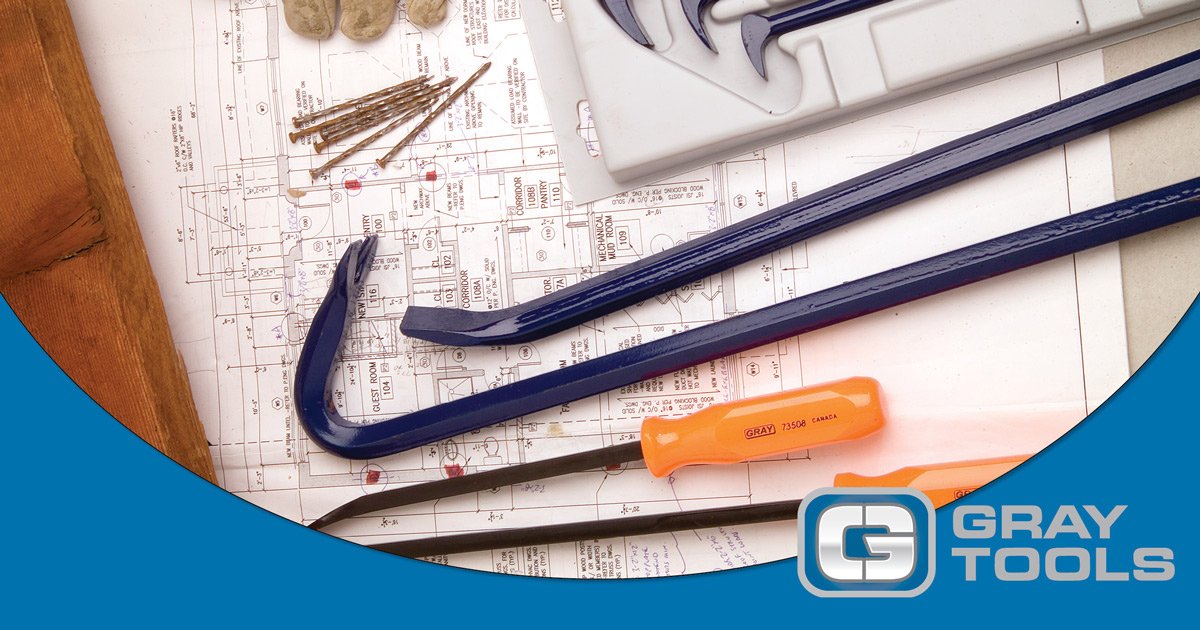
Types Of Pry Bars
Pry bars come in different shapes and designs. Each type fits a specific task or space. Choosing the right type makes your work easier and safer.
- Flat Pry Bar:Thin and straight, best for sliding under nails and lifting boards.
- Gooseneck Pry Bar:Curved end for strong leverage and nail pulling.
- Cat’s Paw Pry Bar:Small and pointed, perfect for pulling stubborn nails.
- Wrecking Bar:Large and heavy, used for heavy demolition and prying large materials.
Material And Durability
Pry bars are made from metals like steel or alloy. The material affects strength and how long the tool lasts. Look for bars that resist bending and rust.
| Material | Durability | Rust Resistance |
| Carbon Steel | High | Low to Medium |
| Alloy Steel | Very High | Medium to High |
| Stainless Steel | Medium | High |
Size And Weight Considerations
Choose a pry bar size that fits your task. Longer bars give more leverage but may be hard to handle in tight spaces. Lighter bars reduce fatigue during long jobs.
- Short bars (6-12 inches) work well for small, detailed tasks.
- Medium bars (12-24 inches) offer a balance of power and control.
- Long bars (24 inches and up) provide strong leverage for big demolition.
- Heavy bars can break tough materials but may tire your arms fast.
- Light bars are easier to carry and use for long periods.

Credit: www.tenaquip.com
Essential Safety Gear
Using a pry bar for demolition can be dangerous without proper safety gear. Protecting your hands, eyes, and feet reduces injury risks. Always wear the right equipment before starting work.
This guide covers the main safety gear needed to use a pry bar safely. Each item plays a vital role in keeping you safe during demolition tasks.
Protective Gloves
Gloves protect your hands from cuts, splinters, and bruises. Choose gloves made from tough materials like leather or reinforced fabric. Make sure they fit well and allow a good grip on the pry bar.
- Leather gloves offer good cut resistance
- Reinforced gloves protect against impact
- Gloves with grip pads prevent slipping
- Check gloves for holes before each use
Eye Protection
Eye protection is crucial when using a pry bar. Debris can fly toward your face during demolition. Safety goggles or glasses with side shields work best to block dust and shards.
| Type | Protection Level | Best Use |
| Safety Goggles | High | Full seal around eyes |
| Safety Glasses | Medium | Impact resistant with side shields |
| Face Shield | Extra | Protection for face and eyes |
Proper Footwear
Strong footwear protects feet from heavy falling objects and sharp debris. Steel-toe boots are the best choice. They also give good ankle support on uneven surfaces.
Footwear features to look for:
- Steel or composite toe caps
- Slip-resistant soles
- Waterproof materials
- Good ankle coverage
Basic Techniques For Demolition
Using a pry bar is common in demolition work. It helps break apart walls, floors, and other structures.
Learning the right techniques makes your work faster and safer. Focus on control and careful movements.
Leveraging And Prying
Place the flat end of the pry bar under the material you want to move. Use the bar as a lever to lift or separate parts.
Push down on the handle to create force. The bar will pry the material away without damaging the tool.
- Position the bar close to the edge of the material
- Use steady pressure instead of sudden force
- Move the bar along the material to loosen it gradually
Removing Nails And Fasteners
Use the claw end of the pry bar to pull out nails and fasteners. Slide the claw under the nail head for a firm grip.
Pull the handle back slowly to remove nails without breaking them. This helps keep the area clean and safe.
- Work nails loose before pulling them out
- Keep the pry bar angled to avoid slipping
- Wear gloves to protect your hands from sharp nails
Handling Stubborn Materials
Stubborn materials may need extra effort to remove. Use your pry bar and body weight together for more force.
Try rocking the material back and forth to loosen it. Avoid using too much force to prevent damage or injury.
- Work slowly and keep the pry bar in good position
- Use a hammer with the pry bar if needed for extra impact
- Take breaks if the material is very tough to avoid fatigue
Advanced Pry Bar Methods
Using a pry bar is not just about simple pulling. Advanced methods help you work smarter and safer. These methods improve your control and protect the area you work in.
This guide covers how to use a pry bar with a hammer, work in tight spaces, and reduce damage to surroundings.
Using A Pry Bar With A Hammer
A hammer can add extra force to your pry bar work. Tap the pry bar’s end gently with a hammer to slide it under nails or tight boards.
Use controlled hits to avoid bending the pry bar or breaking materials. Always wear safety glasses to protect your eyes from flying debris.
- Hold the pry bar firmly near the working end
- Tap lightly with a hammer to drive the bar under objects
- Increase force gradually to avoid damage
- Wear safety gear to protect yourself
Working In Tight Spaces
Tight spaces need careful handling with a pry bar. Choose a smaller pry bar or one with a slim profile for these areas.
Use slow, gentle prying motions to avoid slipping or breaking nearby parts. Position your body to get good leverage without strain.
- Pick a narrow pry bar for confined spots
- Work slowly and watch your hand placement
- Use angled pulls for better leverage
- Keep the area clear to avoid accidents
Reducing Damage To Surroundings
Prevent damage by protecting surfaces near your work. Use wood blocks or scrap pieces as buffers between the pry bar and walls or floors.
Apply steady pressure and avoid sudden jerks. This helps keep nearby materials intact and saves time on repairs.
- Place scrap wood between pry bar and surfaces
- Push slowly to control force
- Avoid sharp angles that can cause chips or cracks
- Inspect the area often for any signs of damage
Common Mistakes To Avoid
Using a pry bar for demolition can be easy if you use the right method. Many people make mistakes that cause injury or damage. Avoiding these errors will make your work safer and faster.
Read on to learn about common mistakes and how to prevent them when using a pry bar.
Applying Excessive Force
Many users think pushing harder will break materials faster. This can cause the pry bar to slip or bend. It also risks hurting your hands or body.
- Do not use your full body weight to force the bar.
- Try steady, controlled pressure instead of sudden force.
- Use a longer pry bar for more leverage if needed.
- Take breaks to avoid fatigue, which leads to accidents.
Ignoring Tool Maintenance
Not cleaning or checking your pry bar can cause problems. Dirt and rust make the tool less safe and less effective. A damaged tool can break during use.
| Maintenance Task | Why It Matters | How Often |
| Clean the bar | Prevents rust and keeps grip strong | After each use |
| Inspect for cracks | Stops tool from breaking unexpectedly | Before each use |
| Oil moving parts | Keeps bar easy to handle | Monthly |
Poor Body Positioning
Using a pry bar with bad posture causes strain and makes the tool less effective. It can also lead to loss of balance and injury.
Follow these tips for safe body positioning:
- Stand with feet shoulder-width apart for balance.
- Bend your knees slightly, not your back.
- Keep your arms close to your body.
- Face the work directly to avoid twisting.
Credit: angelguardproducts.com
Maintaining Your Pry Bar
Keeping your pry bar in good shape helps it work better and last longer. Regular care stops damage and makes your demolition tasks safer.
Simple maintenance steps like cleaning, sharpening, and inspecting will keep your tool ready for heavy use.
Cleaning And Storage
After each use, clean your pry bar with a wire brush or cloth to remove dirt and rust. Wipe it down with oil to stop corrosion.
- Remove debris and dust
- Use a light oil to protect metal
- Store in a dry place away from moisture
- Keep it off the ground to avoid damage
Sharpening Tips
A sharp pry bar edge makes demolition easier and safer. Use a metal file or grinder to sharpen the tip carefully.
| Tool | Sharpening Method | Notes |
| Metal File | Hand filing | Use smooth, even strokes |
| Angle Grinder | Power sharpening | Wear safety gear and work slowly |
| Bench Grinder | Stationary sharpening | Keep edge cool to avoid damage |
Inspecting For Wear And Damage
Check your pry bar often for cracks, bends, or worn edges. Damage can cause accidents or break the tool.
- Look for rust spots or corrosion
- Check if the tip is rounded or chipped
- Ensure the handle is secure and not loose
- Replace the pry bar if cracks appear

Credit: trueprepper.com
Frequently Asked Questions
What Is The Best Way To Use A Pry Bar For Demolition?
Use the pry bar by positioning its flat end under the material edge. Apply steady leverage to lift or separate materials safely and efficiently. Always wear protective gear to avoid injury during demolition.
How Do I Choose The Right Pry Bar For Demolition?
Select a pry bar based on length, weight, and tip type. Longer bars provide more leverage, while different tips suit various materials. Choose a durable steel bar for effective demolition work.
Can A Pry Bar Damage Surfaces During Demolition?
A pry bar can damage surfaces if used improperly. To minimize damage, apply controlled force and use the correct tip. Protect surrounding areas with padding when needed.
What Safety Precautions Are Needed When Using A Pry Bar?
Wear gloves and eye protection to prevent injuries. Ensure a firm grip and stable footing. Use the pry bar slowly to avoid sudden slips or breakage.
Conclusion
A pry bar is a simple but useful tool for demolition work. It helps remove nails, lift boards, and break apart materials. Using it correctly makes the job safer and easier. Always wear safety gear and take your time. Practice good technique to avoid damage or injury.
With these tips, your demolition tasks become smoother and faster. Grab your pry bar and get started with confidence.
