Imagine turning a simple piece of metal into a personalized masterpiece with just a few easy steps. That’s the magic of using a rotary tool for engraving!
Whether you’re a seasoned DIY enthusiast or a curious beginner, engraving metal can unleash your creativity and add a unique touch to your projects. Have you ever wondered how intricate designs are etched onto metal surfaces? Or perhaps you’re eager to create personalized gifts that leave a lasting impression?
This guide is your key to unlocking the secrets of metal engraving with a rotary tool. Discover the tips, tricks, and techniques that will transform you into a metal engraving pro. Ready to dive in and see what you can create? Let’s get started!
Choosing The Right Rotary Tool
A good rotary tool makes engraving metal easier and more precise. Picking the right one depends on your needs and the types of metal you work with.
This guide covers features, brands, and accessories to help you find the best rotary tool for metal engraving.
Essential Features For Metal Engraving
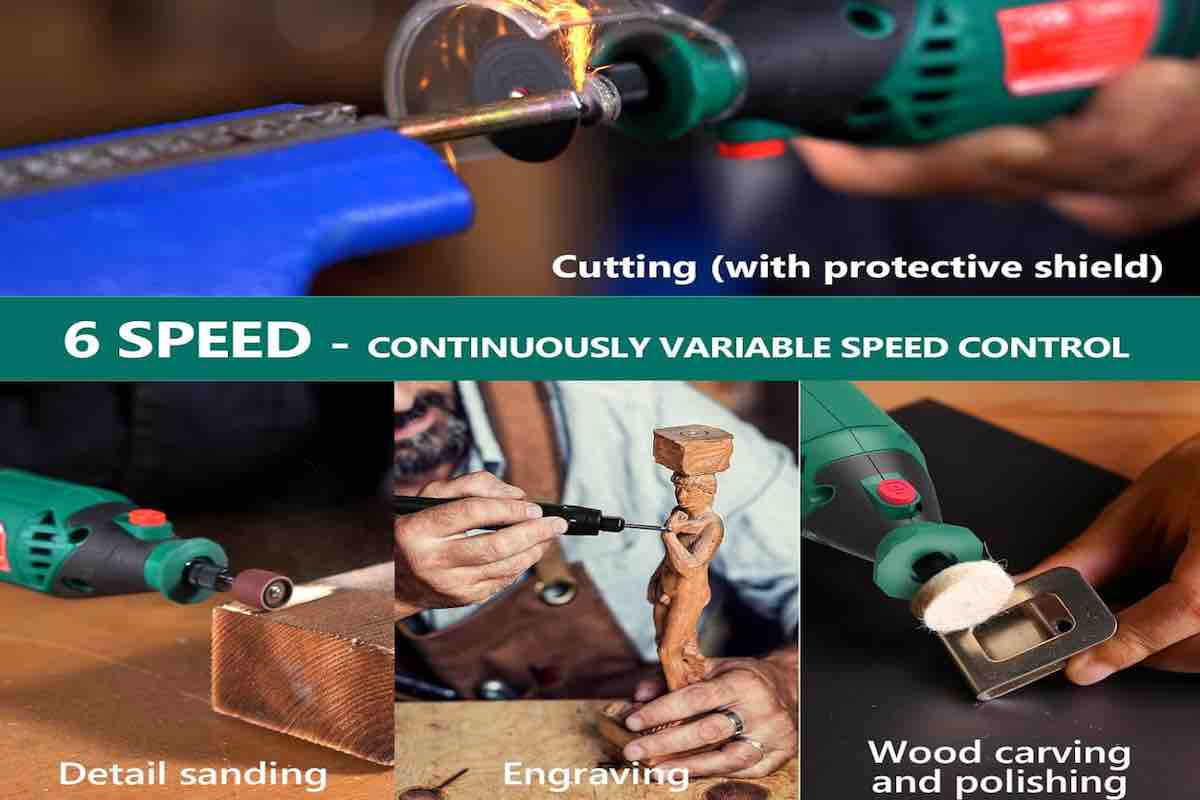
Look for a rotary tool with variable speed control to adjust power for different metals. A tool with a comfortable grip helps reduce hand fatigue during long work sessions.
- Variable speed settings for control
- Strong motor for consistent power
- Lightweight and ergonomic design
- Compatibility with various bits and attachments
- Easy bit changing system
Recommended Brands And Models
| Brand | Model | Key Features |
| Dremel | 3000 | Variable speed, durable, wide accessory range |
| Proxxon | 38606 | High precision, compact, low vibration |
| WEN | 2305 | Affordable, good power, adjustable speeds |
Accessories And Attachments
Accessories expand what your rotary tool can do. For metal engraving, diamond-tipped bits work best because they cut cleanly and last long.
- Diamond engraving bits for fine detail
- Cutting discs for shaping metal
- Grinding stones for smoothing edges
- Polishing wheels to finish surfaces
- Flexible shafts for better control in tight spaces
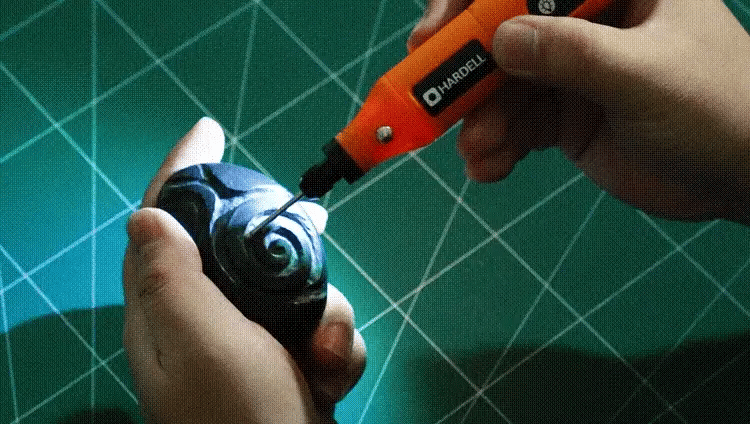
Credit: hardell.com
Preparing Your Workspace
Setting up your workspace is important before engraving metal. A clean and safe area helps you work well and avoid accidents.
This guide will help you get your space ready for using a rotary tool safely and efficiently.
Safety Precautions
Safety is the top priority when working with a rotary tool. Protect yourself and others around you.
- Wear safety glasses to protect your eyes from metal shards.
- Use gloves to guard your hands from sharp edges and heat.
- Keep a mask handy to avoid breathing metal dust.
- Work in a well-ventilated area to reduce fumes.
- Keep a first aid kit nearby for emergencies.
Setting Up Work Area
Choose a flat, stable surface to work on. Make sure you have good lighting to see your metal piece clearly.
| Work Area Element | Recommendation |
|---|---|
| Lighting | Bright, focused light source |
| Surface | Flat, sturdy table or workbench |
| Ventilation | Open windows or fan for airflow |
| Power Source | Accessible electrical outlet |
| Seating | Comfortable chair at correct height |
Organizing Tools And Materials
Keep all tools and materials within reach. Organize them to avoid losing small parts and to work faster.
- Sort rotary tool bits by size and type.
- Use small containers for screws and accessories.
- Have cleaning brushes ready to remove metal dust.
- Keep a cloth nearby to wipe your workpiece.
- Place your power cord so it does not tangle or trip.
Selecting The Proper Engraving Bits
Choosing the right engraving bits is key to getting good results on metal. The bits affect the design detail and the tool’s performance.
Understanding bit types, sizes, and care helps you work safely and efficiently with your rotary tool.
Types Of Bits For Metal
There are many bits made for engraving metal. Each type has a shape and use that fits different metal types and designs.
- Tungsten Carbide Bits:Very hard, good for hard metals like steel.
- Diamond Bits:Coated with diamond dust for fine detail and smooth cuts.
- High-Speed Steel (HSS) Bits:Best for softer metals like aluminum and brass.
- Silicon Carbide Bits:Used for engraving glass and some metals with care.
Bit Sizes And Shapes
| Bit Shape | Use | Common Sizes |
| Ball Nose | Curves and rounded grooves | 1mm, 2mm, 3mm |
| Conical | Sharp lines and fine details | 0.5mm, 1mm, 1.5mm |
| Needle Point | Very fine engraving and writing | 0.3mm, 0.5mm |
| Flat End | Surface leveling and wide cuts | 2mm, 4mm |
Choose a smaller size for detailed work. Use bigger sizes for wider cuts and shaping.
Maintaining And Replacing Bits
Keep bits clean and sharp for the best engraving. Dull bits cause poor results and can damage metal.
- Clean bits after use with a soft brush.
- Check bits for wear before each job.
- Replace bits that are chipped, dull, or bent.
- Store bits in a dry place to avoid rust.
Techniques For Precise Engraving
Using a rotary tool for metal engraving needs careful control. Precise techniques help create sharp and clear designs.
This guide focuses on three key areas to improve your engraving: marking your design, controlling speed and pressure, and achieving consistent depth.
Marking Your Design
Start by outlining your design clearly on the metal surface. Use tools like fine-tip markers or scribes to mark the exact lines. This step helps guide your rotary tool and reduces mistakes.
- Clean the metal surface before marking.
- Use a ruler or stencil for straight lines.
- Draw lightly so marks can be removed later.
- Double-check your design before engraving.
Controlling Speed And Pressure
Adjust the rotary tool’s speed depending on the metal type and detail needed. Use low speed for fine lines and higher speed for broader cuts. Pressure matters too; too much can slip or damage the surface.
| Metal Type | Recommended Speed (RPM) | Pressure Level |
| Aluminum | 10,000 – 15,000 | Light to Medium |
| Steel | 15,000 – 20,000 | Medium |
| Copper | 8,000 – 12,000 | Light |
| Brass | 10,000 – 14,000 | Light to Medium |
Achieving Consistent Depth
Keeping your engraving depth steady creates a professional look. Move the tool at a steady pace and avoid pausing in one spot. Practice on scrap metal to get a feel for consistent pressure.
- Hold the tool firmly but relax your hand.
- Use a guide or jig to stabilize your hand.
- Check your work regularly with good lighting.
- Take breaks to avoid hand fatigue.
Troubleshooting Common Issues
Using a rotary tool for metal engraving can be tricky at times. Some common problems may slow down your work.
Understanding how to fix these issues helps keep your project on track and your tool in good shape.
Dealing With Tool Slippage
Tool slippage happens when the rotary tool slips off the metal surface. This can cause uneven marks or mistakes.
Slippage often occurs if the bit is dull or if you press too hard. It can also happen if the metal is oily or wet.
- Check and replace dull bits regularly.
- Hold the tool steady with a light but firm grip.
- Clean the metal surface before engraving.
- Avoid pressing too hard; let the tool do the work.
Preventing Overheating
Overheating can damage both the tool and the metal. It causes the bit to wear out fast and may burn the metal.
High speed and long use without breaks often cause overheating. Using the wrong bit for metal can also raise heat.
- Use the correct bit designed for metal engraving.
- Work at moderate speeds to reduce heat build-up.
- Take short breaks to let the tool cool down.
- Apply light pressure to avoid extra friction.
Fixing Uneven Engraving
Uneven engraving happens when the depth or width of the design is inconsistent. This makes the work look rough or unclear.
It may occur if you move the tool too fast or too slow, or if the tool speed changes during engraving.
- Keep a steady hand and move the tool at a consistent speed.
- Set the rotary tool speed to a level suitable for metal.
- Practice on scrap metal before starting your main project.
- Use guides or stencils to help keep your design even.
Credit: tendsupplies.com
Finishing And Polishing Engraved Metal
After engraving metal with a rotary tool, finishing is important. It helps protect the design and makes it look better. Polishing removes rough spots and adds shine to the metal surface.
This guide covers cleaning residue, smoothing edges, and enhancing design visibility. These steps improve the final result of your engraving work.
Cleaning Residue
Engraving leaves behind metal dust and small particles. Cleaning these residues is the first step before polishing. Use a soft brush or cloth to remove loose debris. For stubborn dust, a small amount of rubbing alcohol on a cloth works well.
Smoothing Edges
Engraved edges can be sharp or rough. Smoothing them protects your fingers and improves the look. Use fine sandpaper or a small sanding bit on your rotary tool. Move gently along the edges to avoid removing too much metal.
- Select fine-grit sandpaper (around 400-600 grit).
- Lightly sand the edges of the engraving.
- Use a sanding bit on low speed for hard-to-reach spots.
- Wipe off dust with a clean cloth.
Enhancing Design Visibility
To make your engraved design stand out, polishing and contrast help a lot. Here is a simple table of common polishing tools and their uses:
| Tool | Use |
|---|---|
| Buffing wheel | Adds shine to the metal surface |
| Polishing compound | Removes fine scratches and brightens |
| Microfiber cloth | Final wipe to enhance gloss |
| Blackening agents | Increase contrast in engraved areas |
Use these tools carefully to avoid removing details. Polishing brings out your design’s depth and beauty.
Advanced Tips For Experienced Users
Using a rotary tool for engraving metal can bring great detail and texture to your work. Skilled users can improve their results by trying advanced techniques.
This guide shares tips for combining methods, customizing your tools, and exploring new projects with confidence.
Combining Techniques
Mixing engraving styles adds depth and interest to metal designs. Use different bits and speeds for varied effects.
Start with a rough cut, then add fine details with smaller bits. This layering gives a professional look.
- Use a diamond bit for deep grooves
- Switch to a fine point for delicate lines
- Try shading with a sanding drum at low speed
- Combine etching and carving for texture
Customizing Tools
Changing your rotary tool setup helps improve precision and comfort. Adjust grips or add attachments for better control.
Experiment with different collets and speed settings for various metals and designs. Keep bits sharp and clean for best results.
- Use a flexible shaft attachment for detailed work
- Install a depth stop to control engraving depth
- Try ergonomic handles to reduce hand fatigue
- Clean bits often to avoid metal buildup
Exploring Creative Projects
Try new projects to challenge your skills and find fresh ideas. Use engraving on jewelry, tools, or household items.
Test different metals like aluminum, brass, or stainless steel. Each metal reacts differently and offers unique styles.
- Personalize rings, bracelets, and pendants
- Add designs to kitchen knives or utensils
- Create metal plaques or decorative panels
- Combine engraving with painting for color effects
Credit: bouncemagazine.co.uk
Frequently Asked Questions
What Rotary Tool Is Best For Engraving Metal?
A rotary tool with variable speed and diamond-tipped bits is ideal. Brands like Dremel offer precision and durability for metal engraving.
How Do I Prepare Metal Before Engraving?
Clean the metal surface thoroughly to remove dirt and oil. Use fine sandpaper to smooth the area for better engraving results.
What Speed Should I Use For Metal Engraving?
Use a medium to high speed setting. Too slow can cause uneven cuts; too fast may damage the metal or bit.
Can I Engrave All Metals With A Rotary Tool?
Most metals like aluminum, brass, copper, and steel can be engraved. Harder metals may require specialized bits or slower speeds.
Conclusion
Using a rotary tool for metal engraving is simple and fun. Choose the right bits and keep a steady hand. Practice on scrap metal before starting your main project. Take your time and work carefully for best results. Safety always matters—wear goggles and work in a clean space.
With patience, your designs will look sharp and clear. Keep learning and trying new techniques to improve. This guide helps you start engraving metal with confidence. Enjoy creating unique, personalized metal art at home.