Are you ready to tackle your flooring project with confidence? Knowing how to use a tape measure correctly can save you time, money, and frustration.
Whether you’re installing new floors or just checking dimensions, precise measurements are key to getting the perfect fit. This guide will walk you through simple steps to use a tape measure like a pro, helping you avoid costly mistakes and achieve professional results.
Keep reading to master this essential skill and make your flooring project smoother than ever.

Credit: www.tilemountain.co.uk
Choosing The Right Tape Measure
Picking the right tape measure helps you get accurate flooring measurements. It also makes your work easier and faster.
This guide covers the types of tape measures, their length and width, and the materials they are made from.
Types Of Tape Measures
You can find different tape measures for various jobs. Some are small and easy to carry. Others are large for measuring big areas.
- Steel tape measures: Durable and good for rough use.
- Fiberglass tape measures: Flexible and resistant to stretching.
- Cloth tape measures: Soft, used for curved surfaces.
- Long tape measures: Used for large floor spaces.
Length And Width Considerations
| Length | When to Use |
| 12 to 25 feet | Small rooms and furniture |
| 25 to 50 feet | Most flooring projects |
| 50 feet or more | Large rooms and open spaces |
The width of the tape affects its rigidity. Wider tapes are easier to hold straight for long measurements.
Material And Durability
Choose a tape measure made from strong materials. This keeps it from bending or breaking during work.
- Steel tapes resist cuts and wear.
- Fiberglass tapes do not stretch and resist water.
- Plastic coatings protect the tape markings.
- A sturdy case helps protect the tape inside.
Preparing For Accurate Measurements
Measuring flooring correctly is important for a good fit. Preparing the area helps get exact numbers.
Before you start, clear the space and mark points. This makes measuring easier and more accurate.
Clearing The Flooring Area
Remove furniture and items from the floor. This gives you full access to the surface.
Clean the floor to see any uneven spots or obstacles. A clean area helps you measure better.
- Move furniture to another room
- Pick up rugs and mats
- Sweep or vacuum the floor
Identifying Measurement Points
Find the corners and edges where the flooring will go. These are the points to measure between.
Look for any unusual shapes or cuts in the room. Mark these spots to include in your measurements.
- Corner to corner across the room
- Along walls and doorways
- Near vents or fixed objects
Using Reference Marks
Use tape or chalk to mark key points on the floor. These marks guide your measuring tape.
Label the marks clearly. This helps avoid confusion when measuring longer distances.
- Place marks at corners and edges
- Write numbers or letters near marks
- Use a straight line for long measurements
Measuring Techniques For Flooring
Measuring floors correctly is important before installing flooring materials. Using a tape measure helps get accurate dimensions for a good fit.
This guide explains simple methods for measuring length, width, and tricky spaces. It also covers how to measure around obstacles and corners.
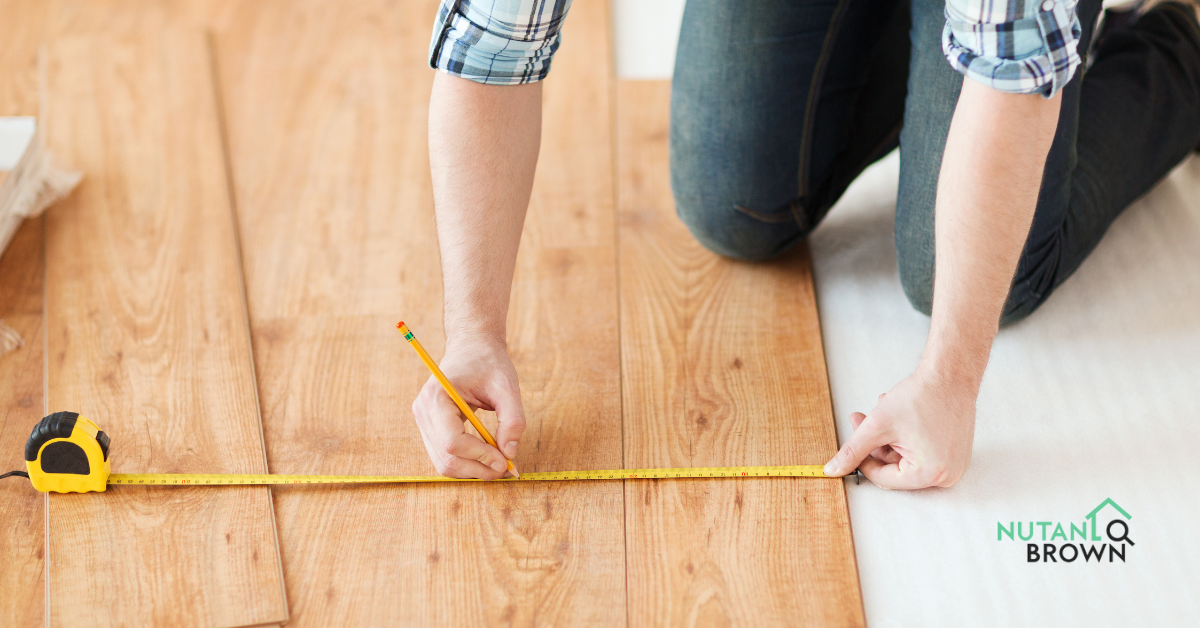
Measuring Length And Width
Start by measuring the length and width of the room. Use the tape measure to get straight, precise lines along the floor edges.
- Place the tape measure at one wall edge.
- Extend it across to the opposite wall.
- Note the length in feet or meters.
- Repeat the process for the width.
- Record both measurements carefully.
Measuring Irregular Spaces
Rooms may have odd shapes or areas that do not form perfect rectangles. Divide the space into smaller rectangles or squares.
Measure each smaller section separately:
- Identify simple shapes within the irregular area.
- Measure length and width of each shape.
- Write down each measurement clearly.
- Add all areas together for total flooring size.
Handling Obstacles And Corners
Floors often have obstacles like pipes or corners that need careful measuring. Use the tape measure to get exact sizes around these points.
| Obstacle Type | Measuring Tip |
| Corner | Measure each wall side from the corner point. |
| Pipe or Column | Measure the distance around the obstacle for cutting. |
| Door Frame | Measure width and length of the opening precisely. |

Credit: www.familyhandyman.com
Recording And Calculating Measurements
Using a tape measure correctly is key for good flooring work. You need to record measurements clearly. Then, calculate how much material you need.
Accurate records help avoid mistakes and save money. This guide shows how to write down measurements, convert units, and calculate material needs.
Writing Down Measurements
Write each measurement as soon as you take it. Use a notebook or a mobile app. This keeps your data safe and easy to read.
Note the exact location of each measurement. Label them clearly to avoid confusion later.
- Measure the length and width of each room section
- Record measurements in feet and inches or centimeters
- Label each entry with the area or wall name
- Double-check numbers before moving on
Converting Units
You may need to convert measurements to match your flooring material. Some materials list sizes in feet, others in meters.
Learn simple math to convert units. For example, 1 foot equals 12 inches or 30.48 centimeters.
| Unit | Conversion |
|---|---|
| 1 foot | 12 inches |
| 1 inch | 2.54 centimeters |
| 1 meter | 100 centimeters |
| 1 yard | 3 feet |
Calculating Material Needs
Multiply the length by the width to find the area for each section. Add all areas together for total floor size.
Include an extra 5-10% for waste and cuts. This ensures you have enough flooring material.
- Calculate area for each room part (length × width)
- Add all areas for total square footage or meters
- Multiply total by 1.05 to 1.10 for extra material
- Round numbers up to simplify ordering
Tips For Accurate Tape Measure Use
Using a tape measure correctly is important for precise flooring work. Small mistakes can cause big problems in fitting materials.
This guide offers simple tips to help you measure floors accurately and avoid errors.
Keeping The Tape Straight
Always keep the tape measure straight along the surface you are measuring. Bending or twisting the tape causes false readings.
Hold the tape tight at both ends to avoid sagging. Use your hand or a clamp to keep it steady.
Avoiding Tape Slack
Slack in the tape can add extra length to your measurement. Pull the tape firmly but gently to remove any slack.
- Lock the tape measure at the correct length.
- Check that the tape is taut between points.
- Do not let the tape droop or bend while measuring.
- Reset the tape if you notice any slack.
Using A Helper For Large Areas
Measuring large floor spaces is easier and more accurate with a helper. One person holds the tape at the start, the other at the end.
| Helper’s Role | What to Do |
| Person 1 | Secure the tape at the starting point firmly |
| Person 2 | Extend the tape to the end point, keeping it straight |
| Both | Check for slack and adjust tension before reading |
| Both | Confirm the measurement aloud for accuracy |
Common Mistakes To Avoid
Using a tape measure correctly is important when installing flooring. Many people make simple mistakes that cause wrong measurements.
This guide covers three common errors to avoid. Fixing these will help you get better results.
Misreading The Tape
Many people misread the tape measure marks. This leads to cutting flooring pieces too long or short.
- Check if the tape shows inches or centimeters.
- Read the smaller marks carefully; they show fractions of an inch.
- Make sure you start measuring from the tape’s zero mark.
- Double-check your numbers before cutting.
Ignoring Tape Damage
A damaged tape can cause wrong measurements. Look for dents, bends, or worn numbers.
| Damage Type | Effect on Measurement |
|---|---|
| Dents or Bends | Tape may not lay flat, causing longer readings |
| Worn Numbers | Hard to read, leading to guessing |
| Loose Hook | Starting point may shift during measuring |
Replace or fix your tape measure if it has any damage. This keeps your measurements accurate.
Overlooking Wall Irregularities
Walls are often not perfectly straight or flat. Ignoring this causes flooring pieces to not fit well.
- Use a level to check wall straightness.
- Measure at several points along the wall.
- Mark the smallest measurement to cut flooring pieces.
- Allow extra space for expansion if needed.
Maintaining Your Tape Measure
Using a tape measure for flooring needs care. Keeping it in good shape helps you get accurate results.
Regular maintenance extends the life of your tape measure and makes your work easier.
Cleaning And Storage
Clean your tape measure after each use. Dirt and dust can affect its accuracy.
Store it in a dry, cool place. Avoid leaving it where it can get wet or dusty.
- Wipe the tape with a soft cloth
- Use mild soap and water if needed
- Dry it completely before storing
- Retract the tape slowly to prevent damage
- Keep the tape measure in its case or pouch
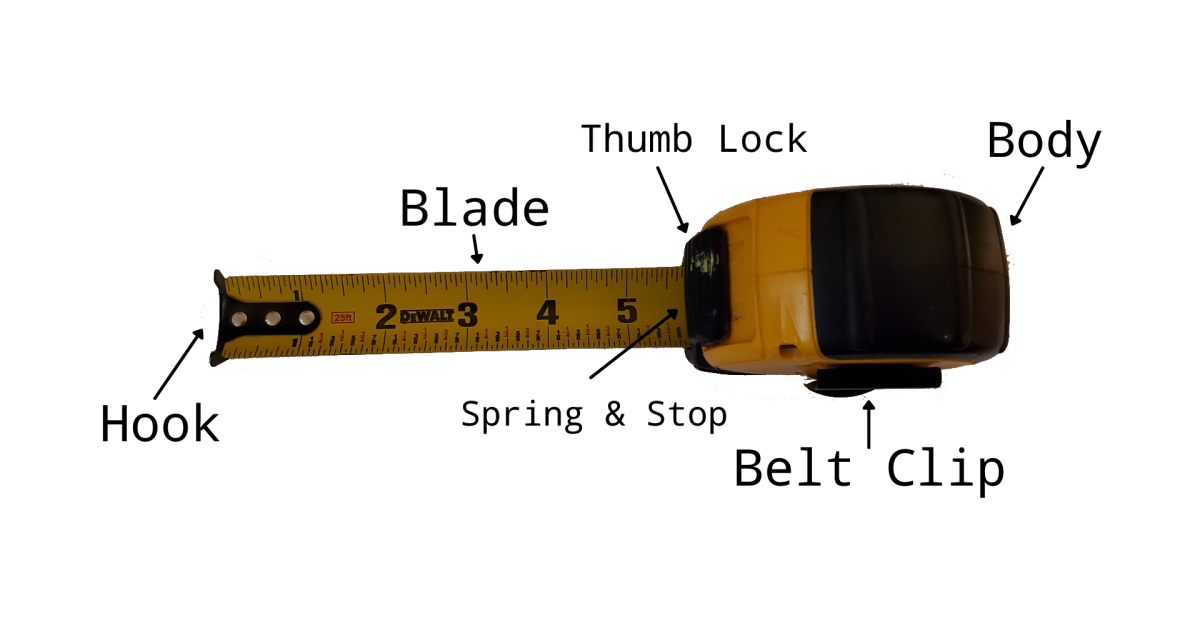
Checking For Wear And Tear
Inspect your tape measure regularly. Look for cracks, rust, or bent parts.
Check the tape blade for faded numbers or missing marks. These affect measurement accuracy.
- Look for breaks or kinks in the tape
- Make sure the hook at the end is secure
- Test the lock mechanism to ensure it holds
- Check for rust or corrosion
Replacing When Necessary
Replace your tape measure if it is damaged beyond repair. A faulty tape can cause wrong measurements.
Buy a new tape measure if numbers are hard to read or if the tape does not retract smoothly.
- Replace if the tape blade is cracked or broken
- Get a new tape if the hook is loose or missing
- Change if the locking system fails
- Choose a tape measure with clear, easy-to-read markings
Credit: www.nutanbrown.com
Frequently Asked Questions
How Do I Measure Flooring With A Tape Measure Accurately?
To measure flooring accurately, stretch the tape from one end to the other. Keep it straight and level. Note the measurement at the edge. Double-check by measuring twice to ensure accuracy. Record measurements carefully for precise flooring cuts and installation.
What Tape Measure Type Is Best For Flooring Projects?
A sturdy steel tape measure of 25 feet or longer works best. It provides durability and length needed for most flooring jobs. Choose one with clear, easy-to-read markings. A lock feature helps maintain measurements while cutting or marking.
How Do I Read Tape Measure Markings For Flooring?
Read the tape measure by noting the large numbers for feet. Smaller lines indicate inches and fractions of inches. Understand common fractions like 1/2, 1/4, and 1/8 inches. This helps in precise flooring cuts and fitting pieces perfectly.
Why Is Measuring Twice Important Before Cutting Flooring?
Measuring twice prevents costly mistakes and material waste. It ensures the cut piece fits perfectly. Flooring materials can be expensive, so accuracy saves money. Double-checking measurements boosts confidence and reduces installation errors.
Conclusion
Measuring for flooring doesn’t have to be difficult. A tape measure is your best friend. Always double-check measurements. Precision saves money and time. Measure twice, cut once. This ensures a perfect fit. Remember, accuracy matters in flooring projects. Practice makes measuring easier.
Soon, you’ll feel confident in your skills. With careful steps, your floor will look great. Enjoy the process. Happy measuring!