Are you ready to transform your woodworking or DIY projects with a flawless finish? Imagine running your hand over a perfectly smooth surface, free of any imperfections.
This level of perfection is within your grasp, and the secret lies in mastering the use of an orbital sander. Whether you’re a seasoned pro or new to the world of sanding, understanding how to effectively use this versatile tool can make all the difference in your projects.
In this guide, you’ll discover essential tips and tricks to achieve that professional-quality finish. Stick with us, and by the end of this article, you’ll be equipped with the knowledge to elevate your craftsmanship to new heights. Don’t miss out on unlocking the potential of your projects—let’s get started!
Choosing The Right Orbital Sander
Using an orbital sander helps create smooth, even surfaces on wood or metal. Picking the correct sander makes your work easier and better.
There are many types of orbital sanders. You also need to select the right grit and consider power and speed before buying one.
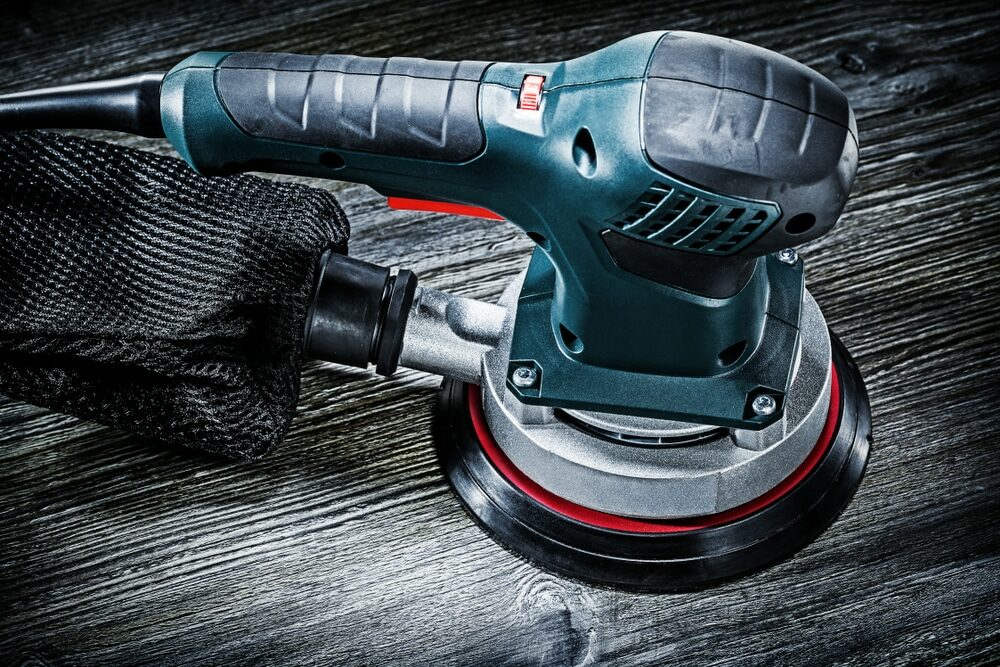
Types Of Orbital Sanders
Orbital sanders come in different styles. Each style fits certain jobs better than others.
- Finishing Sander:Small and light. Best for fine sanding and finishing.
- Random Orbital Sander:Moves in random orbits. Good for smoothing and removing paint.
- Detail Sander:Has a pointed tip. Ideal for corners and small spaces.
Selecting The Correct Grit
Sanding grit affects how smooth your surface will be. Lower numbers mean rougher grit.
| Grit Number | Use |
| 40–60 | Removing old paint or rough sanding |
| 80–120 | Smoothing surfaces after rough sanding |
| 150–220 | Final finishing and polishing |
Power And Speed Considerations
Power and speed affect how fast and smooth your sanding will be. Choose based on your project size and detail.
- Power:Higher power works better for large or tough jobs.
- Speed:Variable speed lets you adjust for different materials.
- Comfort:Look for ergonomic design to reduce hand fatigue.
Preparing The Surface
Preparing the surface is important before using an orbital sander. It ensures smooth and even sanding. Proper preparation helps avoid damage and gives better results.
This guide covers cleaning, inspecting, and securing the workpiece for safe sanding.
Cleaning And Inspecting
Start by cleaning the surface to remove dirt, dust, and grease. Use a soft cloth or brush. Check the surface for nails, screws, or other objects that could damage the sander or cause injury.
- Remove all loose debris with a brush or cloth
- Check for nails, screws, or staples and remove them
- Look for cracks or dents that may need repair
- Ensure the surface is dry before sanding
Securing The Workpiece
Keep the workpiece steady to avoid mistakes or accidents. Use clamps or a vise to hold it firmly. A stable surface lets you control the sander better.
| Method | Use | Notes |
| Clamps | Hold wood pieces | Place clamps evenly to avoid damage |
| Workbench Vise | Secure smaller objects | Make sure the vise grips tightly |
| Non-slip Mat | Prevent sliding on smooth surfaces | Use under the workpiece or sander |
Sanding Techniques
Using an orbital sander properly helps finish surfaces smoothly. Good sanding techniques prevent damage and save time.
Learn the best ways to hold the tool, apply pressure, and move it for even results.
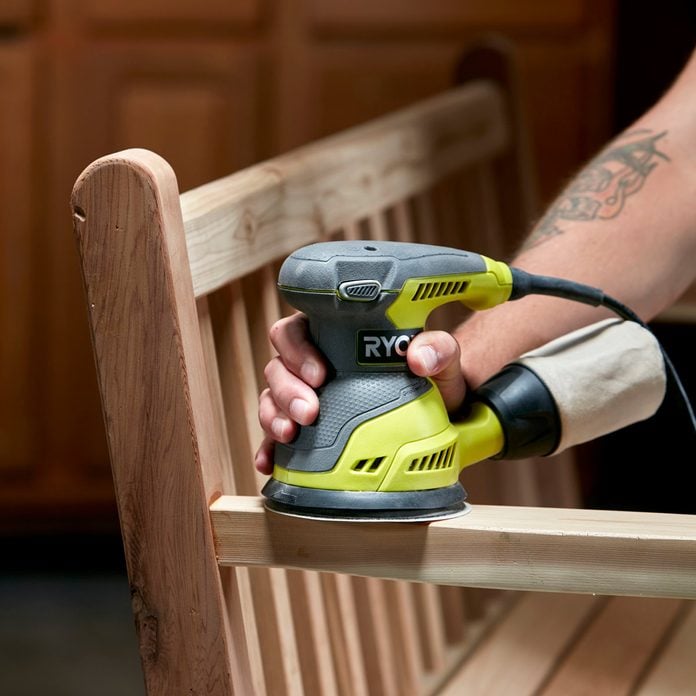
Proper Hand Positioning
Hold the orbital sander with both hands for control. One hand should grip the front handle, the other the rear. Keep your fingers away from the sanding pad to avoid injury.
Maintaining Even Pressure
Apply steady, light pressure on the sander. Pressing too hard can cause uneven sanding and damage the surface. Let the sander’s weight do the work.
- Keep your grip firm but relaxed
- Do not push down too hard
- Move the sander smoothly over the surface
- Check the surface often for evenness
Using Circular Motions
Move the sander in small circular motions. This pattern helps avoid deep scratches and creates a smooth finish. Overlap each circle slightly for full coverage.
Avoiding Common Mistakes
| Mistake | Effect | How to Avoid |
|---|---|---|
| Applying too much pressure | Uneven surface and gouges | Use light, even pressure |
| Keeping sander in one place | Burn marks on wood | Keep the sander moving |
| Using worn sandpaper | Slow sanding and poor finish | Replace sandpaper regularly |
| Ignoring dust buildup | Clogged sandpaper and scratches | Clean dust often |
Credit: mrsander.co.uk
Finishing Touches
Using an orbital sander well can give your project a smooth and even surface. Finishing touches help bring out the best look and feel of your work.
Proper sanding, cleaning, and sealing improve durability and appearance. Each step is important for a professional result.
Switching Grits For Smoothness
Start sanding with a coarse grit to remove rough areas. Then, move to medium grit for a finer finish. Finish with a very fine grit to get a smooth surface.
- Begin with 80 or 100 grit sandpaper to shape the surface.
- Use 150 to 180 grit to smooth out scratches from the coarse grit.
- Finish with 220 grit or higher for a soft, even finish.
Cleaning Dust And Debris
Dust can ruin the final look and make finishes stick poorly. Clean the surface well before applying any finish.
- Use a brush or vacuum to remove sanding dust.
- Wipe the surface with a damp cloth to catch fine particles.
- Allow the surface to dry completely before sealing.
Applying Sealants Or Finishes
Sealants protect the surface and bring out the grain or color. Choose the right finish for your project and apply it evenly.
| Finish Type | Use | Dry Time |
| Polyurethane | Strong, clear protection | 4-6 hours |
| Wax | Soft shine, easy to apply | 1-2 hours |
| Varnish | Durable and glossy | 6-8 hours |
| Oil | Enhances wood grain | 24 hours |
Safety Tips
Using an orbital sander can make surfaces smooth and ready for finishing. Safety is very important to avoid accidents and health issues.
Follow these safety tips to protect yourself and keep your work area safe while sanding.
Protective Gear
Wear the right gear to protect your body from dust and flying debris. Safety glasses shield your eyes from particles. A dust mask helps you breathe clean air. Hearing protection guards your ears from noise.
- Safety glasses or goggles
- Dust mask or respirator
- Earplugs or earmuffs
- Work gloves for hand protection
- Long sleeves and pants to cover skin
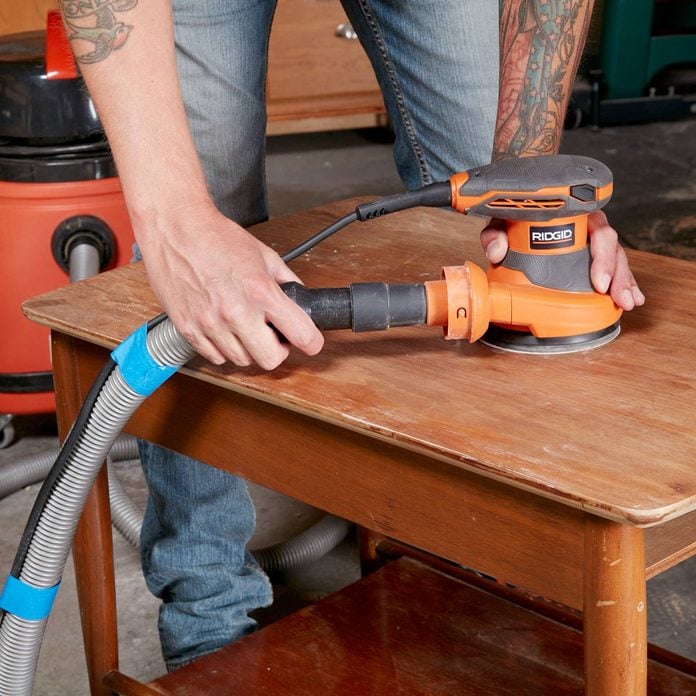
Handling Dust And Ventilation
Dust from sanding can harm your lungs and make the air dirty. Work in a well-ventilated area. Use a dust collection system if available. Clean up dust often to keep the workspace safe.
| Tip | Reason |
| Open windows and doors | Improves air flow |
| Use a vacuum with the sander | Reduces airborne dust |
| Wear a dust mask | Protects lungs |
| Clean dust from surfaces | Prevents slipping and fire risk |
Tool Maintenance
Keep your orbital sander in good shape. Check it before each use. Look for worn sanding pads and loose parts. Clean the tool after use to avoid dust buildup. Proper care helps the tool work safely and last longer.
- Inspect sanding pads and replace if worn
- Tighten all screws and parts
- Clean dust from vents and moving parts
- Store the sander in a dry place
- Unplug the tool before maintenance
Credit: www.familyhandyman.com
Troubleshooting Issues
Using an orbital sander can speed up finishing surfaces. Sometimes problems happen that affect results.
Fixing common issues helps get smooth and even surfaces. Read on to find easy solutions.
Dealing With Swirl Marks
Swirl marks appear as circular scratches on the surface. They happen when sanding too long in one spot or using rough grit paper.
- Use finer grit sandpaper to remove marks gradually.
- Keep the sander moving in smooth, even strokes.
- Do not press hard; let the tool do the work.
- Clean the surface often to avoid sanding dust buildup.
Fixing Uneven Surfaces
Uneven surfaces result from uneven sanding pressure or old sandpaper. You can fix this by checking your technique and materials.
| Cause | Fix |
| Uneven pressure | Hold sander flat and steady |
| Worn sandpaper | Replace sandpaper regularly |
| Surface dents | Fill dents before sanding |
| Skipping grit steps | Sand progressively from coarse to fine |
Sander Not Working Properly
If the sander does not start or stops suddenly, check power and parts. Regular maintenance can prevent many problems.
- Is the power cord plugged in and undamaged?
- Is the on/off switch working correctly?
- Are the sanding pads tightly attached?
- Is the motor overheating? Let it cool down.
- Are dust vents clear of blockage?
Credit: www.familyhandyman.com
Frequently Asked Questions
What Is The Best Grit Sandpaper For Orbital Sanders?
Use 120 to 220 grit sandpaper for finishing surfaces with an orbital sander. Coarser grits remove more material, while finer grits create smoother finishes.
How Do I Avoid Swirl Marks With An Orbital Sander?
Keep the sander moving steadily and don’t apply too much pressure. Use fine grit sandpaper and sand in overlapping, circular motions to prevent swirl marks.
Can I Use An Orbital Sander On Painted Surfaces?
Yes, an orbital sander works well to smooth painted surfaces. Use medium to fine grit sandpaper to avoid removing too much paint or damaging the surface.
How Often Should I Change The Sandpaper On An Orbital Sander?
Change the sandpaper when it becomes clogged or worn out. Using fresh sandpaper ensures efficient sanding and a smooth, even finish every time.
Conclusion
Using an orbital sander makes finishing surfaces easier and faster. It helps create smooth, even finishes on wood or metal. Remember to choose the right sandpaper grit for each step. Always keep the sander moving to avoid marks. Clean the surface after sanding to see your progress clearly.
Practice a little to get comfortable with the tool. With patience and care, your projects will look professional. This simple guide helps you work confidently and safely. Try these tips and enjoy better results every time.