
Are your tools scattered all over your workspace, making it difficult to find what you need when you need it? You’re not alone.
Many DIY enthusiasts and professionals face this frustrating challenge. But there’s a simple solution that can transform your clutter into a well-organized haven: pegboards. Imagine walking into your garage or workshop and instantly spotting the tool you need. No more rummaging through boxes or drawers.
Sounds perfect, right? In this guide, you’ll discover how to use pegboards effectively for tool storage, ensuring your tools are always within easy reach. Get ready to revolutionize your workspace and boost your productivity. Keep reading to learn how to create the ultimate tool storage system that will make your life easier and your projects more enjoyable.
Benefits Of Pegboards
Pegboards offer a simple way to organize tools. They keep your workspace neat and tools easy to find.
Using pegboards helps save room and makes your tools more accessible. You can change the layout anytime.
Maximizing Vertical Space
Pegboards use wall space to store tools. This frees up your workbench and floor areas. You can store many tools in a small space.
- Keep tools off counters and floors
- Use tall walls for extra storage
- Store small and large tools together
- Free up room for projects and movement
Easy Access To Tools
Tools hang in plain sight on pegboards. You can grab what you need fast. This reduces search time and keeps work moving.
| Tool Type | Placement on Pegboard |
| Screwdrivers | Near workbench |
| Hammers | At eye level |
| Wrenches | Grouped by size |
| Measuring Tape | Close to cutting area |
Customizable Layouts
Pegboards let you arrange hooks and holders any way you want. Change the layout as your tool collection grows or shifts.
- Add more hooks for new tools
- Group similar tools together
- Adjust height for comfort and reach
- Use baskets or shelves for small parts
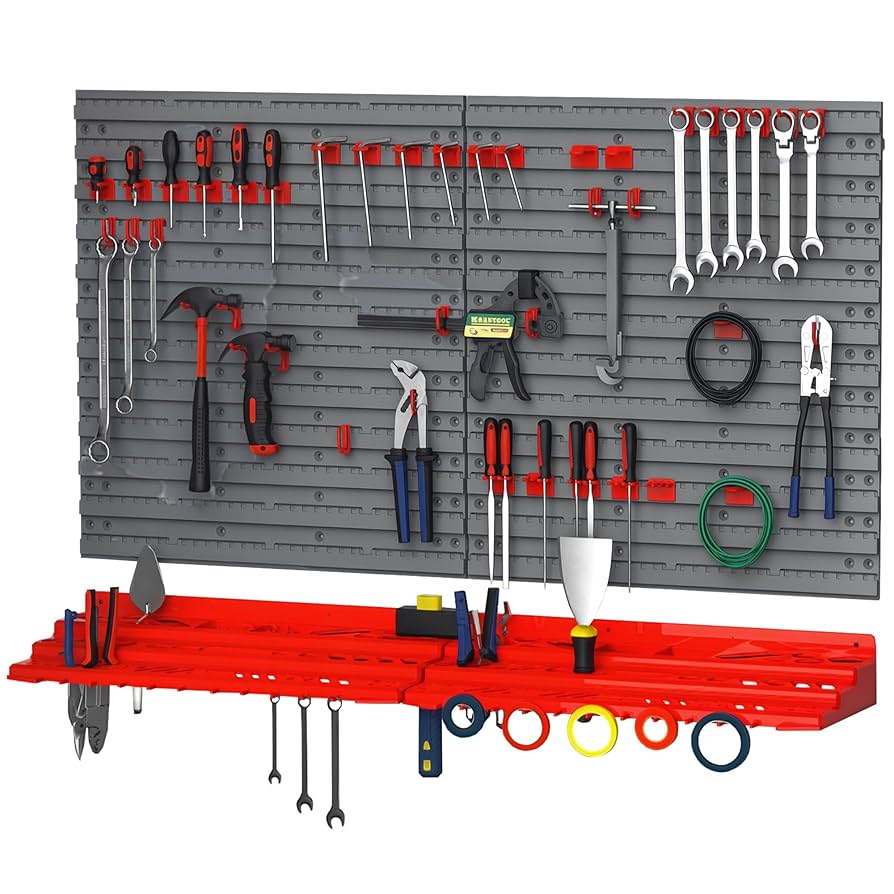
Credit: www.amazon.ca
Choosing The Right Pegboard
Pegboards help keep your tools organized and easy to find. Picking the right pegboard makes your workspace better.
Think about the material, size, and how you will mount it. These choices affect how well your pegboard works.
Material Options
Pegboards come in different materials like wood, metal, and hardboard. Each has its own benefits and limits.
- Wood:Strong and holds heavy tools well. It can be painted or stained.
- Metal:Very durable and resists damage. Ideal for heavy or sharp tools.
- Hardboard:Lightweight and affordable. Best for light to medium tools.
Size And Thickness
Pick a pegboard size that fits your wall space and tool collection. Thickness affects strength and support.
| Thickness | Best Use | Notes |
| 1/4 inch | Light tools | May bend under heavy weight |
| 1/8 inch | Small, light tools | Least durable |
| 1/2 inch | Heavy tools | Very sturdy |
Mounting Considerations
How you mount your pegboard affects stability and tool safety. Choose mounting hardware based on wall type.
- Use screws and anchors for drywall walls.
- Mount directly on studs for best support.
- Consider spacers to create space behind the pegboard for hooks.
- Metal pegboards may need special mounting brackets.
Essential Pegboard Accessories
Pegboards keep tools tidy and easy to find. Using the right accessories helps you organize better. This guide covers key pegboard add-ons to improve your workspace.
From hooks to shelves, each accessory has a role. Choose what fits your tools and work habits to save time and space.
Hooks And Holders
Hooks and holders attach directly to the pegboard holes. They hold hand tools, cords, and other items securely. Different shapes fit different tool types.
- S-shaped hooks for hammers and wrenches
- Loop hooks for screwdrivers and pliers
- Clamp holders for power tools
- Multi-tool racks for sets of similar items
Shelves And Bins
Shelves and bins add storage space for small parts and bulky items. They keep your workspace clean and tools accessible.
| Accessory | Use |
| Shelf | Store paint cans, spray bottles, or boxes |
| Small bins | Hold nails, screws, and washers |
| Tool trays | Keep loose tools organized |
| Adjustable shelves | Fit different sized items easily |
Magnetic Strips
Magnetic strips attach to your pegboard for metal tools. They hold items firmly and allow quick grabbing and replacing.
Key benefits of magnetic strips:
- Hold screwdrivers, pliers, and wrenches
- Free up hooks and shelves for other tools
- Easy to install and adjust
- Keep tools visible and within reach
Planning Your Pegboard Layout
Planning your pegboard layout helps keep your tools easy to find. A good layout saves time and space.
Think about how you use your tools before you start. This will guide your pegboard design.
Grouping Similar Tools
Put tools that do the same job close together. This helps you grab what you need fast.
For example, hang all screwdrivers in one area and all pliers in another. This keeps things neat.
- Group wrenches by size
- Keep painting tools in one spot
- Place cutting tools together
Creating Zones
Divide your pegboard into zones for different tasks. This helps you work better and stay organized.
Set a zone for woodworking tools, another for gardening, and one for electrical tools. Each zone has its own space.
- Mark zones with colors or borders
- Keep heavy tools lower for safety
- Use small hooks for light tools
Labeling For Efficiency
Labels help you find tools quickly. Use clear and simple labels for each tool or group.
You can write tool names or draw small pictures. Labels also help others use your pegboard properly.
- Use printed labels for a clean look
- Write with permanent markers on tape
- Change labels easily with removable tags
Installation Tips
Using pegboards for tool storage keeps your workspace tidy. Proper installation ensures your tools stay safe and accessible.
Follow these tips for a strong and useful pegboard setup in your workshop or garage.
Wall Preparation
Choose a clean, dry wall for your pegboard. Remove any dirt or dust to help the pegboard stick better.
Find wall studs using a stud finder. Mounting on studs gives the best support for heavy tools.
Secure Mounting Techniques
Use screws long enough to reach the studs behind the wall. This keeps the pegboard stable and strong.
Add spacers between the wall and the pegboard. This space allows hooks to fit easily behind the board.
- Use 1/4 inch wooden strips as spacers
- Place screws every 12 to 16 inches along studs
- Check that the pegboard is level before tightening screws
Spacing And Height Guidelines
Install the pegboard at a height that suits your reach. Avoid placing it too high or too low.
Keep enough space between pegboards if using more than one. This gives room for tools and easy access.
- Mount the pegboard 4 to 6 feet from the floor
- Leave 2 to 3 inches between multiple pegboards
- Allow space around the board for hooks and accessories
Space-saving Strategies
Pegboards help keep tools organized and easy to find. Using space-saving methods can make your workspace more efficient. Smart placement and clever designs maximize every inch.
Small workshops or garages benefit a lot from saving space. Using corners, stacking tools, and foldable parts can clear up room. These ideas keep tools handy without clutter.
Utilizing Corners And Odd Spaces
Corners and odd spaces often go unused. Pegboards can fit these areas to hold small tools or accessories. Custom shapes or cutouts help fit pegboards in tight spots.
- Use angled pegboards to fit corner spaces
- Install small pegboards behind doors
- Place hooks for hanging items in narrow gaps
- Use vertical space above workbenches
Stacking And Layering Tools
Stacking tools vertically saves wall space. Layering lets you keep frequently used tools at the front. Use shelves or racks combined with pegboards to hold heavier items.
| Method | Best For | Tip |
| Vertical Hooks | Hand tools | Place by size |
| Shelves over Pegboard | Power tools | Label shelves |
| Layered Pegboards | Small items | Use removable hooks |
Incorporating Foldable Elements
Foldable parts save space when tools are not in use. Hinged pegboards or fold-down panels free wall space. Folding tables with pegboard backs hold tools and work surfaces.
- Use strong hinges for safety
- Install latches to secure folded parts
- Plan tool layout for easy access when unfolded
- Combine with magnets for flexible holding
Maintaining Your Pegboard
Keeping your pegboard clean and organized makes tool storage easy. Regular maintenance helps you find tools fast and keeps your workspace neat.
Simple habits can extend the life of your pegboard. Check it often and update it to fit your needs.
Regular Cleaning
Dust and dirt can build up on your pegboard over time. Cleaning it regularly keeps it looking good and working well.
Use a soft cloth or brush to remove dust. Wipe the surface with a damp cloth if needed. Avoid harsh cleaners that damage the board.
Rearranging Tools
Move your tools around to fit your current needs. Rearranging helps keep your workspace efficient and safe.
Group similar tools together. Place the most used tools within easy reach. Change the layout if your tool collection grows.
- Sort tools by type or size
- Keep heavy tools lower on the board
- Leave space for new tools
Updating Accessories
Check your hooks, shelves, and holders often. Replace any that are bent or broken to keep tools secure.
Add new accessories as needed. Use special holders for unique tools. This keeps your pegboard useful and organized.
- Replace worn hooks promptly
- Add baskets for small items
- Use magnetic strips for metal tools

Credit: www.makingmanzanita.com
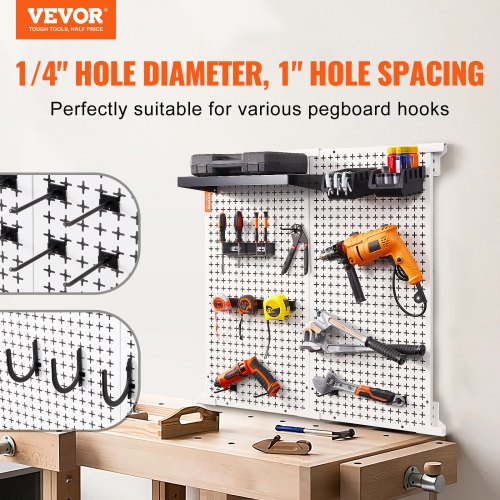
Credit: www.vevor.ca
Frequently Asked Questions
What Are The Benefits Of Using Pegboards For Tool Storage?
Pegboards maximize wall space, keep tools organized, and improve accessibility. They reduce clutter and make tool retrieval faster and easier. Pegboards also allow customization with hooks and holders for various tool sizes.
How Do I Install A Pegboard For Tool Storage?
Choose a sturdy wall and mount the pegboard using anchors or screws. Ensure it is level and securely fastened. Leave space behind the board to hang hooks and tools easily.
What Types Of Tools Work Best On Pegboards?
Hand tools like hammers, screwdrivers, wrenches, and pliers work best. Pegboards also hold measuring tapes, scissors, and small power tools. Use appropriate hooks and holders for heavier or odd-shaped items.
Can Pegboards Support Heavy Tools Safely?
Yes, with proper mounting and strong hooks, pegboards can hold heavy tools. Use thicker pegboards and heavy-duty anchors for added support. Distribute weight evenly to prevent damage or falling tools.
Conclusion
Pegboards keep tools tidy and easy to find. They save space and make work faster. You can customize pegboards to fit your needs. Tools hang neatly, so your workspace stays clean. Using pegboards helps avoid clutter and frustration. Try different hooks and holders to organize better.
A well-organized tool area makes projects more fun. Start small and add more as you go. Simple, smart storage makes a big difference. Pegboards offer a practical way to keep tools ready.
