If your garden soil feels hard or water pools on the surface, your plants might be struggling to breathe. Aerating your soil is a simple way to fix this, and you don’t need fancy tools to do it.
With just a garden fork, you can loosen the soil, help water reach the roots, and give your plants the air they need to grow strong. In this guide, you’ll learn exactly how to aerate soil with a garden fork—step by step—so your garden can thrive like never before.
Keep reading, and discover the easy trick that makes all the difference.
Benefits Of Soil Aeration
Aerating soil helps garden plants grow stronger and healthier. It loosens compact soil and lets air reach the roots.
This process improves how water and nutrients move through the soil. Using a garden fork is a simple way to aerate soil.
Improved Root Growth
When soil is aerated, roots have more space to spread. This helps plants anchor well and take in more oxygen.
Strong roots support healthy plant growth and better resistance to stress.
Enhanced Water Absorption
Aerated soil absorbs water more evenly. This stops water from pooling on the surface or running off.
- Water reaches deep into the soil
- Plants get steady moisture
- Less water waste during watering
Better Nutrient Uptake
Looser soil lets nutrients move freely to plant roots. This helps plants get the food they need to grow.
| Nutrient | Benefit to Plants |
| Nitrogen | Helps leaves grow green and strong |
| Phosphorus | Supports root and flower development |
| Potassium | Improves overall plant health and disease resistance |
Credit: gardenitemreviews.com
When To Aerate Your Soil
Aerating soil helps plants grow strong roots. It improves air, water, and nutrient flow.
Knowing when to aerate makes the process more effective. Soil conditions and seasons matter.
Signs Of Compacted Soil
Compacted soil stops water and air from reaching roots. Look for these signs to know if aeration is needed.
- Water pools on the surface and drains slowly.
- Grass or plants look weak or yellow.
- Soil feels hard when you press or dig it.
- Roots grow near the surface, not deep.
- Weeds grow in bare patches.
Ideal Seasons For Aeration
The best time to aerate depends on your grass type and climate. Aerate when the soil is moist but not wet.
| Season | Best For | Notes |
| Spring | Cool-season grasses | After new growth starts |
| Fall | Cool-season grasses | Before winter dormancy |
| Late Spring to Early Summer | Warm-season grasses | After green-up but before heat stress |
Choosing The Right Garden Fork
A garden fork is a useful tool to aerate soil in your garden. It helps to loosen compacted soil so plants can grow better. Picking the right garden fork makes the job easier and more effective.
Different garden forks suit different soil types and gardening tasks. Knowing what type to choose and what features to look for will help you work smarter.
Types Of Garden Forks
Garden forks come in several types. Each type has a specific use for soil aeration or digging. Choose the type that matches your soil and garden size.
- Digging Fork:Has strong, thick tines for breaking tough soil.
- Border Fork:Smaller and lighter for working in tight spaces.
- Leaf Fork:Lightweight with thin tines to move leaves or mulch.
- Manure Fork:Designed for moving compost or manure, not soil.
For aerating soil, digging and border forks work best. They loosen soil without damaging roots.
Features To Look For
Good garden forks have features that make soil aeration easier. Look for strong materials and comfortable handles.
- Tine Material:Steel tines are strong and last longer.
- Number of Tines:Four or five tines are common and balance digging power.
- Handle Length:Longer handles give better leverage but may be harder to control.
- Handle Grip:Wooden or rubber grips reduce hand fatigue.
- Tine Shape:Slightly curved tines penetrate soil better.
Choosing a garden fork with these features helps you aerate soil with less effort and better results.
Preparing Your Garden Area
Preparing your garden soil is key before aerating with a garden fork. A clean, moist surface makes the job easier.
Start by clearing debris and moistening the soil. These steps help your garden grow healthy plants.
Clearing Debris
Remove leaves, sticks, and stones from your garden bed. This clears the way for aeration and root growth.
- Pick up fallen leaves and twigs by hand or with a rake.
- Remove rocks and large clumps of old roots.
- Clear out any trash or garden waste.
- Dispose of debris properly to prevent pests.
Moistening The Soil
Soil should be damp but not soaked before aerating. Wet soil is harder to work with and can compact further.
| Soil Condition | How It Feels | Action |
| Dry | Powdery, crumbly | Water lightly the day before |
| Ideal | Moist, holds shape but crumbles | Ready for aeration |
| Wet | Sticky, muddy | Wait for it to dry some |
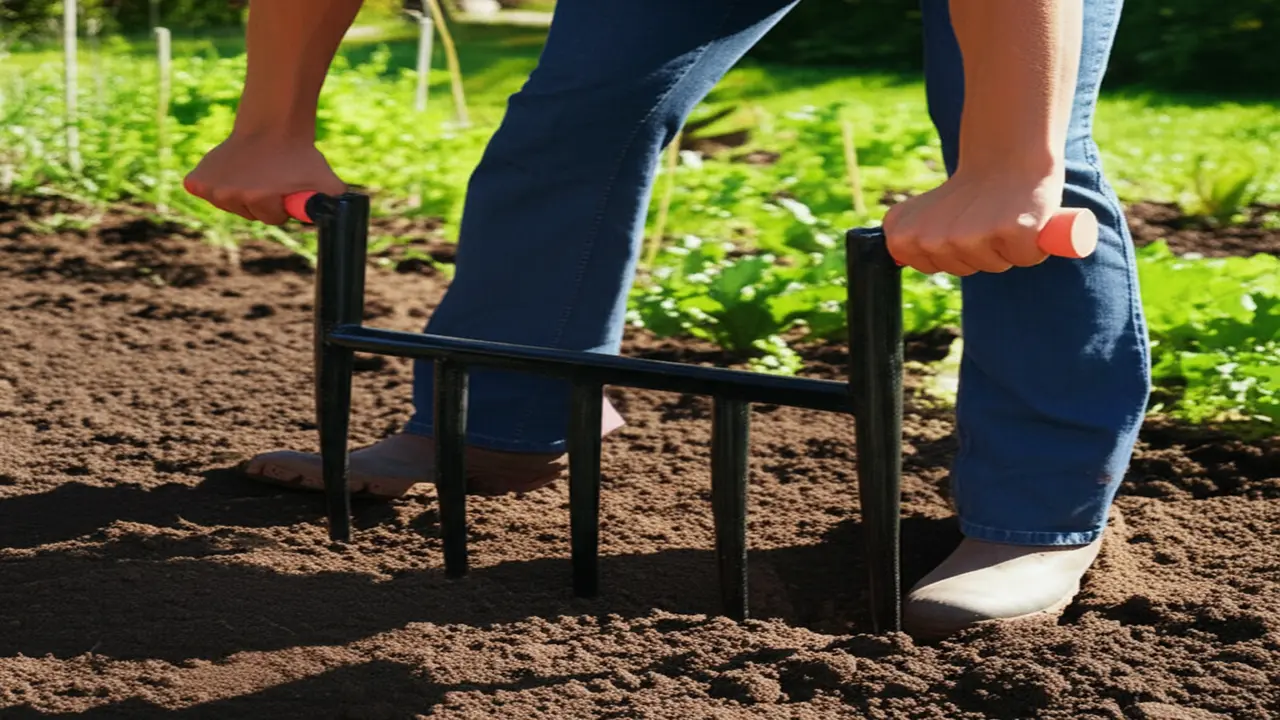
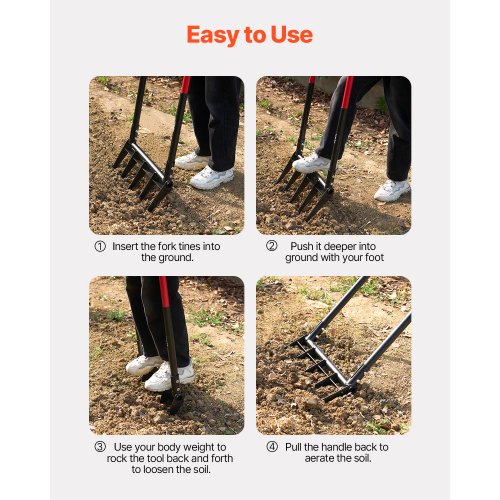
Step-by-step Aeration Process
Aerating soil helps improve water and air flow to plant roots. Using a garden fork is an easy way to do this in small gardens.
This guide shows you how to aerate soil with a garden fork in simple steps. Follow along to keep your soil healthy and loose.
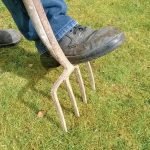
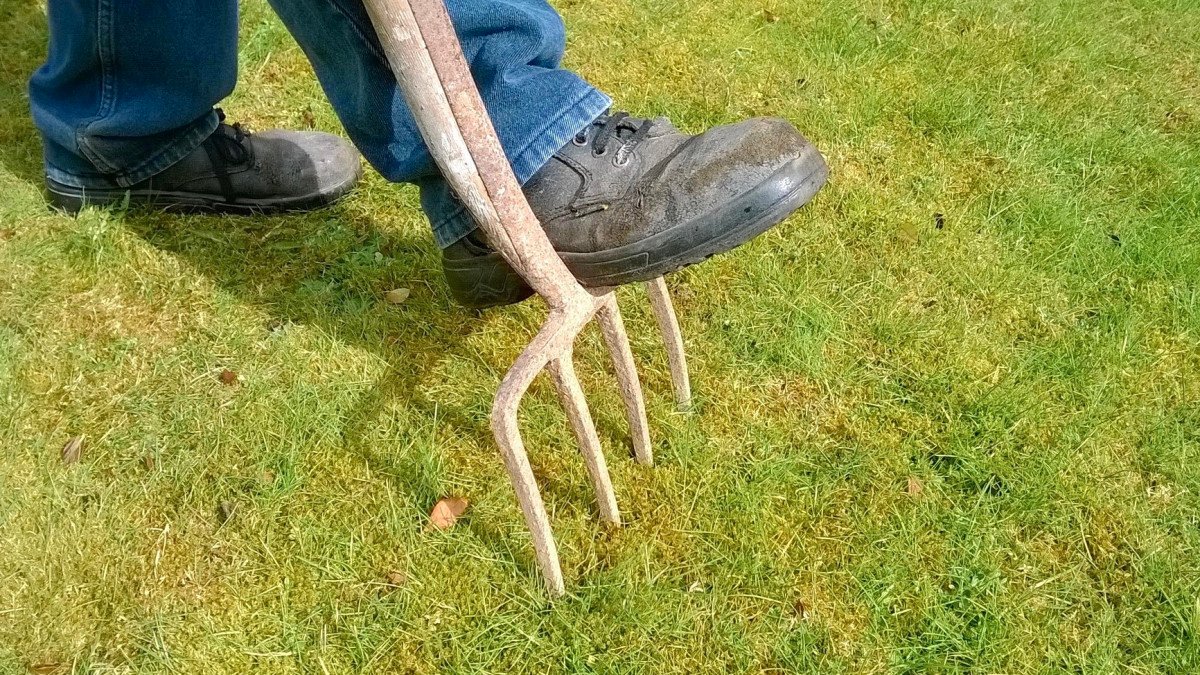
Inserting The Fork
Place the garden fork on the soil where you want to aerate. Hold the handle firmly with both hands.
Push the fork prongs straight down into the soil. Try to go deep enough to reach the roots.
Loosening The Soil
Once the fork is in the soil, rock it back and forth gently. This helps to break up compacted soil.
Lift the fork slightly to allow air to enter the soil. This creates space for roots to grow better.
Repeating Across The Area
Move the fork a few inches to the side and repeat the process. Cover the whole garden area evenly.
- Insert the fork
- Loosen and lift the soil
- Shift position and repeat

Credit: www.ageas.co.uk
After Aeration Care
Aerating soil with a garden fork helps improve air and water flow. After aeration, proper care keeps soil healthy.
Good aftercare supports strong plant roots and better growth. Follow these tips to care for your soil well.
Watering Tips
Water the soil deeply after aeration. This helps settle the soil and fill air pockets with moisture.
Keep the soil moist but not soggy. Water regularly to support root growth and nutrient absorption.
- Water early in the morning or late in the afternoon
- Use a gentle spray to avoid washing away soil
- Check soil moisture with your finger before watering
Applying Fertilizers
After aeration, your soil can absorb fertilizers better. Apply fertilizer to help plants get nutrients.
Use a balanced fertilizer suitable for your plants. Spread it evenly over the soil surface.
- Choose slow-release fertilizer for steady nutrients
- Follow the instructions on the fertilizer package
- Avoid over-fertilizing to prevent plant damage
Avoiding Soil Compaction
After aeration, keep heavy tools and vehicles off the soil. This helps prevent soil from becoming compacted again.
Use walkways or stepping stones to reduce foot traffic on aerated areas. Loose soil stays healthy and drains well.
- Do not walk on aerated soil until it settles
- Use mulch to protect soil surface
- Regularly aerate soil to maintain good structure
Common Mistakes To Avoid
Aerating soil with a garden fork helps plants grow better. It lets air, water, and nutrients reach roots. But there are common mistakes that can harm your garden.
Avoiding these errors will make aeration effective and keep your soil healthy.
Aerating Dry Soil
Aerating soil that is very dry can damage it. The soil may break into large clumps and hurt plant roots. It also makes aeration less useful because air and water cannot move well.
- Check soil moisture before aerating
- Water the soil a day before aeration if it is dry
- Avoid aerating soil that is too hard or cracked
Over-aerating
Using a garden fork too often or too deeply can damage soil structure. Over-aeration breaks soil crumbs and destroys helpful organisms.
| Problem | Effect |
| Too frequent aeration | Disturbs soil life |
| Too deep aeration | Hurts plant roots |
| Excess aeration | Soil dries out faster |
Using The Wrong Tools
Using tools not made for aeration can cause more harm than good. A garden fork is best because its tines loosen soil gently.
- Do not use sharp shovels that cut soil too much
- Avoid heavy machinery for small gardens
- Use a garden fork with sturdy, straight tines
- Keep tools clean to avoid spreading disease
Credit: www.vevor.ca
Frequently Asked Questions
What Is The Purpose Of Aerating Soil With A Garden Fork?
Aerating soil with a garden fork improves air, water, and nutrient flow. It breaks compacted soil, promoting healthy root growth and better plant health.
How Often Should I Aerate My Garden Soil?
Aerate your garden soil once or twice a year. Early spring or fall are ideal times to prepare soil for planting and growth.
Can A Garden Fork Damage Plant Roots During Aeration?
When used carefully, a garden fork does not harm roots. Insert the fork gently around plants to avoid damaging root systems.
What Soil Types Benefit Most From Aeration With A Fork?
Clay and compacted soils benefit most from fork aeration. It loosens dense soil, improving drainage and root penetration for better plant growth.
Conclusion
Aerating soil with a garden fork is simple and effective. Your plants need air to thrive. By using a garden fork, you help roots breathe. This process improves drainage and nutrient absorption. It supports plant growth and health. Regular aeration keeps soil loose and fertile.
Plus, it reduces compaction. Your garden will flourish with this easy technique. So, grab your fork and start today. Your plants will thank you. Happy gardening!