Are you tired of struggling to get your wood pieces perfectly aligned before gluing? You’re not alone.
Even small misalignments can ruin the look and strength of your project. But what if you could easily master the art of aligning wood so your joints come out flawless every time? You’ll discover simple, practical tips that save you time and frustration.
By the end, you’ll have the confidence to tackle your woodworking projects with precision and get professional results. Keep reading to learn how to make your glue-ups strong and seamless.
Choosing The Right Wood
Choosing the right wood is important for strong glued joints. Wood pieces must fit well and hold glue tightly.
Good wood selection helps avoid problems like weak bonds or gaps between pieces.
Selecting Compatible Wood Types
Use wood types that match each other in hardness and grain. Different woods may not stick well together.
Wood with similar properties expands and contracts at the same rate. This keeps the glued joint strong.
- Match hardwood with hardwood or softwood with softwood
- Avoid mixing oily or resin-rich woods with dry woods
- Check that wood grain directions align for better glue contact
- Use wood from the same species if possible
Checking For Warps And Twists
Inspect wood for warps or twists before gluing. Bent pieces cause poor alignment and weak joints.
Lay wood flat on a table and check for gaps or uneven edges. Straight pieces fit better and glue stronger.
- Place wood on a flat surface to see if it rocks or gaps
- Check edges for straightness with a ruler or straight edge
- Reject or plane warped or twisted boards
- Choose dry wood to reduce warping after glue up
Credit: www.familyhandyman.com
Preparing Wood Surfaces
Aligning wood pieces well starts with preparing the surfaces for gluing. Smooth and clean surfaces help glue hold tightly.
Proper preparation avoids gaps and weak joints. Take time to sand and clean each piece before gluing.
Sanding For Smoothness
Sanding removes rough spots and uneven edges. It creates a flat surface for better glue contact. Use medium to fine grit sandpaper.
- Start with 120-grit sandpaper to even out surfaces
- Finish with 220-grit for a smooth feel
- Sand along the wood grain to avoid scratches
- Check edges and corners carefully
- Remove all sanding marks before gluing
Cleaning Dust And Debris
Dust and debris stop glue from bonding properly. Clean surfaces must be free of loose particles before gluing.
| Cleaning Method | Tools Needed | Tips |
| Dry brushing | Soft brush or paintbrush | Brush gently to remove dust |
| Vacuum cleaning | Vacuum with brush attachment | Use low suction to avoid damaging wood |
| Wiping | Damp cloth or tack cloth | Wipe lightly; avoid soaking the wood |
| Compressed air | Air compressor or canned air | Blow dust out of tight spots |
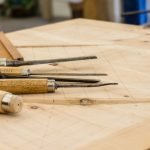
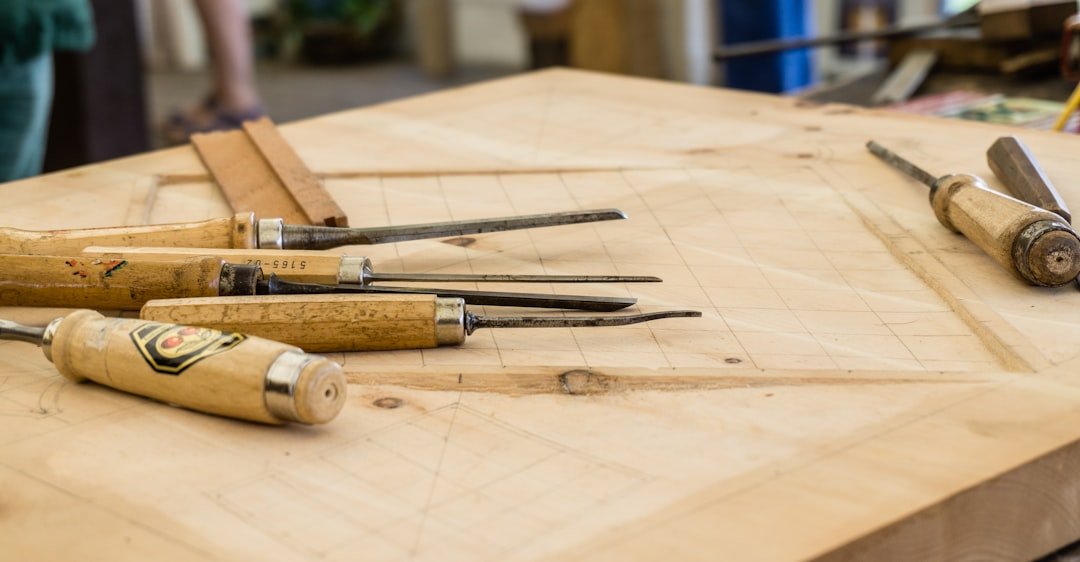
Tools For Alignment
Aligning wood pieces properly before gluing is important. Good alignment helps the pieces fit tightly.
Several tools can make this task easier and more accurate. These tools help keep wood steady and straight.
Using Clamps Effectively
Clamps hold wood pieces firmly while the glue dries. Using the right clamps stops pieces from moving.
Place clamps evenly along the joint. Tighten them just enough to hold the wood without squeezing out all glue.
- Use bar clamps for long edges
- Quick-release clamps save time
- Check for even pressure across the joint
Employing Alignment Jigs
Alignment jigs are tools that help position wood pieces precisely. They keep pieces square and level.
Jigs can be simple right-angle guides or custom-made fixtures. They ensure pieces stay in place during gluing.
- Use corner clamps for perfect 90-degree angles
- Build a jig to hold irregular shapes
- Keep jigs clean for smooth contact
Marking Reference Points
Marking reference points on wood pieces helps line them up quickly. Use a pencil or chalk for light marks.
Match marks on each piece before gluing. This reduces guesswork and improves joint accuracy.
- Draw small lines on edges to match
- Mark matching numbers or letters
- Make marks clear but easy to remove
Techniques For Perfect Joints
Aligning wood pieces correctly is key for strong, clean joints. This guide covers simple ways to prepare and join wood parts for gluing.
Following these techniques helps avoid gaps and misalignment. It improves the look and strength of your woodworking projects.
Dry Fitting Pieces
Test fit your wood pieces before applying glue. This lets you check for tight joints and proper alignment without mess.
- Place the pieces together without glue
- Look for gaps or uneven edges
- Make small adjustments with sandpaper or a chisel
- Ensure all parts fit snugly and squarely
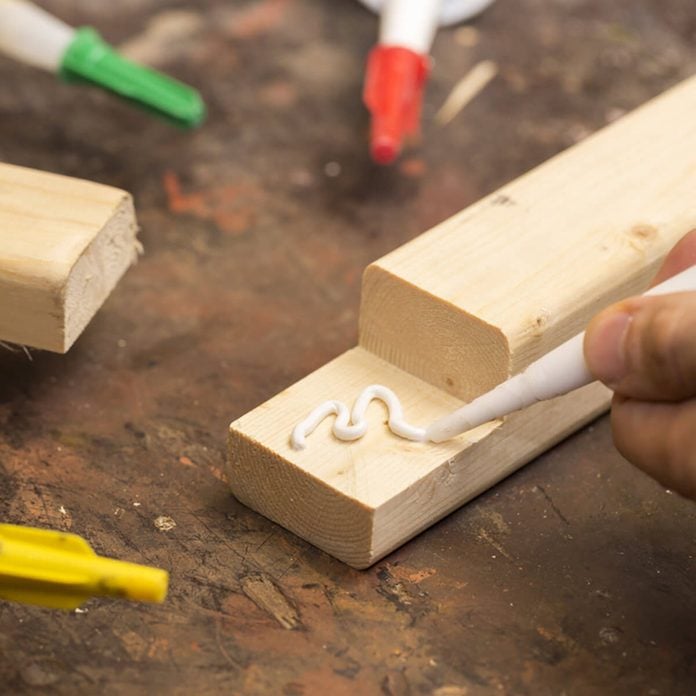
Applying Even Glue Coverage
Spread glue evenly on the surfaces to be joined. Uneven glue can cause weak spots or squeeze out mess.
| Technique | Benefit |
| Use a brush or roller | Covers all areas thinly and evenly |
| Apply thin layers | Prevents excess glue and gaps |
| Work quickly | Stops glue from drying before clamping |
Aligning Edges And Faces
Align the edges and faces carefully before clamping. This keeps the joint flush and the wood surfaces smooth.
- Use clamps to hold pieces tightly together
- Check the alignment from different angles
- Tap gently with a mallet if needed
- Remove excess glue before it dries
Securing Pieces While Drying
Aligning wood pieces correctly is key for a strong glue bond. Keeping them steady while drying helps avoid gaps and weak joints.
Clamping wood ensures even pressure and proper contact during drying. This guide covers clamp pressure, glue squeeze-out, and timing.
Choosing The Right Clamp Pressure
Clamp pressure must be firm but not too tight. Too much pressure can squeeze all the glue out. Too little pressure causes weak bonds.
- Use enough pressure to hold pieces without movement.
- Check for slight glue squeeze-out along the joint.
- Adjust clamps evenly on all sides.
- Do not overtighten to avoid wood deformation.
Avoiding Glue Squeeze-out
Glue squeeze-out shows proper clamp pressure but too much creates a mess. Control squeeze-out for clean joints and easy cleanup.
| Glue Type | Acceptable Squeeze-Out |
| Yellow Wood Glue | Thin bead along joint |
| PVA Glue | Small amount, easy to wipe |
| Polyurethane Glue | Minimal, avoid excess |
Timing For Optimal Bond Strength
Drying time affects bond strength. Remove clamps only after glue sets but before full cure to avoid joint failure.
- Check glue instructions for recommended clamp time.
- Keep pieces clamped at room temperature.
- Allow full cure time before heavy use.
- Do not disturb joints during drying.

Credit: www.reddit.com
Troubleshooting Common Issues
Aligning wood pieces for gluing can be tricky. Small problems may cause weak joints or gaps. Fixing these issues improves the strength and look of your project.
This guide covers common problems like misaligned joints, gaps, and wood movement. Each section offers easy tips to solve or avoid these troubles.
Fixing Misaligned Joints
Misaligned joints happen when wood edges do not match perfectly. This can weaken the bond and make the piece look uneven. Use clamps and guides to keep edges aligned while gluing.
If joints are already glued but misaligned, try sanding the edges gently to even them out. You can also use a scraper to remove dried glue and reset the pieces.
Dealing With Gaps And Voids
Gaps and voids reduce the strength of glued wood joints. Filling these spaces is essential for durability and appearance. Use wood filler or glue mixed with sawdust to fill small gaps.
- Clean the gap area before filling
- Apply filler in thin layers
- Let each layer dry fully before adding more
- Sand the filled area smooth after drying
For larger voids, consider cutting new wood patches to fit the gaps. Glue these patches firmly and sand them flush with the surface.
Preventing Wood Movement
Wood can move due to changes in humidity and temperature. This movement can cause glued joints to fail. Use dry wood and store it in stable conditions before gluing.
| Tip | Why It Helps |
|---|---|
| Acclimate wood for several days | Reduces swelling or shrinking after gluing |
| Use tight clamps | Prevents gaps from forming during drying |
| Seal wood surfaces | Limits moisture absorption and loss |

Credit: www.familyhandyman.com
Frequently Asked Questions
How Do I Prepare Wood Pieces For Gluing?
Clean the wood surfaces by removing dust and debris. Sand edges lightly for better adhesion. Ensure wood pieces fit snugly before applying glue.
What Tools Help Align Wood For Gluing?
Use clamps, corner squares, and alignment jigs. These tools hold pieces tightly and maintain proper angles during drying. They ensure precise, strong joints.
How Long Should I Clamp Wood When Gluing?
Clamp the wood for at least 30 minutes. Full glue curing may take 24 hours. Follow glue manufacturer instructions for best results.
Can Uneven Wood Surfaces Affect Gluing?
Yes, uneven surfaces reduce glue contact and joint strength. Sand or plane wood edges flat before gluing for a better bond.
Conclusion
Aligning wood pieces for gluing is a straightforward process. Start by choosing the right tools. Ensure surfaces are clean and smooth. Use clamps to hold pieces in place. Double-check alignment before applying glue. Patience is key for a strong bond.
Allow adequate time for drying. Practice makes perfect, so keep trying. Each project improves your skills. Soon, aligning wood will become second nature. With these tips, you’ll create sturdy, beautiful wood projects. Happy crafting and gluing!