Are you ready to learn a simple skill that can save you time and money on your next electrical project? Knowing how to bend EMT conduit correctly is a game-changer.
Whether you’re a DIY enthusiast or just starting out, mastering this technique will help you create clean, professional-looking installations without expensive tools or complicated steps. You’ll discover easy, step-by-step instructions that anyone can follow. Keep reading, and you’ll gain the confidence to bend EMT conduit like a pro in no time.
Tools Needed For Bending Emt
Bending EMT conduit requires the right tools to make clean, accurate bends. Using proper tools helps protect the conduit from damage.
This guide covers the main tools needed for bending EMT, including different types of benders, measuring tools, and safety gear.
Types Of Benders
There are several types of benders used to bend EMT conduit. Each type works best for certain bends and conduit sizes.
Choosing the right bender ensures smooth bends without kinks or flattening.
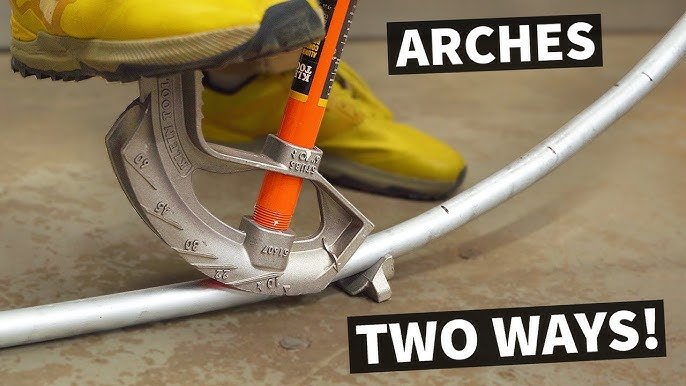
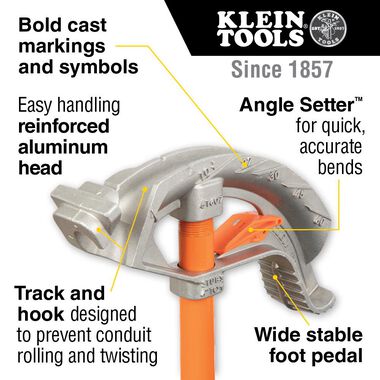
- Hand Benders:Simple tools used for small diameter EMT. They use leverage to bend conduit.
- Hydraulic Benders:Use hydraulic power for larger conduit or tougher bends.
- Electric Benders:Powered machines that bend conduit quickly and accurately.
- Rotary Benders:Allow precise bends by rotating the conduit around a form.
Measuring Tools
Measuring tools help mark where to bend the conduit. Accuracy in measurement leads to proper fit during installation.
Common measuring tools make it easier to plan bends and avoid costly mistakes.
- Tape Measure:Measures length and bend points on the conduit.
- Marker or Pencil:Marks the conduit at the exact spot to bend.
- Angle Finder:Checks the angle of bends to ensure accuracy.
- Combination Square:Helps mark straight lines and angles on the conduit.
Safety Gear
Safety gear protects you while bending EMT conduit. It reduces risks of injury from sharp edges or tool slips.
Always wear the right safety items to stay safe on the job.
- Safety Glasses:Protect eyes from metal shards and debris.
- Work Gloves:Shield hands from cuts and provide better grip.
- Steel-Toe Boots:Protect feet from heavy tools or dropped conduit.
- Long Sleeve Shirt:Guards arms against scratches and burns.
Credit: www.acmetools.com
Preparing The Conduit
Bending EMT conduit needs careful preparation. You must measure and mark the conduit accurately before bending.
Choosing the right bend location helps make clean and precise bends. This ensures the conduit fits well in your project.
Measuring And Marking
Use a tape measure to find the exact spot to bend the conduit. Measure twice to avoid mistakes.
Mark the bend location clearly with a pencil or marker. This mark guides your bend and keeps it straight.
- Measure the distance from the conduit end to the bend point.
- Mark the bend location on the conduit surface.
- Double-check your measurements before bending.
Choosing The Bend Location
Select a bend location that fits the conduit path. Avoid spots near fittings or connectors.
Pick a place where the conduit can bend without hitting walls or other obstacles. This makes installation easier.
- Choose a spot away from joints and fittings.
- Check for enough space around the bend.
- Plan bends to follow the route of wiring.
Basic Bending Techniques
Bending EMT conduit is a key skill in electrical work. It helps fit conduit around obstacles and corners.
Using the right technique saves time and ensures a clean look. This guide covers the basic bends you need.
Making A 90-degree Bend
A 90-degree bend changes the direction of the conduit sharply. Use a conduit bender made for EMT.
Place the conduit in the bender. Align the mark where the bend starts with the bender’s arrow. Pull the handle smoothly to bend.
- Mark the bend point on the conduit
- Place conduit in the bender with mark at arrow
- Pull handle until conduit bends 90 degrees
- Check angle with a square tool
Creating Offsets
An offset allows the conduit to go around an obstacle. It uses two bends in opposite directions.
Mark two bend points on the conduit. Bend the first point at an angle, then bend the second point the same angle the other way.
| Measurement | Purpose |
|---|---|
| Distance between bends | Height of the obstacle |
| Bend angle | Usually 22.5 or 30 degrees |
Forming Saddles
Saddles let the conduit pass over pipes or other objects. This needs three bends.
Make two offset bends with a short straight section between them. The third bend connects the offset to the main line.
- Measure the width of the object to cross
- Bend two offsets on conduit ends
- Create a center bend to connect offsets
- Check alignment before final use

Credit: www.amazon.com
Advanced Bends
Bending EMT conduit beyond simple angles requires specific techniques. Advanced bends help fit conduit around obstacles and tight spaces.
Two common advanced bends are back-to-back bends and three-point saddles. Each has a unique method and use.
Back-to-back Bends
Back-to-back bends allow the conduit to change direction twice in a short distance. This is useful to clear an obstruction or fit conduit along a wall.
- Measure the offset needed between the two bends.
- Calculate the bend radius and center points carefully.
- Make the first bend at the proper angle.
- Make the second bend in the opposite direction, matching the offset.
- Check the alignment and adjust if needed.
Three-point Saddles
Three-point saddles help conduit navigate over or around an obstacle with multiple bends. This bend includes a center bend and two offset bends.
| Part | Description | Purpose |
| First Bend | Offset bend away from the obstacle | Clear the obstacle |
| Center Bend | Bend parallel to the obstacle | Move conduit alongside obstacle |
| Third Bend | Offset bend back to original line | Return conduit to initial path |
Common Mistakes To Avoid
Bending EMT conduit correctly is important for a safe and neat installation. Many beginners make mistakes that can cause problems later.
Knowing what to avoid helps you bend conduit that fits well and lasts long.
Overbending And Underbending
Overbending happens when the conduit bends too much. This can make it hard to pull wires through.
Underbending means the bend is too small. It can cause the conduit to not fit in tight spaces.
- Check your angles before bending
- Use a bending tool with angle marks
- Practice on scrap pieces first
Crushing The Conduit
Applying too much force can crush EMT conduit. This weakens the pipe and may stop wires from passing smoothly.
Always bend slowly and evenly to keep the shape intact.
- Use the right bending tool size
- Support the conduit during bends
- Avoid using excessive force
Improper Alignment
Misaligned bends cause conduit to not fit properly. This creates gaps or stress points in your installation.
Check your bends and marks carefully before finalizing the shape.
- Measure twice before bending
- Use a level or square tool
- Align bends so conduit fits tight
Tips For Consistent Bends
Bending EMT conduit evenly takes practice and good tools. Consistent bends make installation easier and look better.
Use simple methods and follow safety rules to avoid damage to the conduit or injury.
Using Templates
Templates help you create the same bend shape every time. They keep your work accurate and reduce mistakes.
- Choose a template that matches the bend angle you need.
- Mark the conduit clearly before bending.
- Align the conduit with the template carefully.
- Check the bend against the template often.
- Use a sturdy template to avoid shifting during bending.
Practice Techniques
Practice helps improve your bending skills and confidence. Try different angles and lengths to learn control.
| Practice Tip | Reason |
| Bend scrap conduit | Save good conduit and learn without pressure |
| Measure before bending | Ensure correct length and angle |
| Use slow, steady pressure | Prevent kinks and cracks |
| Repeat common bends | Build muscle memory |
| Review each bend | Spot and fix errors early |
Maintaining Your Bender
Keeping your EMT conduit bender in good shape helps it work well. Regular care makes bending easier and safer.
Simple maintenance steps can extend the life of your bender. Clean and store it properly after each use.
Cleaning And Lubrication
Remove dirt and dust from your bender after every job. Use a dry cloth to wipe all parts clean.
Lubricate moving parts with light oil. This keeps the bender working smoothly and prevents rust.
- Wipe off dirt and debris regularly
- Apply oil to pivot points and joints
- Use a dry cloth to remove excess oil
- Check for rust and clean it off promptly
Storage Tips
Store your bender in a dry place to avoid moisture damage. Keep it off the ground to prevent rust and dirt build-up.
Use a tool rack or shelf to keep the bender organized. Avoid placing heavy objects on top of it to protect its shape.
- Keep the bender dry and clean
- Store in a cool, dry area
- Use a shelf or hang on a tool rack
- Protect from heavy objects and impacts

Credit: shieldenstrut.com
Frequently Asked Questions
How Do You Measure Emt Conduit For Bending?
Measure the length needed before bending. Mark the conduit at the exact point where the bend starts. Use a tape measure and a marker for accuracy.
What Tools Are Required To Bend Emt Conduit?
You need an EMT conduit bender, measuring tape, marker, and gloves. These tools help make precise and safe bends.
Can Emt Conduit Be Bent Without A Bender?
Bending EMT without a bender is difficult and may cause damage. Using a proper bender ensures smooth, accurate bends and maintains conduit integrity.
What Is The Correct Angle For Bending Emt Conduit?
Common bend angles are 30°, 45°, and 90°. Choose the angle based on installation needs and follow standard electrical codes.
Conclusion
Mastering EMT conduit bending takes practice and patience. Start with basic bends. Use the right tools for accuracy. Measure twice, bend once. Keep safety first with gloves and goggles. Practice on scrap pieces to gain confidence. Each bend improves your skills and understanding.
Soon, you’ll handle complex bends with ease. Remember to check your work for precision. With time, bending EMT conduit becomes second nature. So keep practicing and stay safe. Happy bending!
