Have you ever wanted to transform a simple piece of wood into a stunning work of art? Carving patterns in wood is a skill that lets you add your personal touch to furniture, decorations, or gifts.
Whether you’re a complete beginner or looking to improve your technique, this guide will show you easy steps to create beautiful designs. Imagine the satisfaction of holding a piece you crafted with your own hands. Keep reading, and you’ll discover the secrets to making your wood carvings stand out.
Your creative journey starts here.

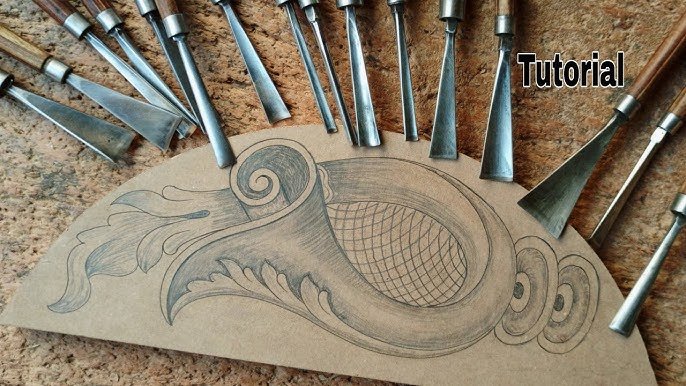
Credit: lsirish.com
Tools Needed
Carving patterns in wood requires the right tools. Good tools make the work easier and safer.
Below are the main tools and materials you need before starting your wood carving project.
Essential Carving Tools
- Carving knives for detailed cuts
- Gouges to remove larger wood pieces
- V-tools for sharp lines and grooves
- Mallet to tap tools gently
- Sharpening stones to keep tools sharp
Safety Gear
Safety gear protects you from injuries. Always wear safety equipment while carving.
| Gear | Purpose |
| Safety glasses | Protect eyes from wood chips |
| Cut-resistant gloves | Prevent cuts on hands |
| Dust mask | Stop inhaling fine wood dust |
| Apron | Keep clothes clean and protect body |
Choosing The Right Wood
Wood type affects how easy it is to carve and the final look. Pick wood that suits your skill and design.
- Basswood: soft and easy for beginners
- Butternut: light color and soft texture
- Cedar: fragrant and easy to carve
- Oak: hard wood, good for detailed work but tough
- Walnut: dark color, great for finished pieces
Preparing Your Wood
Preparing your wood is key to making clear and smooth patterns. It helps your carving tools work well and your design look sharp.
Good preparation saves time and improves your final woodwork. Follow these steps to get your wood ready.
Selecting The Wood Piece
Choose wood that is soft and easy to carve. Basswood, pine, and cedar are popular choices. Avoid wood with knots or cracks.
Pick a piece that fits your project size. Make sure it is dry and free from warping for better results.
Sanding And Smoothing
Sand the wood surface to remove rough spots and splinters. Use medium-grit sandpaper first, then fine-grit for smoothness.
Smooth wood helps your tools move easily and your design show clearly. Clean off dust with a soft cloth before carving.
Transferring Your Design
Draw your design on paper or print it out. Use carbon paper or pencil to transfer the pattern onto the wood.
Make sure the design lines are clear but not too dark. This helps you follow the pattern easily when carving.
Basic Carving Techniques
Carving patterns in wood is a fun and creative skill. It needs practice and patience to get good results.
Start with simple techniques to build your confidence. Learn how to hold tools, make cuts, and shape your design.
Holding The Tools Correctly
Hold your carving tools firmly but not too tight. Use your dominant hand to guide the tool. Your other hand should steady the wood piece.
- Grip the handle close to the blade for control.
- Keep your fingers away from the cutting edge.
- Use a bench clamp or a carving glove for safety.
- Keep your wrists straight to avoid strain.
Making Simple Cuts
Start with straight cuts before trying curves. Use small, gentle pushes with your tool. Let the blade do the work, not your force.
- Mark your pattern lightly on the wood.
- Cut along the lines with steady pressure.
- Clear away wood chips often to see your progress.
- Take breaks to avoid mistakes from tired hands.
Shaping The Design
After cutting, smooth the edges to shape your design. Use different tools to add depth and detail.
| Tool | Use | Effect |
|---|---|---|
| Gouge | Curved cuts | Rounded shapes |
| V-tool | Detail lines | Sharp grooves |
| Chisel | Flat cuts | Clean edges |

Credit: www.youtube.com
Creating Patterns
Carving patterns in wood adds beauty and detail to your project. It takes patience and careful planning. You can create simple or complex designs based on your skill level.
Using the right methods helps you carve clean and consistent patterns. This guide explains how to trace, use templates, and carve repetitive designs.
Tracing Patterns On Wood
Tracing patterns helps you transfer your design onto the wood surface. Start by drawing your pattern on paper. Then use carbon paper or a pencil to copy it onto the wood.
Make sure the wood is clean and smooth. Hold the paper firmly to avoid slipping. Trace slowly to keep lines clear and sharp.
Using Templates And Stencils
Templates and stencils make carving easier and more accurate. You can buy ready-made ones or create your own from cardboard or plastic.
- Place the template on the wood surface
- Secure it with tape or clamps to prevent movement
- Use a pencil or fine marker to outline the design
- Remove the template carefully to avoid smudging
Templates help keep your patterns consistent, especially for complex or repeated designs.
Carving Repetitive Designs
Repetitive designs need careful planning to look uniform. Use guides and marks to keep each section the same size and shape.
| Tip | How to Use |
| Marking Tools | Use rulers and marking gauges for equal spacing |
| Templates | Trace the same pattern multiple times |
| Consistent Pressure | Apply even force when carving each repeat |
| Practice | Try the design on scrap wood before carving the main piece |
Adding Details And Depth
Carving patterns in wood looks best when you add details and depth. These elements give life to the design.
Using the right techniques helps your carving stand out with texture, shadows, and clean edges.
Texturing Techniques
Texturing creates a feel or surface look on your wood carving. It can show roughness, smoothness, or patterns.
- Use gouges to make small lines and marks.
- Try a veiner tool for thin, deep grooves.
- Use a chip carving knife for sharp geometric shapes.
- Lightly tap a textured tool for a dotted effect.
- Sand some areas smooth to contrast with rough parts.
Creating Shadows And Highlights
Shadows and highlights add depth by showing light and dark areas. This makes the carving appear 3D.
Tips for Shadows and Highlights:
- Carve deeper in areas meant to be shadowed.
- Leave raised parts smooth for highlights.
- Use angled cuts to catch light naturally.
- Consider the light source direction before carving.
Refining Edges
Clean edges make your pattern sharp and clear. Rough edges can distract from the design.
| Edge Type | Tool | Purpose |
|---|---|---|
| Sharp Edge | Small knife | Defines the outline of shapes |
| Beveled Edge | Chisel | Adds softness and depth |
| Rounded Edge | Sandpaper | Smooths and blends details |
Finishing Touches
After carving wood, finishing touches make your work look great. These steps protect the wood and show off your patterns.
Focus on sanding, staining or painting, and adding protective coatings. Each step adds beauty and strength.
Sanding The Carved Surface
Sanding smooths the wood and removes rough spots. Use fine-grit sandpaper for best results.
- Start with medium grit to shape edges
- Use fine grit to smooth the surface
- Sand gently to keep details sharp
- Wipe dust off with a soft cloth
Applying Stains Or Paint
Stains and paints add color and highlight patterns. Choose one that fits your wood type and style.
| Finish Type | Effect | Drying Time |
| Wood Stain | Enhances grain, natural look | 4-6 hours |
| Acrylic Paint | Bright colors, opaque cover | 1-2 hours |
| Oil-Based Paint | Rich color, durable finish | 6-8 hours |
Protective Coatings
Protective coatings guard your wood from damage. They keep the surface clean and strong over time.
- Apply clear varnish for shine and durability
- Use polyurethane for water resistance
- Wax adds a soft, natural finish
- Let each coat dry fully before the next
Common Mistakes To Avoid
Carving patterns in wood is a skill that takes patience and care. Avoiding common mistakes helps you create cleaner designs. Below are some errors to watch out for as you carve.
These tips will guide you to safer and better carving results. Pay attention to your technique and the wood you use.
Overcutting
Overcutting happens when you remove too much wood. This can ruin your pattern and weaken the wood piece. It is important to cut carefully and slowly.
- Use sharp tools to make clean cuts.
- Cut shallow lines first, then deepen gradually.
- Check your progress often to avoid mistakes.
- Practice on scrap wood before working on the final piece.
Ignoring Grain Direction
Wood grain affects how your tools move and how the wood will carve. Cutting against the grain can cause splintering and rough edges.
| Grain Direction | Effect on Carving |
| With the grain | Smoother cuts, less splintering |
| Against the grain | Rough cuts, higher chance of tearing |
| Across the grain | May cause uneven texture |
Neglecting Safety
Carving involves sharp tools that can cause injury. Always put safety first to avoid accidents.
- Wear protective gloves and eye gear.
- Keep your hands away from cutting paths.
- Work in a well-lit area.
- Keep tools sharp and in good condition.
- Take breaks to avoid fatigue.

Credit: www.youtube.com
Project Ideas For Beginners
Carving patterns in wood can be a fun and creative hobby. Beginners can start with simple projects to build skills. These ideas use basic tools and easy designs.
Try these projects to practice your carving and make beautiful wooden items. Each project offers a chance to learn different techniques.
Simple Patterned Coasters
Wooden coasters are a great first carving project. You can create simple patterns like lines, dots, or waves. Use soft wood and basic carving tools.
- Choose a soft wood piece about 4 inches square
- Draw your simple pattern with a pencil
- Carve gently along the pencil lines
- Sand the edges smooth
- Finish with a wood-safe sealant
Decorative Wooden Signs
Wooden signs let you add words or shapes to your carving. Start with short words or simple images. Use a flat wood board for best results.
| Material | Soft Pine or Basswood |
| Tools | Carving knife, gouges |
| Design Ideas | Names, welcome signs, simple shapes |
| Finishing | Paint or wood stain |
Personalized Gift Items
Carve small wooden gifts to personalize for friends and family. Items like keychains or ornaments work well. Add initials or small patterns for a special touch.
- Pick small, easy-to-hold wood pieces
- Use simple initials or shapes
- Sand edges carefully for safety
- Apply a clear finish to protect the wood
Frequently Asked Questions
What Tools Are Needed For Wood Carving?
To carve patterns in wood, you’ll need a selection of chisels, gouges, and a carving knife. A mallet is useful for driving the tools into the wood. Sandpaper will help smooth the surface. A workbench with clamps can secure the wood, ensuring safety during carving.
How Do I Transfer Patterns To Wood?
To transfer patterns to wood, print or draw your design on paper. Use carbon paper to trace the design onto the wood. Alternatively, you can use a stencil or freehand sketch with a pencil. Ensure the design is clear and visible on the wood for accurate carving.
What Wood Type Is Best For Beginners?
Basswood is ideal for beginners due to its softness and fine grain. It’s easy to carve and holds detail well. Other suitable woods include butternut and pine. Avoid hardwoods initially, as they require more effort and skill to carve.
How Do I Ensure Safety While Carving?
To ensure safety while carving, always wear protective goggles and gloves. Secure the wood piece firmly to prevent slipping. Keep your tools sharp to reduce the risk of accidents. Work slowly and carefully, using proper techniques to maintain control and precision.
Conclusion
Carving patterns in wood takes patience and practice. Start with simple designs and use the right tools. Always work slowly and carefully to avoid mistakes. Wood carving can be relaxing and fun. Each project helps you improve your skills. Keep trying different patterns to grow your confidence.
Enjoy the process as much as the result. Wood carving brings creativity to life, one cut at a time.