Maintaining your drill press can be a game-changer for your DIY projects and professional tasks alike. You might have noticed that a clean drill press runs smoother, lasts longer, and performs better.
But how often do you actually take the time to clean its components? If you’ve been putting it off, you’re not alone. Many people overlook this essential task, not realizing the hidden costs of neglect. Imagine the frustration of a machine that just won’t cooperate, or worse, breaks down when you need it most.
By the time you finish reading this, you’ll not only know how to clean your drill press components effectively, but you’ll also understand why it’s crucial for optimal performance. So, are you ready to give your drill press the care it deserves? Let’s dive in and ensure it serves you well for years to come.
Preparing The Drill Press
Cleaning your drill press keeps it working well and safe to use. Proper preparation helps you clean all parts carefully.
Before starting, you should follow safety rules and gather the right tools. Then, unplug and take apart the drill press.
Safety Precautions
Wear safety glasses to protect your eyes from dust and debris. Use gloves to avoid cuts and skin irritation. Work in a well-ventilated area to avoid inhaling dust.
- Wear safety glasses
- Use protective gloves
- Work in a ventilated space
- Keep children and pets away
- Ensure your workspace is clean and dry
Gathering Cleaning Supplies
Collect all cleaning supplies before you start. This saves time and makes cleaning easier.
| Supply | Purpose |
| Soft cloths | Wiping surfaces |
| Brushes | Removing dust and debris |
| Cleaning solution | Removing grease and grime |
| Compressed air | Blowing out dust from tight spots |
| Lubricant | Oiling moving parts |
Unplugging And Disassembling
Always unplug the drill press before cleaning. This stops any accidental starts.
- Unplug the power cord from the outlet.
- Remove the chuck key and drill bits.
- Take off the table and other removable parts.
- Keep screws and small parts in a container to avoid loss.
- Handle all parts gently to prevent damage.
Cleaning The Base And Column
Keeping the base and column of your drill press clean helps it work well. Dirt and dust can cause problems over time.
Regular cleaning stops rust and damage. It also keeps your drill press safe to use.
Removing Dust And Debris
Start by removing loose dust and debris from the base and column. Use a soft brush or cloth to clear the surface.
Make sure to clean tight spaces where dust can hide. Avoid using compressed air on delicate parts.
Wiping With Appropriate Cleaners
Use a damp cloth with mild soap or a cleaner safe for metal. Wipe the base and column gently to remove grease and stains.
Do not use harsh chemicals or abrasive pads. They can damage the metal surface or remove protective coatings.
Inspecting For Rust And Damage
Look closely at the base and column for signs of rust or damage. Rust spots need attention to prevent spread.
Check for dents, cracks, or loose parts. Fix any problems before using the drill press again.
- Remove small rust spots with fine steel wool
- Apply rust inhibitor after cleaning
- Tighten any loose bolts or screws
- Replace damaged parts if needed
Maintaining The Table
The drill press table is a key part that holds your workpieces steady. Keeping it clean and well-adjusted helps you drill accurately and safely. Regular care prevents damage and rust build-up on the table surface.
Below are simple ways to clean and maintain your drill press table. Follow these tips to keep it smooth and functional for a long time.
Clearing Surface Residue
Remove dust, wood chips, and metal shavings from the table after each use. A clean surface improves grip and prevents scratches.
- Use a brush or cloth to wipe off loose debris.
- Apply a mild solvent for sticky residue.
- Dry the surface completely before storing.
Polishing And Rust Prevention
Polish the table to keep it smooth and apply protection against rust. This helps your workpieces move easily and stops corrosion.
| Material | Recommended Treatment |
| Cast Iron | Use fine steel wool and apply light machine oil |
| Steel | Polish with metal polish and wipe with rust inhibitor spray |
| Aluminum | Use gentle polish and avoid harsh chemicals |
Adjusting And Securing The Table
Keep the table level and tightly fixed. A loose or tilted table can cause inaccurate drilling and unsafe conditions.
- Loosen the locking lever to move or tilt the table.
- Use a level tool to check for flatness.
- Tighten the locking lever firmly after adjustment.
- Check bolts and screws regularly for tightness.

Credit: www.reddit.com
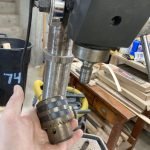
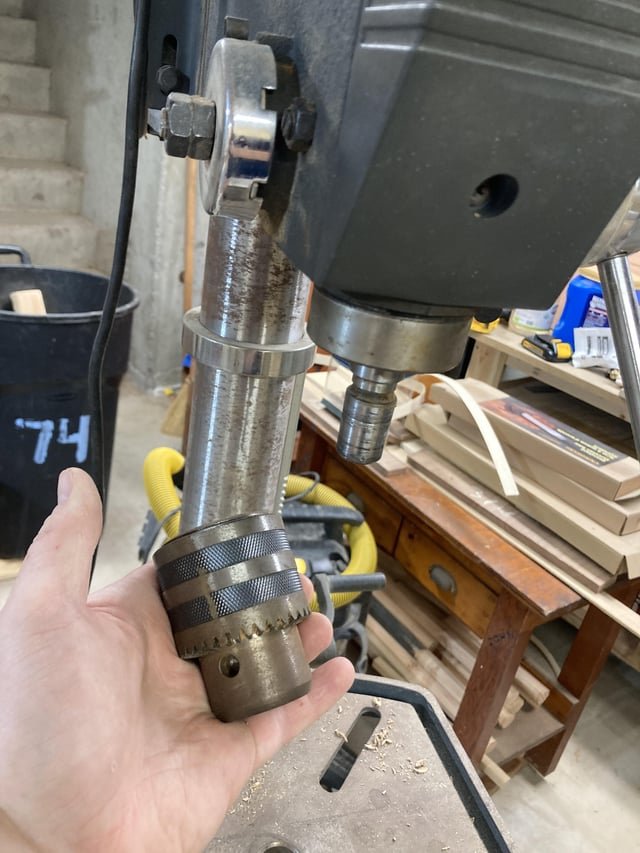
Cleaning The Spindle And Chuck
Keeping your drill press clean helps it work better and last longer. The spindle and chuck are key parts that need regular cleaning.
This guide explains how to remove the chuck, clean inside it, and lubricate moving parts for smooth operation.
Removing The Chuck
First, unplug the drill press to stay safe. Then, open the chuck jaws by turning the chuck key.
Use the chuck key to loosen the chuck from the spindle. Turn it counterclockwise to unscrew the chuck.
- Unplug the drill press
- Open chuck jaws with chuck key
- Turn chuck counterclockwise to remove
Cleaning Inside The Chuck
Use a brush or compressed air to clean dirt and metal shavings inside the chuck. Avoid water to prevent rust.
Wipe the chuck with a clean, dry cloth. Check for damage or wear while cleaning.
- Remove debris with brush or compressed air
- Wipe with a dry cloth
- Inspect for any damage
Lubricating Moving Parts
Apply light machine oil to the chuck jaws and spindle threads. This keeps parts moving smoothly and prevents rust.
Do not use too much oil. Wipe off extra oil to avoid attracting dirt.
- Apply light oil to chuck jaws and spindle
- Use oil sparingly
- Wipe off excess oil
Checking The Motor And Belts
Cleaning your drill press helps it work better and last longer. Checking the motor and belts is important for safe use.
Regular care keeps the motor cool and the belts in good shape. This stops breakdowns and saves money.
Dusting Motor Housing
The motor housing collects dust and dirt over time. Dust can block air vents and cause the motor to overheat.
Use a soft brush or cloth to clean the outside and vents gently. Avoid using water near the motor to prevent damage.
Inspecting And Cleaning Belts
Check belts for cracks, frays, or wear before each use. Damaged belts reduce power and can break during work.
Clean belts with a dry cloth to remove dust and oil. Avoid using chemicals that can weaken the rubber.
- Look for cracks or splits
- Check for signs of stretching
- Clean off dust and grease
- Replace belts if damaged
Ensuring Proper Tension
Belts must be tight enough to turn the drill but not too tight to cause wear. Loose belts slip and lose power.
Press the belt in the middle between pulleys. It should move about half an inch. Adjust the motor or belt position to fix tension.
- Check belt tension regularly
- Move motor to tighten or loosen belt
- Test by turning drill by hand
- Keep belts clean and dry
Credit: www.woodworkingtalk.com
Reassembling And Testing
After cleaning all parts of your drill press, it is time to put everything back together. Careful reassembly ensures the tool works safely and efficiently. Next, you will run a test drill to check the machine’s function.
This guide covers putting components back together, running a test drill, and making final adjustments.
Putting Components Back Together
Start by fitting the main parts in their original places. Make sure all screws and bolts are tight but not over-tightened. Align the table, spindle, and motor correctly to avoid issues later.
- Insert the spindle back into the headstock carefully.
- Attach the motor and secure it with the mounting bolts.
- Replace the belts and adjust their tension.
- Reinstall the table and lock it in position.
- Check that the depth stop and handles are properly attached.
Running A Test Drill
Power on the drill press and run it without load first. Listen for strange noises or vibrations. If it runs smoothly, try drilling a test piece to check the drill’s performance.
| Test Drill Check | What to Look For |
| Noise level | Should be smooth and quiet |
| Spindle runout | No wobbling or shaking |
| Drill speed | Consistent and adjustable |
| Table stability | Does not move during drilling |
Final Adjustments
After the test, adjust any parts that do not work as expected. Tighten loose screws and realign components if needed. Make sure the depth stop and speed controls function properly.
- Check belt tension and adjust if slipping occurs.
- Align the table to be square with the spindle.
- Lubricate moving parts lightly if noise or stiffness returns.
- Test all safety features like guards and switches.
Regular Maintenance Tips
Keeping your drill press in good condition needs regular care. Cleaning and maintenance help it work safely and last longer.
Follow simple steps to clean and protect the drill press parts. This guide covers the cleaning schedule, lubrication routine, and storage tips.
Cleaning Schedule
Set a regular cleaning time to keep the drill press free of dust and debris. Clean parts after each use and do deep cleaning monthly.
- Unplug the drill press before cleaning.
- Use a brush or cloth to remove dust from the table and base.
- Wipe the spindle and chuck with a dry cloth.
- Check and clean the belts and pulleys.
- Clean metal chips and dirt from the feed handles and gears.
Lubrication Routine
Lubricate moving parts to reduce wear and keep the drill press running smoothly. Use the right oil or grease for each part.
| Part | Lubricant Type | Frequency |
| Spindle | Light machine oil | Monthly |
| Feed handles | Grease | Every 3 months |
| Gears | Grease | Every 3 months |
| Belts and pulleys | None (keep clean) | Weekly |
Storage Recommendations
Store the drill press in a dry, clean place to avoid rust and damage. Cover it when not in use to keep dust away.
- Keep the drill press away from moisture.
- Use a dust cover or plastic sheet.
- Store accessories and tools in a dry box.
- Check the machine monthly for signs of rust or wear.

Credit: www.reddit.com
Frequently Asked Questions
How Often Should I Clean Drill Press Components?
Clean drill press components after every 20 hours of use or at least once a month. Regular cleaning prevents rust and ensures smooth operation.
What Materials Are Best For Cleaning Drill Press Parts?
Use a soft cloth, mild detergent, and lubricants designed for metal parts. Avoid harsh chemicals that damage surfaces.
Can I Use Compressed Air To Clean Drill Press?
Yes, compressed air effectively removes dust and debris from hard-to-reach places. Use it carefully to avoid pushing dirt deeper.
How Do I Clean The Drill Press Spindle Safely?
Wipe the spindle with a lightly oiled cloth to remove dirt. Avoid excess oil to prevent attracting dust and debris.
Conclusion
Cleaning your drill press parts keeps the machine working well. Dirt and dust can cause problems and slow you down. Use simple tools and cleaning steps to make the job easy. Regular care stops rust and damage from building up.
Take time after each use to wipe and check parts. A clean drill press lasts longer and works better. Small efforts now save big repairs later. Keep your workspace tidy too, for safety and speed. Good habits make your projects smoother and more fun.