Are you tired of your power hammer not performing at its best? Cleaning it might be the solution you’ve been overlooking.
Keeping your power hammer clean is not just about aesthetics; it’s about ensuring it runs smoothly and efficiently. Imagine the frustration of a project delayed or ruined because of a dirty machine. You can avoid this by learning the right cleaning techniques.
In this guide, you’ll discover simple, effective steps to keep your power hammer in peak condition. Stick with us to find out how a clean power hammer can save you time, money, and a lot of headaches. Your projects deserve the best, and so does your equipment. Let’s dive into the details!
Preparing For Cleaning
Cleaning a power hammer keeps it working well and lasts longer. You must prepare properly before starting the cleaning process.
Preparation helps you clean safely and avoid damage. Follow these important steps before you begin.
Gathering Essential Tools
Collecting the right tools makes cleaning easier. Use tools that fit your power hammer and cleaning needs.
- Soft brushes to remove dust and dirt
- Lint-free cloths for wiping surfaces
- Lubricants recommended by the manufacturer
- Cleaning solvent safe for metal parts
- Protective gloves to keep hands clean
Ensuring Safety Measures
Safety comes first when cleaning power hammers. Protect yourself to avoid injury or damage to the machine.
Wear safety glasses and gloves. Make sure the work area is clear and well-lit.
- Wear safety glasses to protect your eyes
- Use gloves to protect your hands from dirt and chemicals
- Keep the area free of clutter and hazards
- Work in a well-lit space to see all parts clearly
Shutting Down The Power Hammer
Turn off the power hammer before cleaning. This prevents accidents and damage.
Disconnect the power source and wait for all moving parts to stop completely before starting.
- Switch off the machine using the main power button
- Unplug from the electrical outlet or disconnect the power source
- Wait until all moving parts come to a full stop
- Double-check the machine is completely off before cleaning
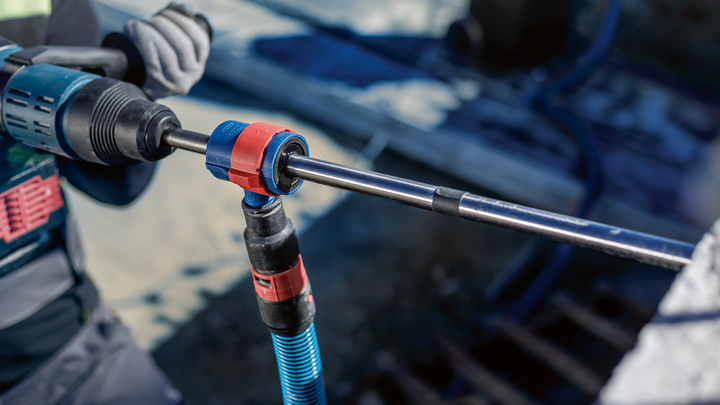
Credit: www.bosch-pt.com.au
Disassembling Key Parts
Cleaning power hammers well needs taking some parts apart. This makes sure you reach all dirty spots inside.
Focus on removing the hammer head, opening internal parts, and handling delicate sections with care.
Removing The Hammer Head
Start by switching off and unplugging the power hammer. This keeps you safe during cleaning.
Use the correct tools to remove bolts or screws holding the hammer head. Keep parts in a safe place.
- Wear gloves to protect your hands
- Use a wrench or socket set to loosen fasteners
- Lift the hammer head straight off to avoid damage
- Store bolts and screws in a labeled container
Accessing Internal Components
After removing the hammer head, open the housing or cover to see inside. This gives access to internal parts.
Clean internal parts carefully to avoid dirt build-up that can harm the machine’s work.
- Remove dust and debris using a soft brush
- Wipe parts with a clean cloth and mild cleaner
- Check for worn or damaged parts while inside
- Do not force open parts that seem stuck
Handling Delicate Sections
Some parts inside power hammers are fragile. Be gentle to avoid breaking them during cleaning.
Use soft tools and avoid harsh chemicals on delicate components like seals and sensors.
- Use cotton swabs for small, hard-to-reach areas
- Apply light oil to moving parts after cleaning
- Do not soak electrical parts in liquid
- Handle springs and wires with care to avoid damage
Cleaning Techniques
Keeping your power hammer clean helps it work well for a long time. Dirt and grime can cause damage if not removed.
Use the right cleaning methods to protect the machine parts and keep it safe to use.
Removing Dust And Debris
Start by removing dust and debris from the power hammer’s surface. Use a soft brush or compressed air.
Clean hard-to-reach areas carefully to avoid damage. Dust can build up in small spaces and cause problems.
- Use a soft brush for loose dirt
- Blow compressed air into tight spots
- Wipe surfaces with a dry cloth
Cleaning Metal Surfaces
Metal parts need regular cleaning to stop rust and wear. Use a damp cloth with mild soap for cleaning.
Dry metal surfaces immediately after cleaning. This prevents moisture from causing rust or corrosion.
- Use mild soap and water for cleaning
- Dry metal parts well with a clean cloth
- Remove rust with a wire brush if needed
Lubricating Moving Parts
Lubricate moving parts to keep the power hammer working smoothly. Use the right oil or grease for each part.
Apply lubricant to joints, bearings, and other moving pieces. Wipe off any extra oil to avoid dirt buildup.
- Use manufacturer-recommended lubricants
- Apply lubricant to all moving parts
- Remove excess lubricant after application
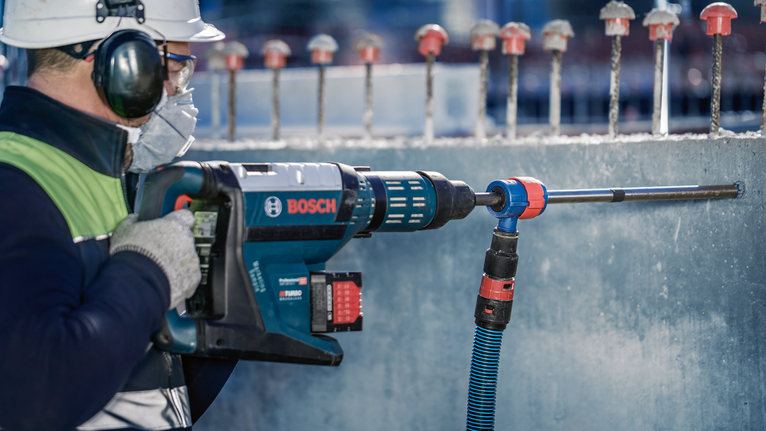
Credit: www.bosch-pt.com.au
Checking For Wear And Tear
Regularly checking your power hammer helps keep it working well. Look for any signs of wear and tear to avoid bigger problems.
Wear and tear can cause your power hammer to fail or work less efficiently. Careful inspection helps you spot issues early.
Inspecting Springs And Bolts
Check all springs for cracks or stretching. Worn springs can reduce the hammer’s force and speed.
Look at all bolts and screws. Tighten any loose bolts and replace any that are rusty or damaged.
- Look for broken or stretched springs
- Tighten loose bolts carefully
- Replace rusty or damaged bolts
Assessing Hydraulic Components
Check hydraulic hoses for leaks or cracks. Damaged hoses can cause loss of pressure and poor hammer performance.
Inspect hydraulic fluid levels and quality. Dirty or low fluid can cause damage to hydraulic parts.
- Look for leaks on hoses and fittings
- Check hydraulic fluid level regularly
- Replace old or dirty hydraulic fluid
Spotting Cracks And Damage
Examine the hammer frame for any cracks or dents. Cracks can grow and cause parts to break.
Check the hammer’s anvil and ram for signs of damage. Worn parts reduce hammer accuracy and power.
- Look closely for cracks in the frame
- Check the anvil and ram surfaces
- Replace any parts with visible damage
Reassembling And Testing
Cleaning power hammers is important for their performance and safety. After cleaning, you must put the parts back correctly. Testing the machine makes sure it works well.
Follow clear steps to reassemble the power hammer. Check each part and test the machine before using it again.
Properly Reattaching Parts
Start by placing all cleaned parts in their correct spots. Use the manual or guide to help you. Tighten screws and bolts firmly but do not over-tighten them.
Make sure moving parts are free and not stuck. Attach all safety guards and covers securely. Check that all cables and hoses connect well without damage.
- Match each part to its original position
- Use tools to tighten screws and bolts properly
- Check for smooth movement in all parts
- Secure safety guards and covers
- Inspect cables and hoses for proper connection
Performing Functionality Tests
Turn on the power hammer carefully for the first test. Listen for unusual noises or vibrations. Watch the hammer’s movement to ensure it is smooth.
Try running the machine at low speed first. Check if all safety features work correctly. Stop the machine immediately if anything seems wrong.
- Power on the machine gently
- Listen for strange sounds
- Observe smooth hammer operation
- Test at low speed initially
- Verify safety features are active
Adjusting Settings For Optimal Use
Adjust settings like stroke length and speed to fit your work needs. Use the machine’s controls to make these changes. Small adjustments can improve performance and reduce wear.
Test the machine after each adjustment. Make sure the hammer hits accurately and works without issues. Keep notes of your best settings for future use.
- Set stroke length according to the task
- Adjust hammer speed carefully
- Test after each setting change
- Ensure accurate and smooth hammer strikes
- Record settings that work best
Maintenance Tips For Longevity
Power hammers need regular care to work well for many years. Cleaning and maintaining them keeps parts running smoothly.
Follow simple steps to protect your power hammer from damage and wear. Proper care helps avoid costly repairs.
Scheduling Regular Cleaning
Cleaning your power hammer often stops dirt and metal dust from building up. This keeps the machine safe and efficient.
- Turn off and unplug the machine before cleaning.
- Use a soft brush to remove dust from all parts.
- Wipe down surfaces with a clean cloth.
- Check for any signs of rust or wear during cleaning.
- Clear vents and cooling fans to avoid overheating.
Using Quality Lubricants
Good lubricants reduce friction and prevent parts from wearing out fast. Use the right type for your hammer.
| Lubricant Type | Use For | How Often |
| Machine oil | Joints and moving parts | Weekly |
| Grease | Bearings and gears | Monthly |
| Hydraulic fluid | Hydraulic systems | Check monthly |
Storing The Power Hammer Properly
Keep the power hammer in a dry, clean place to avoid rust and damage. Proper storage extends its life.
- Cover the hammer with a dust-proof cover.
- Store away from moisture and direct sunlight.
- Place on a stable surface to avoid tipping.
- Disconnect power supply if storing for long periods.

Credit: www.bosch-professional.com
Frequently Asked Questions
How Often Should I Clean My Power Hammer?
Clean your power hammer after every use or at least weekly. Regular cleaning prevents dust buildup and ensures smooth operation. Frequent maintenance extends the tool’s lifespan and improves performance. Always follow the manufacturer’s cleaning guidelines for best results.
What Tools Do I Need To Clean A Power Hammer?
Basic tools include a brush, compressed air, cleaning cloths, and lubricants. Use a soft brush to remove dust and debris. Compressed air helps clean hard-to-reach areas. Proper lubricants keep moving parts functioning smoothly and prevent rust.
Can I Use Water To Clean A Power Hammer?
Avoid using water as it may cause rust and damage. Instead, use dry cleaning methods like brushing and compressed air. If necessary, use a damp cloth sparingly and dry immediately. Proper lubrication after cleaning helps protect metal parts.
How Do I Lubricate A Power Hammer After Cleaning?
Apply manufacturer-recommended lubricants to moving parts and joints. Use light machine oil or grease depending on the specific components. Lubrication reduces friction and wear, ensuring smooth hammer action. Regular lubrication prevents breakdowns and extends tool life.
Conclusion
Cleaning power hammers keeps them working well and lasting longer. Regular care stops damage and costly repairs. Use the right tools and follow steps carefully. Check parts for wear and replace when needed. A clean machine runs smoother and safer.
Small effort now saves big trouble later. Keep your power hammer ready for any job. Simple habits make a big difference in performance. Stay consistent and enjoy better results every time.