Imagine walking into your workshop or garage and finding every tool precisely where you need it. No more searching through cluttered drawers or piles of equipment.
Sounds great, right? That’s exactly what a pegboard for hand tools can do for you. It’s not just about organization; it’s about transforming your workspace into a haven of efficiency and creativity. You’re about to discover how to create your very own pegboard system, tailored to your tools and needs.
By the end of this article, you’ll be equipped with the knowledge to bring order to your chaos, making every DIY project or repair job a breeze. Ready to turn that dream into reality? Let’s dive in.
Choosing The Right Pegboard
A pegboard is a great way to keep your hand tools organized. Picking the right pegboard is important for durability and ease of use.
Consider the material, size, and mounting options before you buy. These factors affect how well the pegboard works for you.
Material Options
Pegboards come in different materials. The most common types are wood, metal, and hardboard. Each has pros and cons.
- Wood pegboards look good but may warp over time.
- Metal pegboards are very strong and durable.
- Hardboard pegboards are affordable and easy to paint.
Size And Thickness
Choose a pegboard size that fits your wall space. Make sure it can hold all your tools comfortably.
Thickness affects strength. Thicker pegboards hold heavier tools but cost more. Thinner boards are lighter but less strong.
- Standard pegboards are usually 1/4 inch thick.
- Thicker boards (up to 1/2 inch) hold heavier tools.
- Measure your wall space before buying.
Wall Mounting Considerations
Mounting your pegboard properly keeps it stable and safe. Use spacers to leave space behind for hooks.
Check the wall type before mounting. Drywall may need anchors. Stud walls hold more weight.
- Use spacers to create a gap behind the pegboard.
- Find studs for strong support.
- Use wall anchors if no studs are available.
Gathering Tools And Supplies
Creating a pegboard for hand tools starts with collecting the right items. Having the correct tools and accessories makes the project easier.
Organizing your supplies before you begin saves time. It also helps to avoid missing important parts during assembly.
Essential Tools
These tools are needed to build and install your pegboard safely and correctly.
- Measuring tape to get accurate dimensions
- Level to ensure the pegboard is straight
- Drill with drill bits for making holes
- Screwdriver for securing screws
- Stud finder to locate wall studs
- Saw to cut the pegboard to size
- Safety goggles to protect your eyes
Recommended Pegboard Accessories
Adding accessories helps keep your tools organized and easy to reach.
| Accessory | Description | Use |
| Hooks | Metal or plastic hooks | Hang tools like hammers and wrenches |
| Bins | Small containers | Hold screws, nails, and small parts |
| Tool holders | Special shaped holders | Keep drills and pliers secure |
| Shelves | Small shelves | Store larger items or toolboxes |
| Clips | Spring clips or clamps | Hold items like rulers or manuals |
Preparing The Workspace
Creating a pegboard for hand tools starts with a clean and organized workspace. Preparing the area helps you work safely and efficiently.
Take time to clear the space and set up safety measures. This will make your project easier and prevent accidents.
Clearing The Area
Remove all unnecessary items from the workspace. This includes old tools, boxes, and trash.
Make sure the floor is free of clutter. This gives you room to move and reduces tripping risks.
- Clear a flat surface to work on
- Organize tools you will use
- Keep a trash bin nearby
- Ensure good lighting
Safety Precautions
Wear safety gear like gloves and glasses before starting. This protects your hands and eyes from harm.
Check your tools for damage. Broken tools can cause injuries or make work harder.
- Wear gloves to protect your hands
- Use safety glasses to shield your eyes
- Inspect tools before use
- Keep a first aid kit nearby

Credit: www.reddit.com
Measuring And Marking
Measuring and marking are key steps to build a pegboard for hand tools. These steps help place the board correctly and make sure holes line up well.
Careful measuring saves time and makes the pegboard strong and useful. Use a tape measure and pencil to mark spots before you drill.
Locating Studs
Studs are wood or metal supports behind the wall. Find studs to mount the pegboard securely. The pegboard needs strong support for heavy tools.
Use a stud finder or tap the wall and listen for a solid sound. Mark the stud locations with a pencil. Studs are usually 16 or 24 inches apart.
- Turn on the stud finder and move it along the wall.
- Mark the edges and center of each stud.
- Double-check marks by tapping or using a small nail.
- Note down stud positions for drilling and mounting.
Marking Drill Points
After finding studs, measure and mark where to drill holes on the pegboard. Mark holes to hold the board and tool hooks.
Use a ruler or tape measure for spacing. Mark drill points clearly with a pencil. Keep holes aligned for a neat look and strong hold.
- Measure the pegboard size and mark stud positions on it.
- Space drill holes evenly along the stud lines.
- Mark holes for mounting screws and peg hooks.
- Check all marks before drilling to avoid mistakes.
Cutting And Installing The Pegboard
Creating a pegboard for your hand tools helps keep your workspace neat. Cutting and installing the pegboard correctly makes it strong and easy to use.
This guide covers how to cut the pegboard to size and mount it securely on your wall.
Cutting To Size
Measure the wall space where you want to install the pegboard. Mark the pegboard with a pencil to match these measurements.
Use a fine-toothed saw or a jigsaw to cut along the marked lines. Cut slowly to avoid splintering the pegboard surface.
- Wear safety glasses and gloves for protection
- Clamp the pegboard to a stable surface before cutting
- Sand the edges lightly to smooth rough spots
Mounting Techniques
Use wooden furring strips to create a gap between the wall and pegboard. This gap allows hooks to fit behind the board.
| Tool | Use |
| Screwdriver | Drive screws into wall studs |
| Level | Ensure pegboard is straight |
| Drill | Make pilot holes for screws |
Secure the furring strips to the wall first. Then attach the pegboard to the strips with screws. Use a level to keep the pegboard even.

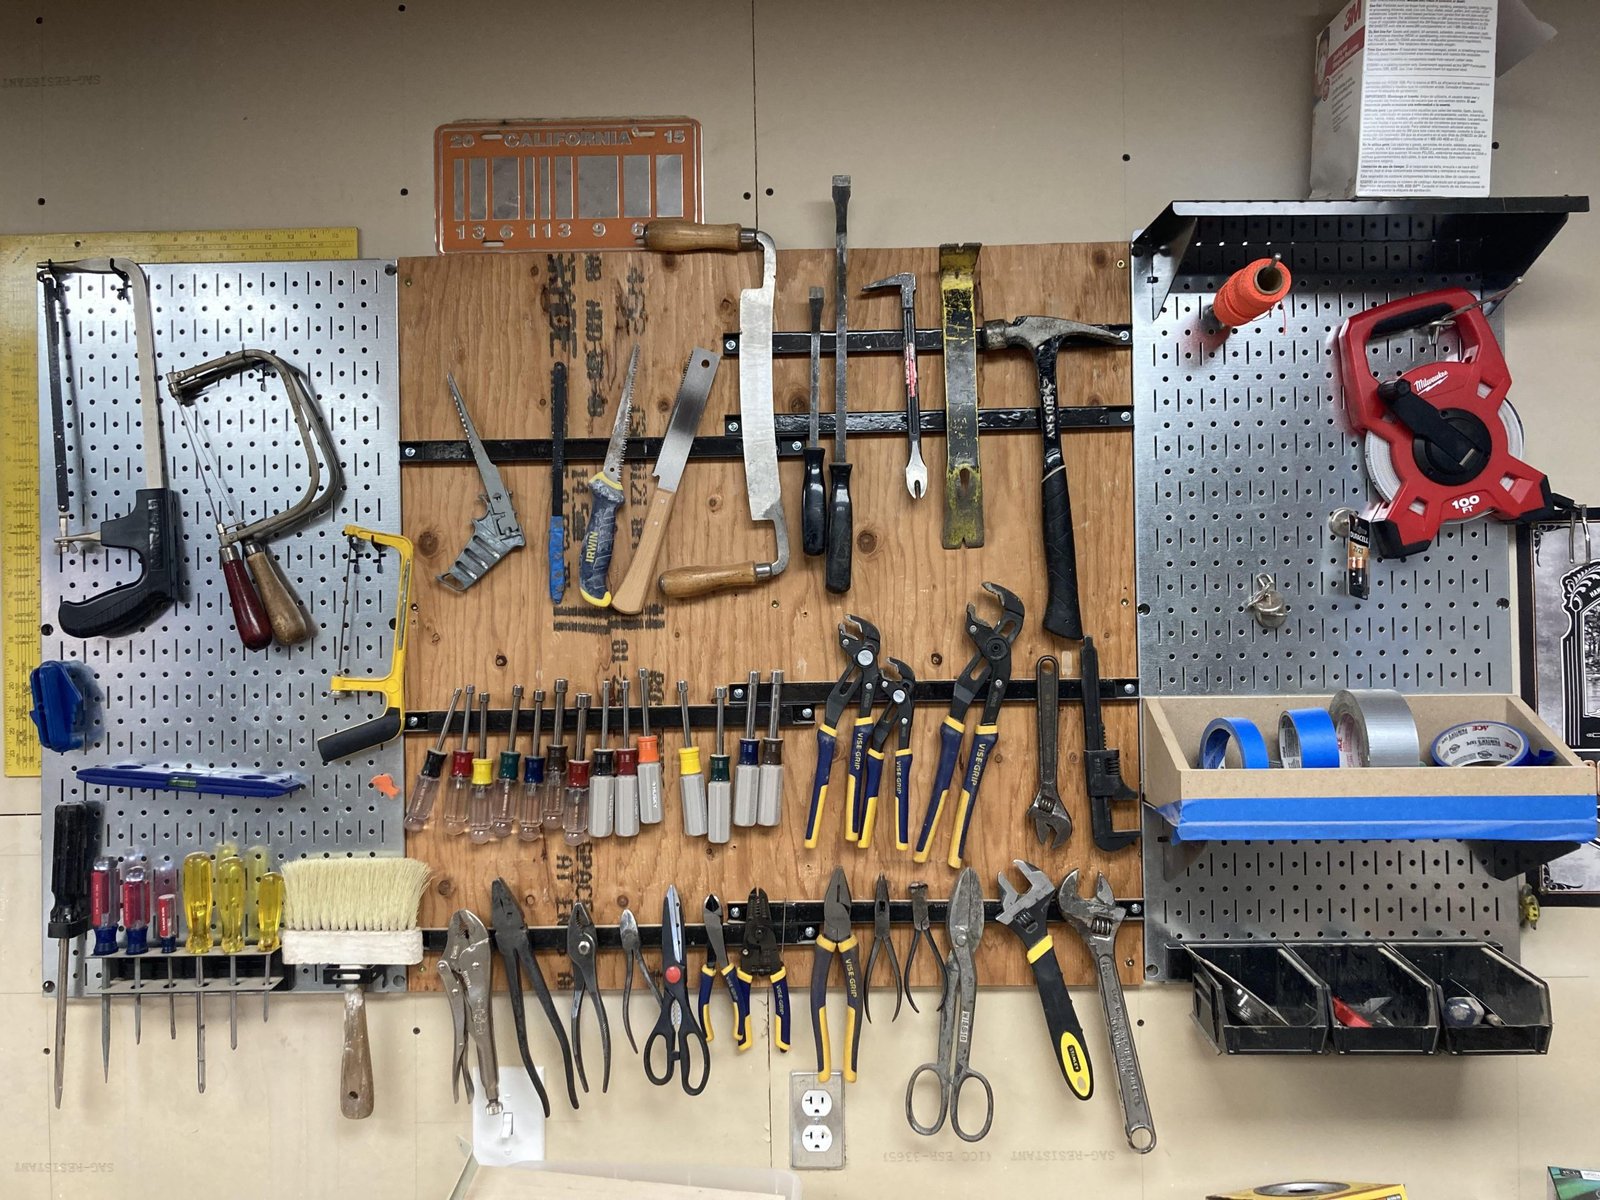
Credit: www.reddit.com
Organizing Hand Tools
Keeping your hand tools organized helps you find them quickly. A pegboard is a great way to store tools neatly and save space.
This guide shows how to create a pegboard to keep your hand tools tidy and easy to reach.
Grouping Tools By Type
Group your tools by type to make finding them simple. For example, put all screwdrivers together and hammers in one place.
Keep similar tools near each other so you can grab what you need fast. This also keeps your workspace neat.
Using Hooks And Holders
Use hooks and holders on the pegboard to hang your tools. They hold tools securely and show them clearly.
Choose hooks that fit each tool’s size and shape. Holders can store items like pliers or tape measures safely.
- Single hooks for hammers and wrenches
- Multi-tool holders for screwdrivers
- Small baskets for nails and screws
Labeling For Easy Access
Label each section of your pegboard to find tools without guessing. Use clear labels above or below each tool group.
Labels help everyone know where tools belong. This keeps the pegboard organized and tools in their right place.
- Use printed labels or write with a marker
- Place labels near the hooks or holders
- Keep labels simple and easy to read
Maintaining Your Pegboard
A pegboard keeps your tools organized and easy to find. Keeping it in good shape helps you work faster. Regular care prevents damage and clutter.
Follow simple steps to clean and adjust your pegboard. This will keep your tools safe and your workspace neat.
Regular Cleaning
Dust and dirt can build up on your pegboard and tools. Clean them often to avoid rust and damage. Use a soft cloth or brush for dusting.
- Remove all tools before cleaning.
- Wipe the pegboard with a damp cloth.
- Use mild soap if needed to remove stains.
- Dry the board completely to prevent moisture damage.
- Clean hooks and tool handles as well.
Adjusting Layout Over Time
Your tool needs may change as you add or remove tools. Adjust the pegboard layout to fit your current tools. This keeps everything accessible and organized.
| Action | Purpose |
| Move hooks to new positions | Make room for new tools |
| Remove unused hooks | Reduce clutter and free space |
| Add labels near tools | Help find tools quickly |
| Group similar tools together | Improve workflow and access |
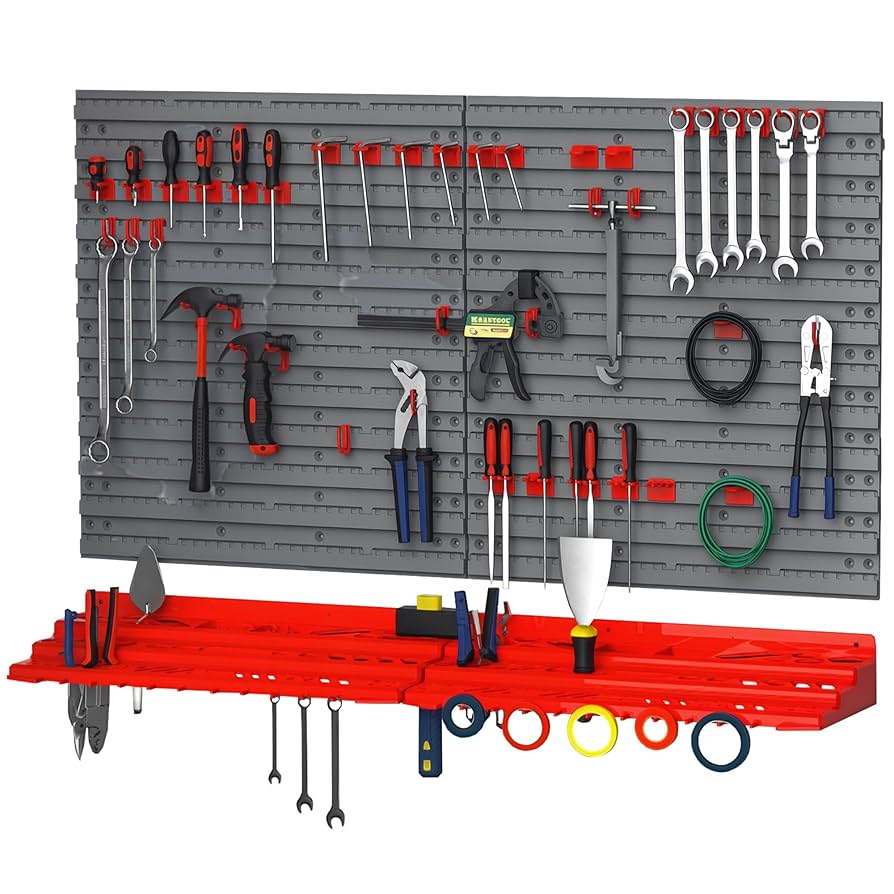
Credit: www.amazon.ca
Frequently Asked Questions
What Materials Do I Need For A Hand Tool Pegboard?
You need a wooden pegboard or metal sheet, peg hooks, screws, wall anchors, a drill, and a level. These materials ensure a sturdy and organized pegboard setup for your hand tools.
How Do I Choose The Right Pegboard Size?
Select a pegboard size based on your available wall space and the number of tools you own. Measure your wall area and list your tools to pick an appropriate pegboard size.
Can I Customize Pegboard Layouts For Different Tools?
Yes, pegboards are highly customizable. You can arrange hooks and tool holders to fit various tool sizes and shapes. This flexibility keeps your tools organized and easy to access.
How Do I Securely Mount A Pegboard On Drywall?
Use wall anchors and screws to securely mount the pegboard on drywall. Locate studs if possible to add extra support. Proper mounting prevents the pegboard from falling or wobbling.
Conclusion
Creating a pegboard for hand tools saves space and keeps tools tidy. Choose a sturdy board and proper hooks to hold your tools well. Arrange tools by size and type for easy access. Regularly check and adjust your pegboard as your tool collection grows.
A well-organized workspace helps you work faster and avoid frustration. Start your pegboard project today and enjoy a neat, efficient tool area. Simple steps bring big benefits.
