If you want your drawers to last longer and look professional, learning how to cut dovetail joints is a game changer. You might think this skill is only for experts, but with the right steps, you can master it too.
Imagine creating strong, beautiful joints that hold your drawers together without nails or screws. You’ll discover simple, clear instructions to help you cut perfect dovetail joints every time. Ready to upgrade your woodworking skills and impress with your craftsmanship? Keep reading—you’re about to unlock a secret that will transform your drawer-making forever.

Credit: m.youtube.com
Tools You Need
Cutting dovetail joints for drawers requires specific tools. These tools help you make precise and strong joints.
Choose the right tools based on your skill level and the tools you already have. Both hand and power tools can work well.
Essential Hand Tools
Hand tools give you control and accuracy when cutting dovetail joints. You will need a few basic tools to get started.
- Marking gauge to set the depth of your cuts.
- Dovetail saw for fine, precise cuts.
- Chisels in various sizes for cleaning out waste wood.
- Mallet to tap the chisels without damaging them.
- Try square to check right angles and ensure accuracy.
- Pencil or marking knife for clear layout lines.
Power Tools Option
Power tools speed up the process of cutting dovetail joints. They are useful if you make many drawers or want faster results.
| Tool | Use |
| Router with dovetail bit | Cut precise dovetail shapes quickly. |
| Scroll saw or band saw | Make detailed cuts easier than with a hand saw. |
| Drill with small bit | Remove waste wood before chiseling. |
| Clamps | Hold wood pieces firmly while working. |
Marking And Measuring Tools
Accurate marking and measuring are key to good dovetail joints. These tools help you layout your cuts clearly and correctly.
- Combination square for measuring and checking angles.
- Marking knife for sharp, clear lines.
- Steel ruler for precise measurements.
- Caliper to check thickness and spacing.
- Marking gauge to set cut depths consistently.
Choosing The Right Wood
Picking the right wood is key for cutting dovetail joints. The wood must be strong and easy to work with. This helps make neat and lasting joints for drawers.
Different woods affect how your dovetails look and hold up. Knowing the types and preparing the wood well leads to better results.
Wood Types For Drawers
Choose wood that is stable and resists splitting. Hardwoods work best for drawer dovetails. Softwoods can be tricky but are workable if handled carefully.
- Maple:Strong and smooth, ideal for fine dovetails.
- Cherry:Easy to cut, with a nice finish.
- Oak:Very durable but can be hard to saw cleanly.
- Pine:Soft and affordable, but dents easily.
- Walnut:Dark wood that cuts well and looks great.
Wood Preparation Tips
Preparing wood properly ensures clean dovetail cuts. Dry wood is less likely to crack or warp. Smooth surfaces help mark lines and fit joints tightly.
| Preparation Step | Description |
| Drying | Use well-seasoned wood with low moisture. |
| Planing | Plane surfaces flat for accurate marking. |
| Sanding | Lightly sand to remove rough spots. |
| Marking | Use sharp pencils or marking knives for clear lines. |
| Clamping | Secure wood firmly to avoid movement during cutting. |
Planning Your Dovetail Joint
Cutting dovetail joints takes careful planning. This step helps your drawer parts fit tightly and last long.
Good planning makes cutting easier and gives better results. Start by thinking about size and layout.
Determining Joint Size
Choose the size of your dovetail joint based on drawer thickness. Thicker wood needs bigger tails and pins.
Keep the tails and pins balanced. Too small makes weak joints. Too big wastes wood and looks odd.
- Use 1/8 to 1/4 of board thickness for tail width
- Pin width should match tail width for balance
- Keep joint depth about half the board thickness
- Adjust size for drawer strength and style
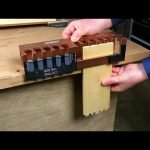
Layout Techniques
Mark your wood carefully before cutting. Use a pencil and ruler for clean lines.
Start by marking the tails on the drawer side. Then transfer the layout to the pin board.
- Use a marking gauge to set joint depth
- Draw tail shapes with a dovetail marker or angle guide
- Keep your lines clear and sharp
- Check measurements twice before cutting

Credit: www.anneofalltrades.com
Marking The Tails
Marking the tails is the first step in cutting dovetail joints for drawers. It helps you plan where to cut and fit the pieces together.
Clear, precise marks make cutting easier and improve the final fit of your drawer joints.
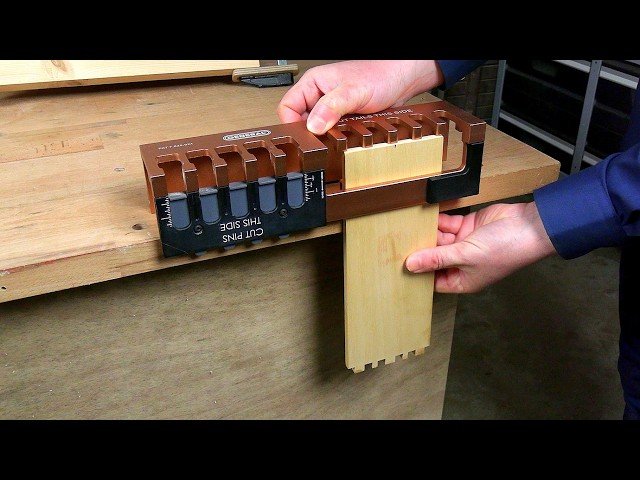
Using The Dovetail Marker
A dovetail marker is a tool that helps you draw the angled shapes for tails. It guides your pencil or marking knife for neat lines.
Place the marker on the wood edge and hold it steady. Draw the tail angles by following the marker’s edges carefully.
- Choose a dovetail marker that fits your joint size
- Hold the marker firmly to avoid slipping
- Use a sharp pencil or marking knife for clear lines
- Mark both sides of the board for accuracy
Transferring Marks Accurately
After marking the tails, transfer these marks to the other piece of wood. This step ensures the pins will match the tails perfectly.
Use a marking gauge or a sharp knife to copy the tail outlines onto the pin board. Make sure the marks line up exactly.
- Place the tail board on the pin board
- Use a marking knife to trace the tail edges
- Check that all marks are clear and complete
- Double-check measurements before cutting
Cutting The Tails
Cutting the tails is the first step in making dovetail joints for drawers. The tails fit into the pins and hold the joint tightly. You need to cut them carefully for a strong connection.
Use sharp tools and take your time. Small mistakes can make the joint weak or loose. Follow these tips to cut clean and accurate tails.
Sawing Tips
Start by marking your tails clearly on the wood. Use a dovetail marker or a square to draw straight lines. Hold the saw steady and cut slowly along the lines.
- Use a fine-tooth dovetail saw for clean cuts.
- Cut on the waste side of the line to keep the tails exact size.
- Keep the saw blade vertical to avoid angled cuts.
- Stop the saw at the baseline to avoid cutting too deep.
- Use light, controlled strokes for better accuracy.
Chiseling Clean Edges
After sawing, clean the edges with a sharp chisel. This helps the tails fit tightly into the pins. Work slowly and remove small amounts of wood at a time.
| Chiseling Tip | Purpose |
|---|---|
| Hold chisel flat against the wood | Prevents angled cuts |
| Tap gently with a mallet | Controls wood removal |
| Work from both sides of the cut | Keeps edges square |
| Check fit often | Avoids over-cutting |
Marking The Pins
Marking the pins is a key step in cutting dovetail joints for drawers. It helps you fit the tail board accurately to the pin board. Careful marking ensures tight, strong joints.
This guide covers two important parts: fitting the tail board and transferring the pin layout. Each part helps you mark the pins correctly for a perfect drawer joint.
Fitting The Tail Board
Start by placing the tail board on the pin board. Make sure both boards are flush and square. This positioning is crucial for accurate marking.
- Align the edges of both boards perfectly.
- Clamp the boards lightly to hold them steady.
- Check that the faces are flush with each other.
- Ensure no gaps exist between the boards.
- Double-check the alignment before marking.
Transferring Pin Layout
Once the tail board fits well, transfer the pin layout onto it. Use a marking knife or pencil to copy the shape of the pins accurately.
| Tool | Purpose |
|---|---|
| Marking Knife | Creates a fine, precise line for cutting |
| Pencil | Used for rough outlines if no knife is available |
| Clamps | Hold boards steady during marking |
| Square | Ensures lines are straight and edges are aligned |
Cutting The Pins
Cutting the pins is the first step in making dovetail joints for drawers. Pins fit into the tails to create a strong connection.
Careful cutting makes the joint tight and neat. Take your time to follow the lines closely.
Sawing Along The Lines
Use a fine-toothed dovetail saw to cut along the marked lines. Keep the saw blade straight and steady.
Cut just outside the line to leave room for cleaning later. Saw slowly to avoid splintering the wood.
Cleaning The Pins With A Chisel
After sawing, use a sharp chisel to remove the waste wood between the pins. Work carefully to keep the pins square.
Hold the chisel flat and pare away small bits. Check the fit often to avoid removing too much wood.
Fitting And Adjusting The Joint
Fitting dovetail joints for drawers requires care and patience. Proper adjustment makes the joint strong and neat.
This guide covers dry assembly tips and ways to fine tune the joint for a tight fit.
Dry Assembly Tips
Before gluing, assemble the joint without glue. This helps spot areas that need adjustment.
- Check that all tails and pins fit together smoothly.
- Use a mallet gently to test the fit without forcing the joint.
- Look for gaps or tight spots that stop the joint from closing properly.
- Mark any tight areas with a pencil for later trimming.
- Repeat the dry fit several times as you adjust.
Fine Tuning For A Tight Fit
Use small tools to trim and shape the joint for a snug fit. Work slowly and test often.
| Tool | Purpose | Tip |
| Sharp chisel | Trim tight pins or tails | Cut small shavings only |
| Sandpaper | Smooth rough edges | Use fine grit for best finish |
| File | Shape tight corners | Work gently to avoid over-cutting |
| Mallet | Test fit without damage | Tap lightly to avoid splitting wood |
Gluing And Clamping
Gluing and clamping are key steps in making strong dovetail joints for drawers. Good glue and steady clamping keep the joint tight and secure.
Take your time during these steps to ensure the drawer lasts long and fits well.
Choosing The Right Glue
Use wood glue made for strong woodworking joints. It should dry clear and hold well under pressure. Avoid glues that dry too fast or remain sticky.
Apply glue evenly on all the surfaces of the dovetail pins and tails. A thin, even coat helps the glue bond better.
- PVA wood glue is a common and reliable choice
- Hide glue works well if you want easy cleanup
- Polyurethane glue creates very strong joints but needs careful use
- Use enough glue, but don’t overapply to avoid mess
Clamping Techniques
Clamp the dovetail joint firmly to hold the parts together while the glue dries. Proper clamping stops gaps and movement.
Use clamps that fit the size of your drawer parts. Apply pressure evenly across the joint to avoid warping.
- Place one clamp across the joint to press pins and tails tightly
- Use corner clamps or band clamps for drawer corners
- Check that the joint stays square while clamping
- Leave clamps on for the glue’s recommended drying time

Credit: www.reddit.com
Finishing Touches
Cutting dovetail joints is only part of the drawer-making process. Finishing touches help improve the look and feel of your work. These steps protect the wood and make the joints smooth and neat.
Two important finishing steps are sanding and applying finish. These steps prepare the wood for daily use and give the drawer a polished appearance.
Sanding And Smoothing
Start by sanding the dovetail joints to remove rough edges and splinters. Use fine-grit sandpaper to avoid changing the shape of the joints. Sand all surfaces where the wood meets.
- Use 120-grit sandpaper for initial smoothing.
- Follow with 220-grit sandpaper for a finer finish.
- Smooth inside corners carefully to keep joint fit tight.
- Remove dust with a soft brush or cloth before finishing.
Applying Finish
Applying a finish protects the wood and enhances its color. Choose a finish that fits your drawer’s use and style. Common finishes include oil, varnish, and wax.
| Finish Type | Appearance | Protection Level | Drying Time |
|---|---|---|---|
| Oil (e.g., linseed, tung) | Natural, matte | Moderate | 6-24 hours |
| Varnish | Glossy or satin | High | 12-48 hours |
| Wax | Soft sheen | Low | 1-2 hours |
Frequently Asked Questions
What Tools Are Needed To Cut Dovetail Joints For Drawers?
To cut dovetail joints, you need a dovetail saw, chisels, marking gauge, square, and a pencil. These tools ensure precise and clean cuts for strong drawer joints.
How Do I Mark Dovetail Joints Accurately?
Use a marking gauge and square to scribe the tails and pins on the wood. Accurate marking helps achieve tight-fitting dovetail joints.
What Is The Best Wood Type For Dovetail Joints?
Hardwoods like maple, oak, and cherry are ideal for dovetail joints. They offer strength and durability for drawer construction.
How Do I Avoid Gaps In Dovetail Joints?
Cut slowly and follow your markings precisely. Use sharp tools and test fit before final assembly to ensure tight joints.
Conclusion
Dovetail joints add strength and beauty to drawers. Practice is key. Start with simple projects. Use quality wood and sharp tools. Measure twice, cut once. Patience helps achieve perfect fits. Don’t rush the process. Each joint tells a story. Feel proud of your craftsmanship.
Learn from mistakes and improve. Enjoy the satisfaction of creating something by hand. Share your work with others. Inspire them to try too. Happy woodworking!