Are you ready to tackle your drywall project but worried about making messy cuts? Cutting drywall accurately can feel tricky, but with the right steps, you can achieve clean, precise edges every time.
Imagine saving time, avoiding costly mistakes, and having your installation look professional from start to finish. In this guide, you’ll discover simple techniques and insider tips that make cutting drywall easier than you ever thought possible. Keep reading, and you’ll gain the confidence to handle your drywall like a pro.
Tools Needed For Drywall Cutting
Cutting drywall accurately is key for a smooth installation. Using the right tools makes the job easier and the cuts cleaner.
This guide covers the essential tools you need for cutting drywall properly. You will learn what tools help you make precise cuts and measurements.
Essential Cutting Tools
Drywall cutting requires sharp and reliable tools. These tools help you cut straight lines and shapes without breaking the drywall.
- Utility Knife: A sharp blade cuts drywall easily. Change blades often for clean cuts.
- Drywall Saw: A small hand saw is good for cutting curves and openings.
- Keyhole Saw: Use this to cut small holes for outlets or switches.
- T-Square: Helps guide straight cuts along the drywall edges.
- Jab Saw: Good for cutting irregular shapes inside the drywall sheet.
Measuring And Marking Instruments
Accurate measuring and marking are important for drywall fitting. These tools help you mark the drywall before cutting.
- Tape Measure: Measure length and width precisely before cutting.
- Pencil: Mark cut lines clearly on the drywall surface.
- Chalk Line: Use this tool to snap straight lines on large drywall sheets.
- Level: Check that your marks and cuts are straight and even.
- Square Ruler: Helps mark right angles for corner cuts.
Preparing The Drywall For Cutting
Cutting drywall correctly starts with careful preparation. This ensures the pieces fit well and the installation goes smoothly.
Two key steps in preparation are measuring the cut area and marking the cut lines precisely on the drywall.
Measuring The Cut Area
Measure the space where the drywall will go with a tape measure. Double-check the height and width to avoid mistakes.
- Measure the height of the wall or ceiling area.
- Measure the width at several points to find the narrowest section.
- Record all measurements clearly on paper or a digital device.
- Check corners and openings like doors or windows for exact sizes.
Marking The Cut Lines
Mark the drywall with a pencil using a straight edge or a drywall square. Clear lines help you cut accurately.
Here is a simple table showing tools used for marking cut lines and their purpose:
| Tool | Purpose |
|---|---|
| Pencil | Draw clear, fine lines for cutting |
| Drywall Square | Make straight and square lines at 90 degrees |
| Tape Measure | Measure distances and mark points accurately |
| Straight Edge | Guide the pencil for long straight lines |
Cutting Techniques For Accuracy
Cutting drywall with precision is key for a neat installation. Using the right technique helps avoid mistakes and wasted material.
This guide explains three common methods to cut drywall accurately. Each method suits different needs and tools.
Scoring And Snap Method
This method works well for straight cuts. It uses a utility knife to score the drywall surface, then snaps the board along the scored line.
- Measure and mark the cut line clearly on the drywall.
- Use a straight edge to guide your utility knife.
- Score the drywall paper deeply, but avoid cutting through the entire board.
- Lift the drywall and snap it along the scored line.
- Cut the back paper with the knife to separate the pieces cleanly.
Using A Drywall Saw
A drywall saw is ideal for cutting holes or curves. It has a sharp, pointed blade for easy piercing and controlled cutting.
| Feature | Benefit |
| Sharp Teeth | Make fast, clean cuts |
| Pointed Tip | Start cuts inside the board |
| Lightweight | Easy to handle for detailed work |
| Ergonomic Handle | Reduces hand fatigue |
Mark your cut, then push the saw back and forth along the line. Keep the blade straight to maintain accuracy.
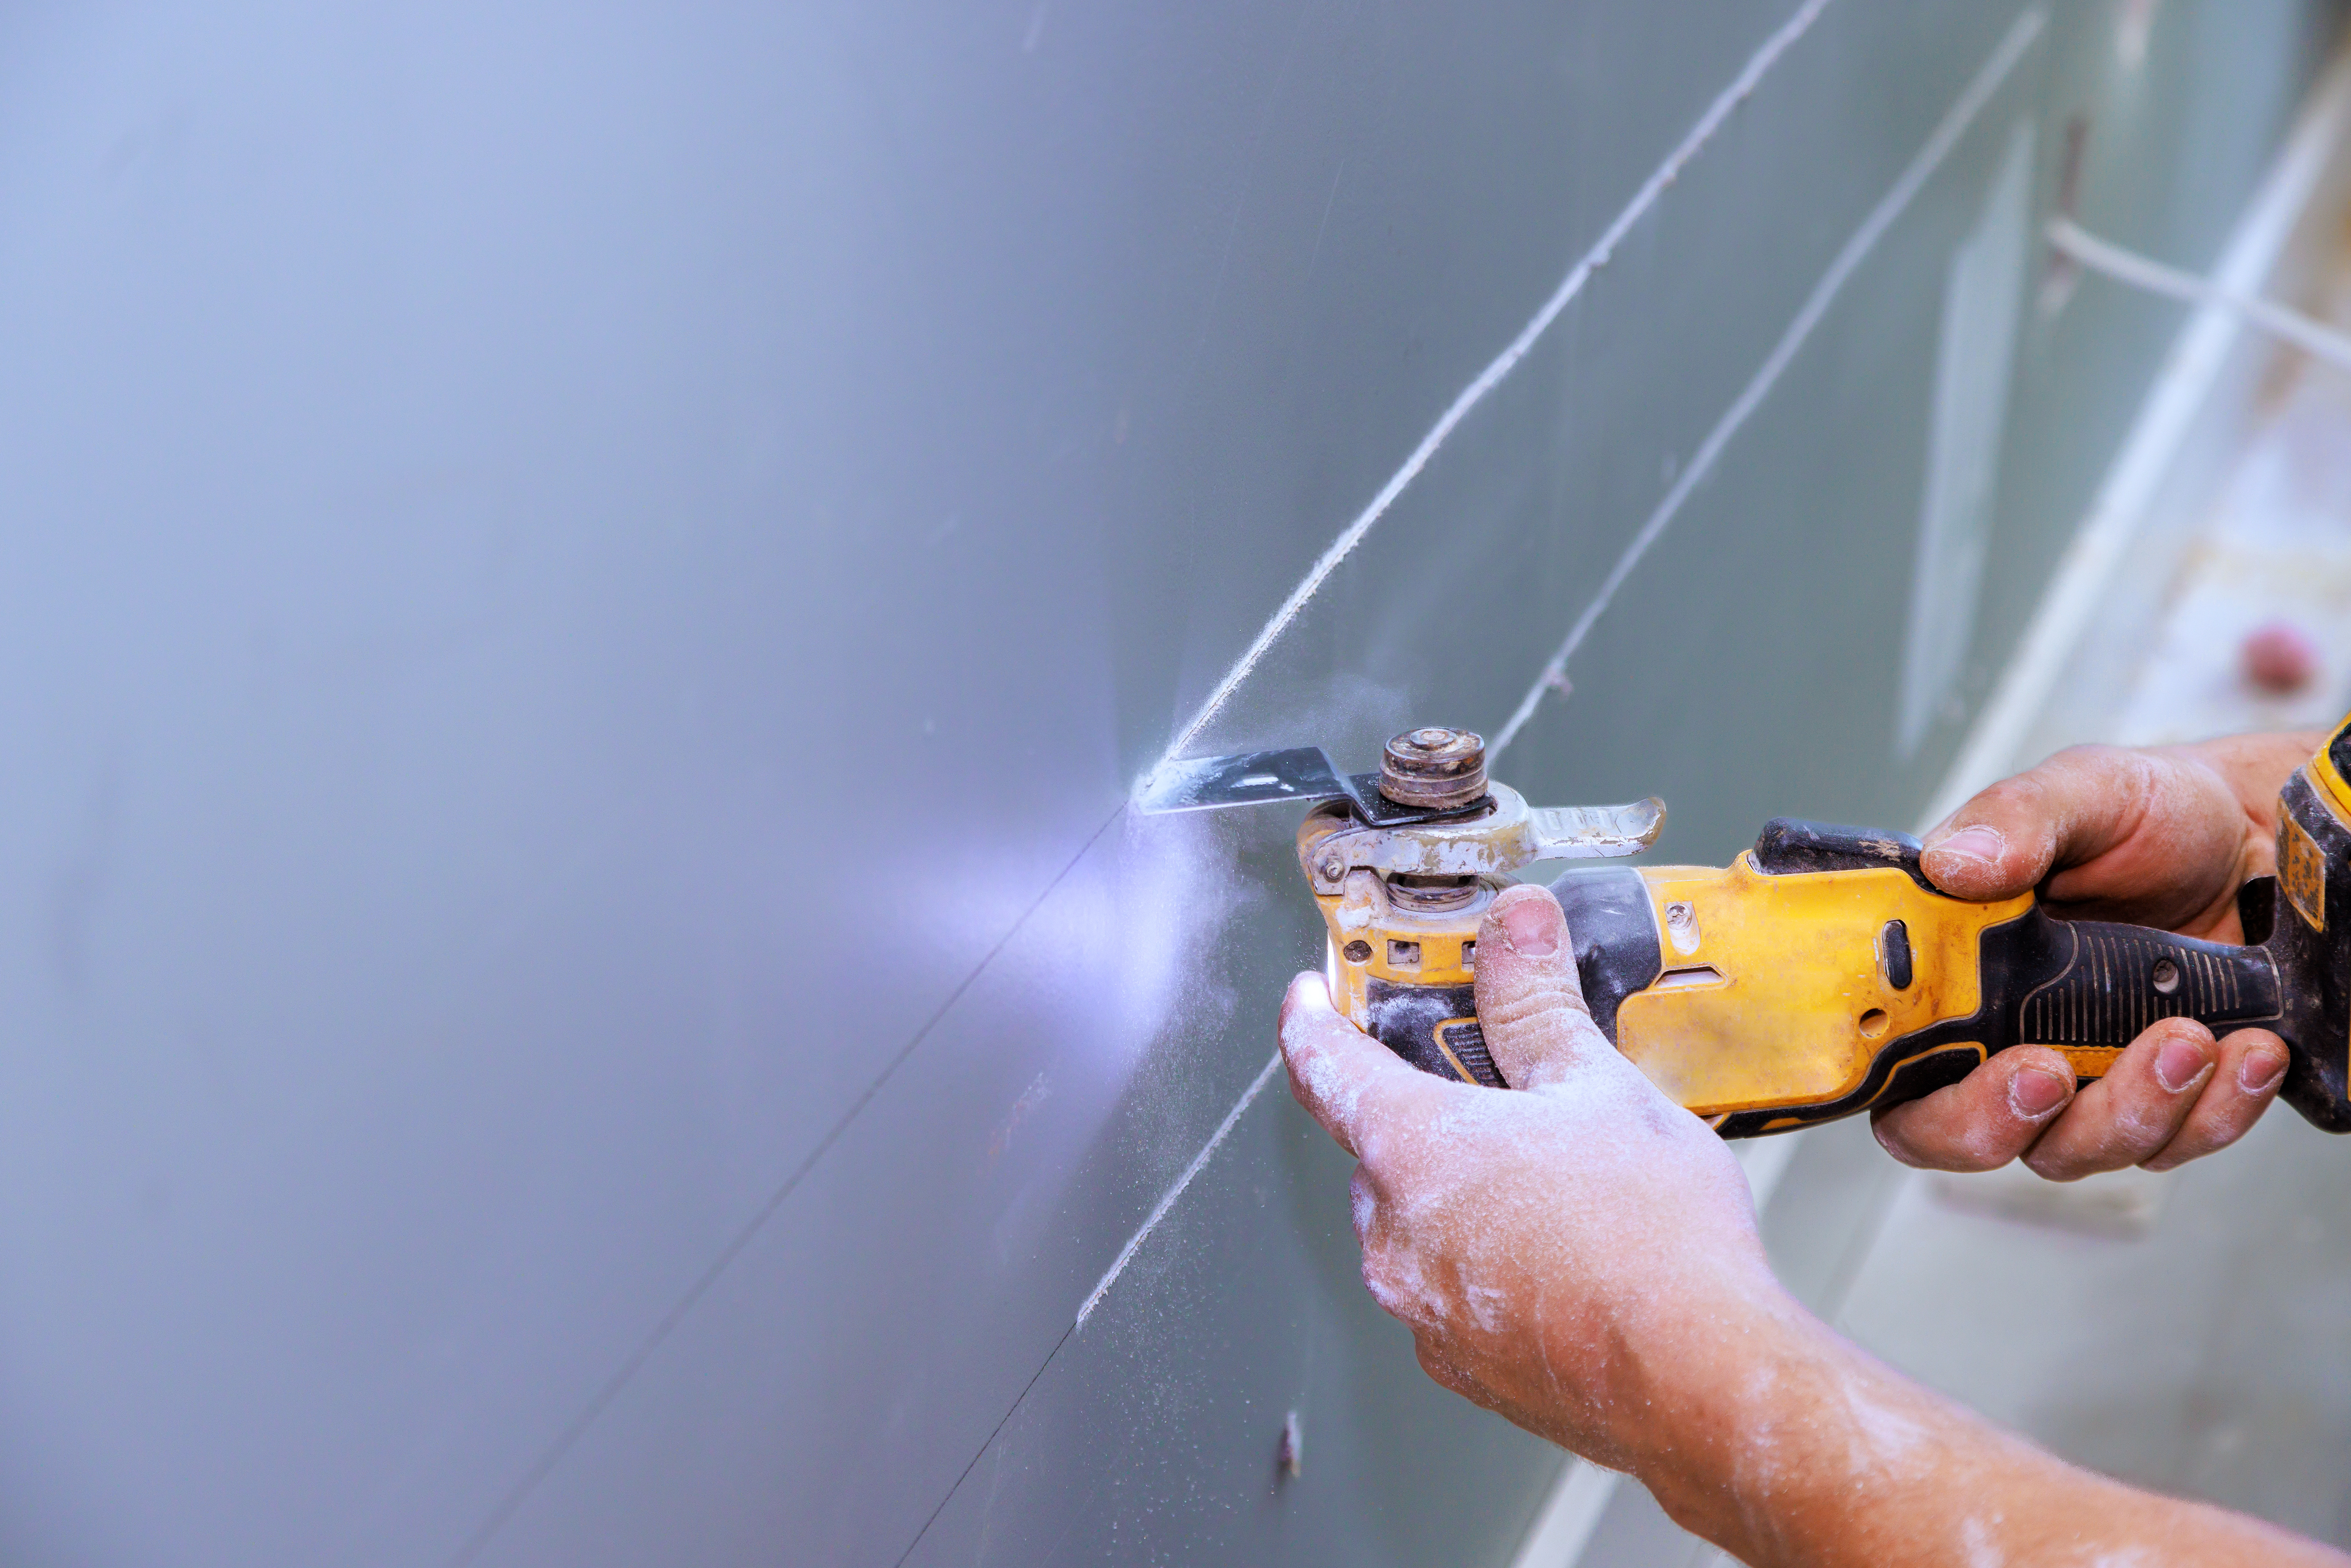
Employing A Rotary Tool
A rotary tool with a drywall cutting bit can make precise cuts quickly. It works well for complex shapes and tight spaces.
- Wear safety glasses and a mask to protect from dust.
- Mark the cut line clearly on the drywall.
- Use a steady hand to guide the rotary tool along the line.
- Cut slowly to avoid chipping or damaging the drywall surface.
- Clean edges with sandpaper if needed.
Credit: www.howarth-timber.co.uk
Handling Complex Cuts
Cutting drywall accurately is key for a clean installation. Complex cuts require careful measuring and steady hands.
This guide covers cutting openings for outlets and switches, plus making curved and irregular cuts.
Cutting Openings For Outlets And Switches
Mark the outlet or switch location on the drywall. Use a template or the device itself to trace the shape.
- Measure the height from the floor to the outlet or switch box.
- Transfer the measurements to the drywall panel.
- Use a drywall saw or jab saw to cut inside the traced lines.
- Test fit the drywall piece around the outlet or switch box.
- Make small adjustments to ensure a snug fit.
Making Curved And Irregular Cuts
Curved and irregular cuts need special attention. Draw the shape carefully on the drywall before cutting.
| Tool | Best Use |
|---|---|
| Keyhole Saw | Small curves and tight spots |
| Jab Saw | Cutting holes for outlets and switches |
| Oscillating Multi-Tool | Precise curved and irregular cuts |
| Utility Knife | Scoring shallow curves and trimming edges |
Take your time cutting to avoid cracks or uneven edges. Sand the edges lightly if needed for a smooth finish.
Safety Tips During Cutting
Cutting drywall can create dust and sharp edges. Taking safety steps protects you from injury and health risks.
Use the right gear and handle materials carefully. Follow safe disposal rules to keep your workspace safe.
Protective Gear Recommendations
Wear protective gear to avoid cuts and breathing in dust. Safety gear keeps you safe while working with drywall.
- Safety goggles to protect your eyes from dust and debris
- Work gloves to prevent cuts from sharp drywall edges
- A dust mask or respirator to avoid inhaling drywall dust
- Long sleeves and pants to protect your skin
- Closed-toe shoes to protect your feet from dropped materials
Safe Handling And Disposal
Handle drywall pieces carefully to avoid injuries. Dispose of scraps and dust properly to keep your area clean and safe.
| Action | Safety Tip |
| Cutting drywall | Use a stable surface and cut slowly to avoid slips |
| Carrying drywall | Hold panels with both hands and watch for sharp edges |
| Disposing scraps | Place scraps in a sturdy container to prevent accidents |
| Cleaning dust | Use a vacuum with a HEPA filter or wet wipe surfaces |

Credit: www.mybuilder.com
Common Mistakes To Avoid
Cutting drywall accurately is key for a smooth installation. Many beginners face problems that cause delays or waste material. Knowing common mistakes helps prevent errors and saves time.
This guide covers two common issues: misaligned cuts and overcutting. Avoiding these will keep your drywall fit tight and your walls looking clean.
Misaligned Cuts
Misaligned cuts happen when measurements or cutting lines are off. This leads to gaps or uneven edges that make it hard to fit drywall pieces together. It also causes extra sanding or patching later.
- Measure twice, cut once to reduce errors.
- Use a straight edge or drywall T-square for clean lines.
- Mark your cut lines clearly with a pencil.
- Check the cut piece against the wall or framing before final installation.
- Keep your cutting tool steady and follow the line carefully.
Overcutting And Damage Prevention
Overcutting is cutting beyond the marked line or too large pieces. This damages drywall and wastes material. It also makes it hard to secure the drywall to studs.
| Common Causes | How to Avoid |
| Cutting without proper guides | Use a straight edge and measure carefully |
| Rushing the cut | Take your time and follow the pencil line |
| Using dull blades | Replace blades often for clean cuts |
| Not checking fit before installation | Dry fit pieces and trim if needed |
Finishing Touches After Cutting
Cutting drywall is just the first step. The edges need extra care to fit well. Good finishing helps the drywall look smooth and neat.
After cutting, focus on smoothing edges and making adjustments. These steps make installation easier and improve the final result.
Smoothing Edges
Use a sanding block or drywall rasp to smooth rough edges. This prevents cracks and helps the drywall fit flush with the wall.
- Lightly sand all cut edges to remove bumps.
- Check edges for any uneven spots and smooth them.
- Wear a mask to avoid inhaling dust while sanding.
- Clean the dust off before installation.
Fitting And Adjustments
Test fit the drywall piece in the opening. Mark any tight spots or gaps to fix before attaching it.
| Issue | Solution |
| Drywall too wide | Trim edges slightly with a utility knife |
| Drywall too tall | Score and snap a small strip off the bottom |
| Uneven wall surface | Use shims to level the drywall |
| Small gaps | Fill with joint compound after installation |

Credit: www.mybuilder.com
Frequently Asked Questions
How Do I Measure Drywall Before Cutting?
Measure the wall space carefully using a tape measure. Mark the drywall with a pencil where cuts are needed. Accurate measurements prevent waste and ensure a perfect fit.
What Tools Are Best For Cutting Drywall?
Use a utility knife or drywall saw for precise cuts. A straight edge helps guide the blade. These tools make cutting drywall easier and more accurate.
How Can I Cut Drywall Without Making Dust?
Score the drywall surface lightly with a utility knife first. Cut slowly to minimize dust. Use a damp cloth nearby to catch dust particles effectively.
What’s The Best Way To Cut Drywall Around Outlets?
Measure the outlet size and mark it on drywall. Use a drywall saw or rotary tool to cut out precisely. This ensures a neat fit around electrical boxes.
Conclusion
Cutting drywall accurately is vital for smooth installation. Start by gathering the right tools. Measure twice to avoid mistakes. Use a sharp utility knife for clean edges. Practice patience and precision. Remember, safety comes first; wear protective gear. Following these steps ensures a neat finish.
With practice, cutting drywall becomes easier. Soon, you’ll handle any drywall project with confidence. Keep these tips handy for future reference. Your walls will thank you!