Are you ready to master a skill that will take your woodworking to the next level? Cutting perfect miters with hand tools might seem tricky, but once you get the hang of it, you’ll create cleaner, sharper corners that make your projects stand out.
Imagine the satisfaction of crafting flawless joints without relying on power tools. In this guide, you’ll discover simple, step-by-step techniques that anyone can follow. Keep reading, and you’ll soon be cutting miters like a pro—no expensive equipment needed.
Choosing The Right Tools
Cutting miters by hand requires the right tools. Choosing tools that fit your project makes the work easier and cleaner.
In this guide, you will learn about essential hand tools, quality blades and saws, and how to prepare your workspace for accurate cuts.
Essential Hand Tools For Miters
Basic hand tools help you measure, mark, and cut miters accurately. Each tool has a specific role in the process.
- Miter Box:Guides your saw to make precise angled cuts.
- Backsaw:Has a stiff spine for straight, clean cuts.
- Combination Square:Measures and marks angles clearly.
- Pencil:Marks cut lines on wood.
- Clamps:Hold pieces steady during cutting.
Selecting Quality Blades And Saws
Choosing the right saw and blade affects the smoothness of your cut. Look for sharp blades made for fine woodwork.
| Tool | Blade Type | Best Use |
|---|---|---|
| Backsaw | Fine-toothed | Precise miter cuts on soft and hardwood |
| Tenon Saw | Medium-toothed | Cutting thicker wood pieces |
| Japanese Pull Saw | Very fine-toothed | Clean, thin kerf cuts |
Preparing Your Workspace
A clean, well-organized workspace helps you cut miters safely and accurately. Good lighting and steady support are important.
- Clear your bench or table of clutter
- Set up clamps to hold wood pieces securely
- Use a stable surface for your miter box
- Arrange tools within easy reach
- Ensure good lighting on the cutting area

Credit: www.stumblingbearwoodcraft.com
Marking Accurate Angles
Cutting miters by hand needs careful angle marking. Accurate angles help your pieces fit well.
Using the right tools makes marking easier and more precise. Let’s explore how to mark angles correctly.
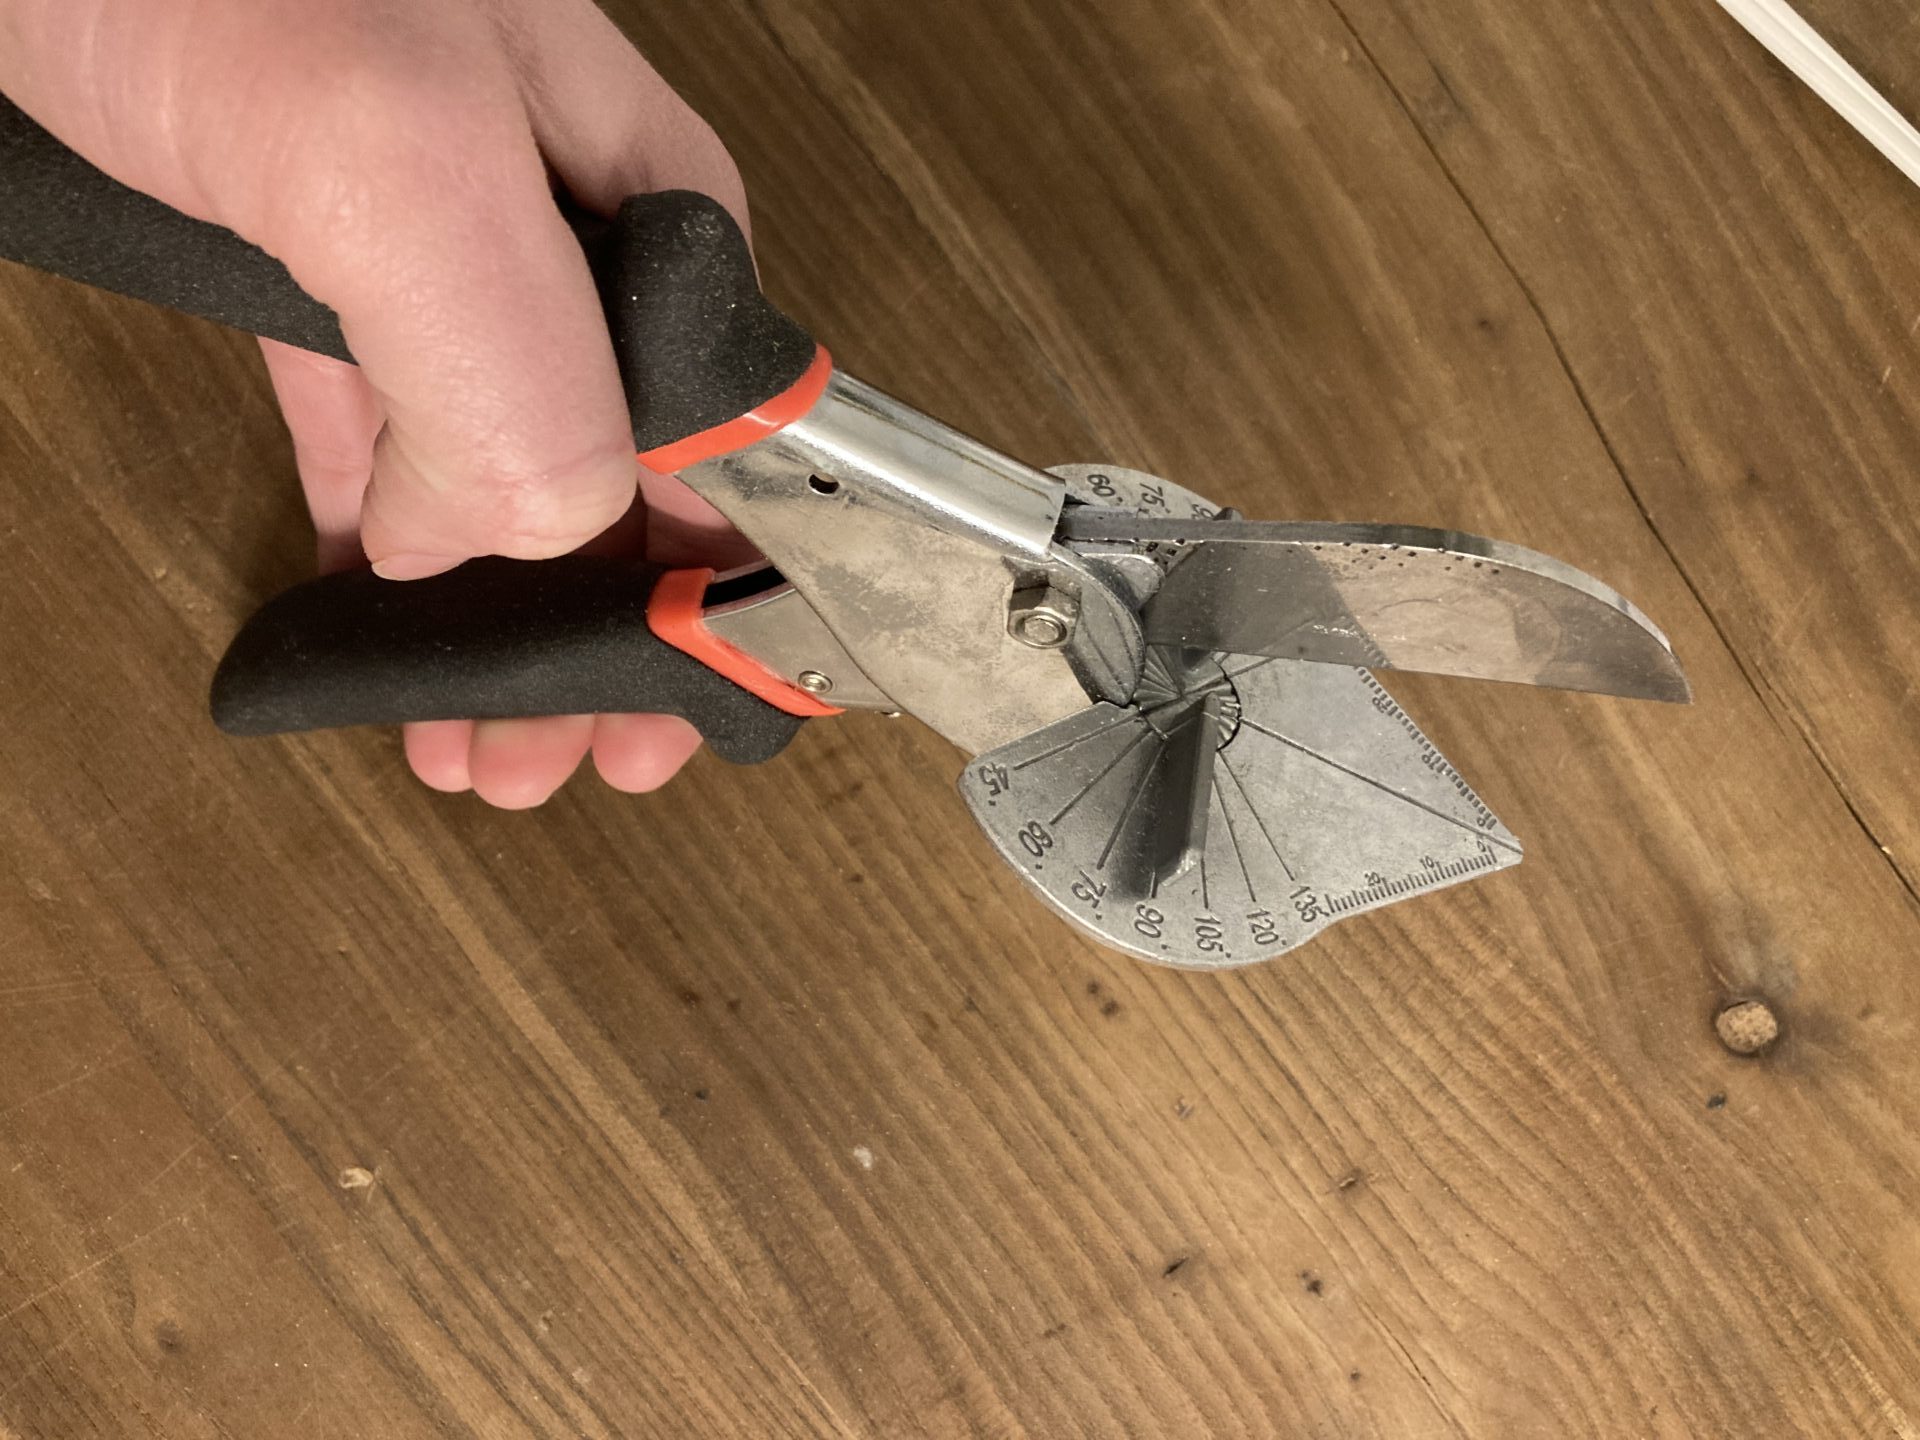
Using A Protractor And Bevel Gauge
A protractor measures angles on your wood piece. Place it flat and read the angle carefully.
A bevel gauge copies angles from other objects. It has an adjustable blade you lock in place.
- Set the bevel gauge to the desired angle.
- Lock the blade to hold the angle firmly.
- Transfer the angle onto your wood edge.
- Use the protractor to check the angle if needed.
Tips For Precise Measurement
Measure twice to avoid mistakes. Small errors can cause gaps in your miters.
Keep your tools clean and free of dust. Dirt can change your reading and ruin accuracy.
- Always use a sharp pencil for marking lines.
- Hold your tool steady while measuring.
- Double-check angles before cutting.
- Use a ruler to confirm line length.
Marking Guidelines Clearly
Draw clear lines on the wood for your saw to follow. Faint lines cause cutting errors.
Mark both sides of the cut line if possible. This helps keep the cut straight and clean.
- Use a sharp pencil or marking knife for fine lines.
- Make lines visible but thin to avoid confusion.
- Label the angle or cut side if needed.
- Check lines under good light before cutting.
Cutting Techniques
Cutting miters by hand requires skill and care. Using the right techniques helps you make clean, accurate cuts. Good technique also keeps you safe while working.
This guide covers key points about stance, grip, starting the cut, and controlling the saw. Follow these tips to improve your hand tool miters.
Proper Sawing Stance And Grip
Stand with your feet shoulder-width apart for balance. Place your weight evenly on both feet. Keep your body steady to guide the saw smoothly.
- Hold the saw handle firmly but not too tight.
- Keep your wrist straight and relaxed.
- Use your whole arm to push and pull the saw.
- Position the workpiece so you can see the cut line clearly.
Starting The Cut Cleanly
Begin the cut by placing the saw blade on the mark at a low angle. Use a few short, gentle strokes to create a shallow groove. This groove guides the saw for the rest of the cut.
| Tip | Reason |
|---|---|
| Start slow and steady | Prevents the saw from slipping off the mark |
| Keep the blade flat | Helps make a straight cut |
| Use light pressure | Reduces wood tear-out |
Maintaining Control Through The Cut
Keep a steady rhythm and let the saw do the work. Do not force the blade. Keep your eyes on the line and adjust your angle if needed.
- Keep your grip firm but relaxed.
- Use your body weight to help push the saw.
- Check the cut angle often to stay accurate.
- Stop and reset if the saw binds or the cut drifts.

Credit: www.youtube.com
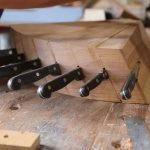
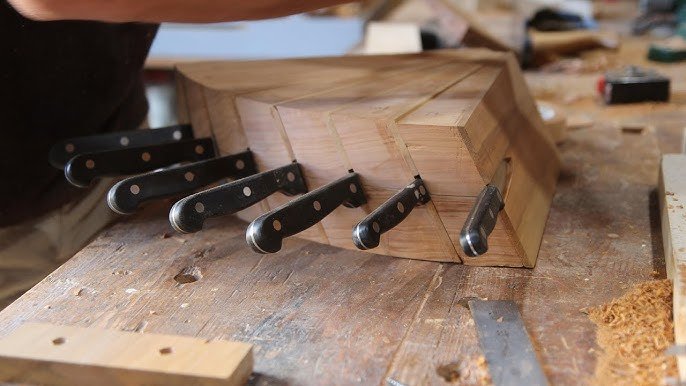
Fitting And Adjusting Joints
Cutting miters with hand tools requires careful fitting and adjusting. Proper joints ensure strong and neat connections in your work.
Small gaps or misalignments can weaken the joint and affect the final look. It is important to check and fine-tune each cut.
Checking For Gaps And Alignment
Start by placing the two mitered pieces together without glue. Look closely at the joint from different angles to spot gaps or uneven edges.
- Hold the joint up to a light source to see small gaps clearly.
- Check if the edges line up evenly without any overlap.
- Press the pieces together to feel any uneven pressure.
- Mark areas that need adjustment with a pencil.
Using A Chisel For Fine Tuning
A sharp chisel helps remove small amounts of wood to improve the fit. Work slowly and carefully to avoid removing too much material.
Use these chisel techniques:
- Hold the chisel at a low angle to shave off tiny edges.
- Tap gently with a mallet or push by hand for control.
- Test the fit often after each adjustment.
- Focus on high spots or tight areas causing gaps.
Sanding And Smoothing Edges
After chiseling, use sandpaper to smooth the edges. This helps the joint close tightly and looks clean.
| Sandpaper Grit | Use |
| 80-120 | Remove rough marks and shape edges |
| 150-220 | Smooth minor imperfections |
| 320+ | Prepare surface for finishing |
Common Mistakes To Avoid
Cutting miters with hand tools takes care and skill. Avoid common errors to get clean, accurate cuts.
Small mistakes can ruin your work. Learn to spot and fix them early for better results.
Misalignment And Angle Errors
Misalignment happens when your miter angles do not match perfectly. This leads to gaps in corners.
Angle errors come from incorrect measuring or cutting tools set wrong. Check your angles carefully before cutting.
- Use a reliable protractor or miter box for precise angles
- Mark your cut lines clearly with a sharp pencil
- Double-check measurements before sawing
- Hold the wood firmly to avoid shifting during the cut
Overcutting And Splintering
Overcutting wastes wood and weakens the joint. Cut only to the marked line.
Splintering happens when the saw tears the wood fibers. This makes rough edges and weak joints.
- Use a fine-toothed saw for cleaner cuts
- Cut slowly and steadily to avoid splintering
- Place masking tape along the cut line to reduce tear-out
- Support the wood firmly on both sides of the cut
Ignoring Tool Maintenance
Dull blades and dirty tools cause poor cuts. Keep your tools sharp and clean.
Regular maintenance saves time and improves accuracy. Check tools before each project.
- Sharpen saw blades often to keep cutting smooth
- Clean saw teeth and handles to remove resin and dust
- Lubricate moving parts to prevent rust and stiffness
- Store tools in a dry place to protect them
Finishing Tips For Durable Joints
Cutting miters by hand takes skill and care. To make joints last longer, you need good finishing steps. These tips help keep your woodwork strong and neat.
We will cover three key areas: choosing the right glue, using clamping well, and protecting the wood after joining. Each step adds to the joint’s strength and appearance.
Choosing The Right Adhesive
Selecting the right glue is key for durable miter joints. Different adhesives suit different woods and uses. You want a glue that dries clear and holds tight under stress.
- Use PVA glue for most softwoods and hardwoods; it is easy to use and cleans up with water.
- Consider polyurethane glue for outdoor projects; it resists water and expands to fill gaps.
- Epoxy works well for heavy-duty joints; it bonds many materials and has strong hold.
- Hide glue is traditional and good for fine woodworking; it allows easy repairs later.
Clamping Techniques For Tight Bonds
Proper clamping holds the miters tight while glue dries. This stops gaps and ensures a solid joint. Use the right pressure and tools for the best results.
| Clamping Method | Best Use | Notes |
| Corner Clamp | Small frames | Keeps 90-degree angles steady |
| Banding Clamp | Irregular shapes | Wraps around the whole piece |
| Bar Clamp | Large boards | Provides strong, even pressure |
| Screw Clamp | Fine woodworking | Adjusts pressure slowly and precisely |
Protecting And Sealing The Wood
After the glue dries, protect the joint from damage and moisture. Sealing the wood keeps it looking good and extends its life.
Use these tips to seal and protect your miters:
- Lightly sand the joint to smooth rough edges.
- Apply a wood conditioner before finishing to avoid blotches.
- Use a clear varnish or polyurethane to add a tough surface layer.
- Reapply finish every few years for outdoor projects.
Credit: youcandiyblog.com
Frequently Asked Questions
What Hand Tools Are Best For Cutting Miters?
The best hand tools for cutting miters are a miter box and a backsaw. A sharp coping saw or a bevel gauge can also help. These tools provide precision and control for accurate angled cuts.
How Do I Measure Angles For Hand-cut Miters?
Use a protractor or a bevel gauge to measure angles. Mark the angle clearly on your workpiece before cutting. Accurate measurement ensures clean and tight-fitting miter joints.
What Techniques Improve Accuracy In Hand-cut Miters?
Take slow, steady strokes with your saw and maintain a consistent angle. Use a miter box for guidance. Double-check measurements before cutting to avoid mistakes.
How Can I Clean Up Rough Miter Cuts By Hand?
Use a fine file or sandpaper to smooth rough edges. A shoulder plane can also refine the joint for a perfect fit. Clean cuts enhance the final appearance.
Conclusion
Cutting miters with hand tools can be easy. Practice makes it perfect. Start with simple projects. Use quality tools for better results. Keep your tools sharp. Measure twice, cut once. This saves time and materials. Stay patient and focused. Mistakes can happen, but you learn.
Enjoy the process. Handcrafted work has its charm. Your skills will improve over time. Soon, you’ll feel more confident. Happy crafting!