Cutting wood accurately is the secret to strong, beautiful joinery. If your cuts are off even by a little, your pieces won’t fit together well, and your project can look messy or weak.
But don’t worry—you don’t have to be a pro to get perfect cuts every time. You’ll discover simple, practical tips and tools that will help you make precise cuts with confidence. Whether you’re building furniture, cabinets, or any wood project, mastering these techniques will save you time, reduce waste, and make your work stand out.
Ready to take your woodworking skills to the next level? Keep reading, because accurate cutting starts here.

Credit: www.familyhandyman.com
Choosing The Right Tools
Cutting wood accurately is key for good joinery. Using the right tools helps you make clean and precise cuts.
Selecting proper saws, measuring tools, and blades makes your work easier and improves results. Let’s look at each tool type.
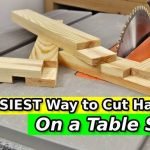
Types Of Saws For Joinery
Different saws serve different purposes in joinery. Choose a saw based on the cut type and wood size.
- Hand saw: Good for small cuts and detailed work
- Circular saw: Best for straight, quick cuts
- Mitre saw: Ideal for angled cuts and joints
- Jigsaw: Useful for curved or irregular cuts
- Table saw: Great for precise, repeatable cuts
Essential Measuring Tools
Measuring tools help you mark wood accurately before cutting. This reduces mistakes and waste.
- Tape measure: For general length measurements
- Combination square: Checks right angles and marks lines
- Marking gauge: Marks consistent lines parallel to edges
- Speed square: Helps with quick angle markings
- Pencil or marking knife: Makes clear, precise marks
Selecting Quality Blades
Good blades cut smoothly and last longer. Pick blades that fit your saw and wood type.
- Choose blades with more teeth for finer cuts
- Use carbide-tipped blades for durability
- Match blade size to your saw’s specifications
- Consider blade width for stability and control
- Keep blades sharp for best results

Credit: www.familyhandyman.com
Preparing The Wood
Cutting wood accurately is key for strong joinery. The right preparation makes a big difference. Always start with good wood handling practices.
In this guide, we focus on checking wood grain and moisture, marking cut lines, and clamping for stability. These steps help ensure precise and clean cuts.
Checking Wood Grain And Moisture
Wood grain affects how the wood cuts and how strong the joint will be. Always examine the grain direction before cutting. The cut should follow the grain to avoid splintering.
Moisture content changes wood size and shape. Wood with high moisture may shrink later, causing gaps in joints. Use a moisture meter to check the wood. Ideal moisture is between 6% and 8% for indoor joinery.
| Grain Type | Cutting Tip | Effect on Joint |
| Straight Grain | Cut along the grain | Strong and clean cut |
| Cross Grain | Cut carefully, may splinter | Weaker joint, needs sanding |
| Knots | Avoid cutting through knots | May cause cracks or weakness |
Marking Precise Cut Lines
Clear markings guide your saw and reduce errors. Use a sharp pencil or marking knife for fine lines. Avoid thick lines that hide the cut edge.
- Measure twice to ensure accuracy
- Mark all cut lines on the wood surface
- Use a square tool to make straight lines
- Label each piece to avoid confusion
Clamping For Stability
Clamping holds wood steady during cutting. This prevents movement and keeps the cut exact. Use clamps that fit your wood size.
- Place clamps near the cut line but not in the way of the saw
- Use enough clamps to prevent any wobble
- Check clamp pressure; too tight may damage wood
- Double-check wood position before cutting
Cutting Techniques
Cutting wood accurately is key to good joinery. Precise cuts help pieces fit well together.
Each saw type needs different skills to cut cleanly and safely. Learn how to use each tool right.
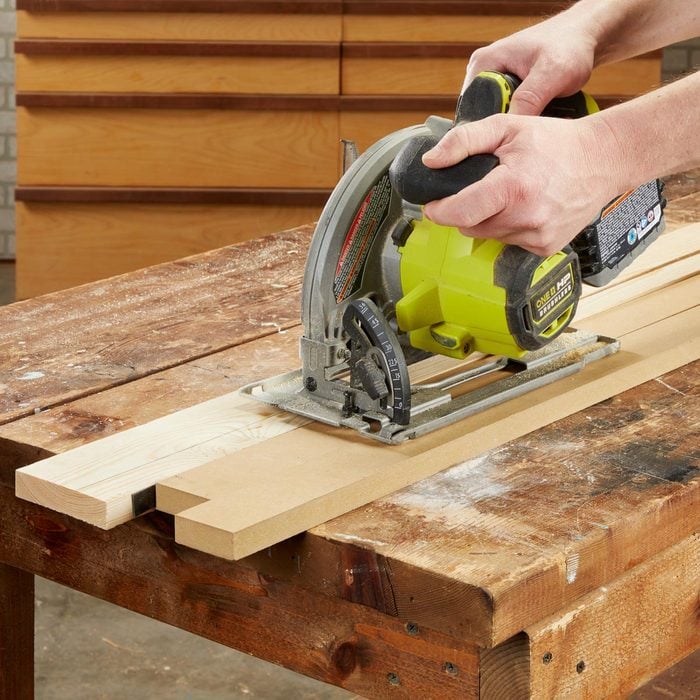
Using A Handsaw Effectively
Hold the handsaw firmly and keep your arm steady. Use long, smooth strokes to cut straight lines.
- Mark the cut line clearly with a pencil.
- Start the cut slowly to create a groove.
- Keep the saw blade at the right angle for the cut.
- Use your whole arm, not just your wrist, to saw.
- Check the cut often to stay on line.
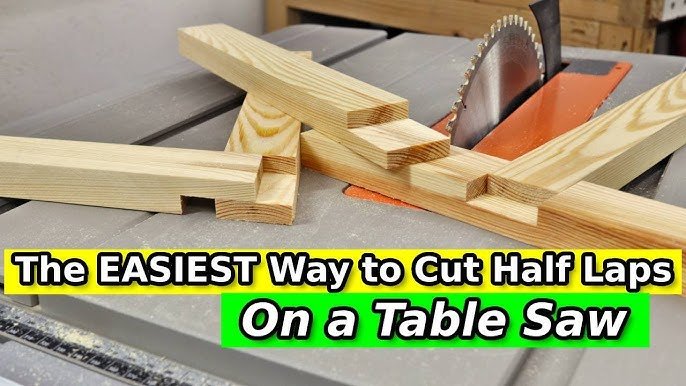
Mastering The Table Saw
Set the table saw blade to the correct height. Use a fence to guide the wood for straight cuts.
| Blade Height | Set so teeth stick 1/8 inch above wood |
| Fence Use | Keep wood tight to fence for straight cuts |
| Push Stick | Use to keep hands away from blade |
| Feed Rate | Feed wood steadily, do not force |
Employing A Miter Saw
Hold the wood firmly against the fence. Lower the blade slowly to avoid splintering the wood.
- Use clamps to keep wood from moving.
- Cut at the marked angle precisely.
- Let the blade stop before raising it back up.
- Wear eye protection to keep safe from dust.
Tips For Scroll Saw Cuts
Use a fine blade for detailed cuts. Guide the wood slowly and keep fingers clear of the blade.
- Drill entry holes for inside cuts.
- Use light pressure to avoid blade bending.
- Change blades often for clean cuts.
- Secure small pieces with tape or clamps.
Maintaining Accuracy
Cutting wood accurately is key for strong joinery. Even small mistakes can cause gaps or weak joints.
Keeping your cuts precise helps your project look better and hold together longer.
Aligning Guides And Fences
Set your guides and fences before cutting. They keep the saw or router steady along the line.
Check that fences are tight and straight. Loose fences can shift and spoil your cut.
- Use a square to check fence angles
- Clamp guides firmly to the workpiece
- Test cuts on scrap wood first
Avoiding Common Cutting Errors
Watch out for common mistakes like cutting off the line or making uneven cuts.
Use slow and steady motions. Rushing can cause the blade to drift or bind.
- Keep your eyes on the cutting line
- Hold the wood firmly while cutting
- Replace dull blades to avoid tear-out
Double-checking Measurements
Measure twice and cut once is a good rule. Double-check your marks before cutting.
Use a reliable tape measure or ruler. Mark the cut line clearly with a sharp pencil.
- Compare measurements on both ends of the wood
- Check your marking tools for accuracy
- Confirm angles with a protractor or square
Finishing Touches
Cutting wood accurately is only part of making strong joinery. The final steps help your project look clean and fit well. Paying attention to small details can improve your results a lot.
These finishing touches include smoothing edges, fitting joints carefully, and practicing cuts before the real work. Each step ensures your wood pieces come together perfectly.
Sanding Cut Edges
After cutting, sanding the edges removes rough spots and splinters. Smooth edges help joints fit tightly and give a neat look. Use fine-grit sandpaper and sand lightly along the cut.
- Start with medium-grit sandpaper to smooth rough cuts.
- Finish with fine-grit sandpaper for a clean edge.
- Sanding blocks help keep edges straight.
- Sand in the direction of the wood grain.
Fitting Joints Precisely
Joints must fit tightly for strength and appearance. Check each joint before gluing. Make small adjustments with a chisel or file if needed. Test the fit often during assembly.
| Tool | Use |
| Chisel | Trim tight spots carefully |
| File | Smooth and shape edges |
| Clamps | Hold pieces while testing fit |
| Square | Check angles for accuracy |
Using Test Cuts For Practice
Making test cuts on scrap wood helps you check your tools and technique. Practice the exact cut and joint before working on your project wood. This saves material and time.
Try these practice ideas:
- Cut the same joint shape on scrap pieces.
- Assemble the test pieces to check fit.
- Adjust your saw or chisel based on the test result.
Credit: www.familyhandyman.com
Safety Practices
Cutting wood accurately requires attention to safety. Using the right safety measures protects you from accidents. Always prepare before starting your joinery work.
Following safety practices helps you work confidently. It also keeps your workspace safe and organized.
Proper Protective Gear
Wearing protective gear is important when cutting wood. It reduces the risk of injury from sharp tools and flying debris.
- Use safety glasses to protect your eyes.
- Wear ear protection to guard against loud noises.
- Put on gloves to protect your hands from splinters.
- Wear a dust mask to avoid breathing sawdust.
- Use sturdy footwear to protect your feet.
Safe Tool Handling
Handle tools carefully to avoid accidents. Always check your tools before use and follow proper techniques.
| Tool | Safety Tip |
| Saws | Keep blades sharp and use guards |
| Chisels | Hold firmly and cut away from your body |
| Clamps | Secure wood tightly before cutting |
| Measuring Tools | Use accurately to avoid mistakes |
Work Area Organization
A clean and organized workspace lowers risks. Keep your area free from clutter and distractions.
- Clear the floor of scrap wood and tools.
- Arrange tools within easy reach.
- Mark cutting lines clearly on the wood.
- Ensure good lighting in your workspace.
- Keep a first aid kit nearby.
Frequently Asked Questions
How Do I Ensure Precise Measurements For Wood Cutting?
Use a reliable measuring tape and mark clearly with a sharp pencil. Double-check measurements before cutting to avoid mistakes. Proper measuring tools and careful marking are essential for accurate joinery cuts.
What Tools Are Best For Accurate Wood Cutting?
A sharp hand saw, miter saw, or table saw with guides ensures clean cuts. Use clamps to hold wood steady and improve precision during cutting.
How Can I Maintain Straight Cuts In Joinery?
Use a straight edge or guide to direct your saw. Secure the wood firmly to prevent movement and check alignment frequently for consistent cuts.
Why Is Sanding Important After Cutting Wood?
Sanding smooths rough edges and ensures joints fit tightly. It improves the wood’s surface for better glue adhesion and a professional finish.
Conclusion
Cutting wood accurately is crucial for joinery success. Use precise measurements. Ensure your tools are sharp and well-maintained. Practice makes perfect, improving your skills over time. Remember to take your time. Rushing leads to errors. Follow the steps outlined for better results.
Patience is key. Accurate cuts lead to strong and beautiful joints. This enhances the overall quality of your work. Keep learning and refining your techniques. With dedication, you can achieve great results in your joinery projects. Enjoy the process and be proud of your craftsmanship.