Are you ready to tackle that plumbing project but find yourself hesitating at the thought of installing a pipe clamp? You’re not alone.
Many people feel daunted by the idea, but here’s the good news: installing a pipe clamp is simpler than you think. In this guide, you’ll discover straightforward steps and insider tips to make the process smooth and efficient. Imagine the satisfaction of completing the task with ease and precision, knowing your pipes are secure and well-supported.
Stay with us, and you’ll gain the confidence and know-how to install a pipe clamp like a pro. Let’s dive in, so you can tick this task off your to-do list without a hitch!
Choosing The Right Pipe Clamp
Choosing the right pipe clamp is important for a secure fit. It helps to hold pipes firmly in place and prevents damage.
Many factors affect your choice. These include the type, material, size, and load capacity of the clamp.
Types Of Pipe Clamps
Pipe clamps come in different types. Each type works best for certain pipe shapes and uses.
- U-Bolt Clamps: Shaped like a U, good for round pipes.
- Split Clamps: Two-piece design for easy installation.
- Cushioned Clamps: Have a rubber layer to reduce vibration.
- Swivel Clamps: Allow some pipe movement without damage.
- Pipe Hangers: Suspend pipes from ceilings or walls.
Materials And Sizes
Pipe clamps come in many materials. Choose one that fits the pipe and environment.
Sizes must match the pipe diameter. Too small or large clamps can cause problems.
- Materials: Steel, stainless steel, plastic, and brass.
- Steel clamps are strong and common.
- Stainless steel resists rust and is good for outdoors.
- Plastic clamps suit light pipes and indoor use.
- Sizes range from small (1/2 inch) to large (several inches).
Load Capacity Considerations
Load capacity is the clamp’s strength to hold weight. Choose clamps that can handle the pipe’s load safely.
Check the weight of the pipe and contents. Always pick a clamp with higher load capacity than needed.
- Heavy pipes need clamps with high load ratings.
- Light pipes can use clamps with lower capacity.
- Consider pressure and vibrations on the pipe.
- Safety margins prevent clamp failure over time.
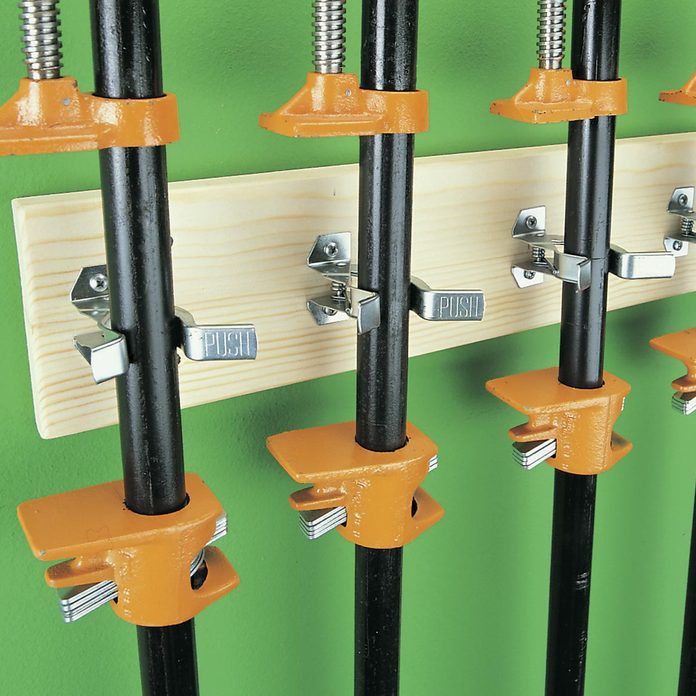
Credit: www.familyhandyman.com
Gathering Necessary Tools
Installing a pipe clamp is easier when you have the right tools ready. This guide covers the essential tools and safety gear you need.
Gathering all supplies before starting helps the job go smoothly without interruptions.
Essential Hand Tools
These hand tools help you fit and tighten the pipe clamp accurately. Make sure each tool is in good condition before use.
- Adjustable wrench for tightening bolts
- Screwdriver set for screws on the clamp
- Measuring tape to check pipe dimensions
- Pipe cutter or hacksaw for cutting pipes
- Level to ensure the clamp is straight
Safety Equipment
Safety gear protects you while working with tools and pipes. Always use the correct equipment to avoid injuries.
| Equipment | Purpose |
| Safety goggles | Protect eyes from debris |
| Work gloves | Protect hands from cuts and scrapes |
| Ear protection | Protect ears from loud noises |
| Dust mask | Prevent inhalation of dust or particles |
Additional Supplies
Some extra supplies help complete the installation and keep your workspace clean.
- Pipe clamps of the right size
- Lubricant or pipe thread sealant
- Rags or cloths for cleaning
- Bucket to catch water or debris
Preparing The Installation Area
Installing a pipe clamp starts with preparing the area well. This helps ensure a secure and proper fit.
Taking time to prepare the space makes the installation easier and safer.
Measuring And Marking
Measure the pipe where the clamp will go. Mark the exact spots for the clamp holes.
Use a tape measure and pencil for accurate markings. This avoids mistakes during drilling.
- Measure the pipe diameter and length
- Mark clamp positions clearly on the pipe
- Double-check measurements before drilling
Surface Cleaning
Clean the pipe and surrounding area to remove dirt and grease. This helps the clamp hold firmly.
Use a cloth or brush with mild cleaner. Wipe the surface dry before installing the clamp.
- Remove dust and loose particles
- Clean off any oil or grease
- Dry the area completely
Checking Pipe Alignment
Make sure the pipe is straight and properly aligned. Misalignment can cause stress on the clamp.
Adjust the pipe position if needed. Use a level to check for straightness.
- Check pipe is level and straight
- Adjust supports if pipe is off-center
- Confirm alignment before fixing the clamp

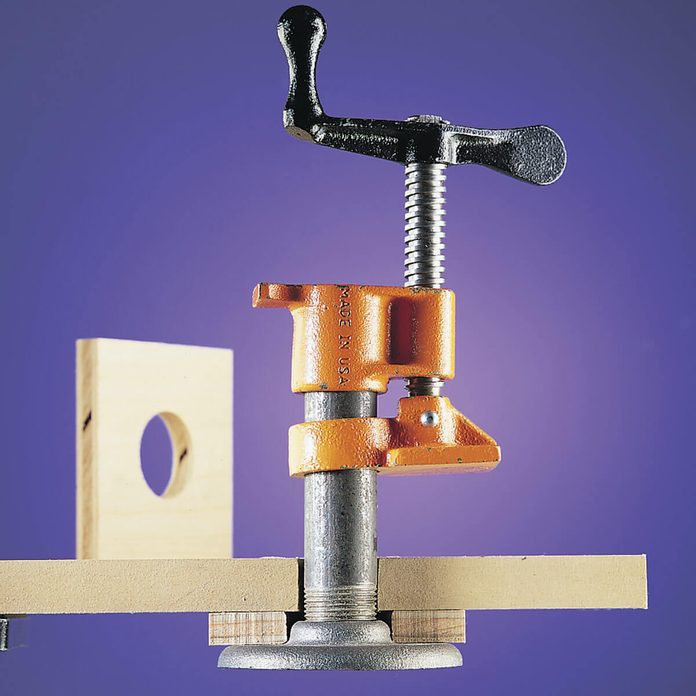
Credit: pipefittingandvalve.com
Step-by-step Installation Process
Installing a pipe clamp correctly ensures a secure and stable hold on your pipe. Follow these clear steps to install the clamp safely.
Each part of the process is important. Take your time and check each step carefully.
Positioning The Clamp
Place the pipe clamp at the exact spot where the pipe needs support. Make sure the clamp fits around the pipe without gaps.
- Clean the pipe surface to remove dirt and grease.
- Align the clamp with the pipe’s length.
- Check that the clamp does not block any connections or valves.
- Position the clamp so it will bear the pipe’s weight evenly.
Securing The Clamp
Attach the clamp firmly to the pipe and the mounting surface. Use the correct fasteners for the material.
| Surface Type | Recommended Fastener | Notes |
|---|---|---|
| Wood | Wood screws | Use pilot holes to avoid splitting |
| Concrete | Expansion anchors | Drill holes with a hammer drill |
| Metal | Machine screws with nuts | Use washers to distribute pressure |
Tightening Techniques
Tighten the clamp evenly to avoid damage to the pipe or clamp. Use tools that fit the fasteners well.
- Start tightening screws by hand to align properly.
- Use a screwdriver or wrench to tighten slowly and evenly.
- Check that the pipe does not move after tightening.
- Avoid over-tightening, which can crush the pipe.
Testing And Adjustments
After installing a pipe clamp, testing and adjustments are important. These steps help ensure the clamp works well and keeps the pipe secure.
Proper testing prevents leaks and damage. Adjustments make sure the clamp fits tightly and stays stable over time.
Ensuring Stability
Check that the pipe clamp holds the pipe firmly without movement. The clamp should not slide or wobble after installation.
Test stability by gently pushing the pipe in different directions. If the pipe moves, the clamp needs tightening or repositioning.
- Make sure the clamp is aligned with the pipe
- Confirm the clamp screws or bolts are tightened
- Check for any gaps between clamp and pipe
Making Necessary Adjustments
Adjust the clamp if it is loose or too tight. A loose clamp may cause leaks or pipe movement. A tight clamp may damage the pipe.
Loosen the clamp slightly to reposition it. Then tighten the screws or bolts evenly to avoid pressure points on the pipe.
- Use a wrench or screwdriver to tighten bolts carefully
- Tighten bolts in a crisscross pattern for even pressure
- Do not over-tighten; stop when the pipe feels secure
Routine Inspection Tips
Regularly inspect pipe clamps to keep them in good condition. Check for signs of rust, wear, or looseness.
Schedule inspections at least once every few months. Early detection of problems helps avoid leaks and damage.
- Look for corrosion or rust on metal clamps
- Test clamp tightness by gently moving the pipe
- Replace worn or damaged clamps immediately
Credit: www.familyhandyman.com
Common Mistakes To Avoid
Installing a pipe clamp seems easy, but mistakes can cause damage. Avoid these common errors to ensure a secure and safe fit.
Knowing what to watch out for helps protect your pipes and saves time and money on repairs.
Over-tightening
Too much force can crack or deform the pipe. Tighten clamps just enough to hold the pipe firmly.
Over-tightening may damage the pipe surface and cause leaks or breaks later.
- Use a torque wrench if possible
- Check manufacturer’s recommended tightness
- Tighten screws slowly and evenly
Ignoring Pipe Movement
Pipes expand and contract with temperature changes. Not allowing movement can cause stress and damage.
Make sure clamps allow some pipe movement to avoid cracks or noise.
- Use cushioned or flexible clamps
- Leave small gaps for pipe expansion
- Check pipe type and temperature range
Incorrect Clamp Selection
Choosing the wrong clamp size or type can lead to poor support and damage. Match the clamp to your pipe and environment.
Clamps differ by material, size, and design. Use clamps rated for the pipe’s diameter and weight.
- Measure pipe diameter accurately
- Pick clamps made for the pipe material
- Select corrosion-resistant clamps for wet areas
Maintenance For Long-term Support
Proper maintenance helps your pipe clamp last longer. It keeps the clamp working safely and well.
Regular care prevents problems and saves time fixing big issues later.
Regular Checks
Check your pipe clamp often to spot damage early. Look for cracks, rust, or loose parts.
Test the clamp’s grip to make sure it holds pipes tightly and safely.
- Inspect clamp body for cracks or bending
- Check bolts and screws for tightness
- Look for rust or corrosion on metal parts
- Test the clamping pressure regularly
Replacing Worn Components
Replace parts that show wear to keep the clamp safe. Worn parts can cause failure.
Common parts to replace include bolts, nuts, washers, and rubber pads.
- Swap out stripped or rusted bolts
- Replace worn rubber pads for better grip
- Change damaged washers to avoid slipping
- Use parts made for your clamp model
Lubrication Tips
Keep moving parts smooth with regular lubrication. This stops rust and reduces wear.
Use light machine oil or grease on screws and hinges. Clean old grease before adding new.
- Wipe off dirt and old grease first
- Apply oil on screw threads and hinges
- Do not over-lubricate; use small amounts
- Lubricate monthly for best results
Frequently Asked Questions
What Tools Are Needed To Install A Pipe Clamp?
You need a pipe clamp, screwdriver, drill, measuring tape, and screws. These tools ensure secure and accurate installation quickly and safely.
How Do You Position A Pipe Clamp Correctly?
Position the clamp around the pipe, aligning it with the mounting surface. Ensure it’s centered and level before tightening for stability.
Can Pipe Clamps Support Heavy Pipes Safely?
Yes, pipe clamps can support heavy pipes if properly installed. Choose clamps rated for pipe size and weight for maximum safety.
How Tight Should A Pipe Clamp Be?
Tighten the clamp until it holds the pipe firmly without crushing it. Over-tightening can damage the pipe or reduce clamp effectiveness.
Conclusion
Installing a pipe clamp is simple with the right steps. Choose the correct clamp size for your pipe. Secure it tightly to avoid leaks or movement. Double-check all connections for safety and durability. Taking your time ensures a strong and lasting hold.
This small effort saves future repairs and problems. Now you can confidently handle pipe clamp installation yourself.