If your toilet is leaking or not filling properly, the problem might be with the valve line. Knowing how to install a toilet valve line yourself can save you time, money, and the hassle of waiting for a plumber.
Imagine fixing this common issue quickly and confidently—no special tools or skills needed. In this guide, you’ll learn simple, step-by-step instructions that anyone can follow. By the end, your toilet will work smoothly again, and you’ll gain a handy skill for future fixes.
Ready to take control of your home plumbing? Let’s get started.

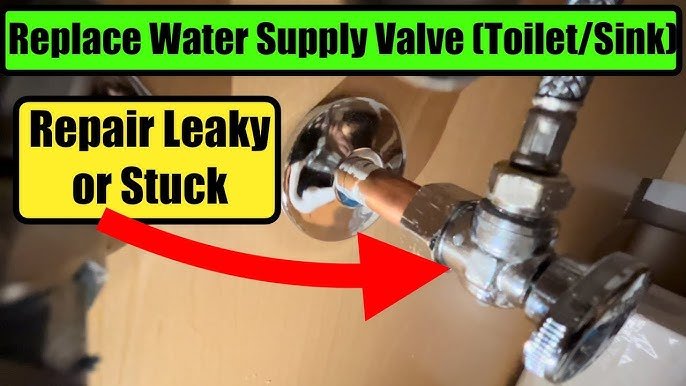
Credit: www.youtube.com
Tools And Materials Needed
Installing a toilet valve line requires some basic tools and materials. Having the right items ready makes the task easier and faster.
Below, you will find essential tools and guidance on choosing the right valve line for your toilet installation project.
Essential Tools
Gathering the proper tools helps you complete the job without interruptions. These tools are common and easy to find.
- Adjustable wrench for tightening connections
- Slip-joint pliers for gripping and turning
- Teflon tape to seal threaded joints
- Bucket to catch water drips
- Towel or rag for cleanup
- Utility knife to trim tubing if needed
- Flashlight for working in low light areas
Selecting The Right Valve Line
The valve line connects your toilet to the water supply. Choosing the right size and type is important for a secure fit and leak-free operation.
| Type | Description | Common Lengths | Material |
| Flexible braided stainless steel | Durable and easy to bend | 12″, 20″, 30″ | Stainless steel with rubber inner tube |
| Plastic tubing | Lightweight and affordable | 12″, 18″, 24″ | Reinforced plastic |
| Copper tubing | Strong but less flexible | 18″, 24″, 30″ | Copper |
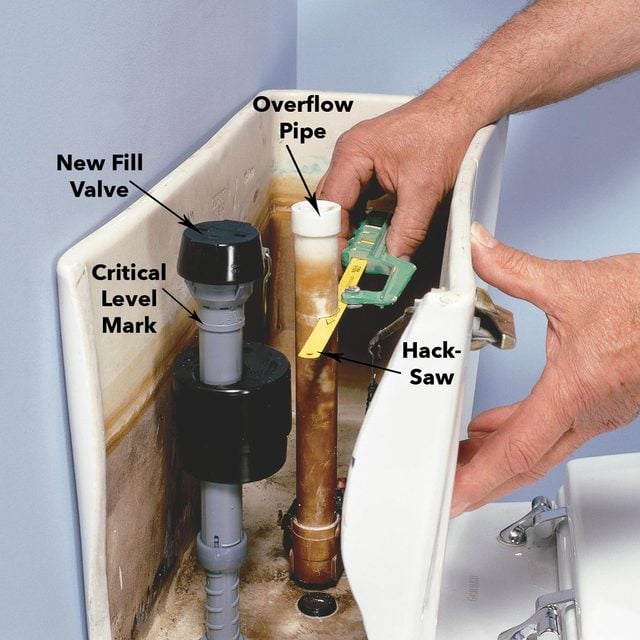
Credit: www.familyhandyman.com
Preparing For Installation
Installing a toilet valve line needs careful preparation. This ensures a smooth and safe process.
Before starting, you must shut off the water and drain the tank. These steps prevent leaks and water damage.
Shutting Off Water Supply
Locate the water shutoff valve near the toilet base. Turn it clockwise to stop water flow. If no local valve exists, turn off the main water supply to your home.
- Find the shutoff valve behind the toilet.
- Turn the valve handle clockwise until it stops.
- Check if water has stopped by flushing the toilet.
- If water still flows, shut off the main valve.
Draining The Tank
After stopping the water, drain the toilet tank. This reduces water mess during installation. Flush the toilet once and hold the handle down to empty the tank.
| Action | Purpose |
| Flush the toilet | Empty most of the water |
| Hold flush handle | Drain remaining water |
| Use sponge or towel | Remove leftover water if needed |
Removing The Old Valve Line
Removing the old valve line is the first step to install a new one. It helps avoid leaks and ensures a proper fit.
Take your time and follow each part carefully. Safety matters when working with water connections.
Disconnecting The Supply Line
Turn off the water supply before disconnecting the supply line. This stops water from flowing while you work.
Use a wrench to loosen the nut connecting the supply line to the valve. Turn it counterclockwise until it is free.
- Make sure to have a towel ready for any water spills
- Hold the valve steady to avoid damage
- Check if the supply line is flexible or rigid
Inspecting The Connection Points
Look closely at the valve and supply line connection points. Check for rust, cracks, or worn-out washers.
Damaged parts may cause leaks or poor water flow. Replace any parts that look old or broken.
- Check the threads on both valve and supply line
- Look for signs of corrosion or mineral buildup
- Ensure washers are intact and not cracked
Installing The New Valve Line
Installing a new valve line ensures your toilet works properly. It controls water flow from the supply to the tank.
This guide covers attaching the valve line to the water supply and connecting it to the toilet tank.
Attaching To The Water Supply
First, turn off the main water supply. Then, drain the line by flushing the toilet. This stops water flow and prevents leaks.
- Disconnect the old valve line from the water supply pipe.
- Clean the threads on the supply pipe to remove dirt and old tape.
- Wrap new plumber’s tape around the threads to ensure a tight seal.
- Attach the new valve line by hand and tighten it with a wrench.
- Check that the valve is fully closed before moving on.
Connecting To The Toilet Tank
Next, connect the valve line to the toilet tank inlet. Make sure the connection is secure but do not overtighten.
| Connection Part | Tip |
|---|---|
| Valve Line Nut | Hand tighten first, then use a wrench for a quarter turn |
| Tank Inlet Thread | Check for old tape or debris and clean before attaching |
| Water Flow Valve | Keep closed until all connections are done |
Testing For Leaks
After installing a toilet valve line, it is important to test for leaks. This ensures your plumbing works properly and prevents water damage.
Testing involves turning on the water and carefully checking all connections for any signs of drips or moisture.
Turning On The Water
Slowly open the main water valve to allow water to flow into the toilet valve line. Watch the valve line closely as water fills the pipes.
- Turn the valve handle counterclockwise to open it.
- Listen for any hissing or unusual sounds.
- Check if water pressure feels normal.
- Stop if you notice any leaks and close the valve.
Checking All Connections
Look carefully at every connection point along the valve line. Tighten any loose fittings gently with a wrench.
| Connection Point | What to Look For | Action If Leaking |
|---|---|---|
| Valve to water supply | Water drops or wetness | Tighten nut or replace washer |
| Valve to toilet line | Drips or moisture around joint | Check alignment and tighten |
| Compression fittings | Signs of corrosion or leaks | Replace fitting if damaged |
Tips For Maintenance
Keeping your toilet valve line in good shape helps prevent leaks and water waste.
Regular care makes sure your toilet works well and lasts longer.
Regular Inspections
Check the valve line often for cracks, bends, or signs of wear.
- Look for water leaks around the connections.
- Feel the valve line to see if it is warm or wet.
- Make sure the valve line is tightly connected at both ends.
- Check if the valve line is twisted or bent sharply.
- Clean any dirt or buildup on the valve line to avoid damage.
When To Replace The Valve Line
Replace the valve line if you notice leaks or if it looks worn out.
| Sign | Action |
| Cracks or splits | Replace immediately |
| Water leaks | Replace and check fittings |
| Corrosion or rust | Replace to avoid failure |
| More than 5 years old | Consider replacement as a precaution |
| Frequent flushing issues | Inspect valve line and replace if faulty |

Credit: www.amazon.ca
Frequently Asked Questions
What Tools Are Needed To Install A Toilet Valve Line?
You need an adjustable wrench, Teflon tape, a tubing cutter, and a bucket. These tools help ensure a secure and leak-free installation.
How Long Does It Take To Install A Toilet Valve Line?
Installing a toilet valve line typically takes 30 to 60 minutes. Time varies based on experience and valve complexity.
Can I Install A Toilet Valve Line Myself?
Yes, with basic plumbing skills and proper tools, you can install it yourself. Follow instructions carefully to avoid leaks.
How Do I Prevent Leaks When Installing A Valve Line?
Use Teflon tape on threaded connections and tighten fittings properly. Check for leaks by turning on water slowly.
Conclusion
Installing a toilet valve line is simple with the right steps. Start by gathering all necessary tools. Carefully follow the instructions for a successful installation. Ensure a tight fit to prevent leaks. Check your work thoroughly. A properly installed valve line keeps your toilet running smoothly.
Regular maintenance extends its lifespan. Save money by doing it yourself. With practice, it gets easier. Enjoy the satisfaction of a job well done. No need to call a plumber. You’ve got this!
