Are you ready to upgrade your bathroom but worried about the plumbing? Installing bathroom plumbing fixtures might seem tricky, but with the right steps, you can do it yourself and save time and money.
Imagine turning your bathroom into a fresh, functional space without waiting for a plumber. In this guide, you’ll learn simple, clear instructions to install sinks, faucets, toilets, and showers with confidence. Keep reading, and by the end, you’ll have the skills to handle your bathroom project like a pro.

Credit: www.familyhandyman.com
Planning Your Bathroom Plumbing
Planning bathroom plumbing is important before installing fixtures. It helps avoid mistakes and extra work.
You need to think about the types of fixtures, tools needed, and local rules for plumbing.
Assessing Fixture Types
Choose the right fixtures for your bathroom size and style. Common fixtures include sinks, toilets, and showers.
Each fixture has different plumbing needs and sizes. Knowing this helps you plan the layout correctly.
- Sink: pedestal, wall-mounted, or vanity
- Toilet: standard or low-flow models
- Shower: walk-in, stall, or tub-shower combo
- Bathtub: freestanding or built-in
Gathering Necessary Tools
Get all tools before starting work. This saves time and keeps the job smooth.
Basic tools include wrenches, pipe cutters, and sealant materials. Each tool helps with different plumbing tasks.
- Adjustable wrench
- Pipe wrench
- Pipe cutter or hacksaw
- Plumber’s tape (Teflon tape)
- Pipe sealant or plumber’s putty
- Level and measuring tape
- Bucket and rags
Checking Local Plumbing Codes
Local codes set rules for safe and legal plumbing work. Check them before you start.
Codes cover pipe sizes, venting, and fixture placement. Following them avoids fines and rework.
- Contact local building department
- Request plumbing code guidelines
- Verify permits needed for work
- Follow rules for pipe materials and sizes
- Ensure proper venting and drainage
Preparing The Installation Area
Before installing new bathroom plumbing fixtures, prepare the area carefully. Proper preparation makes the process easier and safer.
Check the space and tools you will need. Clear the area to avoid any damage or accidents.
Shutting Off Water Supply
Turn off the main water supply to stop water flow. This prevents leaks and water damage during installation.
- Locate the main water valve for your home.
- Turn the valve clockwise to close it.
- Open a faucet to drain remaining water in pipes.
- Check that water flow has completely stopped.
Removing Old Fixtures
Remove old fixtures carefully to avoid damage to pipes and walls. Use the right tools for each fixture.
- Disconnect water supply lines from the fixture.
- Unscrew mounting bolts or nuts holding the fixture.
- Gently remove the fixture from the wall or floor.
- Clean the area where the fixture was installed.
Cleaning And Inspecting Pipes
After removing fixtures, clean and inspect pipes. This step helps find leaks or damage early.
| Task | What to Check | Tools Needed |
|---|---|---|
| Clean Pipes | Remove dirt, debris, and old sealant | Brush, cloth, mild cleaner |
| Inspect for Leaks | Look for cracks or rust | Flashlight, magnifier |
| Check Pipe Connections | Ensure tight and secure joints | Wrench, pliers |
| Test Water Flow | Turn water on briefly to check flow | None (use faucet) |
Installing The Sink
Installing a bathroom sink is a common plumbing task. It involves attaching the sink, connecting water lines, and fitting the drain.
Follow these steps carefully to ensure your sink works properly and does not leak.
Mounting The Sink
First, place the sink on the countertop or wall bracket. Make sure it fits well and is level.
Secure the sink using mounting clips or brackets provided by the manufacturer. Tighten all screws evenly.
- Check for a stable fit before tightening
- Use a level to keep the sink straight
- Do not overtighten to avoid damage
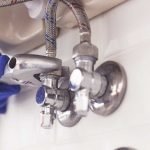
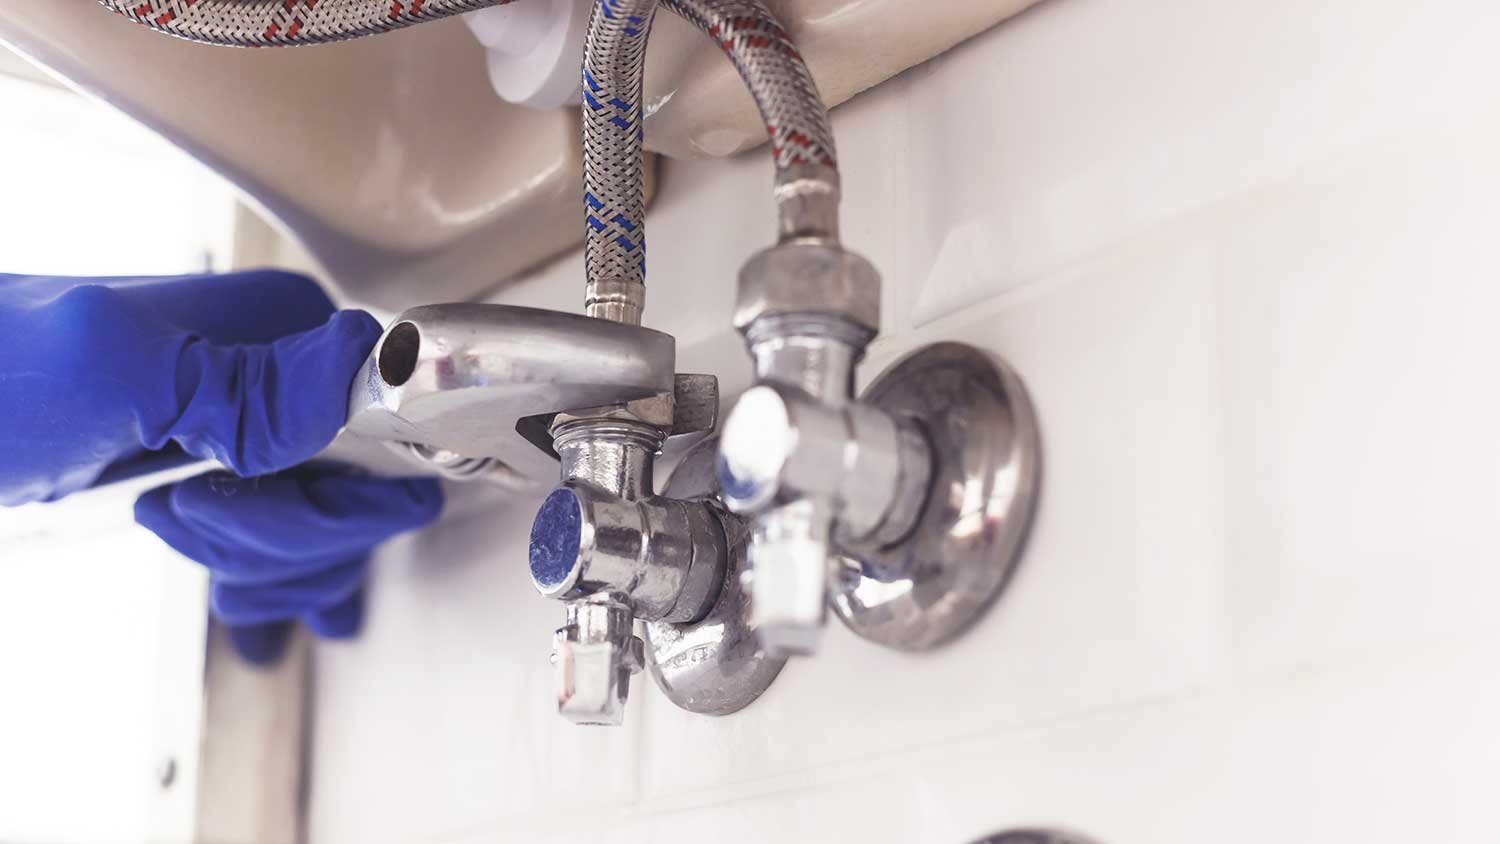
Connecting Water Supply Lines
Attach the hot and cold water supply lines to the faucet. Use flexible supply tubes for easier installation.
Make sure to wrap threads with plumber’s tape to prevent leaks. Tighten connections with a wrench but avoid over-tightening.
- Turn off the main water supply before starting
- Connect hot water line to the left valve
- Connect cold water line to the right valve
- Check for leaks after turning water back on
Attaching The Drain Assembly
Install the drain assembly under the sink basin. Apply plumber’s putty around the drain flange to seal it.
Connect the drain pipe and P-trap to the drain tailpiece. Tighten slip nuts by hand, then give a small turn with a wrench.
- Clean all parts before assembly
- Use plumber’s putty to prevent leaks
- Ensure the P-trap is aligned properly
- Test drainage by running water
Setting Up The Toilet
Installing a toilet is an important part of bathroom plumbing. You need to place the parts carefully. This guide helps you set up the toilet step-by-step.
Follow these instructions to position the flange, secure the bowl, and connect the water supply.
Positioning The Toilet Flange
The toilet flange connects the toilet to the drain pipe. It must sit flat on the floor. Check that the flange is not cracked or loose.
- Clean the area around the drain pipe.
- Place the flange over the pipe so the slots line up.
- Secure the flange to the floor with screws.
- Make sure the flange is level and stable.
Securing The Toilet Bowl
After positioning the flange, you can mount the toilet bowl. Use a wax ring to create a seal. Tighten the bolts evenly to avoid cracks.
| Task | Details |
|---|---|
| Place wax ring | Put it on the flange to seal the connection. |
| Lower toilet bowl | Align holes with flange bolts and press down. |
| Tighten bolts | Use a wrench to secure bolts evenly on both sides. |
| Check stability | Make sure the toilet does not rock or move. |
Connecting The Water Supply
Connect the water supply line to the toilet tank. Turn off the main water valve before starting. Use a flexible hose for easy connection.
- Attach the supply line to the fill valve on the tank.
- Hand-tighten the connection, then use pliers for a snug fit.
- Turn on the main water valve slowly.
- Check for leaks around the connection points.
- Flush the toilet to test water flow.
Fitting The Shower Or Bathtub
Installing bathroom plumbing fixtures requires careful steps. The shower or bathtub must be fitted correctly for good water flow and no leaks.
This guide covers installing the shower valve, attaching the showerhead and faucet, and sealing joints to test for leaks.
Installing Shower Valve
Begin by turning off the main water supply. Remove old valves if needed. Position the new shower valve between hot and cold water lines.
- Secure the valve to the wall framing using screws.
- Connect the hot water pipe to the valve’s hot inlet.
- Connect the cold water pipe to the valve’s cold inlet.
- Attach the outlet pipe leading to the showerhead or tub spout.
- Use plumber’s tape on threaded connections to avoid leaks.
Attaching Showerhead And Faucet
After the valve is installed, attach the showerhead and faucet. Wrap plumber’s tape around the threads of the shower arm.
- Screw the showerhead onto the shower arm by hand.
- Tighten it gently with a wrench but avoid over-tightening.
- Attach the bathtub faucet to the water outlet pipe.
- Make sure all parts are aligned and secure.
Sealing Joints And Testing For Leaks
Seal all joints with waterproof plumber’s putty or silicone sealant. This prevents water from leaking behind walls.
| Task | How to Do It | Tools Needed |
|---|---|---|
| Seal Joints | Apply sealant evenly around pipe connections and fixtures | Sealant, putty knife |
| Test for Leaks | Turn on water slowly and watch all joints for drips | Wrench, flashlight |
| Fix Leaks | Tighten connections or reapply sealant where needed | Plumber’s tape, wrench |

Credit: www.familyhandyman.com
Final Checks And Maintenance Tips
After installing bathroom plumbing fixtures, it is important to do final checks. These checks ensure everything works well and prevents problems later.
Regular maintenance keeps fixtures in good shape. It helps avoid leaks and saves money on repairs.
Testing All Fixtures
Test each fixture to make sure it works properly. Turn on taps, flush toilets, and check drains for leaks.
- Check water flow and pressure
- Look for drips or leaks under sinks
- Flush toilets to ensure proper operation
- Inspect showerheads for even water spray
Fixing Common Issues
Fix small problems quickly to stop them from getting worse. Tighten loose fittings and replace worn washers.
- Use a wrench to tighten leaking connections
- Replace damaged seals or washers
- Clear clogged drains with a plunger or snake
- Adjust water pressure if it is too low or high
Routine Maintenance Advice
Perform regular maintenance to keep fixtures working well. Clean parts and check for damage every few months.
- Clean aerators and showerheads to remove buildup
- Check pipes for signs of corrosion or leaks
- Test shut-off valves to make sure they work
- Replace worn or damaged parts promptly

Credit: www.victorianplumbing.co.uk
Frequently Asked Questions
What Tools Are Needed For Installing Bathroom Plumbing Fixtures?
You need a wrench, plumber’s tape, pipe cutter, screwdriver, and sealant. These tools help ensure tight connections and prevent leaks during installation.
How Do I Prepare Plumbing Before Fixture Installation?
Turn off the water supply, drain pipes, and clean connections. Proper preparation prevents water damage and ensures smooth fixture fitting.
Can I Install Bathroom Fixtures Without A Plumber?
Yes, with basic plumbing knowledge and tools, you can install fixtures. Follow instructions carefully to avoid leaks and ensure proper function.
How To Avoid Leaks When Installing Bathroom Fixtures?
Use plumber’s tape on threaded connections and tighten fittings properly. Test for leaks by turning on water and inspecting all joints thoroughly.
Conclusion
Installing bathroom plumbing fixtures can seem tough, but it’s doable. Follow each step carefully to avoid mistakes. Use the right tools and check for leaks often. Take your time and stay patient throughout the process. Small fixes now can save big problems later.
Enjoy the satisfaction of a job well done. Your bathroom will work smoothly and look great. Keep these tips handy for future repairs. Simple steps lead to lasting results. You’ve got this!