Are you ready to tackle your underground plumbing project but don’t know where to start? Installing underground plumbing can seem tricky, but with the right steps, you can do it yourself and save time and money.
This guide will walk you through everything you need to know, from digging trenches to connecting pipes safely. By the end, you’ll feel confident handling your plumbing needs underground, avoiding costly mistakes, and ensuring your system runs smoothly for years.
Let’s dive in and get your plumbing set up the right way!

Credit: goproplumbingrepair.com
Planning Your Underground Plumbing
Planning is key before installing underground plumbing. It helps avoid problems and saves time.
Good planning includes checking the site, choosing materials, and drawing a clear layout map.
Assessing Site Conditions
Start by studying the ground where you will install pipes. Look at soil type and moisture levels.
Check for rocks, roots, and slopes. These affect how easy it is to dig and place pipes.
- Test soil for hardness and drainage
- Identify underground obstacles
- Note any nearby water sources or utilities
- Observe the land slope for proper water flow
Selecting Materials
Pick pipes and fittings based on your site conditions and budget. Pipes must resist corrosion and pressure.
| Material | Best Use | Durability |
| PVC | Drainage and waste lines | High |
| PEX | Water supply lines | Medium |
| Copper | Water supply, heat resistant | Very high |
| Cast Iron | Drainage, strong and long-lasting | Very high |
Creating A Layout Map
Draw a clear map showing where pipes will run underground. Include all fixtures and connections.
Use this checklist to create your map:
- Mark the house and outdoor plumbing points
- Draw pipe routes avoiding obstacles
- Show pipe sizes and types
- Indicate slope directions for drainage
- Note the location of shut-off valves
Gathering Tools And Supplies
Installing underground plumbing needs the right tools and supplies. Collect everything before you start to make the job easier and safer.
Good preparation helps you avoid delays and mistakes during the installation process.
Essential Plumbing Tools
You need special tools to work on underground pipes. These tools help you cut, join, and test pipes correctly.
- Pipe cutter for clean, straight cuts
- Shovel or trenching tool for digging
- Pipe wrench for tightening fittings
- Measuring tape to measure pipe lengths
- Level to ensure pipes slope correctly
- Deburring tool to smooth pipe edges
- Pipe glue or solvent for joining pipes
Safety Equipment
Safety is important when working underground. Use proper gear to protect yourself from injury and hazards.
- Work gloves to protect your hands
- Safety goggles to guard your eyes
- Hard hat to protect your head
- Steel-toed boots for foot protection
- Hearing protection if using loud tools
- High-visibility vest to stay seen
Choosing Pipe Types
Pick the right pipe for underground plumbing. Pipes vary by material, size, and durability.
Common pipe types include PVC, ABS, and copper. Each works best for different plumbing needs.
- PVC pipes:Lightweight and easy to cut, good for water lines
- ABS pipes:Strong and impact-resistant, often used for drain lines
- Copper pipes:Durable and long-lasting, but harder to install
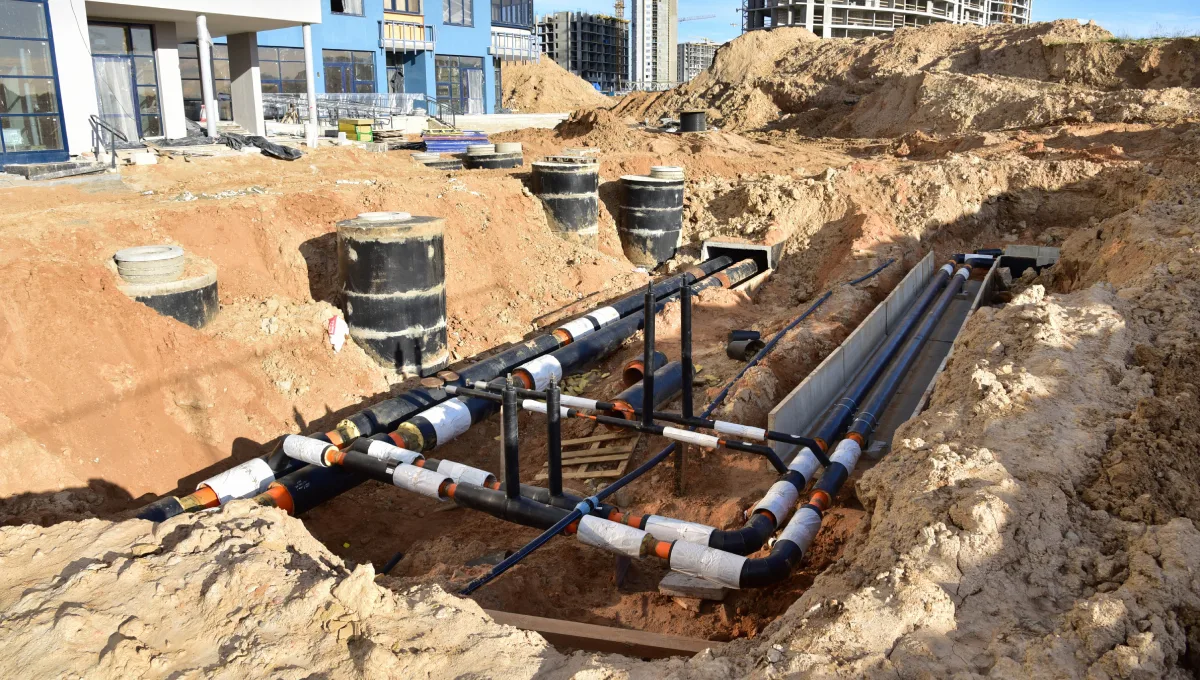
Preparing The Trench
Installing underground plumbing starts with careful trench preparation. A well-prepared trench ensures pipes fit correctly and work properly.
This stage includes marking where to dig, choosing digging methods, and setting the right depth and slope for pipes.
Marking The Path
Mark the exact route for the plumbing line before digging. Use spray paint, stakes, or string to outline the trench.
- Check local utility lines to avoid damage.
- Measure the distance and direction carefully.
- Mark corners and bends clearly.
- Keep the path as straight as possible for easy pipe installation.
Digging Techniques
Choose the right digging tools based on soil type and trench size. Shovels work for small trenches, while machinery suits larger jobs.
Follow these tips for digging:
- Start digging along the marked path.
- Remove soil evenly to keep trench walls stable.
- Clear away rocks and debris that could damage pipes.
- Check trench width to fit pipe size plus extra space for bedding.
Ensuring Proper Depth And Slope
Set trench depth to protect pipes from freezing and surface weight. The slope helps water flow smoothly through the pipes.
| Factor | Recommended Range |
| Trench Depth | 18 to 24 inches below frost line |
| Slope | 1/4 inch drop per foot of pipe |
| Trench Width | 6 to 12 inches wider than pipe diameter |
Use a level or laser tool to check slope regularly. Adjust depth if you find uneven spots to keep flow consistent.
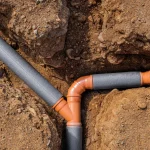
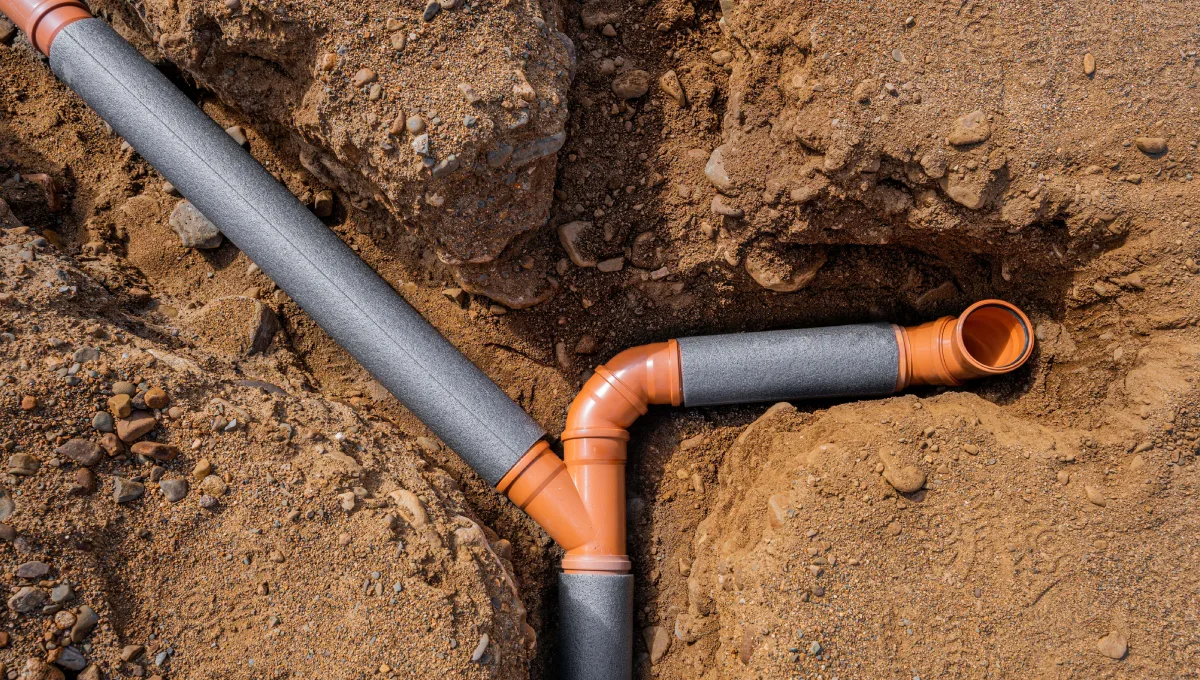
Laying Pipes And Fittings
Installing underground plumbing starts with laying pipes and fittings correctly. Proper installation prevents leaks and blockages. Follow the right steps to ensure a solid plumbing system under your home.
This guide covers cutting and joining pipes, installing cleanouts and vents, and securing pipes in place. Each part is important for a reliable underground plumbing setup.
Cutting And Joining Pipes
Cut pipes straight using a pipe cutter or saw. Smooth the edges with sandpaper to avoid damage. Join pipes with the right fittings and adhesives for your pipe type.
- Measure pipe lengths accurately before cutting.
- Use a deburring tool to smooth cut ends.
- Apply primer and solvent cement for PVC pipes.
- Use threaded fittings for metal pipes.
- Allow joints to dry fully before testing.
Installing Cleanouts And Vents
Cleanouts allow easy access for pipe cleaning. Vents let air into the plumbing system to prevent pressure build-up. Place these components at key points in the pipe layout.
| Component | Purpose | Common Location |
| Cleanout | Access for clearing blockages | Near bends and pipe ends |
| Vent | Allow air flow in pipes | Near fixtures and main stack |
Securing Pipes In Place
Secure pipes firmly to avoid movement and damage. Use pipe clamps, straps, or hangers. Check that pipes slope correctly for drainage.
Follow these tips to secure pipes:
- Space clamps every 3 to 4 feet for horizontal runs.
- Use adjustable straps to fit pipe size.
- Ensure pipes slope at least 1/4 inch per foot.
- Avoid sharp bends or stress on fittings.
- Check all supports are tight but not crushing pipes.
Testing The System
After installing underground plumbing, testing the system is critical. It ensures everything works properly and no leaks exist.
This guide covers two key tests: pressure testing for leaks and inspecting joints and connections.
Pressure Testing For Leaks
Pressure testing checks if the pipes hold water or air without leaking. It helps find weak spots before covering pipes with soil.
- Close all outlets and valves in the plumbing system.
- Attach a pressure gauge and pump to the system.
- Increase pressure slowly to the recommended level.
- Maintain pressure and watch the gauge for 15 to 30 minutes.
- If the pressure drops, inspect pipes carefully for leaks.
- Repair any leaks found and repeat the test.
Inspecting Joints And Connections
Joints and connections are common leak points. Careful inspection ensures these areas are sealed tightly and secure.
| Check Point | What to Look For | Action if Problem Found |
|---|---|---|
| Pipe joints | Cracks, loose fittings | Tighten or replace fittings |
| Sealants | Missing or damaged sealing tape or compound | Reapply or replace sealant |
| Couplings | Gaps or movement | Secure or replace coupling |
| Pressure gauge connection | Leaks during testing | Check fittings and tighten |
Credit: anacondapipeandhose.com
Backfilling And Finalizing
After installing underground plumbing pipes, you need to backfill the trench carefully. This step protects the pipes and prepares the ground for use again.
Backfilling and finishing the surface correctly help avoid future damage and keep the area safe.
Filling The Trench Safely
Start filling the trench with clean soil or gravel. Avoid using large rocks or debris that might damage the pipes.
Fill the trench in layers, not all at once. This helps keep the pipes in place and prevents shifting.
- Use fine soil or sand near the pipes
- Keep heavy materials away from pipes
- Fill in small amounts at a time
- Check pipe alignment as you fill
Compacting Soil
After filling, compact the soil to reduce air pockets. Loose soil can cause the ground to sink later.
Use a hand tamper or mechanical compactor. Press the soil gently around the pipes to avoid damage.
- Compact soil in layers, about 6 inches thick
- Do not use heavy equipment near pipes
- Check for soft spots and compact again
Restoring The Surface
Once the trench is filled and compacted, restore the surface to its original state. This keeps your yard or pavement looking neat.
Replace grass, gravel, or pavement carefully. Water the soil to help it settle and support plant growth.
- Lay sod or spread grass seed on soil
- Replace gravel evenly if used before
- Repair pavement with proper materials
- Water the area lightly to settle soil
Common Mistakes To Avoid
Installing underground plumbing needs care and planning. Many mistakes can cause leaks and costly repairs.
This guide points out common errors to help you do the job right the first time.
Improper Slope Issues
Pipes must have the right slope to let water flow easily. Too flat or too steep causes problems.
- Flat pipes cause water to pool and block drains.
- Steep pipes make water flow too fast, risking pipe damage.
- A slope of 1/4 inch per foot is usually best for drainage pipes.
- Check slope with a level tool before burying pipes.
Using Wrong Materials
Choosing the wrong pipes or fittings can cause leaks and failures underground.
| Material | Use | Common Mistakes |
| PVC | Drain and vent lines | Using for water supply lines |
| PEX | Water supply lines | Exposing to sunlight |
| Cast Iron | Drainage in old buildings | Ignoring corrosion risks |
| Copper | Water supply lines | Using in acidic soil without protection |
Neglecting Permits And Codes
Ignoring local rules can cause legal trouble and unsafe plumbing.
Follow these tips to stay compliant:
- Check with your city or county for required permits.
- Use materials and methods approved by plumbing codes.
- Schedule inspections as needed during and after installation.
- Keep all documents and receipts for reference.

Credit: www.youtube.com
Frequently Asked Questions
What Materials Are Best For Underground Plumbing Pipes?
PVC and ABS pipes are commonly used for underground plumbing. They resist corrosion, are lightweight, and easy to install. Copper pipes are less common due to cost and corrosion risk. Choose materials based on soil conditions and local plumbing codes for durability and safety.
How Deep Should Underground Plumbing Be Installed?
Underground plumbing should be installed below the frost line to prevent freezing. Depth varies by region but typically ranges from 12 to 36 inches. Always check local building codes for exact requirements to ensure proper installation and avoid pipe damage.
Can I Install Underground Plumbing Myself?
Yes, with proper knowledge and tools, DIY installation is possible. However, it requires understanding plumbing codes, trenching, and pipe fitting. For complex systems or large projects, hiring a licensed plumber ensures safety and compliance with regulations.
How Do I Prevent Leaks In Underground Plumbing?
Use high-quality pipes and fittings, ensure proper joint sealing, and test the system before backfilling. Regular inspection and pressure testing help detect leaks early. Proper trenching and bedding support prevent pipe damage and leaks over time.
Conclusion
Installing underground plumbing can seem challenging. But with the right steps, it’s manageable. Start by gathering necessary tools and materials. Follow safety precautions closely. Measure and mark the area accurately. Dig trenches carefully, avoiding damage to existing utilities. Install pipes securely, ensuring correct alignment.
Test the system for leaks before covering. Remember, patience and precision are key. Mistakes can lead to future problems. Seek professional help if unsure. Proper installation ensures effective plumbing for years. With these tips, you can tackle this task confidently.
Enjoy the satisfaction of a job well done. Happy plumbing!