
Have you ever wondered why your belt sander isn’t performing like it used to? You might be surprised to learn that proper maintenance is the key to keeping it running smoothly for years.
Imagine the satisfaction of having a tool that works just as efficiently as the day you bought it. By following a few simple steps, you can ensure your belt sander remains a reliable partner in all your DIY and professional projects.
In this guide, we’ll reveal the secrets to maintaining your belt sander for long-term use. Stick around to discover how you can extend the life of your tool and avoid the frustration of unexpected breakdowns. Ready to unlock the full potential of your belt sander? Let’s dive in!
Choosing The Right Belt Sander
Selecting the correct belt sander is key for long-term use. The right tool makes sanding easier and safer.
Consider your project needs and sander features before buying. This helps you avoid problems later.
Types Of Belt Sanders
Belt sanders come in different types for various tasks. Choose one that matches your work style.
- Handheld belt sanders are good for small jobs and tight spaces.
- Stationary belt sanders suit large projects and heavy use.
- Detail belt sanders help with fine work and curves.
Power And Belt Size
Power affects how fast and smooth the sander works. Belt size impacts the area you can sand at once.
| Power (Amps) | Best For |
| 3-5 | Light sanding and finishing |
| 6-9 | Medium sanding and DIY projects |
| 10+ | Heavy sanding and professional work |
| Belt Width (inches) | Use |
| 3/4 to 1 | Detail and small areas |
| 3 to 4 | General purpose sanding |
| 6 to 8 | Large surfaces and fast removal |
Features To Look For
Good features help improve comfort and control during sanding. Check for these when choosing a sander.
- Adjustable speed settings for different materials
- Dust collection system to keep work area clean
- Ergonomic handles to reduce hand fatigue
- Easy belt change mechanism to save time
Budget And Brand Reliability
Choose a sander that fits your budget but offers quality. Reliable brands often provide better support.
Compare brands by reading reviews and checking warranty terms. A good warranty means fewer worries.
Regular Cleaning Routines
Keeping your belt sander clean is key for long-term use. Dust and debris can build up and affect its performance. Regular cleaning makes sure your tool runs smoothly and lasts longer.
In this guide, we focus on two main cleaning tasks: removing dust and debris, and cleaning the belt and rollers. Both help maintain the tool’s efficiency and safety.
Removing Dust And Debris
Dust and debris collect quickly when sanding. Removing them often prevents damage and overheating. Use a brush or compressed air to clear dust from vents and moving parts.
- Unplug the sander before cleaning.
- Use a soft brush to sweep away dust.
- Blow out dust with compressed air if available.
- Check and clean vents to avoid clogging.
- Wipe the outer surface with a dry cloth.
Cleaning The Belt And Rollers
A clean belt and rollers keep the sander working well. Dirt or resin buildup can cause the belt to slip or wear fast. Remove the belt and clean the rollers regularly.
| Part | Cleaning Method | Frequency |
| Belt | Use a belt cleaning stick or rubber block to remove resin. | After every few uses or when slipping occurs. |
| Rollers | Wipe with a cloth dampened with mild detergent and dry fully. | Weekly or if belt movement is uneven. |
Belt Replacement Tips
A belt sander needs regular care to work well for a long time. Replacing the belt is one key part of this care. Knowing when and how to change the belt helps you get the best results.
Read on to learn the signs of a worn belt and easy steps to replace it safely and correctly.
Signs You Need A New Belt
Watch for these signs to know if your belt needs replacing:
- The belt tears or frays along the edges.
- The sander vibrates more than usual during use.
- The sanding surface looks uneven or smooth in spots.
- It takes more effort to sand materials than before.
- The belt slips or does not stay tight on the rollers.
How To Replace The Belt Properly
Follow these steps to replace your belt sander’s belt safely and correctly:
- Unplug the sander to avoid accidents.
- Release the belt tension lever to loosen the old belt.
- Remove the worn belt carefully from the rollers.
- Check the new belt size matches your sander model.
- Place the new belt around the rollers, aligning it properly.
- Use the tension lever to tighten the belt firmly.
- Spin the belt by hand to confirm it moves smoothly.
- Plug in the sander and run it briefly to test the new belt.
| Tip | Reason |
|---|---|
| Always unplug before replacing | Prevents accidental starts and injury |
| Match belt size exactly | Ensures proper fit and performance |
| Check belt alignment | Prevents belt slipping or damage |
| Test belt by spinning manually | Confirms smooth installation |
Credit: www.sumake.com
Lubricating Moving Parts
Lubricating the moving parts of your belt sander helps it work smoothly. It reduces friction and prevents wear. Regular lubrication keeps your tool lasting longer.
Without proper lubrication, parts can overheat and break down. This guide explains which parts to oil and the best lubricants to use.
Which Parts Need Lubrication
Focus on the parts that move or spin. These parts face the most friction and need regular attention.
- Belt rollers and bearings
- Drive shaft and motor bearings
- Idler pulley and its shaft
- Any exposed gears or chains inside the casing
Check your belt sander’s manual to locate these parts. Keep them clean before applying lubricant.
Best Lubricants To Use
Choose lubricants that reduce friction and resist dust buildup. Avoid thick grease that can attract dirt.
| Lubricant Type | Use | Notes |
| Light machine oil | Bearings and shafts | Penetrates easily and stays thin |
| Silicone spray | Plastic parts and belts | Does not damage rubber or plastic |
| Dry graphite lubricant | Gears and pulleys | Repels dust and dirt well |
| White lithium grease | Heavy-duty metal parts | Use sparingly to avoid dirt build-up |
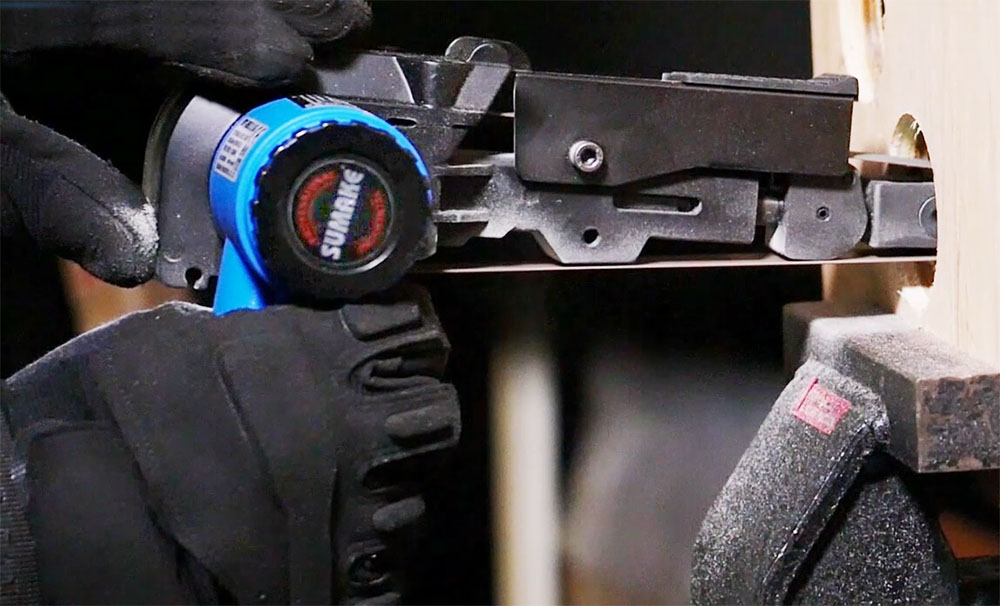
Checking And Adjusting Belt Tension
Proper belt tension keeps your belt sander working well. It stops the belt from slipping or damaging the machine.
Learn how to check and adjust the belt tension to extend your sander’s life.
Why Belt Tension Matters
A belt that is too loose can slip off the rollers. A belt that is too tight can wear out the motor and bearings.
Correct tension helps the belt move smoothly and sand evenly.
How To Check Belt Tension
Turn off and unplug the sander before checking the tension. Press the belt in the middle with your finger.
- If the belt moves more than half an inch, it is too loose.
- If the belt barely moves, it may be too tight.
- The belt should have a little give but stay firm.
Adjusting The Belt Tension
Locate the tension adjustment knob or lever on your sander. Loosen it to adjust the belt.
| Adjustment Action | Effect |
| Turn knob clockwise | Tightens the belt |
| Turn knob counterclockwise | Loosens the belt |
| Release lever | Allows belt removal or replacement |
After adjusting, press the belt again to check tension. Repeat if needed. Secure the knob or lever when done.
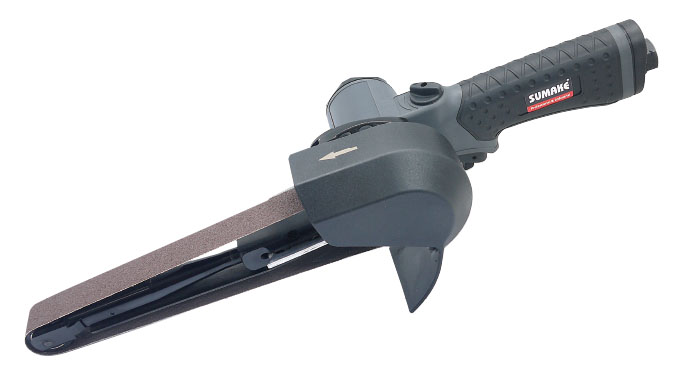
Credit: www.sumake.com
Inspecting Electrical Components
Checking electrical parts of your belt sander is key for safety. Regular inspections help avoid accidents and keep the tool working well.
Focus on the cord, plug, and motor. These parts often face wear and tear during use.
Cord And Plug Maintenance
Look at the power cord for cracks or cuts. A damaged cord can cause shocks or stop the sander from working.
Check the plug for bent or broken prongs. Make sure it fits tightly in the socket to avoid sparks.
- Unplug before inspecting the cord or plug
- Replace cords with visible damage
- Keep the cord away from sharp edges and heat
- Do not use a plug with loose or bent prongs
Motor Care
Inspect the motor for dust and debris buildup. Dust can cause the motor to overheat and fail.
Listen for strange sounds like grinding or buzzing. These noises may signal motor problems.
- Clean the motor vents with compressed air regularly
- Keep the motor dry to avoid rust and damage
- Have a professional check the motor if it sounds unusual
- Do not force the sander if the motor slows down
Safe Storage Practices
Keeping your belt sander stored safely helps it last longer. Proper storage stops damage and keeps it ready to use.
Follow simple steps to protect your sander from dust, moisture, and accidents during storage.
Clean The Sander Before Storing
Remove dust and debris from the belt sander before storage. Dust can cause rust and damage parts.
Use a dry cloth or compressed air to clean all surfaces. Make sure the sanding belt is free of dirt.
Store In A Dry Place
Keep your belt sander in a dry area to avoid rust. Moisture can harm the motor and metal parts.
Choose a shelf or cabinet away from water sources and humidity. Use silica gel packs for extra moisture control.
Use A Protective Cover
Cover your sander with a cloth or plastic cover to keep dust off. This prevents buildup on the tool.
A cover also protects the sander from accidental bumps or scratches while stored.
Store On A Stable Surface
Place the sander on a flat, stable surface to avoid falls. A drop can damage the motor or belt system.
- Use a shelf or workbench with enough space
- Avoid stacking heavy items on top
- Keep the power cord neatly wrapped to prevent tripping
Unplug And Disconnect Accessories
Always unplug the sander before storing it to prevent electrical hazards. Disconnect any sanding belts or attachments.
This keeps the tool safe and ready for the next use without extra setup needed.
Troubleshooting Common Issues
Maintaining a belt sander ensures it works well for a long time. Some problems can stop it from working correctly.
This guide helps you fix common issues like belt slipping, uneven sanding, and strange noises.
Belt Slipping
A slipping belt reduces sanding quality and can cause damage. It often happens if the belt is loose or worn out.
- Check if the belt is tight. Adjust the tension knob if needed.
- Inspect the belt for wear or damage. Replace it if torn or stretched.
- Clean the rollers to remove dust and debris that cause slipping.
- Make sure the belt is aligned properly on the rollers.
Uneven Sanding
Uneven sanding leaves marks on your workpiece. It happens when the belt or machine parts have problems.
| Cause | Fix |
|---|---|
| Worn belt | Replace with a new sanding belt. |
| Uneven belt tension | Adjust tension to keep the belt tight and even. |
| Damaged platen | Inspect and replace if bent or broken. |
| Dirty rollers | Clean rollers to ensure smooth belt movement. |
Strange Noises
Unusual sounds can mean parts need attention. Fixing noises prevents bigger problems.
- Check for loose screws and tighten them.
- Look for worn bearings and replace if noisy.
- Lubricate moving parts to reduce friction sounds.
- Inspect the motor for damage or dust build-up.

Credit: www.familyhandyman.com
Frequently Asked Questions
How Often Should I Clean My Belt Sander?
Clean your belt sander after every use. Remove dust and debris to prevent clogging. Regular cleaning extends the tool’s life and ensures better performance.
What Type Of Lubricant Is Best For Belt Sanders?
Use a light machine oil or silicone-based lubricant. Apply it to moving parts to reduce friction and wear. Avoid heavy oils that attract dust and dirt.
How Do I Replace The Sanding Belt Correctly?
Turn off and unplug the sander first. Release the tension lever, remove the old belt, and fit the new one. Ensure it’s aligned properly before tightening.
Why Is Belt Sander Maintenance Important?
Proper maintenance prevents overheating and mechanical failure. It ensures smooth operation and consistent sanding results. Regular care saves money on repairs and replacement parts.
Conclusion
Regular care keeps your belt sander working well for years. Clean the belt and check parts often. Replace worn belts quickly to avoid damage. Store the sander in a dry place. Small steps prevent big problems. A well-maintained sander saves money and time.
Trust your tool by treating it right. Keep sanding smooth and easy. Simple habits lead to long-lasting use.