If you want your belt sander to work smoothly and last for years, knowing how to take care of it is key. Imagine finishing your projects faster, without unexpected breakdowns or costly repairs.
You’ll discover simple, practical tips to keep your belt sander in top shape. By following easy maintenance steps, you’ll save time, money, and frustration. Ready to get the most out of your tool? Let’s dive in and make sure your belt sander stays reliable and powerful for every job.
Credit: www.akhurst.com
Choosing The Right Belt
Picking the right belt for your sander helps it last longer. The right belt makes sanding easier and cleaner.
Different belts work better on different materials and tasks. Choose a belt that fits your project needs.
Types Of Belt Materials
Belt materials affect how well the sander works. Some belts last longer, and some cut faster.
Common belt materials include cloth, paper, and polyester. Each has its own uses and strengths.
- Cloth belts:Durable and flexible. Good for heavy sanding jobs.
- Paper belts:Less durable but cheaper. Best for light sanding and finishing.
- Polyester belts:Resistant to heat and wear. Good for metal and hardwood.
Selecting Grit For Your Project
Grit size controls how smooth or rough the sanding will be. Lower grit means rougher sanding.
Choose grit based on what you want to remove or smooth. Start coarse and finish fine for best results.
- Coarse grit (40-60):Removes paint or rough wood fast.
- Medium grit (80-120):Smooths surfaces and removes small scratches.
- Fine grit (150-220):Prepares surface for painting or finishing.
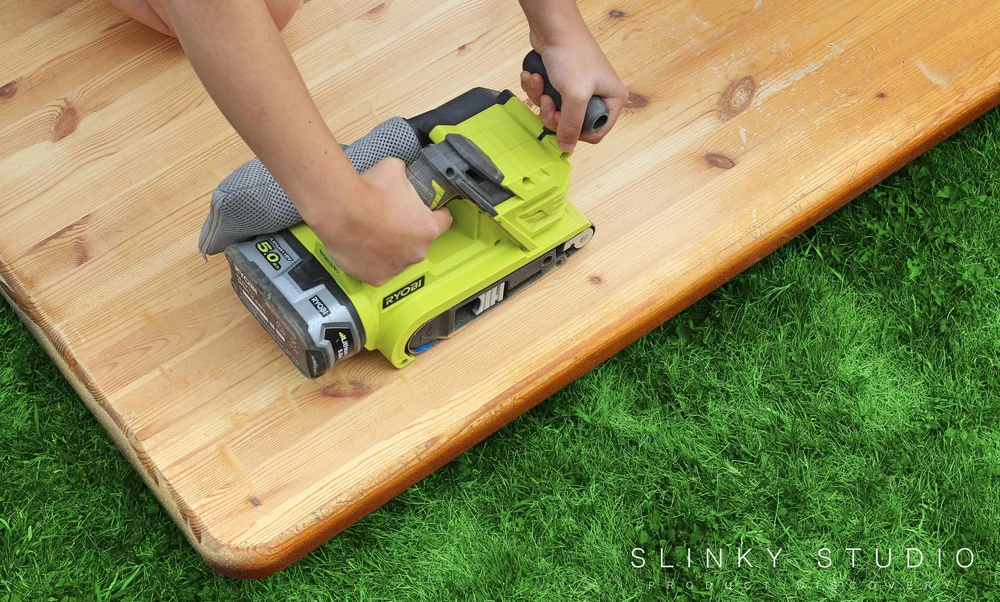
Credit: slinkystudio.info
Cleaning After Use
Cleaning your belt sander after each use keeps it working well. Dirt and dust can cause damage over time.
Regular cleaning helps the tool last longer and perform better. It also keeps your work safe and smooth.
Removing Dust And Debris
After sanding, check the belt sander for dust and debris. These can build up on the belt and motor parts.
Use a cloth to wipe away dust from the surface and the belt area. Clear out any stuck debris carefully.
- Turn off and unplug the sander before cleaning
- Wipe the belt with a dry cloth
- Clear dust from vents and housing
- Check the belt for damage or clogging
Using Compressed Air And Brushes
Compressed air helps remove dust from hard-to-reach places inside the sander. It blows out fine particles quickly.
Use a small brush to clean around the belt and motor parts. It helps loosen stubborn dust and debris gently.
- Wear safety glasses when using compressed air
- Hold the air nozzle a few inches from the surface
- Use a soft brush to clean tight spots
- Do not use water or wet cloth on electrical parts
Lubricating Moving Parts
Lubricating the moving parts of your belt sander helps it last longer. It reduces friction and prevents wear.
Regular lubrication keeps the machine running smoothly and avoids costly repairs.
Identifying Parts That Need Lubrication
Focus on parts that move or rotate. These parts need regular oil or grease to work well.
- Bearings and bushings
- Rollers and pulleys
- Drive belts and shafts
- Adjustment screws and levers
Recommended Lubricants
Use lubricants that match the part and its movement type. Some parts need oil, others need grease.
| Part | Lubricant Type | Notes |
| Bearings | Light machine oil | Apply sparingly to avoid buildup |
| Rollers and pulleys | Grease | Use a high-quality, non-drying grease |
| Drive belts | None | Keep clean; do not lubricate belts |
| Adjustment screws | Light oil or grease | Use oil for smooth turning |
Checking Belt Alignment
Keeping your belt sander’s belt aligned helps it work well longer. Misalignment can cause uneven sanding and damage the belt.
Regular checks of the belt alignment prevent problems and save money on repairs.
Signs Of Misalignment
Look for these signs that show your belt sander belt is off track. Fixing early stops bigger issues.
- The belt moves to one side during use
- Uneven wear or frayed edges on the belt
- Strange noises or rubbing sounds from the machine
- Difficulty keeping the belt centered on the rollers
How To Adjust The Belt
Adjusting the belt helps keep it centered. Use the tracking knob or screw on your sander.
Turn the knob slowly while the sander runs. Watch the belt move and stop when it stays centered.
- Turn the tracking knob clockwise to move the belt right
- Turn it counterclockwise to move the belt left
- Make small changes and check belt position each time
- Stop adjusting when the belt runs smoothly in the middle
Inspecting Electrical Components
Keeping your belt sander in good shape helps it last longer. Checking its electrical parts is very important.
Look closely at the power cords and switches. Fix small problems early to avoid bigger issues.
Checking Power Cords And Switches
Check the power cord for cuts, cracks, or worn spots. These can cause shocks or stop the sander from working.
Test the switch by turning it on and off. It should feel smooth and respond right away.
- Unplug the sander before inspecting.
- Look for exposed wires or damage.
- Make sure the switch clicks clearly.
- Replace damaged cords or switches quickly.
Avoiding Electrical Hazards
Keep the sander dry and clean. Water and dust can cause shorts or fires.
Use the sander only with the right power source. Avoid overloading circuits or using broken outlets.
- Never use the sander near water or wet areas.
- Do not pull the cord to unplug the tool.
- Keep cords away from heat and sharp edges.
- Wear rubber-soled shoes to reduce shock risk.

Credit: www.youtube.com
Storing Your Belt Sander
Proper storage helps your belt sander last longer. It keeps the tool safe and ready for use.
Storing your belt sander the right way prevents damage and maintains its performance.
Ideal Storage Conditions
Keep your belt sander in a dry, clean place. Avoid direct sunlight and extreme temperatures. A cool, stable environment protects its parts.
- Store the sander in a toolbox or a cabinet
- Use a soft cloth or cover to protect from scratches
- Place it on a flat, sturdy surface
- Keep it away from heavy tools that might fall
Protecting From Moisture And Dust
Moisture and dust can harm your belt sander’s motor and belt. They cause rust and reduce its efficiency.
| Protection Method | Details |
| Use a sealed plastic case | Blocks dust and moisture effectively |
| Apply light machine oil | Prevents rust on metal parts |
| Store indoors | Avoids damp outdoor air and rain |
| Cover with dust cloth | Keeps dust from settling on the tool |
Regular Maintenance Schedule
Keeping your belt sander in good shape helps it last longer. A regular maintenance schedule prevents problems and keeps the tool working well.
Follow simple daily, monthly, and yearly care steps. This routine saves money and improves safety while using the sander.
Daily Care Tips
Check your belt sander before and after each use. Clean dust and debris from the tool to keep it running smoothly.
Inspect the sanding belt for wear or damage. Replace the belt if it looks worn or torn to avoid poor performance.
- Wipe dust off the sander with a dry cloth
- Check the sanding belt for tears or wear
- Make sure the belt is tight and properly aligned
- Remove debris from the belt and rollers
- Store the sander in a dry place after use
Monthly And Yearly Checkups
Perform detailed inspections at least once a month. Look for loose parts, damaged cords, and motor issues.
Once a year, check the internal parts and lubricate moving components. This keeps the sander working quietly and efficiently.
- Inspect power cord for cuts or frays
- Check all screws and bolts, tighten if needed
- Clean motor vents to prevent overheating
- Lubricate bearings and rollers as per manual
- Replace worn parts like belts and brushes
Replacing Worn Parts
Keeping your belt sander in good shape means replacing parts that wear out. This helps the tool last longer and work better.
Focus on belts, rollers, and bearings. These parts get used the most and need regular checks.
Signs You Need New Belts
Belts wear down with use. Watch for these signs to know when to replace them.
- The belt looks frayed or torn.
- Sanding becomes uneven or rough.
- The belt slips or does not stay tight.
- You see shiny spots on the belt surface.
- The belt makes unusual noises during use.
Changing Rollers And Bearings
Rollers and bearings help the belt move smoothly. Replace them if they show wear or cause problems.
| Symptom | Cause | Action |
| Grinding noise | Worn bearings | Remove and replace bearings |
| Belt misalignment | Damaged rollers | Inspect and change rollers |
| Vibration during use | Loose or damaged parts | Tighten or replace affected parts |
Frequently Asked Questions
How Often Should I Clean My Belt Sander?
Clean your belt sander after every use. Remove dust and debris from the belt and motor vents to prevent clogging. Regular cleaning ensures optimal performance and prevents overheating. Use a brush or compressed air for thorough cleaning. This simple step extends your tool’s lifespan significantly.
What Is The Best Way To Replace Sanding Belts?
Always unplug the sander before replacing belts. Release the tension lever to remove the old belt. Align the new belt properly on the rollers and re-engage the tension. Ensure the belt tracks straight to avoid damage and improve sanding efficiency.
Check the manual for model-specific instructions.
How Can I Prevent Belt Sander Overheating?
Avoid applying excessive pressure during sanding. Let the sander do the work at its own pace. Take breaks during extended use to cool the motor. Clean the air vents regularly to improve airflow. Overheating can cause motor damage and shorten your sander’s life.
Why Is Sanding Belt Tracking Important?
Proper tracking keeps the sanding belt aligned on rollers. Misaligned belts can slip off or wear unevenly. Adjust the tracking knob to center the belt during operation. Correct tracking improves sanding accuracy and prolongs belt life. It also prevents damage to the sander’s components.
Conclusion
Proper care keeps your belt sander running smoothly. Clean it regularly. Check for worn parts. Replace belts when needed. Lubricate moving parts to reduce wear. Store your sander in a dry place. This prevents rust and damage. Regular maintenance saves time and money.
A well-maintained sander lasts longer. You achieve better results with less effort. Happy sanding!