Imagine transforming a simple piece of wood into a masterpiece of smooth, polished perfection. Your orbital sander is the key tool in achieving that flawless finish for your furniture projects.
But to keep it performing at its best, you must give it some TLC. Just like any tool, your orbital sander needs regular maintenance to ensure it runs smoothly and lasts longer. In this guide, you’ll discover simple yet effective tips to maintain your orbital sander, ensuring every project you work on is a success.
By the end, you’ll have the confidence and knowledge to keep your sander in top shape, making your furniture finishing tasks easier and more efficient. Whether you’re a seasoned DIY enthusiast or just starting out, understanding these maintenance techniques will empower you to achieve professional results with every project. Ready to dive in? Let’s make your orbital sander work for you, not the other way around.
Choosing The Right Orbital Sander
Selecting the right orbital sander is important for smooth furniture finishing. The right tool saves time and gives a clean surface.
Consider the type, features, and best models for your furniture projects. This guide helps you make a good choice.
Types Of Orbital Sanders
There are several types of orbital sanders. Each type fits different tasks and finishes.
- Finishing Sander:Small and lightweight, used for fine sanding and detail work.
- Random Orbital Sander:Moves in random orbits, good for smooth and swirl-free finishes.
- Detail Sander:Has a pointed tip for sanding tight corners and edges.
- Palm Sander:Compact and fits in the palm of your hand, ideal for small surfaces.
Key Features To Consider
| Feature | Why It Matters |
|---|---|
| Orbital Speed (OPM) | Higher speed means faster sanding but can cause heat damage. |
| Dust Collection | Keeps your work area clean and improves air quality. |
| Ergonomics | Comfortable grip reduces hand fatigue during long use. |
| Power Source | Electric or cordless models offer different mobility options. |
| Pad Size | Larger pads cover more area; smaller pads reach tight spots. |
Best Sanders For Furniture
Choose a sander that matches your project size and detail needs. Some models stand out for furniture finishing.
- Random orbital sanders are popular for smooth finishes on flat surfaces.
- Finishing sanders work well for delicate or small projects.
- Detail sanders help with corners and carved furniture parts.
- Cordless models offer freedom to move but check battery life.
Preparing Your Sander For Use
Using an orbital sander properly keeps your furniture finishing smooth. Preparing the sander well helps avoid damage and work delays.
This guide covers inspecting the sander, attaching sandpaper, and setting speed and pressure for best results.
Inspecting The Sander Components
Check all parts of the sander before use. Look for cracks, loose screws, and worn pads. Make sure the power cord is intact without cuts or frays.
Test the sanding pad for firmness and evenness. Replace any damaged parts to keep the tool safe and efficient.
Selecting And Attaching Sandpaper
Choose sandpaper grit based on the wood and finish type. Coarse grit removes old finish; fine grit smooths the surface.
- Pick the correct size and shape of sandpaper for your sander.
- Align the holes in the sandpaper with the sander’s dust collection holes.
- Attach the sandpaper firmly using the clamp or hook-and-loop system.
- Make sure the sandpaper is flat without wrinkles to avoid uneven sanding.
Setting The Speed And Pressure
| Speed Setting | Recommended Use |
| Low | Fine sanding and delicate finishes |
| Medium | General purpose sanding |
| High | Removing old paint or rough surfaces |
Apply gentle, steady pressure. Pressing too hard can damage the wood or the sander. Let the tool do the work.
Cleaning After Each Use
Cleaning your orbital sander after every use keeps it working well. It stops dust and dirt from building up inside the tool.
Regular cleaning also helps you finish your furniture smoothly. It makes sure the sander lasts longer and works safely.
Removing Dust And Debris
Dust and debris can clog the sander and reduce its power. Use a soft brush to clear dust from the vents and body.
Blow compressed air through the tool to remove hidden dust. Make sure the sander is unplugged before cleaning.
Cleaning The Sanding Pad
The sanding pad collects dust and particles during use. Remove the sanding disc and wipe the pad with a damp cloth.
If the pad has sticky residue, use mild soap and water to clean it. Let it dry completely before attaching a new sanding disc.
Maintaining The Dust Collection System
The dust collection system keeps your workspace clean. Empty the dust bag or container after each use.
Check the dust port for clogs. Clear any blockages to keep suction strong and the tool efficient.
Regular Maintenance Routines
Keeping your orbital sander in good condition is important for smooth furniture finishing. Regular care helps the tool work better and last longer.
Follow simple routines to keep all parts clean and running. This guide covers key maintenance tasks you should do often.
Lubricating Moving Parts
Lubricate the moving parts of your sander to reduce wear and keep it running smoothly. Use a light machine oil or grease recommended by the manufacturer.
- Clean dust and debris from parts before lubrication.
- Apply oil to bearings and joints carefully.
- Wipe off excess lubricant to avoid attracting dirt.
- Lubricate every few weeks if used often.
Checking And Replacing Worn Components
Inspect your sander regularly for worn or damaged parts. Replace these to maintain performance and safety.
| Component | Signs of Wear | Replacement Frequency |
| Sandpaper Pads | Torn, clogged, or uneven | Replace after heavy use or damage |
| Brushes | Sparks, reduced power, noise | Check every 50 hours of use |
| Drive Belts | Cracks or slippage | Replace when damaged or loose |
Inspecting Electrical Connections
Check all electrical parts for safety and good contact. Loose or damaged connections can cause problems or hazards.
Follow this checklist to inspect electrical connections:
- Unplug the sander before inspection.
- Look for frayed or damaged power cords.
- Ensure plugs fit tightly in outlets.
- Check internal wiring if you see sparks or smell burning.
- Replace damaged cords or connectors immediately.
Troubleshooting Common Issues
Orbital sanders help smooth furniture surfaces. Sometimes, they face small problems during use. Fixing these issues keeps your tool working well.
Below are common problems and easy ways to solve them. Follow these tips for better sanding results.
Dealing With Uneven Sanding
Uneven sanding leaves rough spots or stripes on your furniture. It happens when the sandpaper wears out or the pad is dirty.
Check the sandpaper for tears or clogs. Replace it if worn. Clean the sanding pad to remove dust and debris.
- Use fresh sandpaper with the right grit.
- Keep the sanding pad clean and dry.
- Hold the sander flat and move it evenly.
Fixing Excessive Vibration
Too much vibration makes the sander hard to control. It may come from loose parts or an unbalanced sanding pad.
Turn off the sander and check all screws and bolts. Tighten any loose parts. Inspect the sanding pad for damage and replace if needed.
- Secure all screws and bolts firmly.
- Replace damaged or worn sanding pads.
- Use the correct sandpaper size for your sander.
Handling Motor Overheating
The motor can get too hot if the sander is used too long or blocked by dust. Overheating may damage the tool.
Give the sander breaks during long jobs. Clean air vents often to keep airflow clear. Avoid pressing too hard while sanding.
- Pause sanding every 10-15 minutes to cool the motor.
- Blow out dust from vents with compressed air.
- Use light pressure to prevent motor strain.
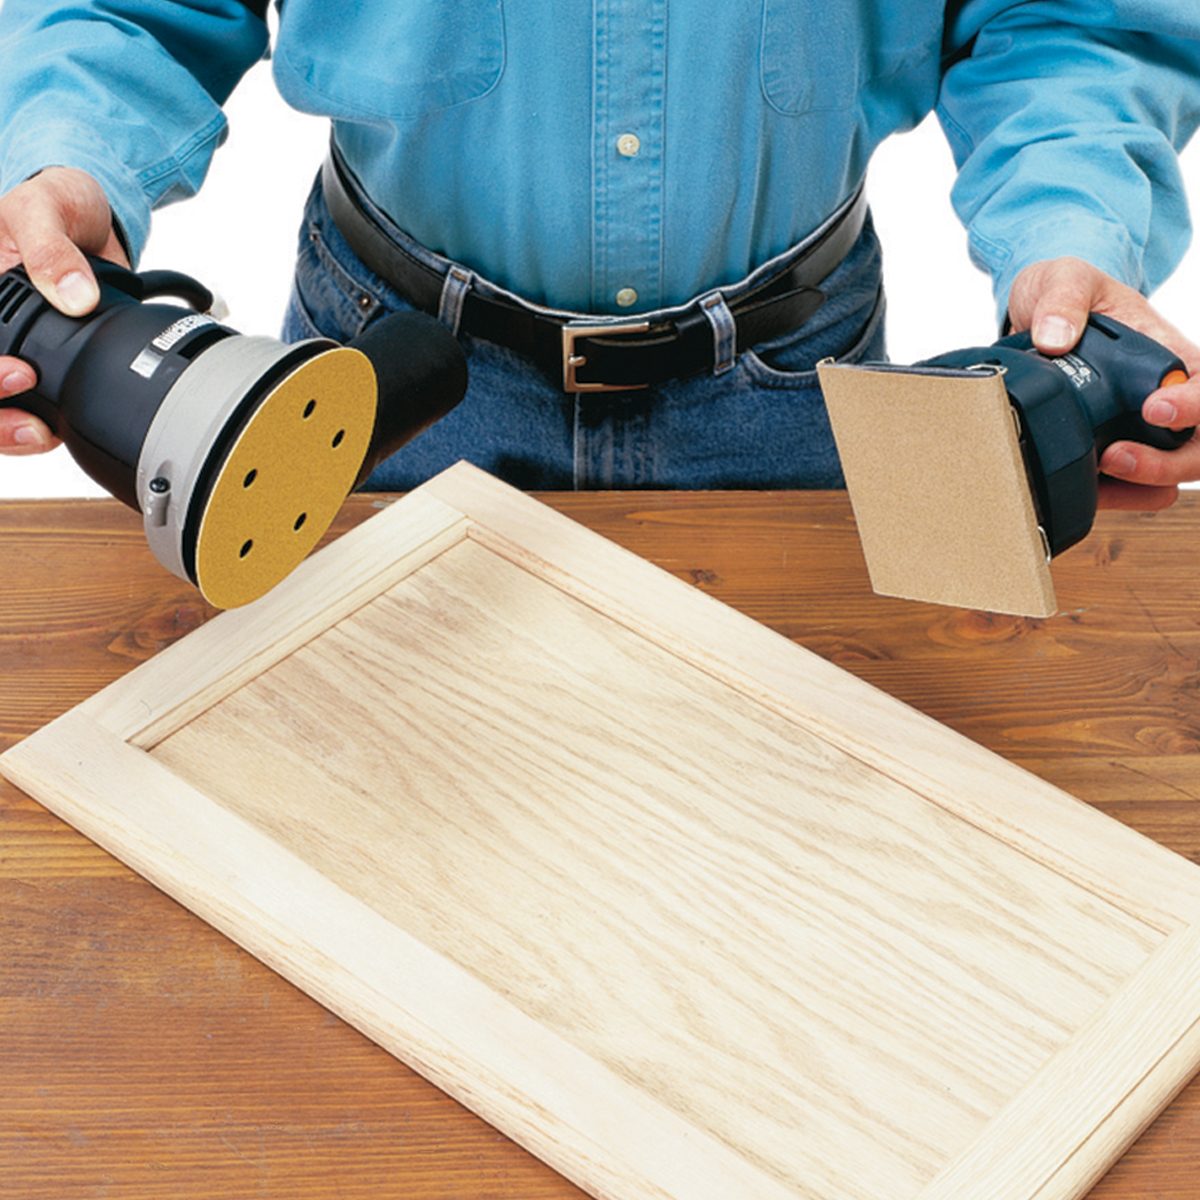
Credit: www.familyhandyman.com
Storage Tips For Longevity
Keeping your orbital sander in good shape starts with proper storage. This helps it last longer and work better.
Learn simple ways to store your sander and its accessories safely. This prevents damage and keeps everything ready for use.
Proper Storage Environment
Store your sander in a dry, cool place. Avoid areas with high humidity or extreme temperatures. These conditions can cause rust and damage the motor.
- Keep away from direct sunlight to prevent plastic parts from warping.
- Use a dust-free cabinet or toolbox to reduce dirt buildup.
- Ensure good air circulation to avoid moisture buildup.
Protecting The Sander From Damage
Handle the sander carefully when storing it. Avoid placing heavy objects on top. This can harm its body and internal parts.
| Storage Tip | Reason |
| Use padded cases or sleeves | Absorbs shocks and prevents scratches |
| Keep cords neatly coiled | Prevents damage and tangling |
| Store on stable shelves | Avoids accidental falls |
Storing Accessories Safely
Keep sanding discs and other accessories organized. This avoids loss and damage. Use containers or compartments to separate different items.
- Label containers with disc grit sizes
- Store discs flat to keep shape
- Keep small parts like screws in sealed bags
- Check accessories for wear before storing
Safety Precautions During Maintenance
Maintaining an orbital sander is necessary for good furniture finishing. Safety should always come first during maintenance tasks.
This guide covers key safety steps to protect yourself and your tools.
Disconnecting Power Sources
Always unplug the sander before starting any maintenance. This prevents accidental starts that could cause injury.
Check the power cord and plug for damage. Do not use the sander if the cord is frayed or the plug is loose.
Using Protective Gear
Wear safety gear to protect your eyes, hands, and lungs from dust and debris. This reduces health risks during maintenance.
- Safety goggles to protect your eyes
- Dust mask or respirator for your lungs
- Work gloves to protect your hands
- Hearing protection if noise is loud
Safe Handling Of Replacement Parts
Use the correct replacement parts for your sander model. Handling parts properly prevents damage to the tool and injury to you.
| Part | Handling Tip |
| Sanding Pads | Clean hands before touching |
| Carbon Brushes | Install gently without force |
| Power Cord | Check for cuts, do not bend sharply |
| Screws and Bolts | Use the right screwdriver size |
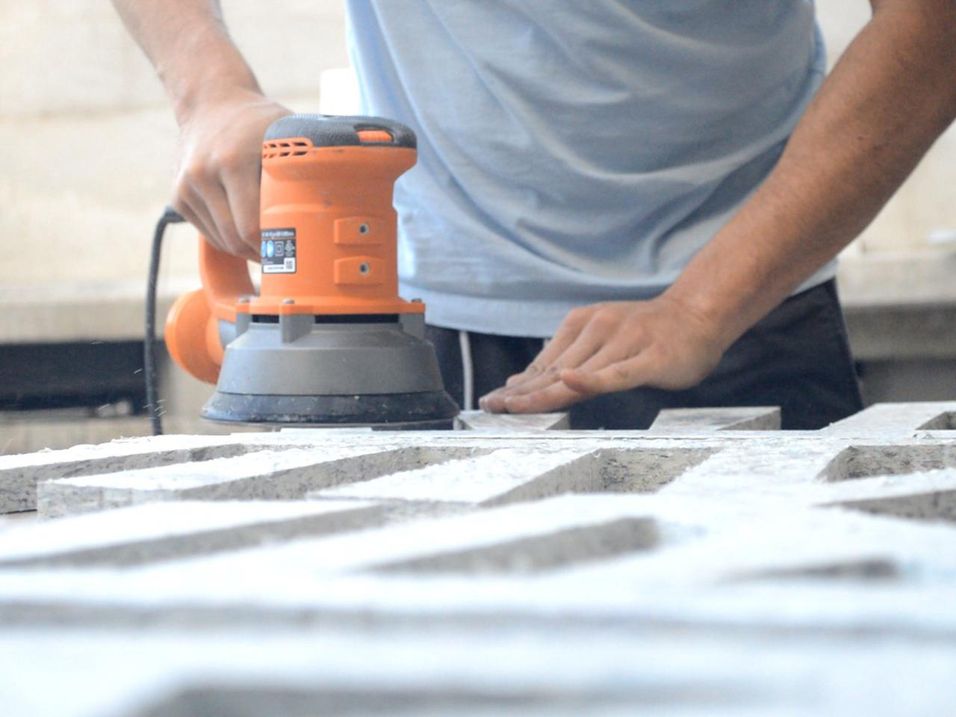
Credit: community.preciousplastic.com
Credit: www.aosom.com
Frequently Asked Questions
How Often Should I Clean My Orbital Sander?
Clean your orbital sander after every use. Remove dust from vents, pads, and the motor. This prevents clogging and prolongs tool life.
What Type Of Sandpaper Is Best For Furniture Finishing?
Use fine to medium grit sandpaper, typically 120 to 220 grit. It provides a smooth finish without damaging wood surfaces.
How Do I Replace The Sanding Pad On An Orbital Sander?
Turn off and unplug the sander. Release the pad by unscrewing or unclipping it, then attach a new one firmly before use.
Why Is Dust Collection Important When Using An Orbital Sander?
Dust collection improves visibility, prevents inhalation of harmful particles, and keeps your workspace clean. It also extends the sander’s lifespan.
Conclusion
Maintaining your orbital sander keeps it working well for a long time. Clean the dust often and check the pads for wear. Tighten loose parts and store the tool in a dry place. These small steps protect your investment and improve your sanding results.
A well-kept sander makes furniture finishing easier and smoother. Remember, regular care saves money and frustration later. Keep your sander ready for every project. Simple habits make a big difference.