If you want your hammer to work like new every time you pick it up, knowing how to maintain it is key. A well-kept hammer saves you time, effort, and frustration on the job.
Imagine finishing your project faster, with fewer mistakes and no unexpected breaks. You’ll discover simple, effective ways to keep your hammer sharp, strong, and ready for any task. Stick with me, and your hammer will become your most reliable tool.
Choosing The Right Hammer
Selecting the right hammer helps you work faster and safer. Different tasks need different types of hammers.
Knowing the hammer’s material and weight makes your job easier and reduces strain.
Types Of Hammers And Their Uses
Each hammer type suits a specific task. Using the right hammer protects your tools and work.
- Claw Hammer:Best for driving and removing nails in woodwork.
- Ball Peen Hammer:Used for metalwork and shaping metal.
- Sledgehammer:Ideal for heavy demolition and breaking concrete.
- Rubber Mallet:Good for gentle tapping without damaging surfaces.
- Tack Hammer:Designed for small nails and upholstery work.
Material And Weight Considerations
Hammer heads come in steel, titanium, and other metals. Handles are wood, fiberglass, or steel.
| Material | Benefits | Common Use |
| Steel Head | Durable and strong | General purpose |
| Titanium Head | Lighter and absorbs shock | Longer work sessions |
| Wood Handle | Comfortable grip | Traditional use |
| Fiberglass Handle | Shock resistant and durable | Heavy use |
| Steel Handle | Very strong but heavy | High impact work |
Credit: dlvroofing.com
Cleaning Your Hammer
Keeping your hammer clean helps it work better and last longer. Dirt and grime can reduce its efficiency.
Regular cleaning prevents rust and damage. It also keeps the handle safe to hold.
Removing Dirt And Debris
Remove dirt and debris after each use. This stops buildup that can harm the hammer.
Use a stiff brush to clear mud and dust. Clean the head and handle carefully.
- Brush off loose dirt
- Wipe with a dry cloth
- Use a toothpick for tight spots
- Check the claw for stuck debris
Safe Cleaning Methods
Use safe cleaning methods to protect your hammer. Avoid harsh chemicals that can damage it.
Soap and water work well for most cleaning tasks. Dry the hammer fully to stop rust.
- Mix mild soap with warm water
- Use a soft cloth or sponge
- Do not soak the hammer
- Dry with a clean towel
- Apply a light oil coat to the metal parts
Inspecting For Damage
Regular inspection keeps your hammer safe and efficient. Look closely for any signs of damage.
Small problems can cause big accidents. Checking often helps you fix issues early.
Checking The Handle
Look for cracks, splinters, or bends in the handle. A weak handle can break during use.
Wood handles need extra care. Make sure they are smooth and free of damage.
- Check for cracks or splits
- Feel for rough or splintered areas
- Ensure the handle is straight and not bent
Examining The Head
Inspect the hammerhead for dents, chips, or rust. Damage can reduce its effectiveness.
Clean rust spots and smooth out rough areas. Replace the head if it is badly damaged.
- Look for dents and chips
- Check for rust or corrosion
- Make sure the striking surface is flat
Identifying Loose Components
Shake the hammer gently to check for loose parts. Loose heads or handles are dangerous.
Tighten or replace any loose parts before using the hammer. Secure tools work better and last longer.
- Test if the hammerhead moves
- Check if the handle wiggles in the head
- Look for loose wedges or nails securing the head
Credit: www.americanfarriers.com
Proper Storage Techniques
Keeping hammers in good shape helps them work better and last longer. Proper storage stops damage and keeps tools ready for use.
Organizing your hammer storage saves time and protects your tools. It also makes your workspace safer and cleaner.
Avoiding Moisture And Rust
Moisture causes rust, which weakens hammers. Store hammers in dry places to keep rust away.
Use silica gel packs or moisture absorbers in toolboxes. Wipe hammers dry before storing them after use.
- Keep hammers away from water and damp areas
- Use rust-proof containers or toolboxes
- Apply light oil to metal parts to prevent rust
- Check tools regularly for signs of rust
Organizing Your Tool Space
Organize your tools so you can find hammers quickly. Use racks, shelves, or pegboards to store them safely.
Keep hammers separated from other tools to avoid damage. Label storage spots for easier access and neatness.
- Hang hammers on pegboards by size or type
- Use foam inserts in drawers to hold hammers
- Store handles facing the same way for safety
- Keep the storage area clean and free of clutter
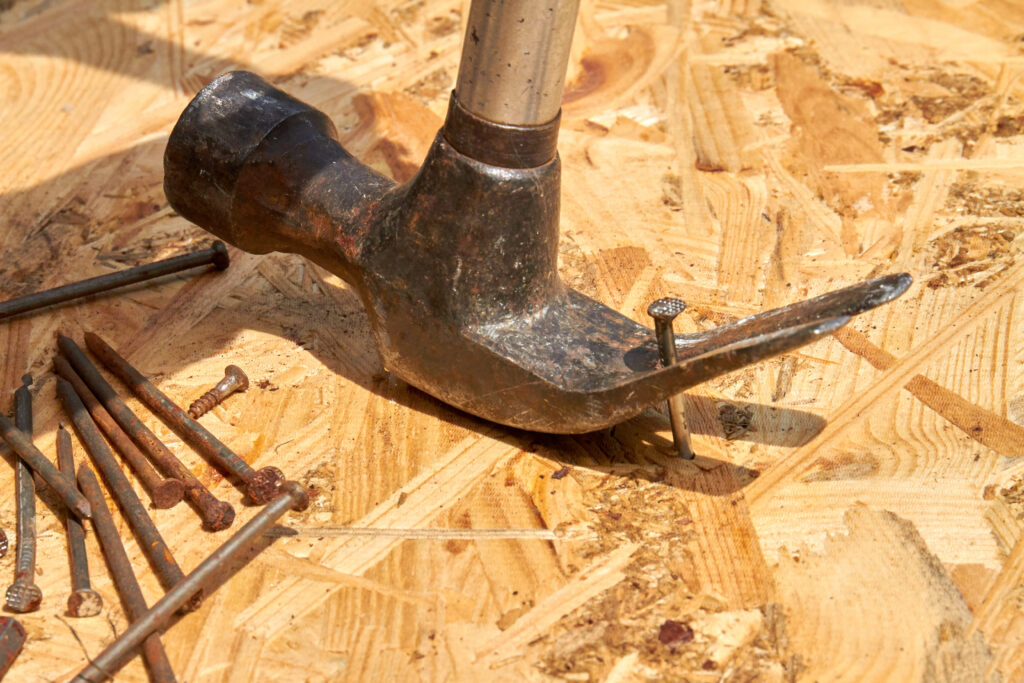
Sharpening And Reshaping
Keeping your hammer’s claw sharp and properly shaped helps you work faster and safer. Dull or bent claws can make nail removal hard and damage the hammer.
Regular care includes checking the claw and using the right tools to sharpen or reshape it. This guide explains when and how to do this.
When To Sharpen The Claw
Sharpen the claw if you notice it has become blunt or rounded. A sharp claw grips nails better and pulls them out with less effort. Look for these signs:
- Difficulty pulling nails out
- Visible dull or rounded edges on the claw
- Slipping or sliding off nails during use
- Rust or corrosion on the claw’s edges
Sharpening usually needs a file or sharpening stone. File the edges evenly until they are sharp but avoid making them too thin.
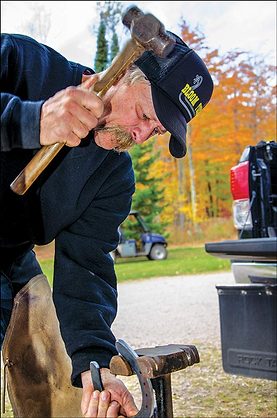
Tools For Reshaping
Bent or misshaped claws need reshaping before sharpening. Use these tools to fix the shape safely:
| Tool | Purpose |
| Hammer | To gently tap the claw back into shape |
| Bench Vise | Hold the hammer steady while reshaping |
| Metal File | Remove rough spots and sharpen edges |
| Sharpening Stone | Refine the claw’s edge for better grip |
| Safety Gloves | Protect hands during reshaping and sharpening |
Always use light taps and check the claw often. Reshaping takes patience to avoid damaging the hammer.
Credit: jcblhandtools.com
Handle Maintenance
Maintaining the hammer handle is key for safety and performance. A well-kept handle feels comfortable and lasts longer.
Check your hammer handle regularly for damage. Fix small issues early to avoid bigger problems.
Sanding And Smoothing
Use sandpaper to smooth rough or splintered areas on the handle. This helps prevent injuries and improves grip.
- Start with medium-grit sandpaper to remove rough spots.
- Switch to fine-grit sandpaper for a smooth finish.
- Wipe the handle with a clean cloth after sanding.
- Check for cracks or deep dents and replace the handle if needed.
Applying Protective Coatings
Applying a protective coating keeps the handle strong and resists moisture. It also extends the handle’s life.
| Coating Type | Benefits | Application Tips |
| Linseed Oil | Deeply nourishes wood | Apply with a cloth, let dry fully |
| Varnish | Creates a hard protective layer | Use thin coats, sand lightly between coats |
| Wax | Adds water resistance | Rub on, buff for shine |
Replacing Hammer Parts
Keeping your hammer in good shape is important for safety and work quality. Sometimes, parts wear out and need replacement.
Knowing when and how to replace hammer parts helps you keep the tool efficient and reliable.
When To Replace Handles
Handles often break or crack from heavy use. Replace a handle if it shows any splits or feels loose.
A loose or damaged handle can cause accidents. Swelling or shrinking wood also means replacement is needed.
- Cracks or splits in the wood
- Handle feels loose in the head
- Handle is bent or warped
- Swelling or shrinking from moisture
Replacing Worn Or Damaged Heads
Hammer heads wear down or get damaged over time. Replace the head if it is cracked, chipped, or heavily worn.
A damaged head can reduce hitting power and cause injury. Check the head regularly and replace it as needed.
- Cracks in the metal
- Chips or missing pieces
- Worn striking surface
- Rust that weakens the head
Safety Tips For Hammer Use
Using a hammer safely prevents injuries and helps you work better. Knowing how to hold and swing the hammer is important. Wearing the right gear also keeps you safe.
Follow these tips to use your hammer with care. These simple rules protect your hands, eyes, and body from harm.
Proper Grip And Swing
Hold the hammer near the end of the handle for more power. Keep your wrist straight and use a controlled swing. Avoid wild or fast swings that can cause accidents.
- Grip the hammer handle firmly but not too tight.
- Stand with feet shoulder-width apart for balance.
- Swing the hammer in a smooth, controlled motion.
- Focus on hitting the nail squarely to avoid slips.
- Do not use a bent or damaged hammer.
Using Protective Gear
Protective gear helps you avoid injuries while using a hammer. Always wear safety glasses to protect your eyes from flying debris. Gloves can shield your hands from blisters and splinters.
| Protective Gear | Purpose |
|---|---|
| Safety Glasses | Shield eyes from flying particles |
| Work Gloves | Protect hands from cuts and blisters |
| Closed-Toe Shoes | Guard feet against dropped hammers |
| Long Sleeves | Prevent scratches and minor cuts |
Frequently Asked Questions
How Often Should I Clean My Hammer For Best Efficiency?
Clean your hammer after every use to remove dirt and debris. Regular cleaning prevents rust and ensures smooth operation. Use a damp cloth and mild detergent, then dry thoroughly to maintain the hammer’s performance and longevity.
What Is The Best Way To Store Hammers Safely?
Store hammers in a dry, organized toolbox or on a pegboard. Keep them away from moisture to avoid rust. Proper storage prevents damage and keeps your tools ready for efficient use.
How Can I Check If My Hammer Needs Repair?
Inspect the hammer handle for cracks or splinters and the head for looseness. If the head is loose or the handle is damaged, repair or replace immediately to maintain safety and efficiency.
Why Is Hammer Handle Maintenance Important?
Maintaining the handle ensures a secure grip and prevents accidents. Regularly check for wear and apply linseed oil to wooden handles to keep them strong and durable. This improves control and extends hammer life.
Conclusion
Regular hammer maintenance ensures tool longevity and efficiency. Keep your hammers clean. Dirt can cause wear and tear. Regular inspection helps spot problems early. Replace damaged parts promptly. Store hammers in a dry place. Moisture can lead to rust. Use the right hammer for the job.
This reduces unnecessary strain. A well-maintained hammer makes tasks easier. It also saves time and effort. Following these simple steps prolongs your hammer’s life. Remember, a little care goes a long way. Happy hammering!