When you dive into your DIY projects, safety should always be your top priority. Whether you’re sanding, painting, or working with chemicals, a reliable respirator is your best friend.
But owning one is just the beginning. To ensure your respirator does its job and protects you effectively, regular maintenance is crucial. You wouldn’t want to compromise your health because of a neglected mask, would you? Proper care not only extends the life of your equipment but also ensures every breath you take is safe and clean.
Are you ready to learn how to keep your respirator in top-notch condition? Let’s explore the essential steps to maintain your respirator, so you can focus on creating without worry.
Choosing The Right Respirator
Using a respirator keeps you safe from dust and fumes in DIY projects. Picking the right one helps you work safely and comfortably.
This guide explains the types of respirators, factors to check, and fit tips to help you choose well.
Types Of Respirators For Diy
There are many respirators. Each type suits different project needs and hazards.
- Disposable Masks:Light, easy to use, good for dust and light fumes.
- Half-Face Respirators:Cover nose and mouth, with replaceable filters for better protection.
- Full-Face Respirators:Cover the whole face, protect eyes, nose, and mouth from strong hazards.
- Powered Air-Purifying Respirators (PAPR):Use a battery to blow filtered air, best for long or tough tasks.
Factors To Consider
| Factor | Details |
| Type of Hazard | Dust, fumes, chemicals, or paint vapors |
| Filter Type | Choose filters that block your specific hazard |
| Duration of Use | Short tasks may need light masks, long tasks need more support |
| Budget | Disposable masks cost less; reusable types cost more but last longer |
| Maintenance | Reusable respirators need cleaning and filter changes |
Fit And Comfort
A good fit stops air leaks and keeps you safe. Comfort helps you wear the respirator longer.
- Check the seal around your nose and mouth.
- Adjust straps so the respirator fits snug but not tight.
- Try the respirator on before starting your project.
- Look for soft materials that do not irritate your skin.
- Make sure you can breathe easily while wearing it.
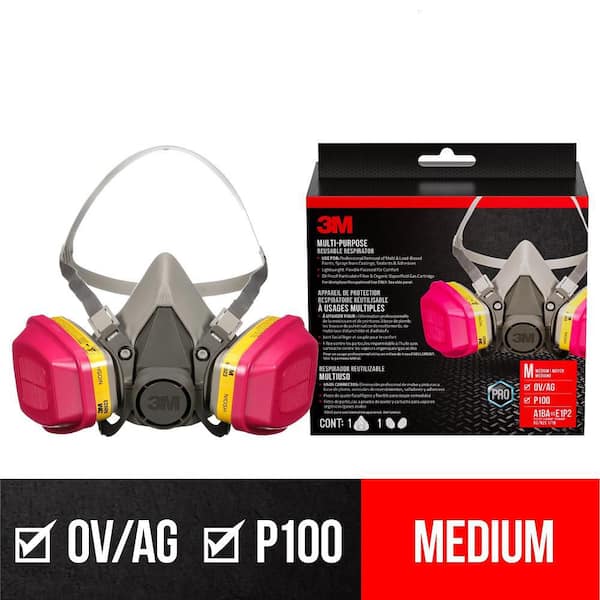
Credit: www.homedepot.com
Cleaning After Each Use
Cleaning your respirator after every use keeps it safe and working well. Dirt and dust can build up on parts and reduce protection.
Proper cleaning helps remove harmful particles and prevents damage. It also makes sure the respirator fits properly next time.
Disassembling The Respirator
Take your respirator apart carefully before cleaning. Remove filters, cartridges, and any detachable parts. This makes cleaning easier and more effective.
- Remove the head straps gently
- Detach filters or cartridges according to the manual
- Separate any valves or face seals
- Keep small parts in a clean container to avoid loss
Washing Techniques
Use warm water and mild soap to wash the respirator parts. Avoid harsh chemicals that may damage the material.
| Part | Cleaning Method |
| Facepiece | Wash with warm soapy water, scrub gently |
| Straps | Soak and wipe with mild soap |
| Valves | Rinse carefully, do not use abrasive tools |
| Filters/Cartridges | Do not wash; replace if dirty or damaged |
Drying Methods
Dry all parts completely before reassembling. Moisture can cause mold and affect the respirator’s seal.
- Place parts on a clean towel in a warm area
- Do not use direct sunlight or high heat
- Allow at least several hours to air dry
- Check that all parts are dry before putting them back together
Inspecting For Damage
Regular inspection keeps respirators safe and effective. Check all parts carefully before use.
Look for any signs of damage or wear. Replace parts as needed to maintain protection.
Checking Straps And Seals
Straps hold the respirator in place. Seals create a tight fit on your face. Both must be in good shape.
- Look for cracks or tears in straps
- Check if straps stretch out or lose elasticity
- Inspect seals for cracks or hard spots
- Make sure seals are clean and flexible
- Replace damaged straps or seals immediately
Examining Filters And Cartridges
Filters and cartridges stop dust and harmful particles. They must be clean and undamaged.
| Filter Type | Signs of Damage | Action Needed |
| Particulate Filter | Tears, holes, or clogging | Replace filter |
| Gas Cartridge | Cracks, dents, or leaks | Replace cartridge |
| Combination Filter | Physical damage or odor breakthrough | Replace immediately |
Identifying Wear And Tear
Wear and tear reduce respirator safety. Look for signs on all parts before each use.
- Check facepiece for cracks or deformities
- Inspect valves for sticking or damage
- Look for discoloration or hardening on rubber parts
- Listen for air leaks during a fit check

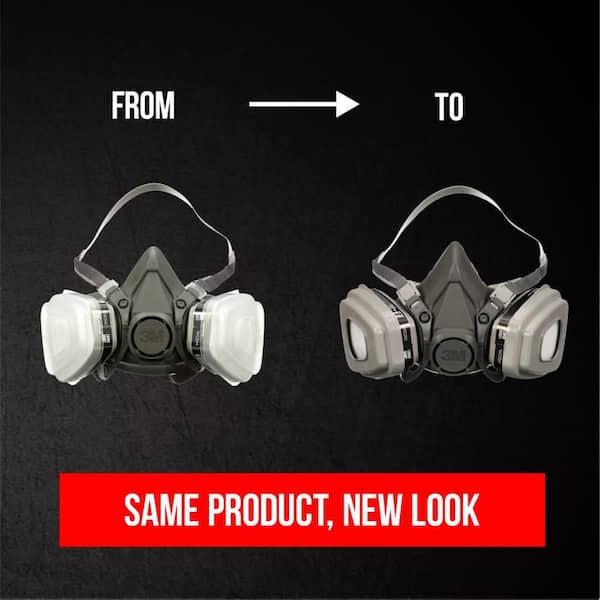
Credit: www.reddit.com
Replacing Filters And Cartridges
Maintaining respirators is key for safe DIY projects. Replacing filters and cartridges keeps the air clean and protects your lungs.
Knowing when and how to change these parts helps your respirator work well. Proper disposal prevents harm to others and the environment.
Signs Filters Need Change
Filters and cartridges do not last forever. Watch for signs to know when to replace them.
- Breathing feels harder or heavier than usual
- Noticeable odors or fumes come through the mask
- Filters look dirty, damaged, or clogged
- Working time exceeds the filter’s recommended use
- Manufacturer’s guidelines say it is time to change
How To Replace Filters
Changing filters and cartridges is simple if you follow these steps carefully.
- Remove the respirator from your face and place it on a clean surface.
- Open or unscrew the filter or cartridge housing according to the model.
- Take out the used filter or cartridge carefully to avoid dust release.
- Check the new filter or cartridge for any damage before installing.
- Insert the new filter or cartridge firmly into the housing.
- Close or screw the housing tightly to secure the filter in place.
- Test the respirator seal on your face to ensure no air leaks.
Proper Disposal
Dispose of old filters and cartridges safely. They may hold harmful particles.
| Disposal Tip | Reason |
| Seal used filters in a plastic bag | Prevents dust and particles from escaping |
| Follow local hazardous waste rules | Protects the environment and public health |
| Do not burn or crush filters | Releases toxic substances into the air |
| Label bags if required | Helps waste handlers know contents |
Storing Respirators Safely
Proper storage of respirators keeps them clean and ready to use. It helps protect your health during DIY projects.
Storing respirators safely prevents damage and contamination. This ensures they work well each time you need them.
Ideal Storage Conditions
Store respirators in a cool, dry place away from sunlight. Avoid places with extreme temperatures or high humidity.
Keep respirators away from chemicals and dust. This helps keep the mask materials strong and safe to use.
- Temperature between 60°F and 80°F (15°C to 27°C)
- Low humidity to prevent mold growth
- Dark or shaded area to avoid UV damage
- Clean, dust-free environment
Avoiding Contamination
Always clean respirators before storage. Remove dirt, sweat, and oils from the mask and straps.
Do not store respirators with dirty hands or in dirty places. Contamination lowers their protection level.
- Wash hands before handling respirators
- Use clean cloth or wipes to clean respirators
- Keep respirators separate from tools and chemicals
- Label storage areas to avoid mix-ups
Protective Storage Cases
Use protective cases to keep respirators safe during storage and transport. Cases shield from dust and physical damage.
Choose cases made of hard plastic or durable fabric. Make sure the case fits your respirator well without squashing it.
- Hard plastic cases protect against drops and impacts
- Fabric cases offer breathability to reduce moisture
- Cases with compartments keep filters and parts organized
- Easy-to-clean materials help keep cases hygienic
Credit: www.homedepot.com
Tips For Prolonging Respirator Life
Respirators protect you during DIY projects by filtering harmful particles. Keeping them in good shape helps them work better and last longer.
This guide shares simple ways to take care of your respirator. Follow these tips to make your respirator safe and durable.
Regular Maintenance Schedule
Check your respirator often for dirt, damage, or wear. Clean it after each use to stop germs from building up.
Replace filters and parts as the manufacturer suggests. Keeping a maintenance calendar helps you remember when to service your respirator.
- Inspect respirator before and after each use
- Clean with mild soap and warm water
- Dry completely before storing
- Replace filters on time
- Store in a clean, dry place
Avoiding Harsh Chemicals
Do not use strong cleaners or solvents on your respirator. Harsh chemicals can damage the mask materials and seals.
Stick to mild soap and water for cleaning. Harsh chemicals may cause cracks or weaken the filter.
- Use only mild detergent or soap
- Avoid bleach, alcohol, or ammonia
- Rinse well to remove all soap
- Let the respirator air dry fully
Proper Usage Practices
Wear your respirator correctly to get the best protection. Make sure the mask fits snugly without gaps.
Do not touch the inside of the mask. Keep it away from dirt and moisture when not in use to avoid damage.
- Check the fit before starting work
- Do not share your respirator with others
- Store in a clean bag or container
- Keep away from direct sunlight and heat
Frequently Asked Questions
How Often Should I Clean My Respirator For Diy Projects?
Clean your respirator after every use to prevent dirt buildup. Use warm soapy water and a soft cloth. Dry thoroughly before storing to avoid moisture damage and bacteria growth.
What Is The Best Way To Store A Respirator?
Store your respirator in a clean, dry, and cool place. Use a sealed container or bag to protect it from dust and contaminants. Avoid extreme temperatures to maintain its material integrity.
How Do I Check If My Respirator Filters Need Replacement?
Inspect filters for dirt, damage, or difficulty breathing through them. Replace filters immediately if you notice any signs of wear or clogged material to ensure proper protection.
Can I Use Household Cleaners To Disinfect My Respirator?
Avoid harsh chemicals or bleach. Use mild soap and warm water for cleaning. This maintains the respirator’s material and ensures safe, effective disinfection without damage.
Conclusion
Maintaining your respirator keeps you safe during DIY projects. Clean it regularly to remove dust and dirt. Check filters often and replace them on time. Store your respirator in a dry, cool place. Avoid damage by handling it gently and with care.
Proper care helps your respirator last longer. Stay protected and breathe easier while working. Simple steps make a big difference in safety. Keep your respirator ready for every project. Safety first, always.