
If you want your sanding belts to last longer and work better, you need to know how to maintain them properly. Taking care of your sanding belts isn’t just about saving money—it’s about getting smooth, consistent results every time you work.
You’ll discover simple and effective tips that anyone can follow, whether you’re a beginner or a pro. Keep reading, and you’ll learn how small changes in your routine can make a big difference in the life of your sanding belts.
Credit: mrsander.co.uk
Choosing The Right Sanding Belt
Picking the right sanding belt helps you get smooth and even surfaces. It makes your work easier and saves time.
Different belts work best for different tasks and materials. Knowing how to choose the right one improves your results.
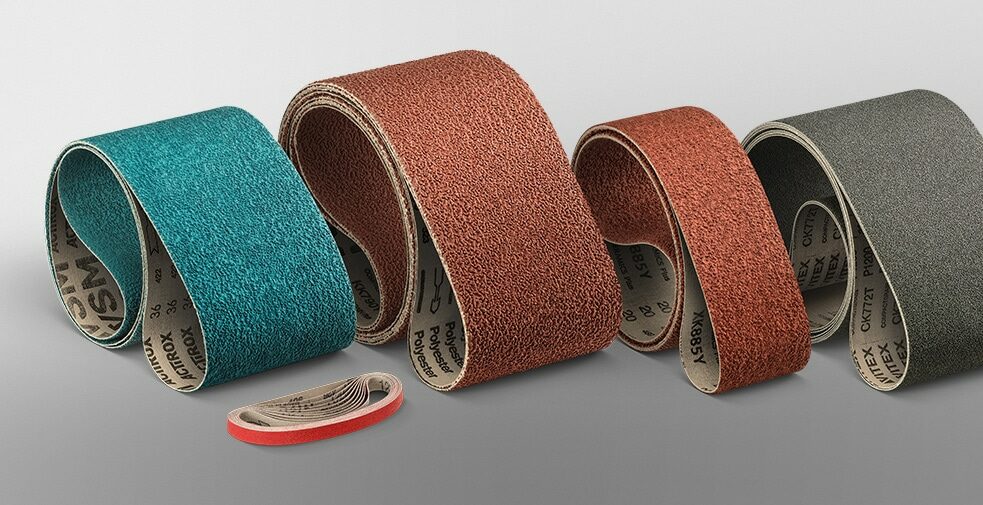
Types Of Sanding Belts
Sanding belts come in many types. Each type uses a different abrasive material for certain jobs.
- Aluminum Oxide: Good for wood and metal
- Garnet: Best for fine wood sanding
- Silicon Carbide: Works on metal and plastic
- Zirconia Alumina: Tough on metal and heavy sanding
Choose a belt type that matches your project material. This helps you get the best finish.
Matching Grit To Task
The grit number shows how coarse or fine the belt is. Lower numbers mean rough, higher numbers mean smooth.
- Coarse grit (40-60): Removes old paint or rough surfaces
- Medium grit (80-120): Shapes wood or metal
- Fine grit (150-220): Smooths surfaces before finishing
- Very fine grit (320+): Final polishing work
Pick the grit based on your sanding stage. Using the right grit saves time and improves results.
Material Compatibility
Different materials need specific sanding belts. Using the wrong belt can damage the work or wear the belt fast.
- Wood: Use aluminum oxide or garnet belts
- Metal: Use zirconia alumina or silicon carbide belts
- Plastic: Use silicon carbide belts to avoid melting
- Painted surfaces: Use coarse grit belts for removal
Check your material before picking a belt. This keeps your tools working well and your work smooth.
Proper Storage Techniques
Storing sanding belts properly extends their life and keeps them ready to use. Poor storage can cause damage that lowers their performance.
Follow simple rules to keep your sanding belts in good shape. Focus on avoiding moisture, controlling temperature, and organizing belts for easy access.
Avoiding Moisture Damage
Moisture can weaken the backing and cause sanding belts to warp. Keep belts dry to prevent rust and loss of grit.
- Store belts in a dry area away from water sources.
- Use sealed plastic bags or containers for extra protection.
- Avoid keeping belts near sinks or humid rooms.
- Check belts regularly for signs of moisture or mold.
Temperature Control
Extreme heat or cold can damage sanding belts. Heat may dry out adhesives, while cold can make belts brittle.
| Temperature Range | Effect on Sanding Belts |
| Below 40°F (4°C) | Belts become stiff and brittle |
| 40°F – 90°F (4°C – 32°C) | Safe storage range |
| Above 90°F (32°C) | Adhesive may weaken, belts warp |
Organizing For Easy Access
Organize sanding belts by size and grit for quick use. Proper organization prevents damage from bending or crushing.
- Use wall-mounted racks or pegboards.
- Keep belts flat or roll loosely.
- Label each section by grit size.
- Store frequently used belts within easy reach.
Regular Cleaning Methods
Sanding belts need cleaning to work well. Dirt and dust build up on the belt’s surface. This reduces sanding power and shortens belt life.
Regular cleaning keeps belts effective and extends their use. Clean belts help finish projects faster and with better results.
Removing Debris And Dust
Debris and dust get stuck in sanding belts during use. Removing them helps the belt stay sharp and work smoothly.
Use a soft brush or compressed air to remove particles. Brush gently along the belt’s surface to avoid damage.
- Turn off the sander before cleaning
- Use a dry brush or air blower
- Brush in the sanding direction
- Repeat as needed for heavy debris
Using Cleaning Sticks
Cleaning sticks remove clogged dust from sanding belts. They are rubber bars that pull out dirt from the abrasive surface.
Rub the cleaning stick gently against the moving belt. This clears the grit and helps the belt sand better.
- Turn on the sander at low speed
- Press the cleaning stick lightly on the belt
- Move along the belt evenly
- Stop when dust is gone
Preventing Clogging
Clogging happens when dust blocks the belt’s abrasive surface. Prevent clogging to keep sanding effective.
Choose the right belt type for the material. Clean belts often and avoid sanding wet or oily surfaces.
- Select belts designed for your material
- Clean belts after each use
- Store belts in dry places
- Avoid sanding oily or wet items
Inspection And Replacement
Maintaining sanding belts is important for good results and safety. Regular checks help spot problems early.
Knowing when to replace belts keeps your tools working well and avoids damage to your workpieces.
Signs Of Wear And Tear
Look for these signs to know if a sanding belt is worn out:
- Frayed or torn edges
- Clogged or glazed abrasive surface
- Uneven wear or bald spots
- Loss of grip on the sanding drum
- Unusual noises or vibrations during use
When To Replace Belts
Replace belts if you see serious wear or if sanding is less effective. Using damaged belts can harm your work.
| Condition | Action |
| Small tears or frayed edges | Replace immediately |
| Clogged surface reducing sanding quality | Clean or replace |
| Belt slips or loses grip | Replace |
| Even wear but still works well | Continue use with caution |
Extending Belt Lifespan
Take these steps to make sanding belts last longer:
- Store belts in a dry, cool place
- Clean belts with a belt cleaner or rubber stick
- Use the right belt speed and pressure
- Change belts before deep damage occurs
- Keep sanding machines well maintained
Correct Usage Practices
Using sanding belts the right way helps them last longer and work well. Proper use stops damage and saves money.
Follow simple habits to keep your sanding belts in good shape and avoid common problems.
Proper Tension And Alignment
Keep the sanding belt tight but not too tight. Too much tension can tear the belt.
Align the belt so it runs straight on the rollers. Misalignment causes uneven wear and belt damage.
- Adjust tension according to the machine’s guide
- Check belt alignment before each use
- Replace rollers if they cause belt misalignment
Avoiding Overheating
Heat damages sanding belts and reduces their life. Avoid pressing the belt too hard or sanding too long in one spot.
Let the belt cool down by pausing or sanding evenly across the surface.
- Use moderate speed settings
- Sand with light to medium pressure
- Move the belt smoothly over the workpiece
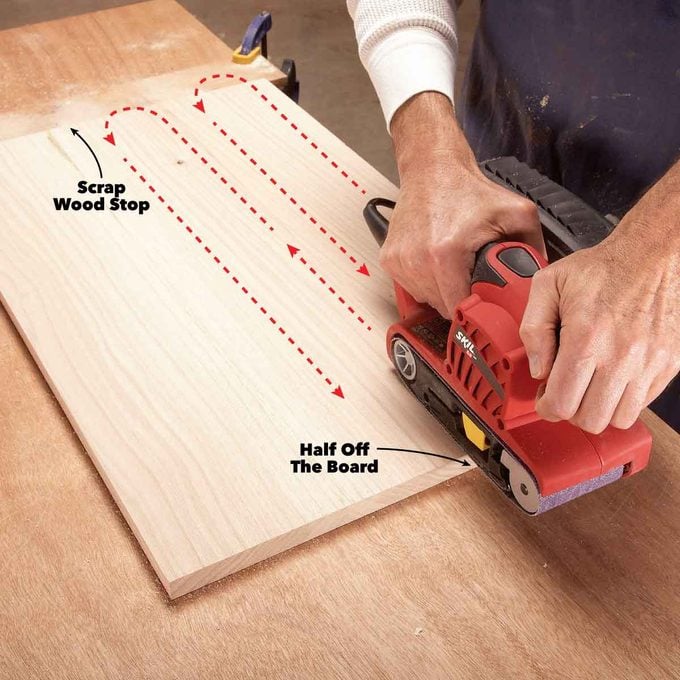
Maintaining Consistent Pressure
Apply steady pressure when sanding. Changing pressure causes uneven wear and belt damage.
Keep your hands and body steady to control the pressure on the belt.
- Hold the tool firmly but relaxed
- Use both hands if possible
- Practice smooth, even sanding strokes

Credit: www.familyhandyman.com
Safety Tips During Maintenance
Maintaining sanding belts is important for their long life. Safety should always come first while doing maintenance tasks.
Using the right safety steps helps avoid injuries and keeps the work smooth and safe.
Protective Gear Essentials
Wear protective gear to protect yourself from dust and belt debris. Safety glasses keep your eyes safe.
Use gloves to protect your hands from cuts and scrapes. Wear a dust mask to avoid breathing in dust.
- Safety glasses or goggles
- Protective gloves
- Dust mask or respirator
- Long sleeves to protect arms
Handling Belts Safely
Turn off and unplug the tool before handling sanding belts. This stops the belt from moving while you work.
Remove belts carefully to avoid snapping or sudden movement. Check belts for damage before reuse.
- Always disconnect power first
- Use both hands to remove belts
- Check belts for tears or wear
- Store belts flat and dry
Preventing Accidents
Keep your workspace clean and clear. Clutter can cause trips or falls while working with belts.
Follow manufacturer instructions for belt changes and maintenance. Never force belts onto tools.
- Keep area free of dust and debris
- Use proper tools for belt changes
- Do not rush the maintenance process
- Report and fix any tool faults immediately
Credit: www.familyhandyman.com
Frequently Asked Questions
How Often Should I Clean Sanding Belts?
Cleaning sanding belts after every use is ideal. It prevents clogging and extends the belt’s life. Use a belt cleaning stick to remove debris. Regular maintenance ensures optimal performance and efficiency.
Can Sanding Belts Be Reused?
Yes, sanding belts can be reused if cleaned properly. Remove dust and debris with a cleaning stick. Check for wear and tear before reusing. Proper maintenance enhances their lifespan.
What Causes Sanding Belts To Break?
Sanding belts break due to excessive heat and pressure. Incorrect tension can also cause breakage. Regularly inspect belts for wear. Ensure correct installation and usage to prevent damage.
How To Store Sanding Belts Properly?
Store sanding belts in a cool, dry place. Avoid direct sunlight and moisture. Hang them to maintain their shape. Proper storage prevents warping and extends their lifespan.
Conclusion
Maintaining sanding belts keeps them working longer and saves money. Clean belts after each use to stop dust buildup. Store belts in a dry place to avoid damage. Check for tears or wear before every job. Proper care helps achieve smooth, even sanding results.
Simple habits make a big difference in belt life. Keep these tips in mind for better sanding performance. Your tools will thank you with lasting quality and efficiency.
