Are you tired of making inaccurate cuts on your woodworking projects? Imagine the satisfaction of seeing perfectly aligned pieces, fitting together seamlessly.
Achieving this level of precision starts with marking your wood correctly. In this guide, you’ll discover simple, effective techniques to ensure every mark you make leads to a flawless cut. Whether you’re a seasoned woodworker or just starting out, mastering this skill can transform your projects from good to exceptional.
Stay with us, and you’ll learn how to turn your woodworking frustrations into triumphs with precise, easy-to-follow steps.
Essential Tools For Marking Wood
Marking wood correctly helps make precise cuts. Using the right tools ensures accuracy and neat work.
This guide explains important tools to mark wood for your woodworking projects.
Choosing The Right Pencil Or Marker
Select a pencil or marker that shows clearly on wood surfaces. Different woods need different marks.
Hard pencils make thin lines, good for fine work. Soft pencils leave darker marks but can smudge.
- Use an HB or 2B pencil for general marking
- Try carpenter’s pencils with flat leads for rough surfaces
- Choose a fine-tip marker for very dark or finished wood
Using Marking Gauges And Scribes
Marking gauges help draw straight lines parallel to an edge. They improve repeatability and precision.
Scribes scratch thin lines on wood. They are ideal for hardwoods where pencil marks may not show well.
- Marking gauges have adjustable arms for different widths
- Scribes create fine, permanent lines for guiding saws
- Use these tools for joinery and detailed cuts
Benefits Of Combination Squares
Combination squares measure and mark 90 and 45-degree angles. They help keep cuts square and accurate.
They include rulers and spirit levels, making them versatile for layout work.
- Use the square’s blade to mark straight lines
- Check angles quickly for cutting or assembly
- Measure depths and distances with the ruler edge

Credit: www.familyhandyman.com
Preparing The Wood Surface
Marking wood for precise cuts starts with a clean, smooth surface. This helps you see your lines clearly.
Preparing the wood also includes choosing the right grain direction. This affects how the wood cuts and looks.
Cleaning And Smoothing The Surface
Remove dust, dirt, and debris from the wood. Use a brush or cloth to clean the surface well.
Sand the wood to smooth rough spots. This prevents your marking tools from skipping or smudging.
- Start with medium-grit sandpaper
- Finish with fine-grit sandpaper
- Wipe off sanding dust before marking
Selecting The Best Grain Direction
Look at the grain lines on the wood surface. Choose a direction that makes cutting easier and cleaner.
Cutting with the grain reduces splinters. It also helps your saw follow the line better.
- Mark along the grain for smooth cuts
- Avoid cutting against the grain to prevent tearing
- Check grain direction before drawing lines
Techniques For Accurate Marking
Marking wood carefully helps make clean and precise cuts. Using the right methods avoids mistakes and saves time. This guide shows some easy techniques for accurate marking.
Each method focuses on accuracy and repeatability. You will learn how to measure correctly, mark smartly, and use guides for repeated cuts.
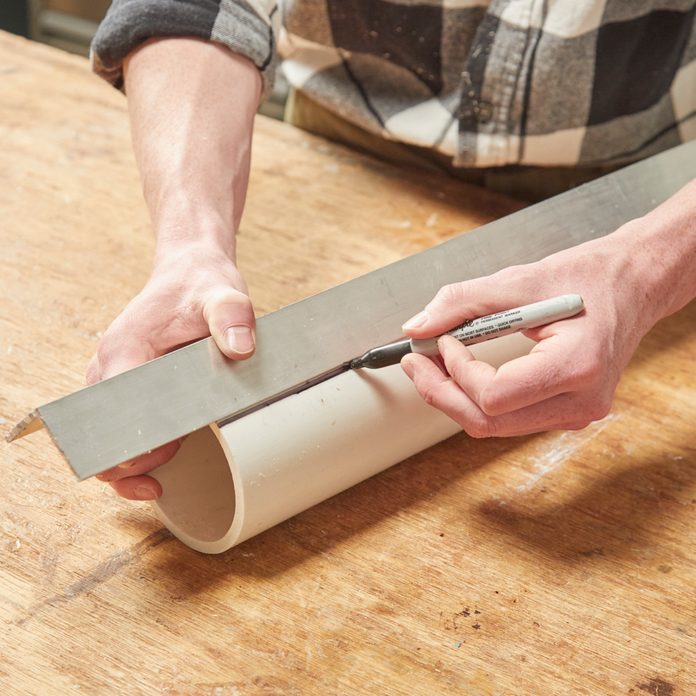
Measuring Twice, Marking Once
Measuring twice means checking your measurements before marking the wood. This step reduces errors and ensures your cut lines are correct. Use a reliable tape measure or ruler for best results.
- Measure the length needed from the edge of the wood.
- Double-check the same measurement to confirm accuracy.
- Mark the spot clearly with a sharp pencil or marking knife.
- Use a square tool to extend the mark across the wood.
Using Stop Blocks For Repetition
Stop blocks help you make many cuts of the same length without remeasuring each time. Attach a block of wood firmly to your saw’s fence or workbench to act as a physical stop.
Here is how to set up a stop block:
- Cut a small piece of wood to the exact length you want.
- Clamp or screw it tightly to your fence or table.
- Push your wood stock against the stop block before cutting.
- Make the cut; the stop block keeps every piece the same.
Employing Center Lines And Reference Points
Center lines help find the exact middle of your wood piece. Reference points guide your cuts and help align parts properly. Use a combination square or ruler to mark these lines.
| Tool | Purpose | How to Use |
|---|---|---|
| Combination Square | Mark center and right angles | Set the square to half the wood width and draw the center line |
| Pencil | Make fine, visible marks | Use a sharp pencil for thin lines to improve accuracy |
| Marking Knife | Create precise cut lines | Score the wood surface to guide the saw blade |
| Ruler | Measure distances and mark points | Place ruler carefully and mark exact points for cuts |
Common Mistakes To Avoid
Marking wood correctly is important for making straight cuts. Small mistakes can cause big problems in your project.
Knowing what to avoid helps you save time and wood. Focus on common errors to improve your cutting accuracy.
Misreading Measurements
One common mistake is reading measurements wrong. This leads to cuts that are too long or too short.
Always double-check your numbers before marking. Use a clear ruler or tape measure for better accuracy.
- Measure twice, mark once
- Read measurements at eye level
- Use the correct units (inches or centimeters)
Overlooking Tool Calibration
Ignoring tool calibration can cause wrong marks. Tools that are out of calibration give false readings.
Check and adjust your tools regularly. This includes rulers, squares, and marking gauges.
- Verify tool accuracy before use
- Calibrate tools after drops or impacts
- Keep tools clean and free of damage
Marking On Unstable Surfaces
Marking wood on an unstable surface causes errors. The wood may shift, making marks inaccurate.
Always place the wood on a flat, steady surface. Secure it with clamps if needed to keep it still.
- Use a workbench or sturdy table
- Clamp wood before marking
- Avoid marking while holding wood by hand
Advanced Tips For Precision
Marking wood accurately is key to making clean, exact cuts. Small mistakes can cause big problems in your project.
Using the right tools and methods helps you avoid errors and save time. Here are some advanced tips for marking wood with precision.
Laser Guides And Digital Tools
Laser guides attach to saws and project a straight line on the wood. This line shows exactly where the blade will cut.
- Use laser guides to align your cut marks perfectly.
- Try digital angle finders to set bevels and angles precisely.
- Digital measuring tools reduce human error in marking.
- Combine laser lines with pencil marks for clear cutting paths.
Using Clamps To Steady The Wood
Clamps hold the wood firmly in place. This prevents movement while marking or cutting, keeping your lines accurate.
| Clamp Type | Best Use | Tip |
|---|---|---|
| C-bar Clamp | Holding small boards | Apply pressure evenly to avoid dents |
| Spring Clamp | Quick jobs and light holds | Use multiple clamps for stability |
| Pipe Clamp | Large panels | Check for alignment before tightening |
Double-checking With Dry Fitting
Dry fitting means assembling your pieces without glue or screws. This step checks if your marks and cuts fit together perfectly.
- Place cut pieces together to test fit.
- Look for gaps or misaligned edges.
- Mark any adjustments needed on the wood.
- Make corrections before final assembly.

Credit: www.familyhandyman.com
Maintaining Your Marking Tools
Keeping your marking tools in good shape helps you make clear and precise marks on wood. Well-maintained tools ensure better cuts and less waste.
Regular care extends the life of pencils, scribes, and other marking devices. It also saves you time during your woodworking projects.
Sharpening Pencils And Scribes
Sharp pencils and scribes give you fine, accurate lines. Dull tips can cause thick or uneven marks that affect your cuts.
- Use a quality pencil sharpener or fine sandpaper for pencils.
- Sharpen scribes with a small file or sharpening stone.
- Check the tip often and resharpen as needed.
- Avoid over-sharpening to prevent breaking the tip.
- Keep your sharpening tools clean for smooth edges.
Cleaning And Storing Tools Properly
Cleaning your marking tools removes dust and wood particles that can dull tips or cause rust. Proper storage keeps them safe and ready to use.
| Task | How to Do It | Benefit |
| Cleaning | Wipe with a dry cloth after use | Removes debris and prevents buildup |
| Storing | Keep in a dry case or toolbox | Prevents rust and damage |
| Inspection | Check tips and handles regularly | Ensures readiness for accurate marking |
Credit: www.familyhandyman.com
Frequently Asked Questions
How Do I Mark Wood For Accurate Cuts?
Use a sharp pencil or marking knife for precise lines. Measure twice, mark once, and use a square for straight edges. Clear, fine lines help guide saws accurately.
What Tools Help Mark Wood Precisely?
A combination square, marking knife, and fine pencil work best. These tools create sharp, visible lines for exact cuts. Avoid dull pencils to prevent thick, unclear marks.
Why Is Measuring Before Marking Important?
Measuring ensures your cuts match project dimensions exactly. It prevents material waste and improves project quality. Always double-check measurements before marking.
How Can I Avoid Marking Errors On Wood?
Use steady hands and sharp tools for clean lines. Mark on the wood’s face and edge to guide cuts. Double-check measurements and markings before cutting.
Conclusion
Marking wood carefully helps you make clean, accurate cuts. Use simple tools like pencils, rulers, and squares for best results. Take your time to measure twice before cutting once. Clear, visible marks guide your saw perfectly. This skill saves wood and reduces mistakes.
Practice these steps to build confidence in your work. Precise marking leads to better projects and happier results. Keep your tools sharp and lines straight. Soon, cutting wood will feel easier and more enjoyable.