Are you struggling to get perfect miters for your woodworking or home projects? Measuring angles for miters can seem tricky, but with the right steps, you’ll find it easier than you think.
Imagine cutting corners that fit together flawlessly every time—no gaps, no guesswork. You’ll learn simple, clear methods to measure angles accurately, so your miters look sharp and professional. Keep reading, and you’ll gain the confidence to tackle your next project with precision and ease.

Credit: www.reddit.com
Tools Needed
Measuring angles for miters requires specific tools. These tools help ensure your cuts are precise and fit perfectly.
Choosing the right tool depends on the type of project and the accuracy needed. Let’s explore common tools and how to pick the best one.
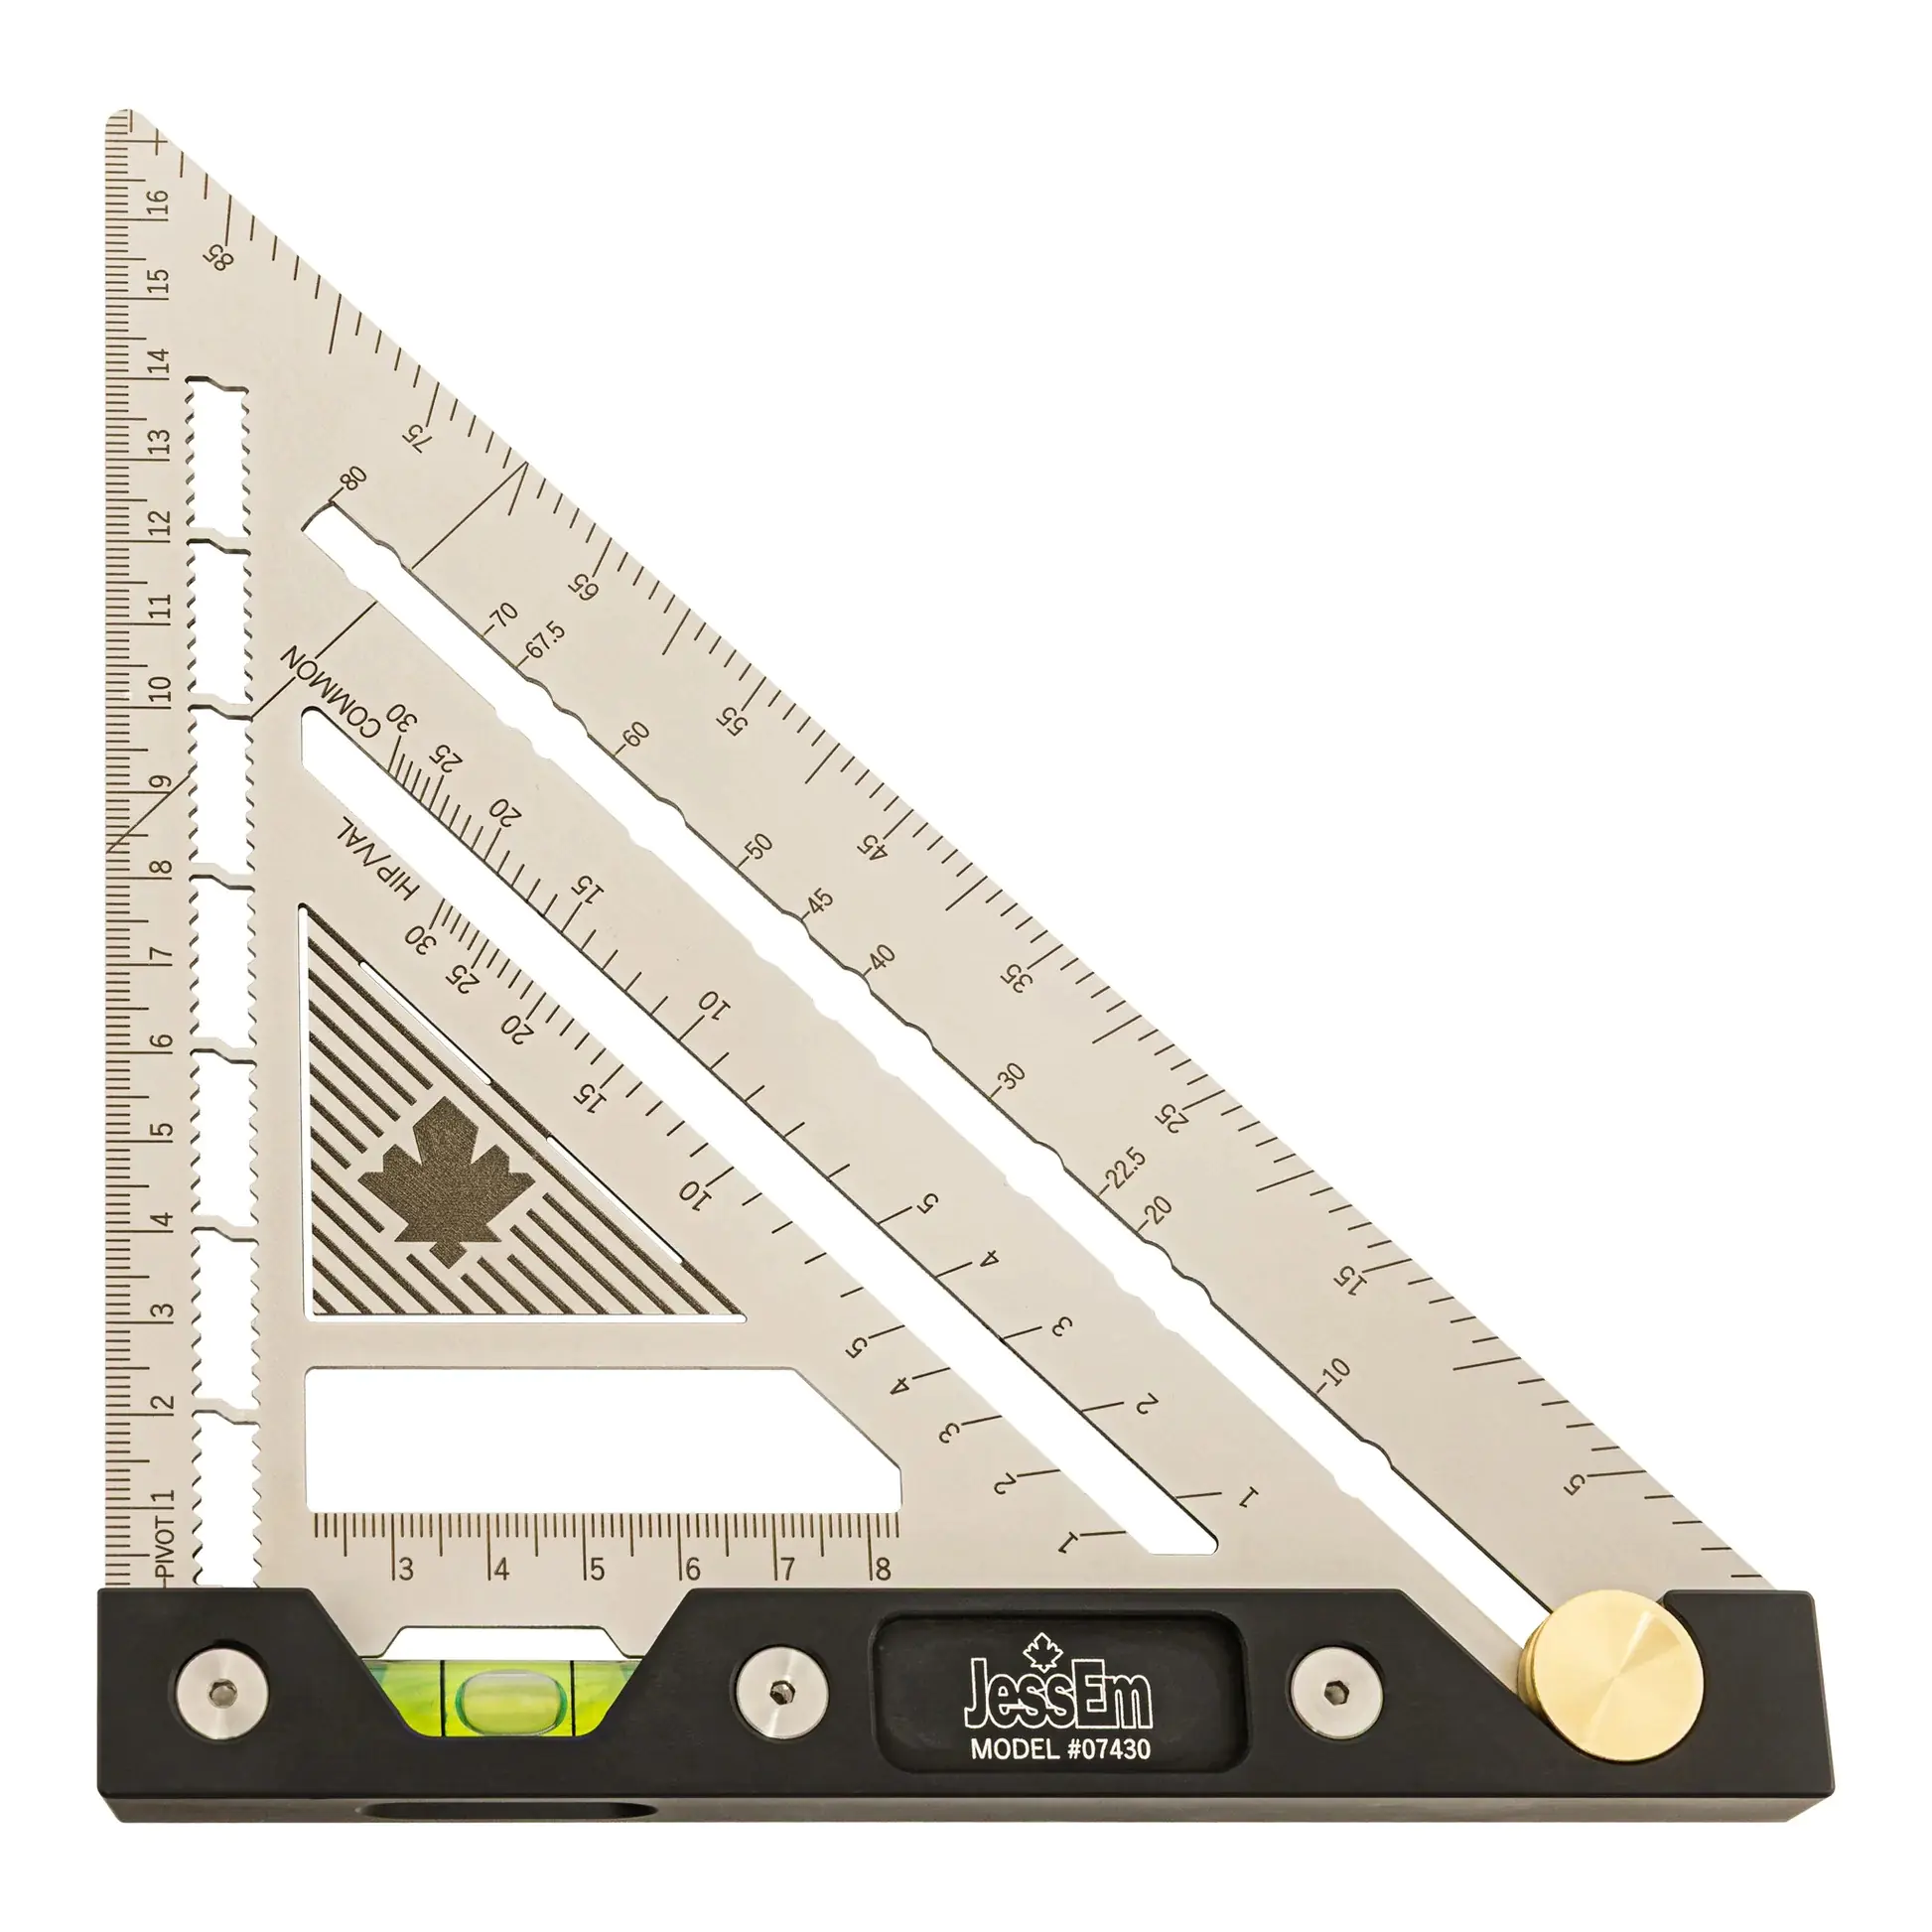
Types Of Angle Measuring Tools
Several tools exist to measure angles for miters. Each has a unique design and use case.
- Protractor:A simple tool that measures angles from 0° to 180°.
- Miter Gauge:Often attached to a saw to set and guide angled cuts.
- Combination Square:Used for marking and measuring angles, especially 45° and 90°.
- Bevel Gauge (Sliding T-Bevel):Adjustable tool that copies and transfers angles.
- Digital Angle Finder:Provides precise digital angle readings for accuracy.
Choosing The Right Tool
Selecting the correct tool depends on your project needs and skill level. Some tools suit beginners, others professionals.
| Tool | Best For | Accuracy |
| Protractor | Simple angle checks | Basic |
| Miter Gauge | Guiding saw cuts | Good |
| Combination Square | Marking angles | Moderate |
| Bevel Gauge | Copying angles | High |
| Digital Angle Finder | Precise measurements | Very High |

Credit: www.reddit.com
Basics Of Miter Angles
Miter angles help you cut wood pieces to fit together at corners. They are important in making frames, moldings, and trim.
To measure miter angles, you need to know the angle between the two surfaces you want to join. This angle guides your saw blade adjustment.
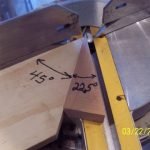
Common Miter Angles Explained
The most common miter angle is 45 degrees. It is used to join two pieces at a right angle, like a 90-degree corner.
Other angles include 22.5 degrees for octagonal shapes and 30 degrees for more complex joints. Each angle helps create a smooth corner.
- 45 degrees: Makes a 90-degree corner
- 22.5 degrees: Used for octagon shapes
- 30 degrees: Creates sharper or wider corners
Impact On Joint Fit
Correct miter angles ensure tight joints without gaps. Wrong angles cause gaps and weak joints.
Even small angle errors can make the joint look uneven. Accurate measuring and cutting improve the strength and appearance of your project.
- Accurate angles create tight, strong joints
- Wrong angles lead to gaps and weak joints
- Check angles twice before cutting
Step-by-step Angle Measurement
Measuring angles correctly is important for making clean miters. It helps your cuts fit perfectly together. This guide shows how to measure angles step-by-step.
Use simple tools and clear steps to get the right angle for your project. Follow each part carefully to avoid mistakes.
Preparing The Workpiece
Start by placing the workpiece on a flat surface. Make sure it is stable and clean. Remove any dirt or debris that can affect the measurement.
- Check the edges for straightness using a ruler.
- Secure the workpiece with clamps to prevent movement.
- Mark the reference edge clearly with a pencil.
- Decide which edge will form the miter joint.
Using A Protractor Or Angle Finder
Choose the right tool to measure your angle. A protractor or digital angle finder can give accurate results. Read the angle carefully and note it down.
| Tool | Best for | How to Use |
| Protractor | Simple angles | Align center with vertex, read degrees |
| Angle Finder | Complex or hidden angles | Place on edges, read digital display |
| Combination Square | Quick angle checks | Adjust ruler, lock angle, read scale |
Marking The Angle
After measuring, mark the angle on your workpiece clearly. Use a sharp pencil or marking knife for accuracy. Double-check the mark before cutting.
- Place the tool back on the workpiece to confirm the angle.
- Draw a clear line along the angle edge.
- Label the mark if needed for future reference.
- Keep the marked surface clean for a better cut.
Adjusting For Compound Miters
Compound miters occur when two angles tilt in different directions. These angles combine to form a complex joint. Measuring and adjusting for these angles ensures a perfect fit.
This guide explains how to identify compound angles and measure multiple angles for your miter cuts. Follow these steps to get accurate results.
Identifying Compound Angles
Compound angles have two different angles that meet at one point. One angle is usually a tilt, and the other is a rotation. Recognizing these helps you set your saw properly.
- Look for angles that lean in two directions
- Check if the joint has a slant and a turn
- Use a protractor to find each angle
- Note the angles separately before cutting
Measuring Multiple Angles
Measure each angle carefully to adjust your saw settings. Use tools like angle finders or digital inclinometers for accuracy.
| Tool | Purpose | How to Use |
| Protractor | Measure flat angles | Align with edge, read angle |
| Digital Inclinometer | Measure tilt angles | Place on surface, read digital value |
| Angle Finder | Find joint angles | Fit into corner, read scale |
Cutting Techniques
Cutting angles for miters requires care and precision. Using the right techniques helps create clean and accurate cuts.
This guide explains how to set your miter saw, make test cuts, and fine-tune the angle for the best results.
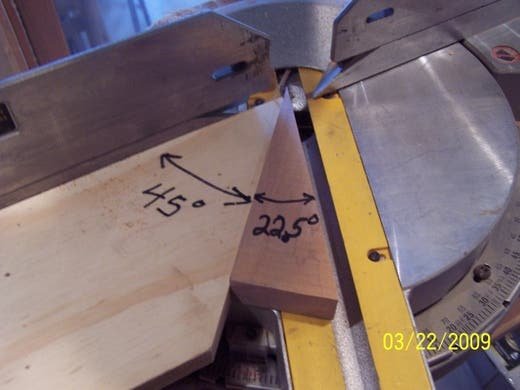
Setting The Miter Saw
Start by adjusting the saw to the desired angle. Most miter saws have a scale with markings to guide you.
- Loosen the angle adjustment knob.
- Rotate the saw base to match your angle.
- Tighten the knob to lock the saw in place.
- Check the angle with a protractor if needed.
Making Test Cuts
Before cutting your actual workpiece, make a test cut on scrap wood. This helps check the accuracy of the angle and the saw’s settings.
| Test Cut Checklist | What to Check |
| Cut Angle | Use a protractor or angle finder to verify the angle |
| Cut Surface | Look for clean, smooth edges without splinters |
| Fit | Place cut pieces together to check for tight joints |
Fine-tuning The Angle
If the test cut is not perfect, adjust the saw angle slightly and try again. Small changes can make a big difference.
Tips for fine-tuning:
- Use a digital angle gauge for more precision.
- Mark adjustments clearly on the saw base.
- Keep the saw blade sharp to ensure clean cuts.
- Repeat test cuts until the angle fits perfectly.
Credit: www.fine-tools.com
Tips For Accuracy
Measuring angles for miters needs care and focus. Accurate measurements help cuts fit well and look clean.
Using the right tools and checking your work can avoid mistakes and save time.
Double-checking Measurements
Always measure your angles twice before cutting. This reduces errors and ensures precision.
Use a protractor or angle finder to confirm the angle matches your needs. Write down measurements clearly.
- Measure the angle and note it down
- Re-measure to confirm the angle is correct
- Compare measurements with your saw setting
- Adjust if there is any difference
Using Clamps And Guides
Clamps hold your work steady while you cut. This keeps the material from moving and changing the angle.
Guides help set the saw at the exact angle you measured. They keep your cut straight and clean.
- Use clamps to secure wood firmly
- Set a guide on the saw or workbench
- Check the guide angle before cutting
- Cut slowly and steadily along the guide
Frequently Asked Questions
How Do You Measure Angles For Miters Accurately?
Use a protractor or angle finder to measure the angle precisely. Align the tool with the workpiece edges. Read the angle directly on the scale to ensure accuracy for clean miter cuts.
What Tools Are Best For Measuring Miter Angles?
Protractors, digital angle finders, and combination squares work best. These tools provide clear angle readings. They help achieve precise cuts and reduce measurement errors in miter projects.
Why Is Measuring The Correct Miter Angle Important?
Correct angles ensure tight joints and professional finishes. Improper angles cause gaps and misalignment. Accurate measurements save time and materials by avoiding rework.
How To Measure Inside Versus Outside Miter Angles?
Inside miters are measured on inner corners; outside miters on outer corners. Use the angle finder on the joint’s edge accordingly. This distinction ensures correct angle calculation and fit.
Conclusion
Measuring angles for miters seems complex but is easy with practice. Start by using the right tools. A protractor or angle finder helps a lot. Check and double-check your measurements. Precision ensures perfect miters every time. Practice makes perfect. With time, you’ll gain confidence.
Angles will become second nature. Remember, patience is key. Don’t rush the process. Take it step by step. Soon, you’ll be making clean, accurate cuts. Feel proud of your work. Share your skills with others. Keep learning and improving. Happy woodworking!