Are you tired of making cuts that are too shallow or too deep in your woodworking projects? Getting the depth just right is crucial for a perfect fit and a professional finish.
But measuring depth can sometimes feel tricky and frustrating. Don’t worry—you’re not alone. You’ll discover simple, effective techniques to measure depth accurately every time. By mastering these tips, you’ll save time, reduce mistakes, and take your woodworking skills to the next level.
Ready to cut with confidence? Let’s dive in.

Credit: www.youtube.com
Essential Tools For Depth Measurement
Measuring depth accurately is key in woodworking cuts. Using the right tools helps get precise results.
This guide covers essential tools to measure depth well and improve your woodworking projects.
Calipers And Depth Gauges
Calipers and depth gauges are precise tools for measuring depth. They fit into grooves or holes easily.
- Calipers measure internal and external dimensions plus depth.
- Depth gauges focus only on measuring depth accurately.
- Both tools often have a sliding scale for exact readings.
- Use them to check cut depths before and after cutting.
Marking Tools And Measuring Tapes
Marking tools and measuring tapes help show where to cut and how deep to go. They guide your work visually.
| Tool | Use | Benefit |
| Marking Gauge | Marks depth lines on wood | Clear visual guide for cuts |
| Measuring Tape | Measures length and rough depth | Quick and simple depth checks |
| Pencil or Knife | Marks measurement points | Easy to see on wood surfaces |
Digital Vs. Analog Options
Both digital and analog tools work for depth measurement. Each has strengths and weaknesses to consider.
- Digital tools show readings on a screen for quick checks.
- Analog tools have scales or dials for manual reading.
- Digital versions need batteries but can be easier to read.
- Analog tools never run out of power and are often more durable.
- Choose based on your comfort and work style.
Preparing Your Wood For Accurate Cuts
Measuring depth for woodworking cuts needs careful preparation. Proper setup helps you avoid mistakes and get clean results.
This guide covers key steps to prepare your wood before cutting. Focus on inspecting, securing, and marking the workpiece.
Surface Inspection And Cleaning
Check the wood surface for dirt, dust, or damage. Clean it well to ensure the measuring tools work correctly.
- Look for knots, cracks, or rough spots
- Use a brush or cloth to remove dust
- Wipe with a damp cloth if needed, then dry
- Remove any old paint or glue residues
Securing The Workpiece
Hold the wood firmly in place to avoid movement during measuring and cutting. Use clamps or a stable surface.
| Method | Use |
| Clamps | Hold edges tightly on a workbench |
| Non-slip pads | Prevent sliding on smooth surfaces |
| Workbench Vise | Secure smaller pieces firmly |
| Weight | Keep large boards from shifting |
Setting Reference Points
Mark clear reference points on the wood. These points guide your depth measurements and cuts.
- Use a pencil to draw cut lines
- Mark the start and end points clearly
- Measure from edges to set depth marks
- Double-check measurements before cutting
Techniques For Measuring Cut Depth
Measuring the depth of cuts is important in woodworking to ensure accuracy. Using the right tools helps you get precise results.
This guide explains simple ways to measure cut depth for clean and accurate work.
Using A Combination Square
A combination square is a common tool for measuring cut depth. It has a ruler and a sliding head that can be set to the desired depth.
Place the ruler into the cut and adjust the sliding head to touch the surface. Read the measurement on the ruler to find the cut depth.
- Set the sliding head to zero before use
- Insert the ruler into the cut slot
- Adjust the head until it rests on the cut edge
- Read the depth value on the ruler
Employing Depth Stops
Depth stops limit how deep your tool cuts into the wood. They help keep cuts consistent and prevent going too deep.
Attach the depth stop to your saw or router. Adjust it to the needed depth before making the cut. This controls the cut depth without extra measuring.
- Check the stop’s position before cutting
- Set the stop to the exact depth needed
- Use the stop for repeated, uniform cuts
Marking Depth Lines Clearly
Marking lines on wood helps you see where to cut and how deep. Use a pencil and ruler to draw clear depth lines.
Draw the line at the exact depth needed on the wood’s edge. This guides your saw or chisel and improves accuracy.
- Use a sharp pencil for thin, clear lines
- Measure and mark the depth on the wood edge
- Check lines before starting the cut

Credit: www.wikihow.com
Adjusting Tools For Precise Cuts
Getting the depth right is key for clean woodworking cuts. Adjusting your tools carefully helps you avoid mistakes. This guide covers how to set up saws and routers for exact depths.
Taking time to check and recheck settings makes your cuts safer and more accurate. Follow these tips to improve your woodworking projects.
Calibrating Saws And Routers
Calibrating your saw or router means making sure the tool cuts at the right depth. Use a ruler or depth gauge to measure the blade or bit.
- Turn off and unplug the tool before adjusting.
- Loosen the depth adjustment knob or lever.
- Lower or raise the blade or bit to the desired depth.
- Tighten the knob or lever to lock the setting.
- Measure again to confirm the depth is correct.
Using Depth Adjustment Features
Most saws and routers have built-in depth adjustment features. These let you change the cutting depth easily and precisely.
| Tool Type | Adjustment Method | Tip |
| Circular Saw | Depth lever under base plate | Set depth so blade cuts just below wood thickness |
| Router | Depth ring or turret stop | Use stops for repeatable cuts |
| Jigsaw | Base plate tilt and blade length | Check blade protrusion before cutting |
Double-checking Settings Before Cutting
Before cutting, double-check your depth settings to avoid errors. Small mistakes can ruin your workpiece or cause safety risks.
- Measure the depth setting with a ruler or gauge.
- Make a test cut on scrap wood.
- Inspect the cut to see if the depth is right.
- Adjust again if needed and retest.
- Secure all adjustment knobs firmly.
Common Mistakes To Avoid
Measuring depth for woodworking cuts needs care and attention. Small errors can cause big problems in your work. Knowing common mistakes helps you avoid costly errors.
Focus on accuracy and take your time. This guide covers key mistakes to watch out for during measuring and setup.
Ignoring Tool Calibration
Not calibrating your tools leads to wrong measurements. Tools can lose accuracy after use or transport. Regular calibration keeps your tools reliable.
- Check calibration before starting any cut.
- Use a known standard or gauge block to test accuracy.
- Adjust tools if measurements do not match the standard.
- Keep a log of calibration dates and results.
Misreading Measurement Scales
Reading measurement scales wrong is a common error. Scales may have small marks that are hard to see. Misreading them changes your cut depth.
| Common Error | How to Fix |
| Confusing fractions with decimals | Double-check scale type before measuring |
| Ignoring zero point on ruler | Always start at the correct zero mark |
| Reading scale from wrong angle | Look straight at the scale to avoid parallax |
| Mixing metric and imperial units | Use one unit system consistently |
Rushing The Setup Process
Hurrying setup risks poor cuts and unsafe work. Take time to set tools and measure carefully. Slow setup saves time and material later.
- Prepare workspace before measuring.
- Double-check measurements before cutting.
- Secure wood firmly to avoid movement.
- Wear safety gear during setup and cutting.
Credit: www.popularwoodworking.com
Advanced Tips For Complex Projects
Measuring depth correctly is important for woodworking projects. Complex cuts need extra care to be precise. Using advanced methods helps you get the right depth every time.
This guide covers ways to measure multiple depths, use templates and jigs, and add digital tools. These tips help improve your accuracy and save time.
Measuring Multiple Depths
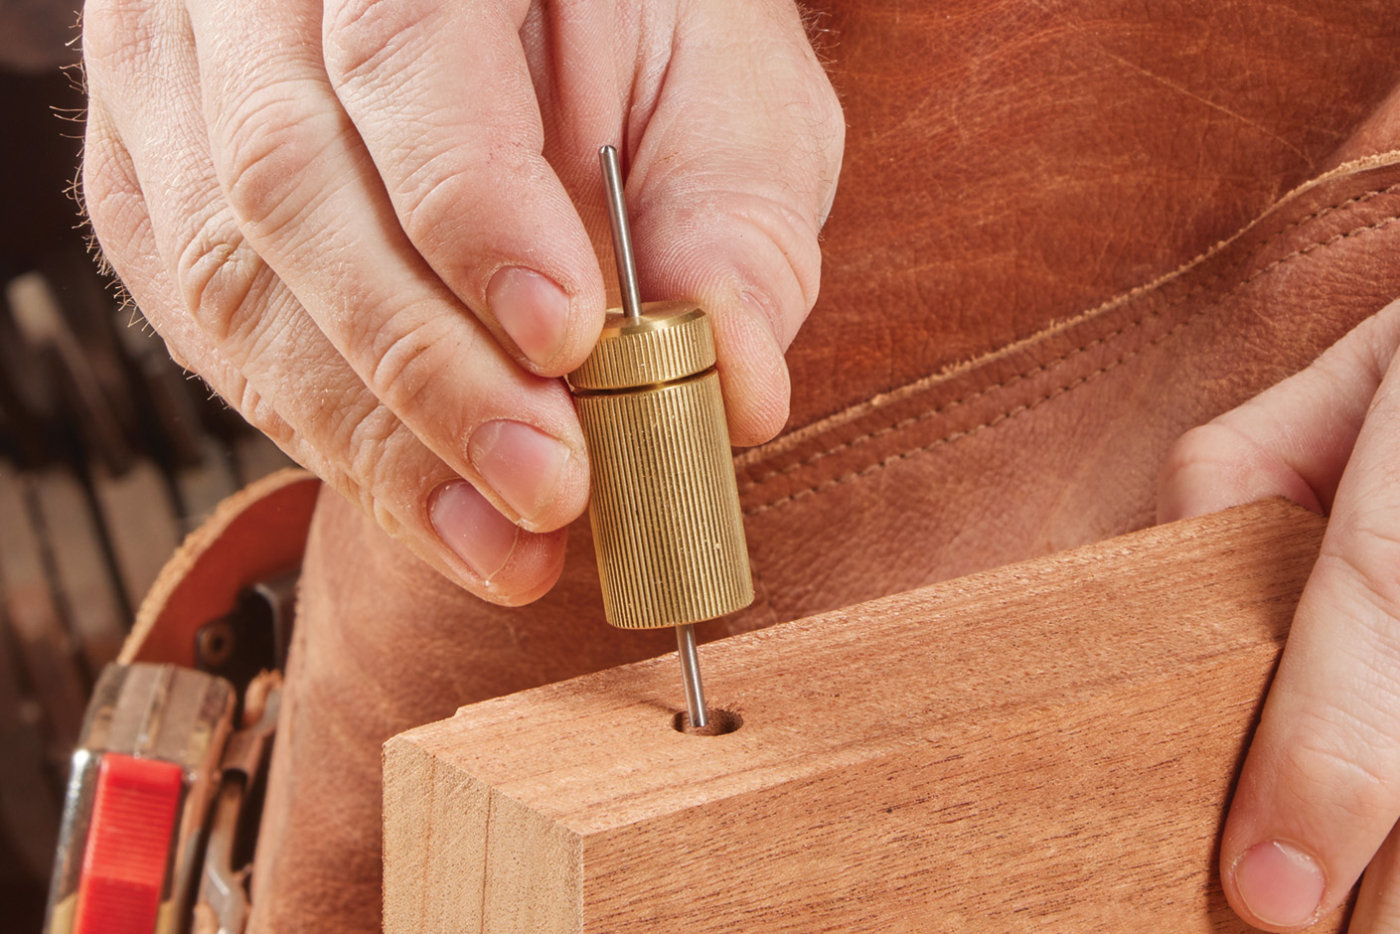
Some projects need cuts at different depths on the same piece of wood. Measuring each depth carefully is key. Use a depth gauge or a ruler with clear marks.
Mark the wood clearly for each cut depth. Check your measurements before making each cut. This avoids mistakes and keeps your work clean.
- Use a depth stop on your saw or router
- Mark each depth with a pencil
- Measure twice to confirm accuracy
- Adjust your tool for each cut depth
Using Templates And Jigs
Templates and jigs guide your tools to cut consistent depths. They help repeat complex cuts easily. You can make templates from scrap wood or buy ready-made ones.
Jigs hold your wood steady and set the cutting depth for you. This reduces errors and speeds up your work. Use clamps to keep everything secure while cutting.
- Create templates with exact cut depths marked
- Use jigs to control tool movement and depth
- Secure templates and jigs firmly with clamps
- Test on scrap wood before cutting your project
Incorporating Digital Measuring Tools
Digital tools add precision to depth measurement. Digital calipers and depth gauges show exact numbers. Some tools connect to apps for easy tracking.
Use digital tools to set your saw or router depth. They reduce guesswork and improve repeatability. Always zero your tool before measuring.
- Use digital calipers for quick depth checks
- Try digital depth gauges with LCD screens
- Connect tools to apps for record keeping
- Calibrate tools regularly for best results
Frequently Asked Questions
How Do I Measure Depth For Woodworking Cuts Accurately?
Use a depth gauge or caliper to measure cut depth precisely. Set the tool to zero on a flat surface before measuring. Mark your desired depth on the tool. This ensures consistent and accurate cuts every time.
What Tools Are Best For Measuring Woodworking Cut Depth?
Depth gauges, calipers, and combination squares are ideal. These tools provide precise measurements for accurate cuts. Choose one based on your project needs for better control.
Why Is Measuring Cut Depth Important In Woodworking?
Measuring cut depth ensures safety and precision. It prevents cutting too deep or too shallow, maintaining structural integrity. Accurate depth leads to professional-quality woodworking results.
Can I Measure Cut Depth Without Special Tools?
Yes, you can use a ruler or tape measure carefully. Mark the desired depth on your workpiece before cutting. However, specialized tools provide more accuracy and consistency.
Conclusion
Measuring depth in woodworking is crucial for accurate cuts. Simple tools like rulers and depth gauges help a lot. Practice using these tools often for better precision. Don’t rush the process. Careful measuring ensures your project fits together well. Mistakes can lead to wasted materials.
Always double-check your measurements before cutting. Remember, precision is key in woodworking. Enjoy the process and create with confidence. Happy woodworking!
